
How to Light a Flare

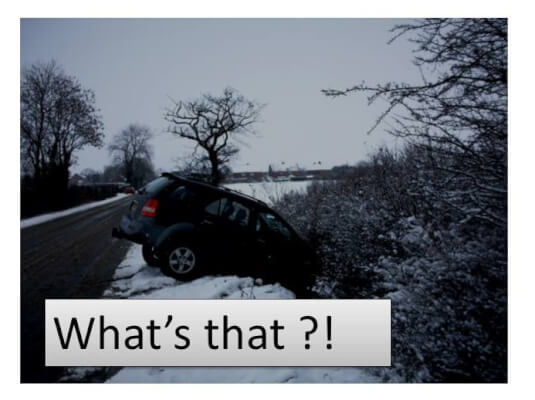
Winter darkness makes accidents on the road hard to see and even more dangerous.
Having a good accident kit in the car can help protect YOU, and might help protect others if you come across an accident scene.
An accident kit is different from a car survival kit. The survival kit has stuff for YOU – warm clothing, flashlight, food, water, etc. The accident kit has stuff for the CAR, like jumper cables, emergency reflector triangles, flat tire inflator, and flares.
Does your car accident kit have road flares?
When it’s dark, there’s nothing better than flares to warn oncoming vehicles of an accident, a stranded car or even an injured person. Flares are easy to get, easy and safe to store, and they last a long time. The problem that people have with ‘em is . . .
How to light a standard industrial flare?
Our CERT group had the opportunity to practice one evening with the police department. We hung around in our official vests, enjoying the cool evening and the chance to see each other again. When it came time to light the flares, however, some of us looked pretty dumb.
It’s not as simple as you might think!
Here are some guidelines that I took away from that evening.
1–Have more than one flare so you can warn oncoming vehicles and direct them around the accident.
2-Pick where you want each flare to go BEFORE you attempt to light it. Once the flare is burning, you will not want to carry it around to be positioned! It’s BURNING and shooting off white-hot bits! Some things to keep in mind:
- If there’s spilled gas, don’t use a flare nearby at all.
- Keep flares on the road so they don’t roll into a ditch or catch vegetation on fire.
- Go to where you’ll place the flare, and then light it.
3-Remove the cap on the flare to expose the rough striking surface.
A flare has a plastic cap. Part of the cap contains a rough “striking surface.” Under the cap is the “igniter” end of the flare. You want to hold the striking surface in one hand and the flare in the other.
4-Light the flare by scratching it across the striking surface.
Extend both arms and scratch the flare across the striker in a movement going away from your body.
It’s rather like striking a very large match. Too soft a strike, nothing happens. Too hard, and you can break the “head” off the match.
In our group, most people had trouble getting the right amount of pressure and speed to get the flare to light. One person actually broke the head off the flare because he “scratched” too hard.
5-Place the ignited flare where you had planned to place it.
Put the cap back on the non-burning end of the flare. If you’re carrying it, keep the flame pointed down so you don’t get any drips on your hand.
Don’t drop the flare – you could break or extinguish it. Don’t place the flare in a puddle – it could go out.
If it’s raining, place the flare so any running water goes around the base of the flare and not directly against the flame end. You can prop it up to keep it dry.
6-The flare will burn for 10-30 minutes.
When you’re ready to extinguish it, break off the burning end and let it burn out. You cannot easily smother this flame.
(In our group, we picked up the burning flares and carefully tossed them a little ways down the road. When they landed the burning end broke off.)
After practicing, we all felt more competent.
It’s like so much else. Until you’ve practiced, you really can’t count on being able to make it work! So here’s a suggestion:
Buy a supply of flares and set up a practice. Even if everyone doesn’t attempt to light a flare, everyone in the group will clearly see how it’s done – and what NOT to do! A great CERT group exercise, and a great family exercise, too.
Hi-tech No-Flame Alternative — LED, Battery-driven Flares
Obviously, First Responders use “real” flares because they work! Everyone recognizes just what they mean, and starts paying attention as soon as they become visible.
But not everyone is ready to handle industrial flares as described above!
If you find this just too challenging, consider a good alternative: plastic strobe light flares that are safe and comfortable to use.
These flashing, reusable flares come in two styles – stand-up flares with a tripod base, and round, disc-style flares that lie on the ground or attach magnetically to a car.
I personally prefer flares that are really bright and can be seen from all sides – so the disc style would not be my first choice.
In fact, here are flares that we own. (We also own reflective triangles made by the same company). I particularly like that they come in their own case; otherwise, the flares (and their bases) can get lost in the trunk of the car.
Click on the link or the image to get full details. (As you know, we’re affiliates at Amazon so this link will take you there.)

Magnatek LED Flashing Roadside Emergency Beacon Flares-Two RED Flares with Solid Storage Case

A couple of hints if you’re considering flares like these.
- Each flare has 3 different settings, one of which converts it to a flashlight. Handy.
- The flares use AAA batteries. If you leave the batteries installed in the trunk of your car for weeks and months, ultimately they will corrode. So, store the batteries in a baggie UN-INSTALLED but in the package with the flares. Of course, it makes sense to PRACTICE installing them as soon as you get the flares so you’ll be able to do it in the dark and when you’re nerves are frazzled because of an accident.
- These flares also have magnetic bases so you could place one on TOP of your stranded vehicle for more visibility.
(This image – for one order — shows the front and back of the case. It’s misleading. Each individual case comes with two flares. If you want more than two, then you’ll have to order more cases.)
Another good idea for a stocking stuffer! (A very large stocking, perhaps!)
Virginia
Your Emergency Plan Guide team
P.S. Again, a reminder to check the status of the batteries in your emergency lights, flashlights, etc. They ultimately do go bad if not recharged or replaced. Now’s a good time to do that.