Category: Family Survival

Disasters are gonna happen! Planning Calendar for 2022, Part 1

Share
Ice cream cone dropped on the ground, melting
A disaster!

We hope we never have to hear you say something like this:

“Oh, darn!  I KNEW I should have fastened up that shelf / replaced those bottles of water / checked those batteries . . . !”

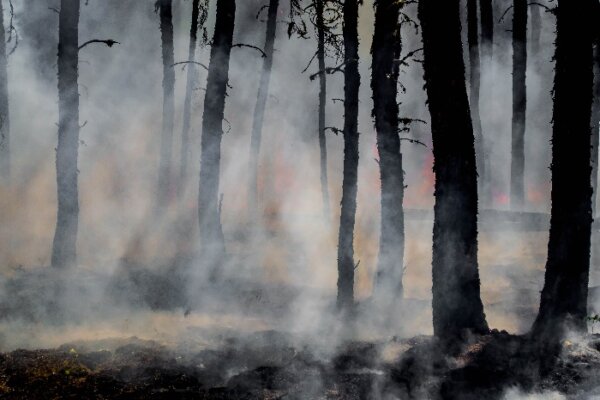
Truth is, disasters are gonna happen. Most aren’t entirely unexpected. And we’ve learned that if we simply prepare for a few of the biggest ones, we’ll be ready for most of the smaller ones. But if we let the small ones go . . . well, bigger and scarier emergencies are right around the corner! (Nothing worse than a spilled ice cream cone, of course!) A preparedness planning calendar can help keep us on track.

Your family’s well being comes first on your planning calendar.

About half of the Advisories we write deal with suggestions for individuals and  families.  They range from revisiting the contents of your go-bag, to keeping emergency radios maintained, to how solar works as an emergency power supply.

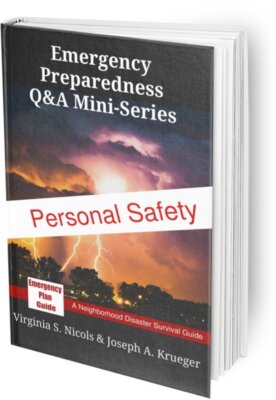
Last year, during the pandemic lock-down, we collected 14 of the most popular Advisory ideas for individuals.  Then we doubled the amount of info on each basic topic. Each topic became one volume of our “Emergency Preparedness Q&A Mini-Series.”

(Happy note: one of my real estate friends gave away copies of several of the mini-books to her clients as holiday gifts. She sent me this text: “I’ve gotten many many sincere thanks for such wonderful books!!!! Thank you so much! Hugs, Jaci, Seven Gables Real Estate”)

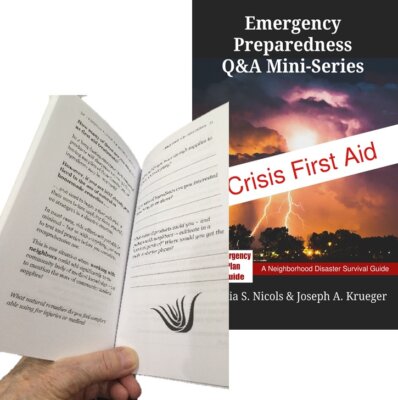
Worried that you may have overlooked some preparedness essentials? Looking for an easy way to review? Check out our mini-series and add some of them right now to your To-do list for 2022. Pass them along when you’ve finished with them!

But don’t stop there. Take your preparing to the next step!

We think Emergency Plan Guide is unique in its focus on building prepared neighborhoods. As you have seen, in “real life” Joe and I help organize and train our own neighborhood emergency response group. We’ve done it for nearly 20 years!

So besides the info for individual preparedness, our Advisories cover activities aimed at attracting and engaging our immediate neighbors. You may recall some of our stories from 2020 and 2021. Even when so much community activity was shuttered, our team was able to put together an  “Emergency Whistle Give-away,” hold a first-of-its-kind virtual meeting with our City’s Emergency Manager, and very early on, reach out to isolated neighbors via simple telephone conference calls.

Neighborhood resilience depends on  —  neighbors!

No matter what the make-up of your neighborhood, every family will benefit by knowing more about readiness. But we believe preparedness extends beyond each family having emergency supplies and training.

A prepared neighborhood may be able to rescue and support those people whose homes or livelihood were damaged or destroyed! 

It was neighbors who pulled out boats to search for survivors in the floods after Hurricane Harvey. After Hurricane Ida slammed into Louisiana, it was neighbors who got busy and nailed blue tarps over leaking roofs when there was no sign of promised government help. When the tornados hit in Kentucky last month, it was neighbors who pulled people from the debris in the darkness.

Who would help YOU if an earthquake flattened your home? Your school? Your place of business?  It would be your neighbors!  The ones right there. The ones who know where you are likely to be. The neighbors who have gloves and crowbars and lights and are ready to jump into action as soon as they know they themselves are safe.

So as we take a look at planning for 2022, sure, let’s let the FEMA calendar guide us with some good themes. But at the same time, let’s add to our planning calendar some activities that build group awareness and resilience.

And next week, in Part 2, we’ll take a look at who you really want for your neighborhood team – and who you might NOT want.

So, a list of activities by month for 2022.

January – Time to get the year organized. Get your hands on or make your own monthly calendar, with plenty of place to write. For each month, fill in at least one appropriate topic. Then set up two columns, one to help individuals and families take action, and the other for groups. For example: In January, survey your group members to find out what they are worried about. Use that information to build in training over the course of the year to meet their concerns.

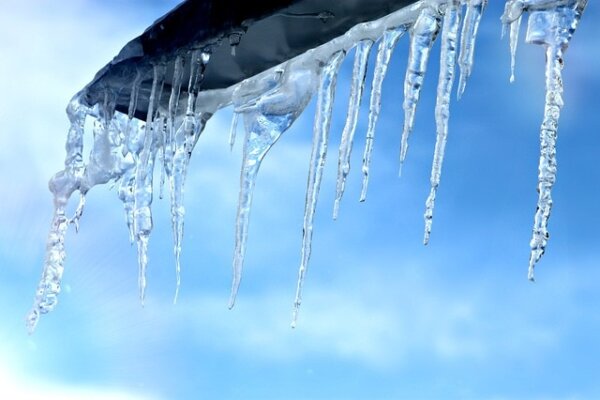
February – Winter awareness month, per FEMA. Focus on your location and your audience to identify winter threats. (For example, small children have different needs than the elderly when the power goes off . . .) Idea for group planning: what specialized winter equipment do you have available in the neighborhood that could be used to help more people? (snow plow, generator, home with fireplace, etc.) How would you deploy it?

March – Flood safety. Idea: test and emphasize your neighborhood emergency alert systems. Did forest fires ravage nearby areas? If so, watch out for mudslides and debris flow where they may never have occurred before.

April – Financial capability month. For most of us, having enough cash or savings to carry us through an emergency may simply not be possible. Idea: invite insurance professionals to speak to your neighborhood group. Be sure you come away knowing what is covered by homeowners or renters’ insurance, and what isn’t. Ask plenty of questions about wind and water damage.

May – Start of wildfire season. Big idea for this month: Become a FireWise USA Community!  Sponsored by the National Fire Protection Association and local fire departments, the program helps individuals and communities get ready for summer and potential fire danger. One of our Emergency Plan Guide groups has held multiple very successful FireWise events.

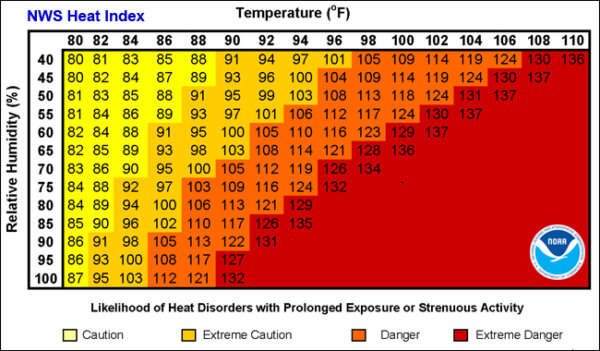
June – Start of Hurricane Season and, traditionally, start of the hottest season of the year. In 2021 we experienced deadly heat waves in the Pacific Northwest. Hundreds died quietly at home, exercising outside at school, and working in orchards and fields. Find out what temperatures to expect in your location. How can you protect the most vulnerable? Idea: set up a system to check on and support seniors in your neighborhood.

July – Fireworks safety.  Last year I studied the various fireworks ordinances in and around our town. Guess what?! Some fireworks were allowed in neighboring cities that weren’t allowed here!  So, be sure you know the rules for kids and adult enthusiasts. And have your fire extinguishers handy.

August – Back to school. Parents, know your school’s emergency procedures. Teachers, know what’s expected and if you aren’t getting comprehensive training, demand it. Traditional fire drills aren’t really enough these days. Make sure your school is ready for other emergencies including intruders, earthquake, tornado, etc. Do you need emergency tools or equipment in the classroom? Emergency food supplies? Find out.

September – This is National Preparedness Month. Idea: Plan a Preparedness Expo for your neighborhood or group. Consider guest speakers, commercial vendors, games, exhibits by police and fire. Invite school or scout groups as partners. Solicit donations so visitors go away with starter items for their own emergency kits. Be sure to arrange for publicity.

October – Cybersecurity month plus the Great American Shakeout! Idea: Sponsor an educational meeting for local businesses, with a “Cyber-Security Checklist” as take-away. Idea for group: Present dramatic video of earthquake footage (available on YouTube) and discuss earthquake myths. Send people home with an Emergency Whistle to help if they are trapped after a shaker.

November – Holiday cooking safety. Idea: Invite professionals to demonstrate how different fire extinguishers work on different types of fires. Review fire extinguisher procedures and practice with real or digital equipment. Already been there and done that?  Do it again for the benefit of new members of the group.

December – seems to be Protection Month!  Ready.gov recommends getting your flu shot. Avoiding shopping scams and hazards. Managing holiday lights and fires. (I seem to have been right on schedule when I came up with my tips for using plugs and extension cords a week ago!)

Customize your planning calendar to fit your circumstances.

The ideas listed above are just that – ideas for you and your leadership team to discuss as you develop your planning calendar. Use or discard them or better yet, come up with variations that will work for you, specifically.

As we continue to emphasize, every community is unique. That’s why we wrote four different versions of our Neighborhood Disaster Survival Guide. There’s probably one for your type of neighborhood. Each of those guides, by the way, has pages full of ideas that could help fill in a year’s calendar of preparedness activities.

Whatever your source of ideas, this is a great time to get organized for the year. There’s no reason to get caught flat-footed when emergencies hit – and so many good reasons to be ready!

Virginia
Your Emergency Plan Guide team

P.S. Planning for 2022, Part 2, will be coming out in a week or so. Watch for it! It will have suggestions for building a workable neighborhood team and keeping it on track.


Ten Minutes Helps Prepare for a Winter Power Outage

Share
Icicles hanging from roof edge
Beautiful for the holidays. Deadly if no power . . .

It’s been a pretty nice day here in sunny Southern California, but that should change starting tomorrow as we’re overtaken by another atmospheric river of moisture. Of course, we look forward to all the promised rain. And so far, there’s no suggestion that we could face a winter power outage.

But elsewhere in California, things are a bit more ominous.

  • Just now I checked with the National Weather Service and I found 23 different storm and winter weather warnings for California!
  • At the same time, I checked for power outages, and discovered 2,205 power outages happening right now in California!

Now I know you may not be in California. And I hope you weren’t in Texas last year, when they experienced a spectacular and devastating winter power outage disaster.

But no matter where you’re located, cold weather combined with a power outage can be deadly.

So that’s the combination we’re looking at with today’s Advisory.

Because it’s the holidays, and I know you’re busy, I have found the perfect way for you to get the info with as little effort as possible. It’s a video from Steven Eberlein of Ethos Preparedness. Only 10 minutes long. You might want to pull up a kid or two to watch with you.

I’ve been following Steven on LinkedIn for a while now. He’s a real preparedness expert with years of experience, a sense of humor (!), and he’s snuck dozens of sensible ideas and suggestions into these 10 minutes.

So grab a cup of hot chocolate and settle in!

Winter Weather Preparedness & Trapping Heat (Ready for Anything Video Library)

A good review, don’t you agree? Do yourself a favor and pull together any winter supplies you might be missing. And let me know what struck you as most important for YOUR circumstances!

Virginia
Your Emergency Plan Guide team

P.S.  Now if you’re asking yourself, “What’s the forecast for our part of the country? Do we have any winter weather warnings?”

You can find out just like I did by heading to the National Weather Service site: https://www.weather.gov/ When you get there you’ll see a map somewhat like this. Type in your state. (The box highlighted in red on the image below shows where to put in your state.)

Map of weather warnings from National Weather Service

What’s ahead for YOU when it comes to winter weather? How ready are you?


Smash and Grab – Worse this year!

Share
Rolex watch, target of smash and grab
Perfect gift — or perfect target???

It’s not too often that I add a new topic to our list of Advisories. So much of emergency preparedness is just getting smarter and more secure around the basics. This week, however, I have felt obliged to add a new threat for you to consider: a Smash and Grab incident!

Over the past few days of Black Friday shopping frenzy, a handful of major cities have experienced dozens of violent Smash and Grab incidents. Teams of people, clearly organized and prepared with crow bars and hammers, violently invade upscale stores, breaking windows and display cases, and making off with thousands of dollars of high-end merchandise. Within minutes, they are gone.

A security guard was shot and killed as he defended a video team filming the violence. So far, though while shoppers’ packages have been snatched by the mobs, no shoppers have been reported injured.

But it’s likely only a matter of time before a shopper or staff member is in the wrong place at the wrong time, or makes the wrong move. We don’t want that someone to be you!

Can I prevent a smash and grab incident?

It’s not clear that there is any way to prevent such an incident. Certainly, mall and store security has been beefed up. But the snatch and grab gangs swoop in and get out before law enforcement personnel can get there.

You might avoid being caught up in an incident by shopping during daylight hours.  And it would be a good idea to shop in smaller local stores rather in malls or big box stores.  (These thieves seem to be drawn by wide aisles, lots of merchandise, multiple ways out, and easy escape routes for their cars.)

Practice situational awareness all the time to help keep yourself out of harm’s way!

We’ve written before about situational awareness. Its simplest definition?  Being more aware of what’s going on around you!

The more complete definition of situational awareness for personal protection includes:

  • Gather information about your environment.
  • Understand what you see, feel, hear, etc.
  • Predict what could happen and come up with options for how you could react. (Use your imagination!)
  • Be ready to take action if you feel unsafe.

Now, this should all make sense to you, and you could probably follow all these steps if you knew in advance that you were heading into trouble.  The challenge is to maintain situational awareness ALL THE TIME! 

You can practice!  And the more you do, the easier it becomes.  (As I have mentioned before, Joe has had training in military intelligence. Situational awareness is built right into him!)

Shopping presents particular threats.

Even if you don’t get caught up in a smash-and-grab incident, you may be broadcasting an invitation to a thief. Are you guilty of any of these shopping-associated behaviors?

  • You just bought that perfect and very expensive gift you’ve been looking for!  As you push your way through the crowd you are exchanging excited video calls with your girlfriends and telling them just what a great discount you got!
  • You’re finished with your shopping. You pretty much stagger into the parking garage so loaded down with parcels and packages you can hardly  see over them. You don’t even notice who is coming toward you in the shadows. 
  • Your shift is up. You’re the last person out of the store tonight, and you head into the nearly empty parking lot alone. All you can think about is getting home and getting out of those shoes.

In every case above, your lack of situational awareness has turned you into a potential victim!   

What if I happen to be in a store when a gang of smash-and-grabbers comes in?

I mentioned that Joe has had valuable experience in staying aware. His experience has been catching!

Every time I go into ANY building I always make the effort to identify ways to get out other than the way I came in. In a grocery store, that’s back through the loading area. In a retail store, I look for signs for restrooms and emergency exits. (Since we’re in California, I also automatically and continually look for places to shelter in an earthquake.)

In a smash-and-grab situation you may suddenly notice people pouring into the store. You may hear breaking glass. If you’ve already identified other exits, move away from the turmoil and toward those exits if you can!

If you can’t get away, try to remain unnoticed.  Stay out of the way. Don’t scream or fight. Let them take your packages if they want them. (If you paid by credit card you may get your money back thanks to “purchase protection!”  Check to see if your card has it!)

Remember, the smash-and-grab mob is not interested in you.  They want things — preferably expensive things like jewelry or electronics that can be resold over the internet. They also want to get their loot and get out quickly, so any person that gets in their way is likely to be fiercely attacked.

This holiday season is turning out to be unlike any other.

Over the past few months we have all witnessed more mass shootings, more bomb threats, more erratic driving, and more angry confrontations than I can ever remember.  The smash-and-grab incidents fall right into this wave of violence. So a refresher on situational awareness is timely.

I have a couple of recommendations for that refresher.

Q&A Mini Series Personal Safety

First, our own Mini-Book on Personal Safety devotes 4 of its 17 questions to situational awareness. Each one of the answers offers up some detailed ways you – and your kids — can practice getting better at it! 

(I got a nice email from an emergency management professional who said he was impressed to have “found new info” there about how to practice!)

Here’s the link to Personal Safety on Amazon. A perfect and inexpensive gift for every member of the family!

Second, as part of the research for today’s Advisory I discovered three videos on YouTube from Homeland Security. They are games to test just how accurately you see things!  Now, you may not do very well on #1, but by the time you’ve finished #3, you will have improved!  Going through them takes less than 15 minutes and it’s fun!

I have relied on news reports for much of this Advisory. If your local police offers tips for safe shopping, or a special press release on smash and grab incidents in your community, be sure to find out more. You may prefer to approach certain shopping areas with extra caution.

That’s it for this week. But the role of situational awareness doesn’t go away. Commit to improving your own skill!

Virginia
Your Emergency Plan Guide team

P.S. Our personal safety book covers a lot more than mindset. If you’re considering self-defense systems, you’ll find questions about martial arts, weapons and deadly weapons, too. It all has to do with gaining more control over your personal safety.

Emergency Preparedness for Seniors — Two Questions for the Family

Share
Retiree at ease, oblivious of any emergency
Is she prepared? or oblivious?

In our retirement community . . .

Everyone is 55 years of age, or older.  Some people are a LOT older than 55!  Many of our neighbors have special needs, whether they know it or not. After years of working in this environment, we have found that when we’re trying to improve the levels of emergency preparedness for seniors, we encounter some specific senior challenges.

Here are some observations and two action items that you may want to take to heart as we head into the winter months. It’s a time where we are all exposed to more potential dangers — storms, ice and snow, power outages, etc.. Happily, it may also be a time when a heart-to-heart talk with family members is possible and welcome.

Some seniors suffer from complacency.

Some of our neighbors have family close by, with children and grandchildren showing up regularly to celebrate holidays.  These families also help mom or dad make decisions and take care of routine chores.

These older folks are lucky to have this support.  But they may also get used to handing off responsibility to someone else.  In a big emergency, adult children won’t be there!  Immediate decisions will have to be made! If people fail to act, results may be disastrous.

So here’s the first question for your family conversation — or for you by yourself if you are a senior:

Question #1: Are you ready to make life-and-death decisions for yourself, by yourself? 

Here’s a simple test of how ready you are. Have you taken the time to think through and make decisions about how you want to be treated in case of a medical emergency? I’m referring to completing and/or updating the information in the “Vial of Life.” It’s a vial/bottle/baggie that holds essential medical information for First Responders who arrive when someone calls 911. Emergency preparedness for seniors requires having prepared a Vial of Life!

A second level of personal decision making is to take the next step and complete an Advance Directive and/or POLST form (Physician’s Orders for Life Sustaining Treatment) — and have them ready for medical professionals. These documents go further than the Vial of Life info in that they tell emergency caregivers what level of care you want in specific medial situations. See the P.S. of this Advisory for a photo.

(The POLST form is often confused with a DNR or “Do not resuscitate” order. The DNR may be one of the options on the POLST form, but it’s only one of the options.)

Here in our community we’re remind our neighbors once a year (at least) about completing these important documents. You can get the details here about how we distributed a Vial of Life to all our neighbors a few years ago.

Action item: If you are getting together with family over the next few weeks, get a copy of the Vial of Life information and the Advance Directive for Health Care . Have them ready for discussion. If YOU don’t keep them up to date, in an emergency you may not get the medical care you deserve or want.

Other seniors operate with a sense of entitlement.

Living as we do near a fire station, and in a community where police services are excellent, we get to know our First Responders by first name!  We see them frequently, and know they are great folks.  Naturally, we expect friendly and competent service to be available all the time.

Our First Responders don’t hesitate to tell us, though, that in a big emergency we will fall off their list so fast our heads will spin! 

City government, schools, hospitals, jails, communications centers – all these will be much higher up on the list of priorities than a retirement community. So we regularly ask this question of our neighbors:

Question #2: Have you fallen into the trap of assuming immediate response if you call 911?

When an overwhelming emergency strikes, everyone will be on their own for at least a while. In our training for emergency preparedness for seniors, we encourage neighbors to plan for 10 days of “Sheltering in Place.” If you can take care of yourself, you can survive.  You may also even be able to assist others. 

And we gently try to remind neighbors: If you can’t take care of yourself, you become a problem for which there is no guaranteed solution. 

What about the staff of the community where you live?

In a senior community, unless it is a nursing home or care facility, when an emergency hits there may be NO ONE responsible for individual residents. In fact, in our senior community, the front page of the official Emergency Preparedness Plan states clearly:

” [Community] will not be responsible for the physical evacuation of residents in an emergency. Individual residents shall be responsible themselves. It is each household’s responsibility to be prepared from an emergency or disaster. {Community] will not be responsible to provide food, shelter or medical help.”

Residents can also assume that staff will quickly leave for their own homes to be sure their families are safe!

Of course, we’d like to think that our Neighborhood Emergency Response Group volunteers will be of service. but its members are all seniors in the middle of the same emergency. They will be busy protecting themselves, confirming their own safety and the condition of their homes before they can effectively mobilize to help others.

Action Item: If you live in a senior community, find out what the expectations are for response and care in a widespread emergency. This may be a tricky conversation. But you need to know what to expect. Below are a few questions to ask of your property managers or property owners.

  • What do we do when 911 doesn’t respond?
  • What about back-up power for medical units or equipment?
  • Are there any food supplies that could be tapped for residents in a wide-spread emergency?
  • What staff is required to remain on the property in an emergency?
  • How will we know what’s going on?

You may find there are really NO GOOD ANSWERS! But it’s best to know that now!

The reality? Seniors are responsible for themselves just like everyone else is!

This entire website is devoted to detailing, step by step, how to prepare for and respond to many different emergencies. Some Advisories are aimed parents with children, some at teenagers, most at able-bodied adults.

This Advisory is specifically aimed at emergency preparedness for seniors (and their adult family members). It deals in large part with attitudes toward preparedness — on the part of the senior and the senior community.

If you know seniors, please share this info and stress the two action items. Neither costs any money — but failure to consider them could add unnecessary stress and potential heartbreak for your family.

Virginia
Your Emergency Plan Guide team

P.S. I want you to know that Joe and I both updated our bright pink POLST forms over the past couple of months. See them hanging on the side of the refrigerator? EMTs will see them immediately!


Safety and Security on Campus

Share
Is she really ready for what’s to come?

Those of us with a built-in “readiness outlook” tend to want to help others to enjoy the same advantages. It’s not just having a working flashlight when the power goes out. The real advantage is attitude: feeling you’re aware of what’s happening and confident you can handle it!

Who better to be talking with about being confident than young people leaving home for the first time, heading off to college?

Last weekend I had that opportunity. I was invited to put together an online discussion for a local group of high-school-aged Girl Scouts. It was part of a series on getting ready for college. (They had already had sessions on test taking, finances, etc. and next up is a session on coping with negative emotions, depression, etc.)

What a pleasure it was to speak to the group!  (Most kept their video feed off, by the way.)

I invite you to share this Advisory – and if you have a group of girls (or guys, for that matter) who might like to talk about this topic, we could make it happen!

Off to College: Girl’s Guide to Safety and Security on Campus

The challenge: college will expose students to new experiences and the need to make decisions they may never had to make before. Our goal is to help students:

  • avoid really dangerous mistakes
  • recognize when they’re headed in the wrong direction
  • use new skills to get straightened out and back on track.

Here are some of the potential dangers we looked at, and the tools and skills available to girls as they make decisions about where to go to college.

What dangers could the weather bring?

First we addressed impersonal challenges.

I’m here in Southern California, as were my audience members. We don’t have hurricanes. We don’t get snow. We don’t get tornados. So, those students heading off to school in the Midwest, the East Coast, and maybe even Hawaii need to do some research on the chances of their school being hit by a natural disaster! Even “non-disaster” weather might result in a power outage, need to shelter-in-place, or to evacuate. (Emergency kit ready?) Certainly, students may need some new clothes!

Weather research is easily done – but do it before you go!

Be prepared for new living conditions.

After weather, we started in on personal situations that have the potential of becoming emergencies or even disasters.

No matter whether it’s a high-rise dorm or an apartment, be sure you know how to escape in an emergency. Where are stairs, back doors, fire extinguishers, etc.? Take a tour!

Are you ready to take care of your health – without a parent’s reminders? This involves what you eat, how much sleep you get, how you care for your “stuff” (doing the laundry on your own, maintain a car, etc.)  For perhaps the first time you will be making all these decision on your own. Learn what you need to know before you leave home!. (The stories about students not being able to do their own laundry seem terribly common!)

Are you ready to deal with a roommate – or several of them?

There’s an art to living with strangers – and a lot of it has to do with open communication about setting boundaries. Freshmen need to be ready to talk with roommates about all sorts of issues they may never have dealt with before, like:

  • routines (sleeping, cleaning)
  • privacy (and this includes digital privacy)
  • visitors including overnight visitors
  • security (locking room, lending computers or cars, etc.)

My own research on security stressed two things: 1. Find out what recommendations the school makes 2. KEEP YOUR DOOR LOCKED. (You may even want to invest in a wedge for the door or an alarm for the door knob.)

Be smart and be ready for new social situations.

This was, of course, the most interesting part of the discussion. (We even had a parent in the group, and she was particularly concerned.)

Of course, there are many areas to cover, but here is some of what we talked about:

  • Don’t find yourself alone in the wrong place. Your homework and discussions with campus security should reveal how best to get around, where not to be in the dark, etc.
  • Be aware that even in a group – such as at a demonstration – you may need to protect yourself and/or take evasive measures.
  • Should you consider carrying a weapon? Something like pepper spray? Every campus is different, every state is different in what’s legal.
  • What about parties?!  Enjoy them! But go with a group, and come home with your group. Manage your drinking (know beforehand how much you can handle), guard your cup, be prepared to say no.
  • Know your own responses and boundaries when it comes to drinking, drugs, physical attention, and peer pressure.

Setting boundaries takes thought and even practice beforehand.

As part of my preparation I interviewed several students now in their second year of college. They all emphasized that a student must be ready to immediately and strongly make it clear when someone is getting too close or too intimate. Let them know you don’t allow that behavior!

(“But what exactly do I say?” I developed a worksheet with sample boundary statements. See the link below.)

Avoid the one activity that makes you more vulnerable than any other.

You must know what that is by now!  It’s being buried in your cellphone!  We talked about the concept of situational awareness. The rule: “Heads up! Phones down!”

In summary . . .

Our discussion really revolved around three important preparedness activities that girls heading for college can engage in:

  1. Do more homework about potential colleges! It’s not just a question of size, reputation, etc. Go online and dig out more info about weather, security recommendations, campus policies, etc.
  2. When you arrive, tap into face-to-face resources: your dorm assistant, campus security, others with your similar interests and values, etc.
  3. Pay attention to what’s going on around you, and be ready to take action when necessary. Don’t be afraid to look silly or to make a scene!

And what more can I recommend with regards to personal safety?

I already mentioned the Setting Boundaries worksheet. It is accompanied by a list of what a student might want in a Campus Emergency Kit. Download both worksheets here.

A serious discussion about personal safety really deserves more than just this one Advisory. The 17 questions in our mini-series Personal Safety booklet cover many of these subjects in much more detail – and make you think a bit harder.  In particular, the booklet deals with questions about alarms, self-defense, pepper spray and tear gas (including legal restrictions), and deadly weapons. It asks some questions, too, about how you might feel after having used them.

Though not written specifically for students, any college-bound young person can use the information in this booklet. Get a copy for high-schoolers you know, and a copy for their advisors, too!

Easy to download, easy to read. Kindle version or paperback, whichever works best for you. Here’s the direct link to Personal Safety at Amazon.

Virginia
Your Emergency Plan Guide team

P.S. Dealing with young people about emergency preparedness was refreshing and a real change of pace for me. I’d love to do it again.

So I repeat my invitation: if you know a group of kids, particularly teen-agers, think about our getting together via Zoom to talk about some of these ideas. The adults might learn something new (I did, in my interviews!). And the young people may become engaged in a new way, too.  Just drop me a line to get the conversation started.


Three Ways to Survive An Earthquake — Which two are wrong?

Share
How to respond to an earthquake!
Earthquake? Act IMMEDIATELY to save your life!

If you exchange personal emails with family or friends and you live in any earthquake-prone corner of the world, you no doubt have heard various recommendations for surviving an earthquake. Let’s look at the three most popular. And let’s make sure you realize which ones are likely to hurt you, not help you survive!

(And if you are tempted to skip this Advisory, because you think you don’t really live in earthquake country, you may want to check out this Advisory. It talks about the risk in areas outside California.)

1.  Triangle of Life.

Doug Copp’s “Triangle of Life” method to survive an earthquake became popular, was questioned, then disproved. But still it lingers. You should know the story so you can make sure neighbors don’t try to sell you on this one!

For the reader who hasn’t been subjected to this idea – or the urban-legend discussions around it – the Triangle of Life (ToL) method for surviving an earthquake goes something like this. According to Copp, when an earthquake hits . . .

  • Find a solid object to cozy up to, such as a piece of heavy furniture, an interior wall, staircase, etc.  That way, when the building collapses, there is a good chance that you will be in a triangular open space or void.
  • Getting under a table, for example, actually puts you in more danger of getting crushed in a collapsing or pancaking structure.

Now there are a couple of serious problems with this theory. First, in a real shaker you will not be able to travel to a chosen place in the room or building. Rather, you will be thrown off your feet and will likely hurt yourself in the fall! Moreover, the piece of heavy furniture you are next to will to move — either away from or maybe right over on top of you. Second, Mr. Copp based his theory on data that he — ahem — “adjusted” to fit his solution. You can read more about this whole theory on Wikipedia.

The upshot — as a theory for how to survive an earthquake, the Triangle of Life just isn’t reliable.

2.  Get under a doorway.

In the “old” days, an exterior doorway in a brick or adobe building might have been the only place that was reinforced.  Today, that could still be the case — but you won’t really know. Moreover, there are fewer and fewer brick and adobe buildings being built. The entire frame of modern buildings, built to earthquake codes. is meant to withstand the shaking and trembling. (No guarantee that the building will actually be habitable afterwards, though.)

And frankly, if you’ve ever been in an earthquake (which I have), you discover that it’s really tough to move across a room to a doorway in the first place.  (Same problem as with Triangle of Life, above.) And if you do happen to be conveniently standing in a doorway when the quake hits, you will immediately discover that a swinging door may want to take the same spot you are in! (The door will win.)

3. DROP! COVER! HOLD ON!

Just last week a 4+ quake hit just south of Los Angeles. I personally didn’t feel it, but my ShakeAlert earthquake app did — and gave me a voice warning! (BREAKING NEWS: As of May, 2021 the entire U.S. west coast now has access to ShakeAlert earthquake early warning system! Find out more and get signed up.)

Some neighbors did feel the quake last week. Given social media, they naturally had to write about their experiences. One person wrote as follows: “I felt shaking and suddenly I couldn’t remember what to do! Drop, roll? Drop, cover? I was terrified!”

By now, you have come to the conclusion that the Drop! Cover! Hold on! advice is the advice I’m recommending as the best way to survive an earthquake. It comes in particular from the Earthquake Country Alliance. (Also from the American Red Cross, the U.S. Geological Survey, and others)

A powerful earthquake creates strong shaking — sudden, sharp, back and forth movement. If you try to stand, you will be knocked right off your feet. So the first action is to drop to your hands and knees. That way you are stable and can move as necessary.

Most injuries in earthquakes come not from the building collapsing, but from articles being thrown across the room! Imagine being bombarded by the TV, your computer screen, a bookshelf, a vase off the mantle, the microwave — even the refrigerator! You must cover yourself — and in particular your head — to protect from flying and falling objects! Hence action two: Cover. Best place is under a sturdy table, in the footwell of your desk, etc. away from windows. (If you can’t get onto your hands and knees — because you’re in a wheelchair, for example — protect your head with your arms as best you can.)

Then, because your “shelter” can move, hold on to it and move with it.

IN CONCLUSION . . . skip the controversy for the moment.

In a major calamity, we know that split-second decisions can make the difference between life and death. When a quake hits, you do not have time to look around to figure out a place to be. You are not likely to be able to even get there!

So, DROP, COVER and HOLD ON. Do it immediately, without trying to move to another place or another room. If you’re in a workplace setting, ignore your co-workers who are hesitant or embarrassed to crouch down under the desk. We’re talking about being safe, not being cool!

Action Item: Right this minute, raise your eyes from your device and take a quick look around. Look behind you, too. If the earthquake were to hit right now, where would be the safest place for you to get to, get covered, and hang on???

In any case, do be knowledgeable about these different recommendations. They provide a great centerpiece for discussions that will raise people’s awareness.  The discussion alone will save some people’s lives by getting them to think about the real dangers of earthquakes before they experience a serious one.

Virginia
Your Emergency Plan Guide team

P.S. This post is about immediate response to an earthquake. Most of us want to think more strategically about managing in a earthquake — and that means doing some thinking and some planning and some preparing IN ADVANCE. That’s what our Q&A Mini-Series booklet can help with. “Prepare Your Home for Earthquake” covers.

  • Toughing it out (supplies you need)
  • Preparing the interior of your home
  • Strengthening the basic structure
  • Earthquake insurance
  • Finding our about YOUR risk at YOUR location

 You can grab the new, Second Edition of our earthquake book right now at Amazon for only $3.99!

Emergency Tools are Critical to Survival

Share

Bare hands won’t work.

Emergency tools require heavy work gloves
But do they fit?

Clearing roads, walkways and corridors, prying open locked or distorted doorways, freeing victims pinned beneath fallen debris — just a few of the scenarios you might experience in an emergency. You’ll want the right emergency tools in your hands — and you’ll want to protect those hands!

So the solution? Heavy, well-fitting gloves!

This is particularly important for women, because most off-the-shelf gloves — even those provided via a CERT class — are JUST TOO BIG. If you’ve been visiting here a while, you’ll have seen some of our gloves. They make for good photos, but the extra space across the palm and at the end of my fingers means I just can’t wear them. In the presence of tools they are just plain dangerous!

The image at the left shows some of the gloves I do like for myself. Heavy-duty construction. Leather. Separation between fingers. Elastic at wrist. And you can select SMALL.

Whatever size you wear, find good ones and get several pairs. In wet or heavy work, you can damage them or even just wear them out. Here’s the link to Amazon so you can take a look for yourself.

OZERO Leather Work Gloves Flex Grip Tough Cowhide Gardening Glove for Wood Cutting/Construction/Truck Driving/Garden/Yard Working for Men and Women 1 Pair (Gold,Medium)

Essential emergency tools for turning off utilities.

Water shut-off.

In an earthquake or storm, you may face broken pipes — somewhere in the system or even inside your house. (Remember those terrible photos from the ice storm in Texas?) If you don’t know where or how to shut the water off, every minute increases the chance of damage or even danger.

Do you know where ALL THREE water supply shut-offs are located?

An Individual appliance may have its own shut-off valve. Check the water lines leading to the toilet, for example. Easy enough to shut off.

Turning off water to the whole house can keep water in your tank from becoming contaminated! Your home has a master shut-off valve. It’s usually in the basement, crawl space or maybe in the garage. It may be located outside by the foundation. These valves usually can be shut off by hand — just turn the faucet handle (clockwise) or the lever (until it’s crosswise to the pipe).

You may also want to turn off water at the street. This valve is probably buried in a concrete box some distance from the house. Use a big screw driver to pry off the cover. (Gloves, here!) Then use a special water shut-off tool that has a sort of hook at the bottom. (You may have used one for your irrigation system.)

Here’s an article with a number of illustrations that may be useful.

ACTION STEP: Plan a time for a family tour to find all your water shut-off valves! Do you need an emergency tool to turn any of them off? (See below for a suggestion.)

Natural gas shut-off.

Here where I live our scariest danger is fire after an earthquake. Fire fueled by gas leaking from broken gas lines! So on a regular basis our neighborhood group puts out information about where and how to turn off the gas if you smell that rotten egg smell!

Just like water, there are a variety of valves to shut off the gas. At the street (distribution pipe), in the neighborhood (smaller pipes) and directly to your home (low pressure pipe). Generally, you can only control the line that leads into your home.

You’ll need a sturdy wrench or specialty tool to turn off the gas! And you’ll need to know HOW to turn if off. (See below for a gas wrench suggestion.)

ACTION STEP: Find your gas shut-off valve. Store a gas shut-off wrench permanently near the valve.

DO NOT PRACTICE shutting off the gas! Once it’s off, you’ll need the gas company to come turn it on again! (All pilot lights will have gone out, remember . . .)

A convenient, all-in-one tool for shutting off water and gas.

Get at least one, have a permanent place for it so it doesn’t go missing. Know you’ll be ready when you need to use it!

4 in 1 Emergency Tool: Gas & Water Shut Off, Pry Bar, 4 in 1, Non Sparking, Emergency earthquake Gas Shut Off Valve – Fireman Tools – Tool Emergency – Emergency Tools – Gas Turn Off Wrench – Tern Tool

Will you be able to use your power tools?

The image at the top of the page shows a standard power tool. But when you’re planning for an emergency, you have to assume that power will be out. So what are your options?

Battery-driven tools (power drills, chain saws) will have a limited useful life span if they can’t be re-charged. These days, many tools come with multiple change-out battery packs, which gives the tools a lot longer useful life span. And there are small Power Banks for small devices. Still, at some point, batteries will run out. So to be useful, they’ll have to be recharged.

What are your recharge options for emergency tools?

  • Some people and businesses keep gasoline or butane-powered generators to supply emergency power. They can be really useful — but generally, they’re big, heavy and noisy. And they can be dangerous.
  • If you live in the right location, and can afford it, you may want to consider using a solar system to charge your tools. Solar works well for small-ish devices and lighting, but it takes a big system to actually drive anything with a motor.
  • Power inverters can take the output of a 12-volt battery and convert it to 110 volt AC, but in an emergency you’ll probably want more power than your inverter can give you. Still, worth another look.

Here’s an updated discussion of generators and inverters.

What about emergency lighting?

And let’s not overlook lights as emergency tools! Without them, you won’t be able to do much with the other tools you may have that still work!

Small flashlights are appropriate for getting around in the dark but may not provide adequate lighting for working in an emergency situation. Some newer flashlights offer more options, fortunately. Some have a side panel of lights, not just the main light. Some have magnets that can stabilize the light so you have both hands free. Flashlights are essential emergency tools — as long as their batteries hold out.

Lanterns can be even more useful, since you can set them down while you work. Low-level lighting is adequate for moving around in a space, and many lanterns adjust to meet that purpose. Other lanterns even have red or blinking emergency signals. From an emergency standpoint, it makes sense to have a couple of solar-powered lanterns, too, since batteries will ultimately fail.

Headlights from cars or trucks often suffice, but they may not be able to maneuver into position to be of help in all situations. There are large battery-operated candlepower spotlights available that can overcome this challenge, but most people don’t have these on hand. And again, they ultimately run out of juice.

Emergency lights keep getting better and better. Here’s our latest review of heavy duty lanterns. And for power tools that will last, take a look at this Advisory about solar-powered lights and tools.

What tools do you need to add to your emergency supplies?

ACTION STEP: Start now to put together an inventory of what emergency tools you have on hand, and what tools are available in the neighborhood.  Make sure you have the essentials. Consider whether an auxiliary power source will be required for tools to be effective.

Joe Krueger
Your Emergency Plan Guide Team

Heat Illness — Will you be a victim?

Share
He’s alone at the track. It’s 99 degrees. What should he be doing differently???

Heat Illness Prevention for People Who Work Alone

Every week I figure out a topic for my blog post. I call them “Advisories” because they usually provide some recommendation or warning about potential emergencies. Often, picking the topic comes out of that week’s news. But this week so many disasters were unfolding at the same time that I was overwhelmed!

So, I took another look at what’s going on in my OWN life. And the top issue – heat.  Again!  Last year I wrote about my own bout with heat exhaustion. Just a month ago I wrote about the dangers of extreme heat for senior citizens.

Then just two weeks ago I attended the “back-to-school training” for school crossing guards in my own town here in Southern California. (I’ve been a crossing guard for 5 years now. Best job ever. There’s definitely a book in there but I haven’t started it yet!)

Anyway, our first meeting always includes some sort of training. For example, how to fill out the request for a day off. Traffic laws. Understanding bullying and harassment. This year, the training was – by now you have guessed it:  Heat Illness Prevention.

I thought I knew a lot about it. But this training added some important info. And I want to share.

This Advisory applies particularly to people like crossing guards who work alone.

What exactly is Heat Illness?

There seem to be five commonly accepted levels of heat illness. Each describes how your body responds to overheating.  The initial response can be mild; level 5 can be fatal.  The progression:

  1. Heat rash
  2. Heat cramps
  3. Fainting
  4. Heat exhaustion
  5. Heat stroke

What factors are at play?

When you’re hot, you sweat. Your sweat evaporates and cools you off. Heat illness occurs when normal sweating and evaporation don’t work.

Naturally, the hotter the temperature, the more you have to sweat. At the same time, the higher the humidity (that is, the amount of moisture in the air), the harder it is to sweat. Hot temp, high humidity = the recipe for heat illness.

“Feels like . . .” The Heat Index

National Weather Service Heat Index Chart

The National Weather Service reports on the “heat index,” which combines air temperature and humidity.  For example, an air temperature of 90° F and a relative humidity of 60% intersect at a heat index of 100°. In other words, the temperature would feel like 100° with this humidity/temperature combination. The index is what’s behind the label “ . . . feels like XX degrees.”  

What’s the heat index where you are right now???  What does it feel like? The NWA warns that when your index reaches 90, it’s time to pay attention.

What else contributes to heat illness?

Temperature and humidity are the key risk factors, as described above. Of course, there are other factors.

  • Your environment also plays a role. For example, being in the bright sunlight, with no shade, can add as many as 15 points to your index.  Standing on hot concrete or asphalt adds a few more points, too. And, of course, the longer you are in that location, the greater the impact. Finally, heavy clothing or masks made add to your danger.
  • Your own health helps determine your risk, of course. Age, medications, (salty) food and (alcoholic) drinks can all have a negative impact.
  • Work requirements that don’t encourage or even allow for a rest can be deadly.
  • Your attitude can be the game changer. That’s what got me into trouble the last time! This is what may apply to the man in the image above, too. (Or to your high-schooler trying out for a new sports team.)

When you are highly motivated to push through any discomfort, when you have a lot of confidence in your own level of fitness, and when you haven’t taken time to get used to a new activity . . . that’s when heat becomes dangerous.  

Advance planning can make a big difference.

  • Drink water!  Drink water!  At least 4 cups per hour whether you are thirsty or not. Have water with you any time you expect to be out in the sun.
  • Don’t strip down to bare skin. Radiation from the sun will have a direct path to your core. Rather, wear a light layer of light-colored clothing to reflect that heat, and a hat that’s breathable.
  • Wear an old shirt, keep your shirt damp or wrap a damp or even wet cloth around your neck and chest. Pour water over your head and clothing (not your shoes!).
  • Look for a shady place nearby where you can take a rest if you start to feel symptoms.

And if you are working or working out alone, follow this important advice that we got at our training:

If you feel ill (rash, cramps, dizzy, nausea, confusion) stop what you’re doing and get into the shade. Rest until you can recover.

Not recovering? Know you’re really in trouble? Call 911 or have someone else call 911 for you.

For people working alone: Write down exactly where you are and have those directions handy.

A stranger who stops to help may not know the streets or the block but with your directions can give emergency crews a huge boost.

I have taken my own advice when it comes to avoiding heat illness.

Here’s a photo of the “beat the heat” gear I have assembled and use when the afternoon shift temperature gets up over 90 degrees. If you look closely you’ll see the three items I wear when it’s hot. (And the 3 items I have with me every day, of course!

Every day:

  • Stop Sign
  • Water bottle
  • Whistle

When it’s hot:

  • Hat with brim that shades ears, neck
  • Light-colored sports scarf (wet)
  • Cool vest (black quilted, zip-up front)

Here’s more about my special gear for hot weather.

My latest purchase – a real hat for a real job

I’ve always worn a hat on the job — visor, baseball cap, whatever. But this year I had to get serious. I needed a hat big enough to protect ears and neck but that wasn’t so big that it blocked my vision. And it needed to stay on in the wind. (I have a small head and short hair and many hats don’t fit!) This one turned out to be just right. Pretty much water repellent, mesh sides for air flow, and an elastic cord for snug fit. (Of course, there are other colors but beige felt more “official.”)

I got my hat at Amazon. Here’s the image and a direct link.

lenikis Unisex Outdoor Activities UV Protecting Sun Hats with Neck Flap Grey

A cooling towel — provided by my employer

Along with the Heat Illness training, we all received a “cooling towel.” I already had a couple of them. The concept is simple, and well-known to athletes. Just get the scarf wet and wrap it around your neck, shoulders or even head. Keep it wet, and evaporation will continue to work — while YOU are working!

The scarves I already have are plain colored. Here is a more stylish model from Amazon.

KAKOO Cooling Towel (40″x12″) 4 Pack Instant Relief Microfiber Cool Towels Chilling Neck Wrap Ice Cold Rags/Scarf for Sports Gym Fitness Camping Cycling Hiking Workout Golf Travel (A-4 Color)

And saving the best for last — the Cool Vest

I discovered the cool vest several years ago when one of my motorcycle-riding women friends gave me the heads up. The vest is a special high-tech material (from Germany) that absorbs and holds water for hours. In my case, I soak the vest for about 10 minutes in the basin at home, pack it into a plastic bag, and then slip it on just before I start my shift. Yes, it feels cold and almost clammy at first! But then, the water evaporates slowly and keeps me cool for my whole shift!

There are a variety of cool vest styles. Some actually have pockets for inserting ice bags! The one below is similar to my own.

FLY Racing Cooling Vest with Evaporative Cooling Technology, Cool Protective Vest for Hours on the Road

If you haven’t previously taken steps to avoid heat illness, now’s the time. We can only expect extreme heat days to increase due to climate change. This summer has already broken heat records – remember the “heat dome” that killed over 600 people in the Pacific Northwest? We’re going to experience more heatwaves that have higher temperatures and last longer.

So don’t wait to add Heat Illness to your list of potential emergencies. And add a hat to each of your Go-Bags, too.

Virginia
Your Emergency Plan Guide team

P.S. What tricks and tips do YOU have for beating the heat? Please share!

Buy Batteries On Sale

Share

Is getting batteries “on sale” a good idea?

Batteries

Check out this article before you buy! Price isn’t the only factor. In the world of batteries, it seems you get what you pay for, and you’d better know in advance just what you need.

Some Background on Batteries (Skim if you already know all this!)

How batteries work

Batteries use a chemical reaction to do work. Alkaline batteries, the AA, C and D batteries we all know, typically depend on zinc interacting with manganese (through an alkaline electrolyte solution) to produce electricity.

Other batteries use different chemistries to achieve a higher “energy density” so they will last longer and perform better. Some of them: nickelcadmium (NiCd), nickelzinc (NiZn), nickel metal hydride (NiMH), and lithium (Li-ion),

In a regular alkaline battery, the reaction ultimately consumes the chemicals (leaving behind hydrogen gas as a “waste” product) and the battery dies.

When to recharge

While an alkaline battery can be recharged, the process is inefficient and dangerous because of the hydrogen gas buildup. Recharging non-rechargeable batteries can result in a leak or even an explosion.

Rechargeable batteries are designed differently. First, they use specific chemicals (most popular seems to be Lithium Ion, which is being used in Tesla batteries) that can undergo a “reverse chemical reaction” easily and efficiently. They contain a catalyst to keep hydrogen gas from forming. They have vents to prevent pressure from building up during recharging.

As you might expect, rechargeable batteries are more expensive because you have to buy that extra “charger.” However, studies suggest that you will save money over time using rechargeables, but they need electricity to work, so IN AN EMERGENCY SITUATION you will probably want to have regular disposable batteries on hand, too.

Getting the most out of batteries

No matter where they are stored, all batteries will ultimately die. Eventually, the steel casing will corrode and rust and leak. (Heat like we’ve had over the past several weeks can speed up the deterioration!)

Still, there are things you can do to preserve the life of your device batteries.

  • Don’t attempt to recharge non-rechargeable batteries.
  • Remove batteries from a device that you won’t be using for a while.
  • Replace all the batteries in a device at the same time. (Clean the contacts with a cloth before you install the new batteries).
  • Don’t mix different kinds of batteries in the same device. Use the same manufacturer, same type, same manufacture date.
  • Store batteries in a cool, dry place. (Your car, in the summer heat, is not so good for preserving the life of whatever battery-operated device you store in there.)
  • Don’t mix loose batteries with metal objects – like in your pocket with change. They can short-circuit and burn or explode!

Oh, and that story about storing batteries in the refrigerator? Keep batteries cool, but there’s no need to refrigerate modern batteries.

My phone’s my most important survival tool! What’s the best solution for it?

The battery already in your phone or computer may have to be replaced as some point. If so, you’ll probably have to get whatever the manufacturer requires.

But, you’ll be recharging that device many times before you have to get a new battery! In an emergency, of course, electrical power for recharging may be out or you may be nowhere near a wall socket. One back-up option is a device that holds an extra charge, just ready for you to plug in to when you need it.

So let’s look at portable chargers or Power Banks.

Power Bank with Flashlight
My Power Bank has a flashlight, too.

If your goal is to extend the life of your electronic devices, consider a Power Bank,  otherwise known as a “mobile power supply,” mobile battery, external battery, spare battery, charging stick, or portable charger. These devices can keep you operating for days at a time!

If your time is worth anything, a power bank will be an inexpensive boost to your productivity and, in an emergency, to your peace of mind.

Power Banks are sized from something similar to a small flashlight to a device that resembles a small external storage drive. They all fit in a palm, pocket or purse, but may be a bit heavy to carry around all day. (Check the weight.)

As you compare them, look for:

  • Capacity (measured in mAh, or milliampere hours). The higher the mAh, the more stored power.

    IS THE POWER BANK BIG ENOUGH TO DO THE JOB?  Some negative reviews come from people who expect a small battery to recharge a much larger device. Doesn’t work!

    You want enough juice to reload your phone or tablet completely, at least once and preferably more often than that! For example, one power bank model declares its 15,000 mAh are able to charge an iPhone 6 more than 5 times. To know how much capacity you need, get the specs on your device from the box it came in, or search online for “technical specs.”
  • Output (measured in V, or volts). Generally, you want the power bank output to be the same as the input to your device. For example, your phone and Bluetooth headset probably each have 5V input.
  • How many ports? Some of the chargers can “feed” as many as 4 devices at the same time. (You’ll need the right cord for each device.)
  • What security against short circuits, over-charging or over heating?

The chart below will gives you a quick idea of features, options and prices. These models range from $20 – well over $100. Click on the image to go directly to more details on Amazon.

BASIC

10,000 mAh. Two different charging speeds. Slim and lightweight.
FASTER CHARGE, MORE POWER

20,000 mAh. Charge multiple devices at once.
CHARGE LAPTOP

About the size of a small book. LED lights show status. Charge laptop 2 1/2 times, phone 11+ times.

What are the best batteries for our other emergency devices?

Disposable batteries

Understanding all that basic information listed above, we have tested disposable batteriesEnergizer, Duracell and Kirkland (Costco brand) — multiple times for our emergency radios. These radios are used once a month for our Emergency Response Team drill, and then very lightly, so we don’t go through the batteries quickly at all. We do automatically replace them regularly (usually twice a year at the time change.)

Re results of our testing? There doesn’t seem to be too much difference in manufacturers, although our current favorite is the Duracell Coppertop with Duralock.   You can get what you need at your local hardware or big box store, or add them to an Amazon order. Some packages have both AA and AAA sizes in one.

Rechargeable batteries

For multi-use devices, like our emergency radios, we prefer rechargeable batteries. We’ve found that rechargeables are often specified BY NAME by the manufacturer of the product. If specified, use ‘em. Other raters for rechargeables have consistently come up with Eneloop NiMH. These are made by Panasonic, and come in AAA and AA sizes.

Panasonic says these can be recharged 2,100 times!  For that reason alone I would try them!

Solar chargers

Finally, don’t overlook the small solar devices designed to recharge your phone and/or other devices. Some emergency radios have small solar panels, and can recharge a phone.

There are also small, handy solar panels you can attach to your backpack and recharge while you go! They cost somewhere between $20 and $40. Here’s an example – click on the picture to get full details.

Whew, this is a lot of info, but given the fact that we all seem to invest in batteries on a consistent basis, it’s worth it to get the right battery for the job. Oh, and buying on sale? A good idea if you know what you’re buying.

But buying just on price alone makes no sense.

Virginia
Your Emergency Plan Guide Team

If you’re part of a Neighborhood Emergency Response group, you’ll need a budget for batteries for your walkie-talkies. Here’s an article with some ideas about financing your group’s efforts.

School Preparedness Questions for Parents

Share
She’s ready to learn – but is she ready for an emergency?

Every year in August I think about school starting and ask, ”Do I really need to give parents a list of questions about school preparedness?” And every year, because things keep changing, the answer is YES. Lately my list has had to be updated more than once a year!

Here are updated school preparedness questions for Fall, 2021.

These questions are written primarily for elementary school parents, teachers, staff, security and healthcare providers. Of course, every school is unique – not to mention every student! – so we can’t provide guidelines for every single situation.

In particular, we can not address the situation with COVID-19 and public health that is front and center for school children this year.

But we can ask pertinent questions with the hope that all parents will make sure to get the answers that work for their family.

Preparedness questions to ask the school

Caution: School personnel may be hesitant to answer some of these questions. They may not want to share details. They may be uncomfortable with preparedness issues in general. Or given all the changes that are happening, they may simply not know the answers. But remember, if you feel good answers are not forthcoming, stick with it!

Also remember this, too. School staff members may not consider themselves “First Responders,” but when something happens, they are the first ones there. Their actions can keep an emergency from turning in to a disaster. School staff deserves and needs to have the right training and supplies — and support from the district and the community — to do this job.

1 – General school emergency policies.

  1. Does the school have written emergency policies and plans? Have they been updated to account for the Coronavirus? For air quality or other emerging situations?
  2. How do parents find out about the policies?
  3. What about emergency contact forms for each child. How are they distributed? Where kept? How detailed? How often updated?
  4. Who decides on the definition of “emergency?”
  5. How will parents be notified in emergencies? Are all parents notified for each emergency?
  6. What are student pick-up policies? What are alternative pick-up locations if school has been closed? Who can pick up your child if school is shut down? How will they be notified? How will they be identified before child is released? What if your child won’t go with them?

2 – Emergency drills.

  1. Does the school face any particular threats because of its location? (near railroad tracks, busy traffic or airport, environmental hazards from neighboring businesses, potential for earthquake or tsunami, etc.)
  2. How are teachers and students on site notified of an emergency? (site-wide PA system, internal phone system, cellphone app, etc.)
  3. How can teachers advise the office of an emergency?
  4. What emergencies does the school train for other than fire or storm? (Earthquake, tornado, wildfire, active shooter?)
  5. Does the school train for evacuation as well as shelter in place?
  6. What should parents know about how these drills are called and how conducted?
  7. Who does the training and how often?
  8. How are substitute teachers included in these drills?

3 – Emergency supplies and equipment.

  1. What food and water supplies are maintained in the school?
  2. Are supplies kept on school buses?
  3. What food, water and hygiene supplies are in the classroom in case of extended lockdown? (Please see P.S.!)
  4. Are first aid supplies available in each classroom?
  5. What first aid training do staff members get? Do they get age-appropriate training? (For example, CPR for infants and children is different than for adults.)
  6. Where is emergency equipment located? (fire extinguishers, AEDs, wheel chairs, etc.)
  7. Who is trained in equipment use?

4 – Security features.

In recent years, many schools have made changes to their physical infrastructure to provide more security. Parents and students should know what to expect.

  1. Have changes been made in the classroom or on the campus due to the threat of COVID?
  2. Has the school made any changes to the way visitors are allowed onto the campus or into the buildings? What are the policies?
  3. Does the school have security cameras? Are they monitored?
  4. Does the school have a professional security force? How many officers with what credentials, what training and what weapons? Their role?

(By the way, a report from the National Center for Education Statistics can give you an idea of how your school stacks up compared to others when it comes to physical security and crime statistics. The report is updated every year.)

5- Getting back to business as usual.

Sometimes it’s easier to focus on immediate protective actions and overlook what it will take to recover once the event is over. A good school preparedness plan has procedures in place to help parents and students “get back to business as quickly as possible.” (Obviously, after a year of distance or hybrid learning, these procedures may be new for everyone.)

Depending on the age of the students, such activities might include

  • professional and peer counseling
  • student-aided clean-up
  • building safety inspections
  • memorials
  • acknowledging First Responders, etc.

See what plans the school has for such activities and what role the parents are expected to play.

Next steps for parents.

First, share your list of school preparedness questions with other parents. You may want to take the time to expand it with details unique to your school. Next, approach teachers and administrators for answers.

Make sure the answers get out to everyone in the neighborhood! You may want to insist on special presentations on some topics. Guest speakers could be school staff and a member of the police or fire department. You yourself might volunteer to help design and put on parts of the presentation.

You may need to create materials in multiple languages.

Presentations could be held virtually, or on Back to School night, at a PTA meeting, and, of course, in the classroom. Have students videotape the presentation for later showing or showing online, as well.

Working together, schools, students, parents and other community members can keep emergencies from becoming disasters and do the best possible job of protecting students when disasters do occur.

Virginia
Your Emergency Preparedness Team that naturally includes children!

P.S. Does your school ask that you send an “emergency kit” to school with your student? If so, please read this companion Advisory, also newly updated for 2021: Emergency Kit for School.


Emergency Kit for School

Share
Emergency kit for school
Any emergency supplies in that backpack?

Is your child missing an emergency kit for school?

The first time I did research for this Advisory, I was shocked to read comments like this:

“Wow, an emergency kit for school. What a good idea! I just thought the school would be taking care of this!”

These were comments from people reading articles online!  What about all the other parents who don’t have time to spend online?!

First things first. What emergency supplies does your school store?

A year or so ago I attended a training put on by the Earthquake Country Alliance, and sat next to a woman who works with schools. She told me about a school that called to ask her to inventory their emergency supplies shed. “How long has it been since you checked it?” she asked.  The answer was, “Uhhhh…”

When she opened the shed she discovered what she called “a hazmat situation.” The shed had leaked and everything inside was completely spoiled and contaminated!

That story should encourage you, when you go to your Back to School night, to ask not only what supplies are kept at school but also how often they are refreshed.

Next, what emergency supplies does the school want children to bring? Are they adequate?

In some schools in our area, each child is required to bring an “emergency kit for school” at the start of the school year. Reading the instructions closely, I discovered that the kit is to consist of a quart-sized resealable plastic bag with the child’s and teacher’s name on the outside, some snacks, and a personal note from the parent to the child.

This “kit” would sustain the kids I know for about 15 minutes.

Here’s another list from a school district in the mid west: ”A little food, some water, a space blanket or large plastic trash bag, a non-toxic light stick and a letter or photograph from home.”

As a parent, you need to find out about “required kits” at your school. The questions to ask:

  • What goes in the kits?
  • How are they stored?
  • What about kids whose parents send nothing at all?

Third, what sort of PERSONAL emergency supplies make sense for YOUR child?

Here at Emergency Plan Guide we talk about survival kits frequently, so none of this should be new or different. In this section we’re not talking about the “required kit” that the school wants to collect and hold. Here, we’re talking about emergency supplies specifically for your child. A few things to consider:

  1. Your child may need access to emergency supplies at any time! An emergency could happen on the way to school, or on the way home, not just while the child is in class. So, the best place to have supplies is in the kid’s bookbag or backpack.
  2. Of course, this kit is meant for emergencies only. It’s not to be shared or talked about at recess. This means the kit has to be separated from the rest of the stuff in the bag.
  3. Every kid’s personal emergency kit will be different. Your first-grader just won’t need or want the same stuff that your 6th-grader wants! And, of course, that kit’s contents will have to change regularly.

Some suggestions from parents for customizing an emergency kit for school.

The kit needs its own pocket.

Pick a backpack or book bag or rolling cart with a zippered pocket for the emergency kit.  A bottom pocket would work, as well as an outside pocket of the right size.  You’ll have to shop for the right backpack based on your your kid’s size, sex and whatever is in fashion at the school! 

An older child may like a “tactical” bag with mesh and lots of pockets – as long as it has one pocket for the survival kit.

Find a sensible container for the personal emergency kit.

Depending on the size of your kid’s backpack, you will very likely be able to find an individual zippered toiletries bag or one in a set of organizers that will fit perfectly in the pocket or on the bottom of the bag. You might want to use a clear bag (meant for travelers) and a couple of sets of compressible “packing cubes.” If you’re packing a jacket or other emergency wear, being able to compress it would be a great space saver. ( Here’s the link to an Advisory with some handy packing tips and organizers.)

You may even be able to pack supplies in a tin box that will fit in a particular pocket.

In any case, the idea is to avoid your child having to paw past the kit to get to books and papers, etc.

What goes into the personal emergency kit for school?

If the student carries the bag every day, it can’t be too heavy. (That’s why a rolling cart is a good idea!) Still, the kit should include items from this list:

  • Food – energy bars, non-perishable snacks. Hard candies. Get some protein bars and not just carbs!
  • Water – if your child carries a water bottle every day anyway, that may suffice. Otherwise, consider packets of water.
  • Warmth – Poncho, space blanket, extra jacket. Maybe hand warmers.
  • Light – Pen with light; light stick.
  • Emergency whistle – good quality. Cheap plastic whistles are hard to blow and may not give the sound quality your child needs.
  • First aid items – Most children won’t be able to use a full first aid kit, but they certainly know and love band aids and maybe anti-bacterial cream.
  • Face mask for emergency use.
  • Wet wipes individually packaged.
  • ID card with emergency contacts and family photo – protected from getting wet.
  • Emergency phone if allowed and if the kid knows how to use it.
  • Small toy, book or comfort item.

Warning: The emergency kit for school is NOT the place for medicines or drugs. Most schools have strict rules about how student prescriptions are to be handled. Be sure you find out about those rules.

Suggestions for parents whose kids walk home alone . . .

Phone Wristwatch.

The minute school lets out I have two young neighbor children who immediately call their parents using a phone wristwatch. Children aren’t allowed to have phones at school, but the watches are allowed. I’ve interviewed the parents, who REALLY like being able to check in via voice and talk with the kids as they head to their after-school care locations. Questions to have in mind:

  1. Is the wristwatch phone limited to a particular carrier?
  2. Can you connect the wristwatch phone via app to YOUR phone? (iOS or Android)
  3. Does it monitor the child’s location via GPS? Can you set limits and get an alert when the child goes out of area?
  4. How many phone numbers can be programmed into the wristwatch phone?
  5. What sort of access to the internet (games!) is available through the phone?

The phone below is a good example. I was attracted because this phone limits calls to 10 known friends or family, and blocks all others. It also can block calls during class time. Naturally, I was looking for different colors, too! Click on the image or the link to check out all the details at Amazon.

Cosmo JrTrack 1 Kids Smartwatch | Pink | Voice & Video Call | GPS Tracker | SOS Alerts | Water Resistant | Blocks Unknown Numbers | SIM Card Included | Class Mode | Perfect for Back to School

Welcome-home doorbell Camera

By now we’ll all seen the home security cameras that can alert you when your kid steps through the front door. Again, parents whose kids arrive home to an empty house are really comforted by this technology. Of course, you’d want to get the kind that allows for two-way conversation.

We’ve written many times about front door security. New models are coming online all the time. The Ring model shown below does what I was looking for for parents wanting to know their child is home safely after school.

Ring Video Doorbell – newest generation, 2020 release – 1080p HD video, improved motion detection, easy installation – Satin Nickel

Special needs kid?

If you have a special needs kid, please take a look at my recent Advisory that describes a particularly powerful tracker for kids who need close supervision.

Let me know of other suggestions you have for items for kids, or what your school requires. I’d like to include that research next time!

Virginia
Your Emergency Plan Guide Team

Welcome to new readers! If you’d like more on the topic of kids and school, you may want to check out this Advisory with Preparedness Questions for Back to School.


The Best Generator for Emergencies

Share
Emergency generator
What should I be looking for???

More on electricity?

Emphatically, Yes!  Why do we dwell so much on electrical power? It’s simple.  We depend so much on electricity for just about everything we do that it becomes a major concern in an emergency. And the news about power outages is ominous. But is a generator the solution? If so, what’s the best generator for emergencies? Let’s take a closer look.

First question: what’s your neighborhood like?  

If you live in a single family home with a lot of space around it, having a generator may make sense for emergency power. If you live in a multi-family unit (an apartment, for example, or in a mobile home park), it’s unlikely that a generator will work for you.

Why not?  Mostly, it has to do with logistics.

Second question: What different kinds of generators are there to choose from?

A home stand-by generator is about as big as a stove, and weighs twice as much.  It will be permanently installed outside, probably on its own pad. It’s hooked up to a permanent source of fuel (probably natural gas) and switches on automatically when power goes off. Depending on the size of your home, you are looking at at least a 10,000 Watt generator, and more likely 20,000 to run nearly every appliance and system. These are big, heavy (like 600 lbs.), and are relatively noisy. (Like your A/C.) As you can imagine, a whole-house stand-by generator is also a big investment – typically in the thousands of dollars.

Even the more efficient portable emergency generators for sale today — meant to power a few essential appliances — are about as big as a filing cabinet, and weigh close to 100 pounds. You plug your appliances or equipment into the portable generator using extension cords. Most run on gasoline; some are dual-fuel, which adds a propane option. Costs range from around $500 (which would be a real bargain) to as much as $2,500. Portable models are just as loud as the stand-by generators, too — so you’ll be bothering the neighbors if they are at all close to you! Even if you could stand the noise, you can’t run these inside the building due to emissions and perhaps fire danger.  Every year, people die from carbon monoxide poisoning because they run a generator in the garage!

A third type of emergency power supply is the inverter-generator. If your major concern is keeping your computers and telephones running, you’ll want an inverter style in order to be sure the power going into your devices is “clean.” Inverter-generators are generally smaller in size, weigh less, and are a lot quieter. This makes them a favorite for week-end camping and tail-gating! Prices for inverter-generators start at below $400 and go up.

Still interested? Here are a few other issues to consider.

Can you handle the weight?

First off, how much does the generator weigh? As mentioned, even the “small” generators are heavy, often over 100 pounds. (That’s why most portable generators come with wheels.) This is one hefty piece of machinery to move around. Can other family members move it without your help?  Can you move it even with everyone helping?

How much fuel can you store, and where?

The real issue here is how long will you be without power and how much gasoline or propane can you store safely? Even the most efficient portable generators, run at 25 or 50%, will empty their gas tank in a day or two. To refill the tank during an extended outage you’ll need to be able to safely (and, we hope legally) store several gas cans or propane tanks.

What size generator do you really need?

By now, you should have realized that there’s a great variety in generators — in size, weight and price. One thing we haven’t mentioned yet — and maybe should have started off with — is the amount of power you require.

Generators’ capacity is measured in Watts. Look at the appliances you want to run and pull the wattage requirement from the labels. Note: appliances or tools with a motor take about TWICE as much power to get started up (surge capacity) as they do to keep running (continuous capacity)! That’s why you’ll see generators advertised with two different wattages.

For example, I recently checked on our house, taking a look at keeping just the refrigerator and freezer and some lights going in an emergency. We need about 2,400 Watts to get everything started — but less than 1,000 to keep everything running! So I was searching in the 2500-2000 Watt range.

The only way you can figure out what size you need is to add up all the appliances/equipment you intend to run. Here’s a wattage chart to get you started. As you’re making your list, consider how many appliances you’ll need to plug in at the same time. (Judicious scheduling can give you better efficiency.) And note what sort of plug each appliance requires. Every generator will have a variety of plugs but it’s limited.

How much generator can you afford?

A stand-by generator will be a custom install, so I can’t anticipate what it might cost. As mentioned above, it will be in the thousands of dollars.

The cost for the dual-fuel generator shown below is around $600. Other similar units won’t cost much less but may cost as much as $2,000, depending on where you live. (We’re having a hot summer here in California, and are anticipating power outages, so prices are higher than usual.)

Prices for the inverter-generator start low, but also go up sharply. It all depends on how much power you need.

Finally, don’t overlook the fact that different states have different emission requirements – notably California. This can also change the prices.

As you consider price, compare to what you might lose if you don’t have a generator. A freezer full of food? Days worth of work?

What to look for in the advertising?

Good advertising is helpful. Look for the wattage output, size of the gas tank, noise in decibels, and safety features like overload and oil sensors, CO sensors, and surge protectors.

Example of a dual-fuel portable generator

This generator could easily serve to get you through a temporary power outage. I’d certainly consider this one for myself.

It’s one of the mid-size models from Champion. If you click the image or link and head to Amazon, you’ll find smaller and larger versions on that same page. Read everything, including reviews, and compare! It’s worth learning all you can before making a buying decision!

Champion Power Equipment 76533 4750/3800-Watt Dual Fuel RV Ready Portable Generator with Electric Start

Example of an inverter-generator

In our household we spend hours everyday at our computers, and we have an office full of printers, lights, fans, etc. For us, a power outage is above all a business disaster! So we’ve also been looking at generators that will provide high-quality power for devices. The model below looks as though it would fit our needs well. And I could lug it around!

WEN 56203i Super Quiet 2000-Watt Portable Inverter Generator w/Fuel Shut Off, CARB Compliant, Ultra Lightweight

The real solution to whether you need a generator for emergencies will be a personal one.

You final decision will require some advance planning. You’ll need to figure out what size you need (based on what appliances or equipment you want to run, and how often), where you’ll store the generator and fuel when you don’t need it, and how you’ll start, refill, and maintain the machine. The best generator for you might be very different from mine.

Full disclosure, we haven’t yet made our final decision!

Virginia
Your Emergency Plan Guide Team

P.S. Please share your personal experiences with home generators! We need more information to make a decision about the best generators for emergencies.


Get-Out-The-Door Bag

Share

Packed and ready . . .

Packed and ready with room left over

We recently asked readers what worried them the most. There was one clear winner (if that’s the right term for it):
“Not being prepared to evacuate.”

One person (Elizabeth!) had a very specific request regarding evacuation, and that’s what we’re addressing today.

“Can you please send us a SHORT list of what we need to have ready?” 

Here’s what goes into the . . .

Get Out The Door Bag.

This is the bag you need to have packed and available at all times, ready for that unexpected emergency.

This is the bag you grab when suddenly there’s a police officer banging at the door and yelling at you to get out, because . . . there’s been a train wreck, a chemical spill, some sort of terrorist attack, whatever. You have ONE MINUTE to get out! 

You pull this bag out from under the bed, scoop it out of the closet near the door, or maybe it’s already stored in the car when you scramble in.

And if it happens in the middle of the night, remember, you are in pajamas.

The Get Out The Door Bag is meant to get you to wherever you end up and give you a sense of confidence until the situation is straightened out, which may take minutes or hours.

This is not the 3-day or 72-hour kit that we talk about so often. Watch for THAT list later. It’s a longer list, so it doesn’t fit in this Advisory!

What 10 things go into the Get Out The Door Bag?

(If you look carefully, you’ll see all these in the image above!)

  1. Sturdy shoes and socks
  2. Long pants, long sleeved shirt (You might be in pajamas, remember?)
  3. Jacket
  4. Flashlight + extra batteries
  5. Emergency radio
  6. Cell phone and charger
  7. List of emergency contact names and numbers
  8. Toiletry kit including several days’ worth of medicines
  9. Extra glasses, sunglasses, contacts
  10. The one small thing you just can’t leave behind . . .

Everything 1-9 on the list will fit into an ordinary-sized backpack, depending on the size of your shoes! This was my list, and it all fit into my bag, with room left over!

As for that item #10 . . .

If you have extra room, or specific concerns, one or more of these might be your “one small thing you just can’t leave behind.”

  • Cash
  • Extra set of keys
  • Memory stick/flash drive with copies of your important documents including website/account passwords
  • Pocket knife or multi-tool
  • Favorite photo, book, etc.
  • Stuffed animal
  • Mylar space blanket/sleeping bag

Because Joe and I are such fans of walkie-talkies, we’d probably each have a hand-held radio, too. You may also have noticed the hard candies in the image above. I always gotta have something sweet!

Some suggestions about how to pack your Get Out The Door Bag.

Line your backpack with a big plastic bag to help keep everything dry.

To make this really work, you will have to “build” a second toiletries kit, just for the Bag. Get a small toothbrush, small sized deodorant, wipes. Pack a supply of pills in small plastic bags. (Get in the habit of replacing pills with a new supply every other week or so.)

Use another plastic bag to build a minimal first aid kit and tuck it into the toiletries bag, too.

And as for phone and charging cables, if you always plug in at the same place, you’ll be able to scoop everything up as you head out the door. Have a plastic bag or see-through packing cube for them, too.

Keep reading for more about plastic bags!

Specific recommendations to consider for your Get Out The Door Bag.

The Packable Jacket

While I was waiting in one of the endless lines at the airport last summer, I watched a young woman dig into her suitcase and pull out a wadded up piece of clothing.

She straightened it up, slipped it on and everybody standing around nodded and smiled in approval! Turns out this is an actual fashion: the PACKABLE jacket. These jackets look like a very light-weight, close-fitting down jacket. Some, of course, are filled with material other than down. The outer material also varies; some are weather resistant. Some have hoods. But all of them are very light, very crushable and would be the perfect item to pack in your Get Out The Door bag and/or have in the car all the time!

Here are a couple of examples from Amazon: prices for packable jackets start as low as $25 (though most are more), so check out several different brands.  (Click on the images below to go directly to Amazon to start your comparison shopping.)

Amazon Essentials Men’s Lightweight Water-Resistant Packable Puffer Jacket, Charcoal Heather, Large
Amazon Essentials Women’s Lightweight Long-Sleeve Full-Zip Water-Resistant Packable Puffer Jacket, Black, X-Large

Plastic baggies

A second essential item for packing is something you may have at home, but maybe not – and that is a collection of different sized zip-lock or other plastic baggies! There’s nothing better for building that

  • Streamlined toiletries kit
  • A small first-aid kit
  • A sewing kit
  • Place to store your cell phone cords, charger, etc.
  • Last summer I spent about $2 I think to buy individual pill baggies. They are tiny – and perfect to hold a daily supply of a half-dozen pills!

I saw this collection at Amazon and it looked very convenient, with six different sizes. Get a couple of packs so everyone will have the sizes they need.

You know what plastic bags look like. Click the link to see this collection:

ShipGuard 600 Ziplock Bags 6 Assorted Sizes Clear 2MIL baggies1.5×2 2×2 2×3 3×3 3×4 3×5

Packing cubes

Here’s yet another packing idea. This one you should consider if you travel AT ALL!

They’re called “packing cubes.” The cubes are soft-sided rectangular-shaped  zipper containers that you pack tightly (fold or roll) and then stack in your suitcase. Put underwear in one, socks in another. PJs in another. All your little “kits” – toiletries, sewing, first aid– in another. The idea is to not have to paw through everything to get to the bottom of the case where these socks are hiding.

Obviously, our Get Out Of The House bag won’t have multiples of many items, but still, organizing in layers simply makes sense. Here’s one set that is bright red. Click on the image to get details.)

Amazon Basics Small Packing Travel Organizer Cubes Set , Red – 4-Piece Set

Extra warmth

And finally, particularly for the Get Out The Door bag, pop in a couple of space blankets or even one of the space blanket mummy bags. These flexible sheets of Mylar aren’t too sturdy, but could add extra warmth in place of or even inside a sleeping bag. The shiny reflective side goes toward your body to capture heat, or turns outside to reflect the sun.

(I added  some duct tape to my kit. I could use it to tape my blanket into a bag.)

Bought singly they cost somewhere around $4-5 each; buy in bulk and you can get them for more like $1-2 each. We have space blankets in every survival kit we own.

EVERLIT Emergency Mylar Thermal Blanket (4 Pack) Space Blankets for First Aid Kit Camping Kit Hiking Outdoor

Here’s another Mylar product that’s been turned into an instant “sleeping bag” with its own fabric case, perfect for emergency shelter and/or camping:

Tact Bivvy 2.0 Emergency Sleeping Bag, Compact Ultra Lightweight, Waterproof, Thermal Bivy Sack Cover, Emergency Shelter Survival Kit – w/Stuff Sack, Carabiner, Survival Whistle + ParaTinder (Orange)

You don’t NEED any of these Amazon items to pack up your Get Out The Door bag. Still, having the right stuff will make the bag easier to pack, easier to carry and easier to manage when you need it.

Let me know when you’ve got YOURs all packed!

Virginia
Your Emergency Plan Guide Team

Ready to get an emergency radio — or another one? Check out our radio reviews. One of these small radios will fit in your Get Out The Door bag, just like my black and red one does.

Fire News

Share
Picture of burned forest, smoke and flames in background
Pictures like this coming one after another . . .

News often drives these Advisories. You can’t have escaped the latest headlines about summer heat and summer fires. The following selected statistics from various fire news sources will give you an idea of what to expect this summer.

First, sobering statistics on the fire front — and they threaten to continue.

  • Fire season – what’s changed? Last season’s California fires were some of the biggest ever seen. Already this year, fires are burning faster and hotter and earlier. Summer fire season used to start in May. Now fire “season” is all year long.
  • High temperatures – how high? This year heat waves with triple-digit temperatures have hit most western states and even western Canada, setting records and breaking them the next day. (Are you familiar with “heat dome?” The NOAA defines it as “when the atmosphere traps hot ocean air like a lid or cap.”  Read more on the NOAA site and you’ll see that it’s all because the Pacific Ocean has heated up faster than the Atlantic. Expect more about heat domes in upcoming fire news.)
  • Drought – again? High temperatures added to dry vegetation make fires more extreme. Two-thirds of western states are in a drought. In California, 85% of the state is in a drought. The Governor has already called for 15% cut-back in water usage.
  • Deaths Dozens! People have died from these extreme temperatures – because they didn’t have A/C and because they didn’t know how to take care of themselves, or couldn’t. And of course there have been deaths due to the fires, too. The whole situation is sad and distressing.

By contrast, is there any good fire news?

Some. You may want to find out more about each of these!

As mentioned above, the fire season is now officially 12 months long. The Federal Budget has increased funding for permanent firefighter staffs. This means departments can do a better job of planning.

Meanwhile, new technologies are coming online to improve fire detection and firefighting. Drones are a good example. They can find fires (with the help of specialized cameras), assess conditions and direct fire fighters. New apps have been developed, for professionals and citizens, which show fire locations, evacuation zones, current evacuation alerts, and up-dated escape routes. Artificial Intelligence is being harnessed to capture and analyze information from cameras, current and archived weather data, satellite images and modeling tools to predict the likelihood of fire conditions wind patterns, utility service, and more.  

All these have potential, of course, but until there are some massive breakthroughs, it looks as though we are going to experience more and more extreme fire seasons.

What can we do today here in our neighborhood?

This question prompts me to write every week!  What can I do? What can my neighbors do, working together? How can we make use of good guidance and professional resources?

The news in this Advisory, and the emergency situations described below, are meant to help you step up to a higher level — of knowledge and of readiness. Like much of what you see here in Emergency Plan Guide, this Advisory assumes you already know most of the basics. So you can consider these items as extra credit!

How many fire extinguishers should you have in your home?

Where's the nearest fire extinguisher?

“More than you need.” CERT training suggests you attack a fire with a buddy. You both should have extinguishers, both pins should be pulled, both extinguishers tested BEFORE you attack the fire. When you’re ready, approach the fire, aiming at the closest lowest edge. Get it put out quickly! Your 2.5 lb. ABC extinguisher will only discharge for approximately 9 seconds! (5 lb., 14 sec.; 10 lb., 22 sec.) Find out more about extinguishers here. It tells about a special meeting we held, plus has a recommendation for a good deal on purchase.

Fire Alert! Wildfires can blow up out of control within as short as an hour, People need all the advance notice they can get in case they need to evacuate. Can you name three ways YOU will get warnings about fires?

Everyone should be familiar with and able to get multiple alerts: text and phone alerts from Federal and local jurisdictions, news from public airways, and messages from their place of  work. We’ve written before about emergency alerts. Be sure you are signed up if signing up is required! Promote signing up as a community or neighborhood activity. Be aware that PEOPLE WITHOUT INTERNET ACCESS MAY NOT GET ALERTS, particularly if power is out!

Possible gas leak from earthquake! Clouds of dust! A gas line valve needs to be turned off, but you know that a spark could set off an explosion or fire. What tools do you use?  

Non-striking adjustable wrench for use around electricity or gas

You use non-sparking tools — wrenches, hammers, etc. They are made of Aluminum-Bronze (Al-Br) or Copper-Beryllium (CuBe) alloys. (The gold-colored handle might as well be gold, for the price!) If you need non-sparking tools for the job, though, you’ll be thankful you have them.

Wind is pushing embers out miles in front of an advancing wildfire! You don’t expect to have to evacuate, but embers could certainly start a smaller fire. What is the latest fire news for removing vegetation fuel outside the home?

“Keep vegetation 1 foot away from the house, keep plants/bushes trimmed up 2 feet off the ground.” Get all the guidelines at FireWise. (And get rid of all Juniper bushes – to quote the firefighter giving one of the recent presentations I attended, “They are a roman candle ready to explode.”)

A small fire starts in an older public building. The fire department has been called. People are getting safely out. You notice a fire hose and standpipe right there. Are you allowed to use this hose to keep the fire from spreading?

fire hose with standpipe

According to my firefighter host – and supplemented by online research – small hose (1 – ½ in.) already connected to standpipe systems are designed for use by “trained building occupants.” If you feel you are “trained,” and you can safely stop an incipient fire from growing, take action. Open the case, turn on the valve, pull the hose all the way out, turn on nozzle and aim water at base of fire. You may have put the fire out before professionals even arrive. (P.S. They will be bringing their own, heavy-duty equipment.) Thanks to Guardian Fire Equipment for the photo. And here’s more info about these systems (no longer required but still found) with a quiz to finish up with.

Next steps

Every one of the questions above can be turned into a comment, an article, a show-and-tell, a flyer, a study session – perfect for sharing with others. You can invite a guest speaker from the fire department. Everything fire-related is appropriate for every single family and every single community. Please make a commitment to share!

Good luck with your fire prevention and preparation activities.

Virginia
Your Emergency Plan Guide team


What’s your preparedness mindset?

Share
Man satisfied with level of preparedness
Who me? Sure, I’m prepared!

One of my favorite sources of ongoing news and trends is LinkedIn. Members of several LinkedIn groups post daily articles about emergency management technology, jobs, trainings, and new people in the field. (Did you know that the new head of FEMA, Deanne Criswell, is the first woman to head that organization?) The posts and articles also often reveal the state of the “preparedness mindset” of the people writing.

One recurring theme among these professionals, of course, is frustration with getting more people to prepare. It seems that every year a few more people do at least one or two things they call “preparing.”  By 2020 people doing one or two things had climbed up to 80%! (Here’s info on the actual National Household Survey.) But only 30% of people are considered to be “prepared.”

Agree or no? “Simple actions get you better prepared.”

Over the past 20 years Joe and I have encouraged our neighbors and our readers to take some of these same preparedness actions. It starts with learning about what’s likely to happen. Then we discuss having some basic strategies and supplies to help carry us through the emergency.

People understand supplies. They are quite happy to buy a few flashlights or some extra jars of peanut butter. Why, when we ask for a show of hands for “Who has extra water stored for emergencies?” we’ll typically get a response of around 70%! People with their hands raised look around with proud smiles on their faces! 

Community projects also often focus on supplies. People hand out “emergency kits” to various groups (often seniors or so-called “underserved.”) Volunteers assemble small packs and fill them with donated snacks, a bottle of water and maybe a whistle.  When the bags have been distributed, and the number documented, the program is declared a success. (In reality, most of these bags have been raided for the food before the day is over.)

Taking action on supplies is easy and has visible rewards. But it may be misleading.

Controversial mindset: “Having a Go-Bag means you’re prepared.”

One of my favorite active members in LinkedIn emergency preparedness groups is Vincent B. Davis. (You can look him up there to see all his credentials. He has plenty.) I first saw his article about Go-Bags, or disaster kits, in 2020. And he reprinted it again just a week ago.

In Vince’s opinion, disaster kits are “preparedness placebos” and we should stop telling people to get one!

He believes disaster kits will make little difference in a big disaster. Moreover, they let people off the hook and give them a false sense of security. I guess you could say that for Vince, Go-Bags create a false preparedness mindset!

Dangerous assumption: “I have my Go-Bag; I’ve done my share. Now it’s time for the authorities to step in.”

Counting on “the government” or “the authorities” can be disappointing or even deadly. We have seen that there are many circumstances where help may NOT be on the way!  Here are some of the obvious ones . . .

  1. In a widespread local disaster, emergency services can be stretched too thin to cover the entire territory.  (That’s where CERT comes in – to provide some assistance until professionals arrive.)  Every year, at one of our neighborhood meetings, some people’s “preparedness mindset” is shattered to hear our Fire Department tell us just how low we are on their list of priorities! (We are a senior community!)
  2. In a regional disaster, your state has to formally declare an emergency before it can ask for Federal assistance. And it may also have to commit to paying part of the bill. These political decisions may take time.
  3. And during the massive disasters like hurricanes, necessary support may need to come from states or organizations all across the country. It may take days or even weeks for that support to get to your street and your door. We’ll likely see “imported” specialty Search & Rescue teams at work this week. And you may remember the pictures of mile after mile of utility company trucks, coming from states half-way across the country, heading toward Florida after Hurricane Irma hit in 2017.

So what’s the solution to being prepared?

I’ve been thinking a lot about preparing for this summer. It is forecast — and has already proven — to be dangerously hot and dangerously dry, with draught, power outages and wildfires. And that’s just here in the west!

And yes, Joe and I have taken a few actions we think make readiness sense. We’ve refreshed the 55-gallon water barrel and bought a grill so we can cook outdoors if there’s no power to the house.

When I think about it, though, no matter what the season or the weather, in our house we regularly start a conversation with “What if . . ?.”  and “How would we handle . . .?” and “I’ll bet that if we . . .” And we spend some time thinking it through to our satisfaction. We have operated with this mindset for years. So for us,

Preparedness is an attitude, not a curriculum! The attitude goes something like this: “Hey, I’m ready for anything! And even if something happens I didn’t prepare for, I’ll have a head start on figuring how to deal with it!”

This is the preparedness mindset we try to inspire in everything we do at Emergency Plan Guide!

Nearly every one of our Advisories tries to deepen our understanding of some aspect of preparedness that we’ve become curious about.  (Even if it’s a disaster like a volcano that I’m not likely to experience, or a piece of equipment like an ATV that I’ll never own.)

Every one of our books is full of examples and options – to give people that “head start” on dealing with any unexpected emergency. We think that whatever you do to prepare for one emergency will probably apply in 80% of all cases. With that foundation, we can get to work immediately to solve the particular problem at hand.

Joe and I both had the advantage of active childhoods – and we are particularly interested in making sure young people get exposed to physical risks and challenges along with their digital experiences. I am busy right now working on a presentation for a group of high-school aged Girl Scouts! (More on that to come.)

Quiz: So where does preparedness fit in your mindset?

  1. Is it built into your daily routines, or is it something you only think about when you catch a glimpse of a disaster on TV?
  2. Do you keep adding to your knowledge or have you pretty much “been there and done that?”
  3. What are you doing to give young people more opportunities to develop their strength and problem-solving skills?

Our world doesn’t seem to be getting either safer or easier to navigate. I think that having a “ready for anything” attitude, based on knowledge plus experience, can be a valuable asset.

That’s what keeps us going, anyway!

Virginia
Your Emergency Plan Guide team

P.S. If the concept of having a “head start” sounds attractive to you, please take another look at our Q&A Mini-Series. Each one of the booklets is filled with examples and answers about one basic emergency need, like water, security, communications, etc. The questions in the booklets are great questions for kids, too.