Category: Neighborhood groups

Immediately After the Earthquake

Share

Dear Neighbor,

As you know, Joe and I continue to support our local Neighborhood Emergency Response Group and its new leader, Laura. Today, I’d like to share a very detailed post earthquake list that Laura and I put together for mobile home dwellers in earthquake country!

(Don’t live in a mobile home? Probably three-quarters of these suggested steps apply to every style of dwelling, so don’t stop reading yet!)


House showing detached porch, common damage after earthquake
Detached porch – common damage after earthquake

Immediately After the Earthquake

List of Post Earthquake Steps for Mobile Home Safety from Emergency Plan Guide

If you’ve seen any detailed images of what happens in a hefty earthquake, you realize that your world will within seconds be TOTALLY CHANGED!

Do you really know what to expect? Do you know what to do first? This step-by-step post-earthquake list may help you avoid injury and reduce further damage to your home. Please check it out now. If you are unfamiliar with your utility turn-offs, or unsure of mobile home terminology, take the time now to find out more!

You may be caught unawares when the next earthquake hits, but you don’t need to be unprepared!

Start: CAUTIOUSLY assess your new situation.

  1. Be ready to Drop, Cover and Hold On for aftershocks!
  2. Do NOT light a candle, DO NOT flip any electrical switches, DO NOT start your car or car radio.
  3. If it’s dark, grab a nearby flashlight or activate a glow stick. (You should have several stashed around the house, and one in every room.)
  4. Now, check yourself for injuries. Control bleeding with pressure.
  5. LOOK OUT BEFORE YOU MOVE. Look ahead for fire, broken glass, fallen objects, and liquid spills as you move to . . . 
    • Immediately get and use fire extinguisher on small fires.
    • Get a first aid kit if injured.
    • Help another person in your home.
    • Change into long pants, long sleeves, sturdy shoes, and work gloves.
  6. Perform inside smell, visual and hearing checks:
    • Smell gas? Hear hissing that could mean a gas leak? Grab your shut-off tool, head outside to meter. Leave door open to ventilate.
    • Does water work? Check a faucet.
    • See electrical sparking or broken walls? Shut off electricity at breaker panel or nearest main (could be inside or outside), exit home. Do not reenter until declared safe.
  7. Continue with outside check (Take a light and gas shut-off tool):
    • Can you go safely outside? Is porch stable? Are steps secure?
    • Do you see fire?
    • Do you hear/smell gas from under the home?
    • Is home skirting bent or buckled?
    • Do you hear water rushing or dripping?

Pause to evaluate. If you extend your evaluation to neighboring homes, be sure to partner up for safety.

Then: TAKE ACTION if you think you detect leaks . . . !

  1. Power Off cell phones or walkie talkies before checking meters.
  2. Do not approach utility tower /utility pedestal if damaged, leaning, or broken!
  3. GAS. If you are sure there is a gas leak, whether inside the home, under a home or in the street, grab shut-off tool or wrench (or find it attached at meter) and shut off gas at Gas Meter Main Valve. ONLY GAS COMPANY CAN RESTORE GAS SERVICE so don’t take this step unless you are sure of the leak.
    Also shut off at Gas Meter Main Valve if skirting has buckled, piers have collapsed, floor has sunk. Gas lines underneath home may have been crushed.
    Know when gas valve is open or closed!
  4. WATER. Shut off Water Main if detected water leaking within your home or hear it/see it outside your home foundation. Look at your Water Meter Main DIAL to see if numbers are spinning.  (Spinning means there is a water leak.)
  5. ELECTRICITY. Shut Off Electricity Main Switch of the Utility Tower if you have broken inside walls, ceiling has fallen, piers have collapsed with buckling of skirting or dropped floors. (Under the meter reading face is an enclosure box. Pull UPWARD on the panel door to open it by grasping it from below. Turn off service disconnect switches inside this enclosure.)

Finally: ORGANIZE for extended inspection and post-earthquake clean-up.

  1. If it’s safe, take photos to document damage for insurance.
  2. Clean up any bleach or flammable liquid within your home.
  3. Text your Out-of-State Emergency Contact.
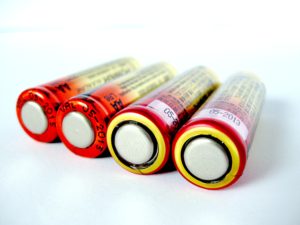
  4. Set battery powered or crank radio to local Emergency Broadcast channel.
  5. Sweep (slowly!) broken glass and small objects out of your frequented paths inside your home.
  6. If no water leaks, check water pressure:
    • Partially fill a small sink with a stopper then release the water. If it flows freely, the line is clear within your home.
    • To prevent sewage leak, plug sinks and bathtub.
    • If sink faucet water is still flowing and pipes not leaking underneath the sink, get containers and fill with water and fill a bathtub half full for washing. (No more than half full – remember, there may be aftershocks!)
  7. Survey your home for partial damage, which will be made worse by aftershocks. Remove objects blocking your exits.
  8.  Outside, push broom broken glass aside carefully, on your own home site.
    • Do not place any debris on the street as it will impede emergency personnel. 
    • Wait for park management directions before transporting any debris off your home site, especially broken glass.
  9. Cooperate with officials and follow their instructions.

Some final comments on the Post-Earthquake List, and a freebee

This Post-Earthquake List deals with only a few minutes or hours AFTER the shock. There’s obviously much more to be done BEFORE the next earthquake hits. I have news about that coming soon. In the meanwhile, take a good look at this Advisory and share with neighbors.

Speaking of neighbors, we have worked with ours over the years to be sure they know much if not all of this . . . but every neighborhood changes! We have folks new to mobile home living and new to earthquakes – so we touch on one or two of these steps every chance we get.  (The various links in the body of this email give you an idea of how we’ve addressed many of these topics in the past!)

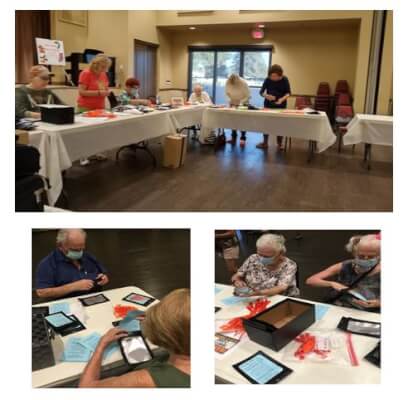
If you are working with a group, and in particular a mobile home park with seniors, you may want to turn this post-earthquake list into a series of programs. It lends itself to discussion and to show and tell – particularly from contractors.

Click to download a free pdf of the Immediately After the Earthquake List for easier use with your group.

And as always, let me know what your group comes up with in terms of concerns or more suggestions. I’ll share.  The more we all know, the safer we all will be!

Virginia
Your Emergency Plan Guide team

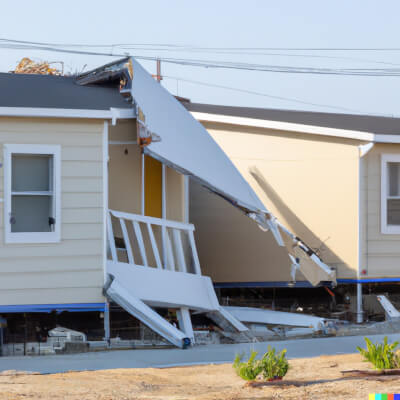
P.S. In case you wondered, the image of the broken porch was created using artificial intelligence. You can see that Dall-e doesn’t really know what American mobile homes look like. Even after multiple tries, it couldn’t come up with skirting! Still, using AI to generate images as well as content is something I’m enjoying testing.

P.P.S. In the first paragraph above I mentioned I’m busy “keeping up.” I’ve found myself researching fire ball fire extinguishers, the steps someone should take to fight back against a donation fraud (a $2,500 real-life crisis for one of our neighbors), the latest earthquake alert technology, and whether security film makes sense for residential window use! None of that research was AI assisted! Stay tuned for more Advisories.

And finally, a disclaimer. Every earthquake is different, every home is different. We have drawn from what we consider “reliable sources,” but our list can’t cover every possible circumstance. Use your own experience and common sense when addressing any of these steps.

Two-way radios: Walkie-talkie or CB?

Share
Man standing in disaster setting, using two-way radio
Full disclosure: This image was made for me by the Artificial Intelligence program Dall-e! I asked for “disaster scene, man using hand-held radio with antenna.” Not sure how accurate the image is, but it sets the tone, doesn’t it?!

Let’s get clear about radios for emergency use.

The radios we refer to often, and describe in detail on our Emergency Radios Reviews page, are one-way radios. They can only receive messages. Today, we’re talking about CB radios and walkie-talkies, which are two-way radios. That is, with them you can both receive in-coming messages and send out your own messages. (In radio speak, that means you can receive and transmit. Combine both features into one word, and you get transceiver!)

Two-way radios are commonly used for emergency communications and, for that matter, for everyday communications in many settings. Joe and I have used two-way radios on a construction site, in a convention hall, and on road trips. Our grandchildren use them when they’re playing in the park. Nearly every day you can see news reports with first responders using two-way radios at some disaster setting.

And maybe you’ve seen the 1977 classic trucker movie, “Smokey and the Bandit,” with Burt Reynolds and Sally Field! That’s how we were all introduced to CB radios and trucker lingo. (See P.S. for some examples.)

What’s the big advantage to two-way radios?

As long as all parties are tuned to the same channel, and are within range, one person can push a button and send out a message and everyone else can hear it instantly. There’s no need to dial numbers, wait as the phone rings, repeat your message over and over again to every member of your group. Just push the transmit button, wait a second, then speak.

That’s the famous PTT or “Push to talk” feature that everyone who uses walkie-talkies is familiar with. (Some advanced models also have a voice-activated “talk” feature as well.)

So what’s the difference between CB radios and walkie-talkies?

Pretty much, it’s size and weight!

As the name suggests, a walkie talkie is compact enough to carry and use easily with one hand.  (Hence, “walk” and “talk.”) Small CB radios look and act pretty much like walkie-talkies. (Note that radio in the AI image above! It does the job of showing how convenient walkie-talkies can be.)

The classic CB radio isn’t a one-piece hand-held!

Most CB radios have two connected components – the rectangular box that is the “radio” plus the microphone, attached by a coiled cord. (Sometimes the faceplate of the radio can be removed from the actual radio itself, to make installation easier.) And there will also be an attached external antenna which would make carrying the unit even more awkward. So, a CB radio may be mobile – that is, you may be able to carry it – but it sure isn’t convenient!

Let’s look more closely at some of the differences.

Number of channels. Both CB radios and walkie-talkies have a number of channels to choose from, as assigned by the FCC. CB radios typically have 40 channels in the low frequency band. The walkie-talkie for public use has fewer channels (typically 22) in the ultra-high-frequency band.

Signal range. How far your radio will reach depends first on the amount of power of the model (.5 up to 4 watts), then on the environment through which the signal is passing. Because these radios operate on a line-of-sight, whatever interrupts that “sight” weakens the signal. Higher frequencies tend to work better when you’re transmitting in or around buildings, such as schools, hospitals, etc. Lower frequencies tend to have a wider range across countryside – sometimes carrying for miles. “It all depends.”

Power source. Both CB radios and walkie-talkies can be powered by direct current from batteries or by an AC to DC power converter. A CB radio installed in your car runs from the car battery, so it can have far more power than can be jammed into the batteries of hand-held radio. Note, however, that some walkie-talkies have a solar panel for charging batteries, making them particularly useful in off-grid or disaster scenarios.

Antenna. An antenna is important for both CB radios and walkie-talkies. Generally, the longer the antenna the better. Most walkie-talkies have stubby, built-in antennas. Only a few walkie-talkie models allow you to add an external antenna. A CB radio in your truck or car, though, can have a much longer antenna. Long whip antennas can become a hazard to garage doors and bushes!

License requirements. CB radios do not require a license. Some walkie-talkies operate on frequencies that do require a license. For more about the different levels of two-way radios and their licensing, check out this review from the Federal Communications Commission.

Cost. Both CB radios and walkie-talkies range widely in price depending on features. Simple walkie-talkies start as low as $30 for a pair; a simple CB radio set-up may cost as little as $50, but you’ll want to add an antenna, which might easily double that price.

Which two-way radio is best for emergency use?

There’s no one answer. Review your own likely needs – and your budget – to see which radio might work best for you and your group. Talk to other preppers or neighborhood emergency teams to get their input. As always, you may want to test before you make your final purchase.

For more details on walkie-talkies, check out our Walkie-Talkies Reviews page. Below, see an example of a well-regarded CB radio, available at sporting goods stores or on Amazon. As you know, we are Amazon Associates and may receive compensation if you purchase through our link.

Basic CB Radio from Uniden

This radio seems like just what you’d want for common family usage. Note that it has an instant switch for emergency channel 9. It weighs about 2 pounds, comes with mounting bracket and will need to be wired into your vehicle.  (We recommend having that done by a qualified professional, although it’s apparently not too difficult to do.) The feature that attracted me: an option for public address system. Click on the image to check for more details and pricing. (This radio was on sale when I added it to this Advisory!)

Basic antenna for CB radio

This antenna has a magnetic base, making it easy for you to mount effectively. It’s about 24 inches tall, comes with the coax cable that connects the antenna to the radio inside the vehicle.

The antenna arrives in pieces and has to be assembled. I found a helpful video on Amazon (from YouTube) to help you get it set up and installed!

Have you used a CB radio? Do you use one regularly? Have a story about how you’ve used a two-way radio in an emergency situation? Please pass along your experience!

Virginia
Your Emergency Plan Guide team

P.S. I promised some CB trucker lingo. Recognize/remember these? Not exactly designed for emergencies, but great for listening in on!

  • Catch you on the flip flop!
  • Bear in the air!
  • Chicken truck heading your way!
  • What’s your 20?

The Joy of Giving — to Senior Citizens

Share

As a senior citizen, you can give others the chance to experience the joy of giving to YOU. Here’s how . . .

When we get to November, we know that “holiday season” is just around the corner. So every year here at Emergency Plan Guide we remind you that preparedness items make good stocking stuffers for kids as well as smart “thank-you gifts” for employees.

This year, though, we are turning things around. We’re not suggesting that you experience the joy of giving to others.

This year, we want to help others get the joy of giving . . . to you!

This is an idea that came up at a recent neighborhood meeting, here in our senior community. (Since everyone at the meeting was a senior citizen, they agreed it was a GREAT idea.) It was such a good idea that we turned it into a newsletter article to share with all!

So here’s what our group will be publishing the first week of December, in time for Hanukkah and Christmas. Today, though, as a reader of Emergency Plan Guide, you’re getting this good idea early.

The Holiday List for Seniors . . .

My Neighbors Helped Me Make this List!

  • Show me how to QUICKLY call 911 using my cellphone.
  • Make sure my doors aren’t blocked with furniture, boxes, etc.
  • Help me get rid of trip hazards — throw rugs, pet dishes, etc.
  • Can you bring me some half-gallon bottles of water?
  • Do all my windows open? Do all my lights work?
  • Grab a towel (to muffle the sound) and test my smoke alarms.
  • Be sure I have a working flashlight in every room.
  • Help me pack an “Under the bed” kit in case a disaster hits at night: flashlight, shoes, sweater or jacket, whistle, gloves, list of emergency contact names, and some water.

This checklist is a great preparedness exercise for an older friend or family member.

Here’s the step-by-step . . .

  1. Are you, or do you know, someone who could use a helping hand to make sure their home is as safe as it ought to be? Cut out this list and hand it to them.
  2. Tell them to check off small safety or preparedness jobs that just aren’t getting done around the house.
  3. Finally, mail or hand the list to younger friends or family members who are planning a holiday visit. If they arrive with list in hand, they will easily get these simple jobs done!

I guarantee that this list has the chance to produce a big WIN-WIN!

Virginia
Your Emergency Plan Guide team

P.S. In this case, the joy of giving is actually a 3-way win!

  • If you’re the one receiving these small gifts, you’ll be so much more comfortable and more confident as you head into a new year.
  • If it’s your mother or father or another older relative that gets these small safety gifts, you can feel satisfied that you have done a good turn – or two.
  • If it’s a neighbor who receives these gifts – your whole neighborhood will be safer in the future.

Take advantage of this simple giving opportunity. Such opportunities don’t come along every day.


New CERT Graduates!

Share
new graduates of the Community Emergency Response Team course celebrate with their neighbors
They made it through!

When you write a book, you get the chance to include a dedication. Every one of the first books in our Neighborhood Disaster Survival Series is dedicated not to mothers or fathers or each other, but to our friends and colleagues at CERT, the Community Emergency Response Team training offered through FEMA and our city!

Twenty years ago CERT was the impetus that moved us from helping big enterprises with disaster recovery to helping improve emergency preparedness for neighborhoods.

Over the years, our own southern California neighborhood has benefitted from adding nearly 4 dozen CERT graduates from our city’s training program. We’ve also welcomed a few new neighbors who brought their training with them from other cities.

Of course, in any neighborhood, people come and go. In a senior community like ours the “going” may be more frequent that the “coming.” Whatever, even after the nearly total shutdown of our emergency group activities because of Covid, here in our small neighborhood we still count 21 active CERTs.

As of this month, our current neighborhood CERT total went up to 24!

Time to celebrate!

The images above show our three new “heroes” and the meeting that featured them. People were interested to hear how the training had gone. Here are some of the questions that came up:

  • “What did you like best?”
  • “What was the biggest surprise about the course?”
  • “Were you worried about anything before you started?”
  • “What was the hardest part?”
  • “Was it really free?”
  • “Why did you take the course in the first place?”
  • “Have you added any new gear to the stuff you got from the training?”

We use these questions whenever we get the chance. CERT graduates like to talk about their experiences – and folks considering the course want to hear about CERT “from the horse’s mouth.”

(No matter how much written material we provide, it’s the fact-to-face interaction that makes the difference!)

And although Joe and I took the training years ago, we too are interested because it’s changed. For example, while medical, fire suppression, and search & rescue are still key components of the course, a whole section on “Terrorism & Disaster Psychology” has been added since we took it.

In any case, as far as our neighborhood is concerned, the more CERT graduates we have among us, the safer and the smarter we feel.

How do we get more neighbors involved in emergency preparedness?

Here’s the way it has worked best for us.

First, we have kept our city CERT leader on speed dial. (Or speed email, whatever.)

Joe and I were in Class 3. A couple of years later, by the time we got to Class 7, our neighborhood graduate group had grown to a half dozen. (Our city is now on class 88, and has trained well over 2,000 people.)

The advantages of having a “core” neighborhood group are clear. Graduates share the same vocab.  They have learned the same basic info. Perhaps most important, they have been exposed to the “Incident Commander” concept. That is, if you are first on the scene, you step up to take charge. Being a leader comes from the CERT training . . . and it is essential.

The core group becomes the engine behind building a community group. And we’ve added Mandarin speakers to our core group!

Next, we focused our promotion activities on the value to individual community members, not just the benefits to the city.

Some CERT trainees finish the class and never join in any further neighborhood or community activities. That’s fine. Their families get the benefit.

Most CERT graduates, however, are enthusiastic about what they have learned. They  realize what an impact they could have in an emergency! These folks often express their commitment to “being of service” to the community, and CERT fits that mindset.

Core group members with a service mentality find it easy to work together to develop a plan, and programs, for their neighbors. We have counted on them year after year.  

Then we planned regular neighborhood activities around scheduled CERT classes.

We’ve used a number of ways to let people know about CERT. Just like we did last week, we take advantage of every chance we get to celebrate course graduates!

Leading up to that, though, takes repeated reminders, stories, and show-and-tells. And once we’ve welcomed new CERT graduates, we continue to involve them in these activities.

I just checked. In our Neighborhood Disaster Survival Guides, we share over 25 of the different activities we have developed to engage neighbors and meet a neighborhood’s particular needs and interests! (We’ve shared a lot more ideas via these Advisories, too. Look for “What are you interested in?” in the sidebar, click the down arrow, and choose “CERT.”)

We have been instrumental in helping build emergency preparedness groups for a variety of neighborhoods. Of course, every neighborhood is unique – but we believe CERT, as a foundation, works for nearly everyone.

These books are updated regularly. (We keep having to add new items to the “threats” list!) Find out more about the books in the series here, with links to get them at Amazon.

As long as our city is offering classes, we have a reason to talk about CERT, emergency preparedness and response. It is an ongoing effort.

What about those neighbors who may not take a CERT class but still want to be part of the team?

In our neighborhood we have busy neighbors who want to be a part of the preparedness activities but make it clear: “I don’t want to take the course but I will be here to help out when you need me.”

This is a problem.

When the emergency hits, these folks will have no idea of how to help and there will be no time for training!

So, we have used material from the CERT course as a framework on which to build a bare-bones custom neighborhood group with a place for everyone who wants to be a member. Interested neighbors agree to participate as volunteers in whatever category makes sense for them. We provide as much training and as many supplies as we can. For example, they get walkie-talkies and fluorescent emergency vests. (We don’t give official CERT gear to people who haven’t taken the full training.)

In addition, our team regularly offers “general education” for everyone on emergency preparedness. People may not want to be part of a group, but they seem to appreciate in-depth climate reports, suggestions for home safety, and hearing about new threats.

Whatever you can do to improve neighbors’ awareness of potential emergencies, and to get them to take steps to prepare, the safer you all will be.

CERT is the best foundation for effective community action that we have found.

Find out about CERT in your town or city!  Simply type into a browser [Your city CERT]. You can also head to the FEMA website for more information: https://www.ready.gov/cert/.

Virginia
Your Emergency Plan Guide team

P.S. Do you have some “old-timers” in your neighborhood with CERT credentials? Consider acknowledging them with an enamel CERT pin or perhaps a safety item with an embroidered CERT patch. You can find these, along with other CERT gear, at my friend Susan’s site: 2BeReady.com/cert-products/.


School Preparedness Questions for Parents – 2022

Share

This will be my 7th year as an elementary school crossing guard. Here I am in the crosswalk on a rare drizzly day in 2019 – fluorescent suit (“one size fits all”), red stop sign (“Hold it up HIGH!”) and whistle. Big grin.

But today, in 2022, things look a little different. These days I carry an electronic pushbutton whistle because you can’t blow a whistle while wearing a mask. With so much school time lost because of the pandemic, our school is starting two weeks earlier — at the height of the summer heat. And this year, on our first day of school, every parent and teacher will still be reeling from the terrible school shooting in Uvalde.

These school preparedness questions are updated for 2022.

These are questions primarily for parents, but if you are in any way connected with schools or students, school security or health care, you’ll want to take a look.

In fact, after you’ve read the whole Advisory, you’ll see a link to a one-page summary of the key questions. It’s meant for you to download. Take it to school. Forward it to a friend who has children. We all need a better grasp of these issues.

Get answers to these preparedness questions from your school

I recently watched a video about our district’s School Safety Plan. It was a 2-hour presentation featuring school staff, local police and fire department representatives. It focused on what they called the threat of a “violent intruder.” Even after 7 years on the street out front, talking with parents, kids, teachers and the occasional police officer, I was amazed at how little I knew about how my school operates behind the scenes.

Of course, every school district and school is unique, so you may not have the opportunity to hear about your own local school’s safety plan.

Moreover, school or law enforcement personnel may be hesitant to answer your direct questions. They may not want to share details, they may be uncomfortable with preparedness issues in general, or they may simply not know the answers.

Still, these are your kids. Your taxes pay for schools and staff. If you feel good answers to your preparedness questions are not forthcoming, don’t be intimidated. Patience and persistence will pay off.

General school emergency policies.

  1. Policies. How do parents find out about emergency policies? Are materials available in different languages?
  2. Emergency contact forms for each child. How distributed? Where kept, under what security? How detailed? How often updated?
  3. Emergency communications. How will parents be notified in emergencies? (As crossing guard I made sure I am on the list to get emergency notifications, too.)
  4. Student pick-up policies. What are alternative pick-up locations if school has been closed? Who can pick up your child if school is shut down? How will they be notified? How will they be identified before your child is released? What if your child won’t go with them?

Emergency drills.

  1. Does the school face any particular threats because of its location? (near railroad tracks or airport, environmental hazards from industry, flood plain, wild animals, etc.)
  2. What trainings does the school hold? Does the school train for any emergencies other than fire or severe weather? (Earthquake, tornado, wildfire, bomb threat, active shooter?)
  3. Does the school train for evacuation as well as shelter in place?
  4. What should parents know about how these drills are called and how conducted?
  5. Who holds the training and how often? Are results of the drills evaluated and shared?
  6. Who is included in the drills? Substitute teachers, maintenance staff and bus drivers?

Emergency supplies and equipment.

  1. What food and water supplies are maintained in the school? How often refreshed?
  2. Do school busses carry any supplies?
  3. What food, water and hygiene supplies are in the classroom in case of extended lockdown?
  4. Where are first aid supplies located?  Do staff members get first aid training? Again, what about bus drivers?
  5. What emergency equipment is available? (fire extinguishers, AEDs, wheel chairs, etc.)
  6. Who is trained in equipment use?

Security features.

In recent years, many schools have made changes to provide more physical security. These questions cover some of the changes that can be considered or implemented. School budgets may limit making any of these changes. In some cases, these ideas may simply be inappropriate. But asking questions can lead to productive discussion. (Want more in-depth information on any of these features? Take a look at Security Magazine.)

  1. Does the school’s emergency communications system include direct connections to other classrooms? To law enforcement and/or emergency services? To other schools?
  2. Does the school have a trained Resource Officer? Is that officer always on the premises? Is the officer armed?
  3. Does the school have security cameras? Are they monitored? By whom?
  4. What about audio sensors to detect aggressive voices, gunshots, calls for help?
  5. Has the school made any changes to the way visitors are allowed onto the campus or into the buildings? (Open campus or one controlled entrance? Fences? ID badges?)
  6. What policies are in place regarding locked or locking doors? Who made these policies? How well are policies followed?

Getting back to business as usual after an incident.

Sometimes it’s easier to focus on immediate protective actions and overlook what it will take to recover once the event is over. A good preparedness plan will have procedures in place to help parents and students “get back to business as quickly as possible.”  We are learning, of course, that overcoming the trauma of a violent school disaster takes months if not years. We touched on that topic last week in our Advisory about gun violence.

Next steps for parents

List of emergency preparedness questions for parents

Share your list of questions with other parents and approach teachers and administrators for answers. Download and print this convenient one-page summary of School Preparedness Questions.

You may want to insist on special presentations on these emergency topics. Guest speakers could be school staff and a member of the police or fire department. You might volunteer to help design and put on parts of the presentation, yourself.

Presentations could be held on Back to School night, at a PTA meeting, and, of course, in the classroom. A presentation could be videotaped for later showing or showing online, as well.

Working together, schools, students, parents and other community members can keep emergencies from becoming disasters and do the best possible job of protecting students when disasters do occur.

Virginia
Your Emergency Plan Guide team

P.S. This list of “Preparedness Questions for Parents” deals primarily with the school. I am updating my list of “Preparedness Questions for Parents about Their Own Children.”  Watch for it coming soon!


“The leading cause of death . . .”

Share
In 2020 firearms overtook car crashes as the leading cause of death for children.
One line heads down, the other up. They cross. What’s what?

We’ve said before, awareness is a big part of being prepared. I think the information on this chart is something we all need to be aware of. Haven’t figured it out yet? Some hints:

  • The lines reflect facts about children in the U.S..
  • They trace causes of death from two sources.
  • They show the new (since 2020) leading cause of death for children.

Those should be the clues you need! But to make it very clear: The purple line shows deaths of children (ages 1-19) over the past 20 years from automobile accidents. (Measured in deaths per 100,000 children).
The green line shows deaths of children 1-19 over the past 20 years from gun violence. (Again, measured in deaths per 100,000 children.)

In 2020, for the first time, firearms surpassed car accidents as the number one killer of kids in the U.S.

Of course, you may immediately question this data. Why doesn’t it include info for the past two years? What role did parents play in these deaths? How many gun deaths were accidents, homicide, suicide? Etc., etc. Where do other causes, like cancer, fit into this chart? If you’re interested in more detail, see my remarks and links at the bottom of the page.

To start with, let’s just consider the purple line killer.

The number of cars in the U.S. has continued to creep pretty steadily upward to around 276 million in 2020. More and more cars. More accidents, too. But the proportion of children dying in auto accidents has come pretty steadily down.

If I were to give you 60 seconds to come up with why, I am sure you’d say something like:

  • Roadways are safer than ever: striping, passing lanes, barriers, signage, etc.
  • Cars themselves are safer: mirrors, seat belts, warnings, anti-lock braking, etc..
  • Driver behavior has been influenced by: licensing by age and type of vehicle, speed limits, DUI controls, etc.

O.K. I think we get what’s been going on with car safety.

Now let’s look at the green line killer in the chart.

The number of firearms has gone up just like the number of cars. (The rise is more dramatic, actually.) So why haven’t children’s deaths from guns gone down like they have for cars?

The answer is pretty obvious. No consistent improvements to gun safety. No consistent constraints on gun ownership and/or shooter behavior. I couldn’t even find two items to make a bullet list with!

Here at Emergency Plan Guide we’re interested in preparing for and managing or responding to emergencies – all kinds. We try to help people keep emergencies from turning into disasters.

Lately, as the leading cause of death, firearms have become a disaster if not a catastrophe for our children and their families.

What preparedness actions should we be taking against this threat? Which ones ARE you taking?

Virginia
Your Emergency Plan Guide team

Disclaimer:  I am not an expert on car or gun safety. My Advisory is not meant to be a scientific report. But that doesn’t mean I wrote it off the top of my head.

I did a fair amount of research on everything mentioned here (and a lot on history and statistics I don’t mention). One thing I discovered . . easy data on both car and gun deaths is hard to come by. Below are some of the sources I found to be useful and I trust credible. But as you read them, or any articles on these topics, note the following:

  • Children” are defined differently in nearly every different report, whether produced by law enforcement, the insurance industry, government agencies, educators, etc. Be sure you are clear what’s being measured.
  • Deaths” are often sub-divided as to homicide, suicide, accidental and unknown. People dying may be killed by law enforcement, a family member, an acquaintance, or a stranger – and the statistics may or may not reflect the type of shooter.

Online sources I can suggest for automobile death statistics:

Sources on gun deaths and children:

And finally, a resource that I found truly compelling.

Research may provide you with statistics, but just as in the case of Paradise, another book I reviewed lately, what brings the issue alive are the stories of real people.  Not the people who died, but the people who lived.

children Under Fire, An American Crisis, John Woodrow Cox

I recommend to you this book by John Woodrow Cox. It came out just last year and is a finalist for the Pulitzer Prize.

The New York Times says it is “a deep and painful accounting, built from intimate reporting, of the traumatic impact of gun violence on children who have witnessed it or lost a loved one to it.” 

You can get Children Under Fire in a variety of formats including audio. Here’s the link to the book at Amazon, where we are Associates.

I believe that Ava and Tyshaun and LB and the other children’s desperate stories provide us with preparedness actions to consider. And now, we have to add to their stories the stories of all the Uvalde brothers and sisters. Certainly, that incident has raised even more questions and suggested more actions.


Plan NOW for Extreme Heat

Share
Hot sun coming up; gonna be a hot one today
“Gonna be a hot one today . . .

Official definition of Extreme Heat: Summertime temperatures that are much hotter and/or humid than average. That definition seems pretty innocuous, doesn’t it?

Let’s look a little deeper into definitions of “extreme heat:”

  • 2-3 days of temperatures above 90 degrees plus high humidity (Read the P.S. when you get there!)
  • a contributing factor to death (from heart attacks and strokes) and the underlying cause of twice as many deaths (from heat illnesses)
  • often results in the highest annual number of deaths among all weather-related disasters.

So why am I writing about planning NOW for extreme heat? Take a look at this weather forecast from yesterday at @US_stormwatch:

An unusually strong signal is showing up in the long-range for a long-lasting major heatwave in California as we head towards mid-June. Much can change given this is 10 days out, but this strong of a signal this far out is definitely concerning. Stay tuned.

And then I went to weather.com and saw this headline:

The weather forecast for summer: Summer Temperature Outlook: Hotter Than Average for Much of Lower 48

So it’s clearly time to plan NOW for extreme heat expected within the next couple of weeks or couple of months.

Planning to be cool and comfortable at home when these weather patterns manifest?

Nearly 90% of homes in the U.S. have air conditioning, and A/C is what will protect you at home during a heat wave. Moving a portable fan around with you works, too. And there’s always ice cubes in the bathtub.

But what are your plans if you don’t have A/C? Or if the power is off?

In last summer’s heat wave in Oregon, 94 people died in Multnomah County.

  • Most were over age 65.
  • Most did not have A/C.
  • And most were living alone, isolated in multi-family apartment buildings.

IF you fit any of these categories yourself, or have friends who do, you need to start planning NOW fpr how you will cope. Given global supply chain problems and rising inflation, if you wait to make essential purchases they will only cost you more!

Some questions to help your planning for extreme heat days.

How will you get the NEWS that a heat wave is coming?

Are you signed up to get weather alerts from your utility or your city or county?  Generally, they won’t automatically contact you. It’s up to you to get on their list.  If you don’t have access to the internet, call customer service at your utility and ask for assistance. (If you are on one of the utility special programs — low income or medical — find out NOW what help they will give you during a weather emergency or power outage.)

What changes can you make to your HOME now to help keep it cool?

Keeping the cool air in is as important as keeping the hot air out. Open windows very early to capture cool air, then shut everything up. If air leaks around your doors and windows, get busy with weather-stripping now, before the heat hits.

Consider whether some sort of reflective window film on windows could keep direct sunlight at bay. (Not all landlords allow this film.) The link takes you to an example of film that comes in multiple colors and is non-adhesive, i.e., easily removable.

If you can afford it, consider buying a room air conditioner. Note the distinction: a PORTABLE air conditioning unit, designed to cool one room or two, can cost around $350 (or more, of course). It probably weighs upwards of 50 lbs. and may be about the size of a large kitchen trash can.  A PERSONAL air conditioning unit sits on the table near you and cools — you!

Some examples of PORTABLE A/C units. (They roll into place.)

This image (not a playable video) is from the promo video of one of the largest portable A/C units, capable of cooling up to 500 sq. ft.. Note the hoses that exhaust air out through the nearby window. This unit has three functions managed by a remote: cooling, humidifying, or fan only. Click here to go to Amazon for full details (and to see the videos).

For comparison, here’s a link to another popular model. It is slightly more than half the size, has slightly more than half the cooling capacity and its price is — you guessed it, slightly more than half the price of the large model shown in the photo. Shop to get the right size for your needs. 

A PERSONAL air conditioner is meant to put on a table near you to cool just you.

These small appliances start at around $50. Add water (and ice cubes?) to turn the fan into a humidifier. Please note that SOME of the personal air conditioners do not meet air filter standards for California, so check before you order. The model below uses battery power — so would be good choice if you could potentially be hit by a power outage. Click the image to see details and current price at Amazon, where we are associates. Remember, summer is nearly here so prices may be changing on these weather-related items.

A simple tabletop electric fan can help, too.

Just remember, a fan creates air flow but doesn’t cool. If the temperature gets up higher than 95 degrees, a fan could increase your chances of getting sick with heat illness!

Simple fans can be round or flat or built like a tower. They usually have multiple speeds. If you want oscillation, be ready to add a few more dollars to the price. I like the simple fan below from Vornado. The manufacturer has literally dozens of different styles and colors – so you can find perfect gifts for summer celebrations! Click this link for details of this flat panel model.

What is your plan for keeping YOURSELF cooler in extreme heat?

It makes common sense to avoid going out in the heat. So make plans now to stick close to home if at all possible.  That way you can also dress VERY lightly, take a cool shower and even dampen your skin and clothes for extra cooling in front of that fan.

Drink plenty of water.

Avoid creating heat inside your house by having “hot day menus” that don’t involve cooking. Let the laundry go for a day or two. See if you can cut back on computer and TV usage, too – these appliances all generate heat.

What is your plan if the house simply gets too hot?

Start making a list NOW of buildings you know have good air conditioning and where you would have a comfortable place to sit if you went there. For example: library, city offices, mall.

Do you know where your utility or your city is likely to have established Cooling Centers? Cooling Centers are required in an emergency! Your challenge will be to find out where centers are open and whether they still have room for you.

Three immediate steps to take NOW for your personal preparedness plan.

  1. Go online NOW (or call your city) to get a list of where Cooling Centers are located. Figure out how far away they are and how best to get there.
  2. Get the phone number NOW of whom to call when the emergency hits, to find out which centers are open and their status. If you have a pet, be sure to ask about bringing your pet to the Cooling Center BEFORE you just show up.
  3. Write down the locations and the phone numbers and place this info NOW with your Emergency Go-Bag.

AND JUST IN CASE: Are you prepared to help yourself or others in the case of heat-related illness?

We’ve all been “overheated.” But when does “overheated” become life-threatening? Say you are checking on a neighbor, who doesn’t seem quite right. Knowing the levels of heat illness will help assess the situation. At the top, and most dangerous, is Level Three.

  • Level Three: Heat Stroke. Internal heat, no sweat, rapid pulse, confusion. CALL 911, cool down with shade, damp cloths, etc.
  • Level Two: Heat Exhaustion. Sweating, paleness, dizziness, nausea. Get into shade. Remove clothing. Sip cool sports drinks.
  • Level One: Cramps. Pains, spasms. Get into shade. Sip cool sports drinks with salt and sugar.

Download the full-sized pdf of this flyer here.

Well, I think we’ve covered extreme heat pretty well today, with some simple to-dos. And if you aren’t quite prepared, now is the time. Don’t let it be too late!

Virginia
Your Emergency Plan Guide team

P.S. The Heat Index calculator combines temperature and relative humidity to give you a better way to plan for potential danger. Just get the two numbers for your location and plug them into this calculator .


Prepare Your Community for Summer Power Outages

Share
Flyer announcing program on summer power outages
Meeting coming up!

This week’s Advisory on power outages has a couple of possible uses.

  • You can use it to confirm or add to your own understanding of the topic. (I almost always seem to be in the “adding to” mode!)
  • It is also an Advisory that can serve as a kickstart for training others. In my case, “others” are my neighbors here in our senior community. Your training may be for a group of Scouts, or a church group, a school classroom, or a “lunch and learn” session with colleagues at work.

Since this week we actually did hold a meeting on summer power outages, I’ve laid out the Advisory so you can use it as a “lesson plan” for your own group!

Goal for this training session: Get people so involved that they go home and make some changes in their level of readiness!

Start with background material on summer power outages for your community (5-10 min)

According to the government, the average utility customer experiences only about 2 hours a year of power outages. However, when we count in “major events,” that average shoots up – to 8 hours in 2020 (latest year for statistics).

Ordinary interruptions are caused by weather and plants/tree limbs falling on or tangling up power lines. Other interruptions come from the utility’s “planned outages” for repairs. Still others are “rolling blackouts,” meant to relieve stress on a grid during a period of high demand.

OK, so those are familiar interruptions. A few minutes or a couple of hours now and then.

Unfortunately, you may have had experience with “major events,” too. We’ve written about some of them here: snowstorms, hurricanes and, of course, wildfires.

Because we just got a warning from our utility, we mustn’t overlook Public Safety Power Shutoffs. This 3 min. video tells the story — from the point of view of our local utility!.

PSPSs happen when the utility deliberately shuts off the power because high wind conditions threaten wildfires. Here in California, PSPS can last for hours or for as many as 7 days!

Conduct Group Exercise: “What stops working when the power goes out?”  (10-15 min.)

Needed:  Paper for everyone to write on. Pens. Easel/white board and a scribe with fat black pen to record answers. If necessary, hand-held microphone so leader can move from table to table to collect input. Items for “show and tell.”

Gather answers:

Pose the “What stops working?” question above. Give people 3 minutes to write down their answers. Table members can share and combine answers if they want. (We were surprised at the delay before people started writing! Maybe they had never considered this question before???)

Now, ask each table for its answers. Transmit them to the scribe so they are recorded in a way everyone can see them. Naturally, there will be duplication. Have the scribe add just new items as they emerge.

As the list of “What stops working?” grows, people will begin to call out more and more items. This is where it gets fun and creative! (Our group came up with these answers, shown here on the first two easel pages. Love those sticky backed sheets.)

Hand out FEMA flyer:

In preparing for this program, we found an excellent flyer produced by FEMA, downloadable here.

(Multiple printed copies are also available FOR FREE from the FEMA library. For my group I ordered 50 copies, along with several other publications, in a couple of languages. It took about 3 weeks for everything to arrive from the distribution center in Colorado.  Link to library: https://www.ready.gov/publications#: )

The FEMA flyer has two pages full of good tips. On the back, it suggests building a personal plan with three sections.

One: How to Prepare Now
Two: How to Survive During the Outage
Three: Be Safe in a Long-Term Outage

Start group members on building individualized three-part plans (1 min)

Have participants divide their own paper into three sections: Now, During and Long-term. Tell them to get ready to add “to-do” suggestions in each category as the group goes through its list of “what stops working.”

Go over details for every pertinent item in the list of “What stops working.” Cover what to expect and explore alternatives. This is the meat of the discussion! (35-45 min)

As leader, you may want to do some research in advance on particular items that you know are likely to come up. The FEMA flyer can be a start. Members of your group will also have experiences and knowledge to share. Finally, at the end of the evening, you may want to ask for volunteers to do further research for future sessions.

Some of the questions that arose in our group:

  • “Will my phone work in a power outage?”
    We discussed cell phones, portable phones, cable modem set-ups, hardwired phones – and all the various battery back-up plans offered by different providers. We also handed around power banks (flat ones, round ones, solar back-up) and car chargers. People wanted to know where to get them and what they cost.
  • “What about back-up power for medical devices?”
    In our senior community we have plenty of powered medical assistance equipment: power chairs and beds, CPAP machines, oxygen concentrators. We have discovered that SOME utilities offer free back-up equipment to people registered on medical “lifeline” programs. Some utilities offer back-up devices for sale. Every customer needs to do their own research. Here’s an example of a versatile power station that could work for several medical devices.
  • “What about prescriptions that need to be kept refrigerated?”
    Some of our new neighbors were unaware of how quickly food spoils when the refrigerator stops working. We emphasized stories of using food up quickly and efficiently. (You’ve heard about the Community Power Outage Picnic, right?). And no one in our group knew how long their refrigerated medicines would last without cooling! Suggestions were made about how to manage food in the refrigerator, and also how to be ready with a separate cooler for insulin, like this one  
  • “What’s the best lighting at night if the power is off?”
    Once again, we had plenty of examples: plug-in emergency LED lights, battery-operated collapsible lanterns, solar garden lighting, glow sticks, motion activated lights (sold for closets), and battery-powered candles. We repeated our usual warning: NO LIVE CANDLES in an emergency! (A home in our neighborhood burned to the ground last year because the resident fell asleep with candles burning . . .)
  • “How do we get out of this building if the automatic doors don’t work?”
    When this question came up, I turned off all the lights in the room! In the dark, we talked about the importance of knowing where ALL the exits are. People were reminded that doors with breaker bars are meant to be pushed open! (A power outage several years ago “trapped” some uninformed neighbors inside the building for a half hour!)

And when the meeting was over ?

At the end of the evening, people went home clutching various to-do lists. Most important, everyone had participated in identifying problems associated with summer power outages. Most had helped come up with do-able and affordable solutions.

We didn’t even get into the generator/inverter discussion for more comprehensive solutions to summer power outages. That will be perfect for a follow-up meeting!

Is all this familiar to you and your family? If so, congratulations. For community leaders, though, the question is, “Do all your neighbors know these power outage basics?” It’s worth spreading the word, because summer power outages are surely coming!

Virginia
Your Emergency Plan Guide team


Your Neighborhood Emergency Group – Planning Calendar Part 2

Share
A neighbor may be the person who reaches out to save you in an emergency

Grab my hand!

When you’re in real trouble, you’ll be so thankful to see that hand! You may be well prepared, but sometimes you just can’t do everything yourself. Sometimes you have to count on others. That’s where the neighborhood emergency group comes in.

Last week’s Planning Calendar introduced over a dozen ideas for improving emergency preparedness.  I chose every one of these ideas because each could help you and at the same time could help build a neighborhood emergency group.

What makes up a neighborhood group?

I’ll start by describing what I think it is NOT.  A neighborhood group is not people who have taken a formal training. It isn’t a church group or a scout troop. Why? Because these motivated people almost always come from across a wide local area. When their meeting or training is over, they scatter to head home.

For our purposes, a neighborhood is made up of the people who live next door and across the street.

Your neighborhood may extend to several blocks or up or down several floors in a large apartment building. It may be made up of 10 homes, or twice that many. We focus on this limited number of people for very specific reasons.

  1. Close neighbors tend to know who lives nearby – they know the size of your family, recognize your kids, your pets and your cars.
  2. Neighbors also tend to know family patterns. Who leaves for work when, who’s at home at a given time.
  3. Neighbors are the people who are nearby and can reach out a hand to save you when the disaster hits!

Neighbors make the difference when it comes to quick response.

When the tsunami and mud flows hit in Japan in 2011, people were dug out alive by neighbors who knew they were at home and even in what room they were likely to be! Of course, it doesn’t always work that way. In 2021, flood waters from Hurricane Ida filled up basement apartments in New York so quickly that not all residents were able to escape, despite the heroic efforts of neighbors.

Still, the advantages of being a part of a neighborhood group extend way past being able to save or be saved.

Over the years, we’ve surveyed our neighbors about why they participate in our neighborhood group. They give a number of reasons, of course. But the most frequent reason? “I want to be of service.” 

We try to respect that and build on it as we plan our activities each year.

What makes a good neighborhood emergency group activity?

Whether it’s held in a community room, a living room or a back yard, a good meeting has at least these three components: 

  1. Valuable information (preferably information that the group members have already indicated an interest in)
  2. A chance to practice or put new information or new skills to work
  3. Interaction giving group members a chance to get to know each other better

Of course, there are many more details for a meeting planner to consider – agenda, publicity, seating arrangements, etc. Here’s our own Meeting Planner Checklist if you’re looking for a good reminder. The main thing for planning: What’s your goal for this meeting?

What makes a good neighborhood emergency group?

Now, just because someone lives next door doesn’t mean they will be a good member of your neighborhood group. What are you looking for as you reach out with invitations? Your neighborhood team will be most successful when . . .

  1. Members share a common goal – in this case, “We want our neighborhood to be better prepared for emergencies.”  (This broad goal includes the whole neighborhood. It doesn’t limit readiness to “the neighbors who have lived here for years” or “the neighbors that look like me” or “the neighbors that speak my native language.”) When an emergency hits the neighborhood, we’re all in it together!
  2. Members are prepared to take an active role. They come with ideas. (When people arrive saying, “I just want to see what’s going on . . .” it doesn’t bode well.) Of course, not everyone can do everything. But we have found that committed group members can always find a job they can do successfully.
  3. Communication is open. People are encouraged and expected to join in. Differences of opinion may arise, which leads to #4 . . .
  4. Patience is required. Not everyone comes with the same level of experience or understanding.  (In fact, we have to go over basic building block info again and again.)
  5. Flexibility is essential. Every neighborhood is unique, so every group will be different. Moreover, over time, neighborhoods change. One “plan” may work for a while, but only until a better “plan” emerges.

Who makes the best neighborhood emergency group leader?

This is tricky. Often, someone with strong background in emergency training just naturally takes on the role of leader. For example, we have worked with groups where ex-military or trained First Responders are leaders.

However, they are not always successful!

Why not? There is a big difference between an official team – such as a military unit or a trained non-profit team – and a neighborhood group. Official teams know who’s in charge. They have had the same training. They expect to follow procedures and orders.

Neighbors are not necessarily ready to “follow orders” as laid down by someone down the block!

In a volunteer neighborhood organization, leaders have to earn their authority. What we have found is that the leadership roles often change, depending on the skills required at the time.

In our neighborhood group, for example, over the years we’ve had medical professionals step up and do intensive trainings for small groups of neighbors. Members with engineering backgrounds have headed up programs on detecting gas leaks. Just this last year a member with an interest in people with hearing and/or mobility loss managed a program that delivered an emergency whistle to everyone in her “division”!

Don’t overlook the value of CERT – Community Emergency Response Team training.

One source of reliable leaders to count on: your city’s CERT program. Every time we can welcome a new CERT graduate our neighborhood group is rejuvenated. CERT volunteers add vital strength to the team:

  • Commitment to preparedness. (After all, CERT trainees self-select. They already have a preparedness mindset!)
  • Grasp of response fundamentals: search & rescue, first aid, etc.
  • Common language to describe emergencies, communicate with authorities, request assistance, etc.
  • Familiarity with official response process – from First Responders, city government, Federal government, etc.
  • Ongoing training opportunities (that they can bring back to the neighborhood group)

Even though they may be few in number, CERT volunteers are our best source of local neighborhood support and leadership. You can probably see why I dedicated our first books, the “Neighborhood Disaster Survival Guide” series, to CERT!

The Survival Guide series goes into much greater detail about developing leaders and how they effectively build a more engaged neighborhood. In each neighborhood the emphasis is on the benefits of working together.

Take another look at the Guide for your neighborhood if you haven’t seen it yet!

What’s a realistic goal when it comes to building a neighborhood group?

If your first goal is “helping our neighborhood be better prepared for emergencies,” you can meet it no matter the size of your group!

At the very least you can get valuable information to all your neighbors. Put articles in with the rent notice. Add tips to a neighborhood social media site. Publish a newsletter or flyers. If you’ve been reading our Advisories for a while you’ve heard how we have distributed a bottle of water to each of our neighbors along with a list of recommended emergency supplies; passed out friendly “Be my neighbor!” forms so people would exchange keys for use in an emergency; and distributed earthquake safety info in English and Chinese.

These educational activities have reached all our neighbors.

At the same time, we have invited interested neighbors to become active members of our neighborhood group. Our active group wants to learn more about the neighborhood (security vulnerabilities; gas line shut-offs, etc.) and develop new skills (how to operate walkie-talkies, a fire extinguisher, an emergency generator). They get particular satisfaction from serving other members of the community!

The active group varies in size, as you can imagine. In our community we’ve had as many as 90 active members (!). Today, after 2 years of Covid shut-down, we have only 37. Not enough for a neighborhood-wide “organization.” But we plan activities to reach out to everyone while we continue to work on ways to attract new “actives.” 

When can you say you’ve been successful?   

Helping create a resilient neighborhood isn’t easy. It doesn’t happen overnight, or even over the course of weeks. In fact, it’s an ongoing process since, just as neighborhoods change, so do the emergencies we are likely to face!  

What doesn’t change, though, is the satisfaction of getting to know and to trust more of your neighbors. General Dwight Eisenhower – born in Texas, raised in Kansas, WWII General and 34th U.S. President — put it like this:

“The only things worth counting on are the people you can count on.”

I hope you’ll find something in this long discussion that will strengthen your group and your own enthusiasm, too. And since this is all meant to help everyone, please share your own best ideas for building a neighborhood group!

Virginia
Your Emergency Plan Guide team


Disasters are gonna happen! Planning Calendar for 2022, Part 1

Share
Ice cream cone dropped on the ground, melting
A disaster!

We hope we never have to hear you say something like this:

“Oh, darn!  I KNEW I should have fastened up that shelf / replaced those bottles of water / checked those batteries . . . !”

Truth is, disasters are gonna happen. Most aren’t entirely unexpected. And we’ve learned that if we simply prepare for a few of the biggest ones, we’ll be ready for most of the smaller ones. But if we let the small ones go . . . well, bigger and scarier emergencies are right around the corner! (Nothing worse than a spilled ice cream cone, of course!) A preparedness planning calendar can help keep us on track.

Your family’s well being comes first on your planning calendar.

About half of the Advisories we write deal with suggestions for individuals and  families.  They range from revisiting the contents of your go-bag, to keeping emergency radios maintained, to how solar works as an emergency power supply.

Last year, during the pandemic lock-down, we collected 14 of the most popular Advisory ideas for individuals.  Then we doubled the amount of info on each basic topic. Each topic became one volume of our “Emergency Preparedness Q&A Mini-Series.”

(Happy note: one of my real estate friends gave away copies of several of the mini-books to her clients as holiday gifts. She sent me this text: “I’ve gotten many many sincere thanks for such wonderful books!!!! Thank you so much! Hugs, Jaci, Seven Gables Real Estate”)

Worried that you may have overlooked some preparedness essentials? Looking for an easy way to review? Check out our mini-series and add some of them right now to your To-do list for 2022. Pass them along when you’ve finished with them!

But don’t stop there. Take your preparing to the next step!

We think Emergency Plan Guide is unique in its focus on building prepared neighborhoods. As you have seen, in “real life” Joe and I help organize and train our own neighborhood emergency response group. We’ve done it for nearly 20 years!

So besides the info for individual preparedness, our Advisories cover activities aimed at attracting and engaging our immediate neighbors. You may recall some of our stories from 2020 and 2021. Even when so much community activity was shuttered, our team was able to put together an  “Emergency Whistle Give-away,” hold a first-of-its-kind virtual meeting with our City’s Emergency Manager, and very early on, reach out to isolated neighbors via simple telephone conference calls.

Neighborhood resilience depends on  —  neighbors!

No matter what the make-up of your neighborhood, every family will benefit by knowing more about readiness. But we believe preparedness extends beyond each family having emergency supplies and training.

A prepared neighborhood may be able to rescue and support those people whose homes or livelihood were damaged or destroyed! 

It was neighbors who pulled out boats to search for survivors in the floods after Hurricane Harvey. After Hurricane Ida slammed into Louisiana, it was neighbors who got busy and nailed blue tarps over leaking roofs when there was no sign of promised government help. When the tornados hit in Kentucky last month, it was neighbors who pulled people from the debris in the darkness.

Who would help YOU if an earthquake flattened your home? Your school? Your place of business?  It would be your neighbors!  The ones right there. The ones who know where you are likely to be. The neighbors who have gloves and crowbars and lights and are ready to jump into action as soon as they know they themselves are safe.

So as we take a look at planning for 2022, sure, let’s let the FEMA calendar guide us with some good themes. But at the same time, let’s add to our planning calendar some activities that build group awareness and resilience.

And next week, in Part 2, we’ll take a look at who you really want for your neighborhood team – and who you might NOT want.

So, a list of activities by month for 2022.

January – Time to get the year organized. Get your hands on or make your own monthly calendar, with plenty of place to write. For each month, fill in at least one appropriate topic. Then set up two columns, one to help individuals and families take action, and the other for groups. For example: In January, survey your group members to find out what they are worried about. Use that information to build in training over the course of the year to meet their concerns.

February – Winter awareness month, per FEMA. Focus on your location and your audience to identify winter threats. (For example, small children have different needs than the elderly when the power goes off . . .) Idea for group planning: what specialized winter equipment do you have available in the neighborhood that could be used to help more people? (snow plow, generator, home with fireplace, etc.) How would you deploy it?

March – Flood safety. Idea: test and emphasize your neighborhood emergency alert systems. Did forest fires ravage nearby areas? If so, watch out for mudslides and debris flow where they may never have occurred before.

April – Financial capability month. For most of us, having enough cash or savings to carry us through an emergency may simply not be possible. Idea: invite insurance professionals to speak to your neighborhood group. Be sure you come away knowing what is covered by homeowners or renters’ insurance, and what isn’t. Ask plenty of questions about wind and water damage.

May – Start of wildfire season. Big idea for this month: Become a FireWise USA Community!  Sponsored by the National Fire Protection Association and local fire departments, the program helps individuals and communities get ready for summer and potential fire danger. One of our Emergency Plan Guide groups has held multiple very successful FireWise events.

June – Start of Hurricane Season and, traditionally, start of the hottest season of the year. In 2021 we experienced deadly heat waves in the Pacific Northwest. Hundreds died quietly at home, exercising outside at school, and working in orchards and fields. Find out what temperatures to expect in your location. How can you protect the most vulnerable? Idea: set up a system to check on and support seniors in your neighborhood.

July – Fireworks safety.  Last year I studied the various fireworks ordinances in and around our town. Guess what?! Some fireworks were allowed in neighboring cities that weren’t allowed here!  So, be sure you know the rules for kids and adult enthusiasts. And have your fire extinguishers handy.

August – Back to school. Parents, know your school’s emergency procedures. Teachers, know what’s expected and if you aren’t getting comprehensive training, demand it. Traditional fire drills aren’t really enough these days. Make sure your school is ready for other emergencies including intruders, earthquake, tornado, etc. Do you need emergency tools or equipment in the classroom? Emergency food supplies? Find out.

September – This is National Preparedness Month. Idea: Plan a Preparedness Expo for your neighborhood or group. Consider guest speakers, commercial vendors, games, exhibits by police and fire. Invite school or scout groups as partners. Solicit donations so visitors go away with starter items for their own emergency kits. Be sure to arrange for publicity.

October – Cybersecurity month plus the Great American Shakeout! Idea: Sponsor an educational meeting for local businesses, with a “Cyber-Security Checklist” as take-away. Idea for group: Present dramatic video of earthquake footage (available on YouTube) and discuss earthquake myths. Send people home with an Emergency Whistle to help if they are trapped after a shaker.

November – Holiday cooking safety. Idea: Invite professionals to demonstrate how different fire extinguishers work on different types of fires. Review fire extinguisher procedures and practice with real or digital equipment. Already been there and done that?  Do it again for the benefit of new members of the group.

December – seems to be Protection Month!  Ready.gov recommends getting your flu shot. Avoiding shopping scams and hazards. Managing holiday lights and fires. (I seem to have been right on schedule when I came up with my tips for using plugs and extension cords a week ago!)

Customize your planning calendar to fit your circumstances.

The ideas listed above are just that – ideas for you and your leadership team to discuss as you develop your planning calendar. Use or discard them or better yet, come up with variations that will work for you, specifically.

As we continue to emphasize, every community is unique. That’s why we wrote four different versions of our Neighborhood Disaster Survival Guide. There’s probably one for your type of neighborhood. Each of those guides, by the way, has pages full of ideas that could help fill in a year’s calendar of preparedness activities.

Whatever your source of ideas, this is a great time to get organized for the year. There’s no reason to get caught flat-footed when emergencies hit – and so many good reasons to be ready!

Virginia
Your Emergency Plan Guide team

P.S. Planning for 2022, Part 2, will be coming out in a week or so. Watch for it! It will have suggestions for building a workable neighborhood team and keeping it on track.


Dead Bodies and Body Bags

Share
Earthquake destruction, rubble
I think I see someone in there . . .

After “The Big One,” what do we do about all the dead bodies?

Here in California we’ve been waiting for “The Big One” for years. Although we’ve had some warning quakes, the big one hasn’t hit yet. Unfortunately, that doesn’t mean it’s somehow going away. In fact, the threat is increasing every day.

That’s why our neighborhood emergency response team schedules at least one “Earthquake Preparedness” session every year. We’re planning our next one right now. For many of us, it will be a refresher. But for people new to California, and to earthquakes, it can be quite a shocker. Dead bodies and body bags tend to capture their attention!

Answering basic questions about earthquakes.

Most people who haven’t really learned about earthquakes seem to have a vague notion of running out of their home when a quake hits. Experts say this is a terrible idea! Our upcoming Earthquake Fair will address just why that notion is so dangerous! And we’ll make an effort to address all the basic questions like those below. How well can YOU answer them?

  • How many alerts exist to give us a warning BEFORE the quake hits? Do they actually work?
  • What will happen in the first seconds and minutes?
  • Are some places safer than others during the quake?
  • What if I am in my car when the quake hits?
  • What are the most common injuries associated with earthquakes?

Can we expect deaths?

A recent article I read stated that “The Big One” could “kill about 1,800 people and leave 50,000 or more with injuries.” Of course, the degree of destruction will depend on which fault breaks, where you are located along that fault, what kind of building you’re in, etc.

Still, we do have to assume there may be deaths, if only from heart attack.

And while we don’t dwell on how to manage dead bodies, we do need a plan for coping. Joe and I have received some professional training on this topic, so I’d like to share it here.

Dealing with dead bodies is a sensitive issue.

We have been told, over and over again, that a big earthquake will result in power outages, bridge collapse, etc., so we can expect to wait certainly hours and maybe days before we’re reached by emergency personnel. That means that deceased people and animals (who aren’t still buried under collapsed buildings and rubble) will be scattered about where they fall. Even while we survivors are busy supporting each other, we must manage any dead bodies — because after as little as 12 hours after death, they may no longer be recognizable.

Steps we may need to take to recover and manage dead bodies.

A municipal entity will have the final authority for managing bodies. But if there is a delay before authorities arrive, our local neighborhood group may have to step up.

Some of the considerations:

  • Once the immediate danger has passed, and the living are being cared for, our goal is to move rapidly to find and identify the deceased.
  • A team will be required to find the body, take appropriate PHOTOS (if possible, without moving the body), and hopefully identify the person. Throughout, the team needs to treat every body with utmost respect. As for identifying, in our case, our neighborhood directory will be invaluable for initial identification, but of course there may be strangers within the disaster area, too.
  • Each body must be carefully LABELED — with a unique number, name if known, where and when found, etc.. If possible, the label will be protected from water or smearing, by being in a plastic cover.
  • As bodies are found and labeled, information from each label must be carefully RECORDED for later use by officials and family. One team member should maintain the record.
  • In the case of anticipated delay, the body can be placed in a BODY BAG or covered or wrapped by a sheet. The covering carries the same label mentioned above. Obviously, in this case the body will need to be handled. New photos of the face and any identifying marks may be appropriate. Workers should not worry about becoming infected, but should follow normal hygiene procedures, wearing boots and gloves and washing and/or disinfecting after touching the body, blood, feces, etc.

Here’s an example of two important forms necessary for managing dead bodies.

You’ll want to have made up some forms in advance.,

In a neighborhood setting, does it make sense to set up a morgue?

While we have body bags, our neighborhood group does not have the ability to transport bodies. Our first choice would be to leave them where they are found (in body bags) as long as they are sufficiently out of the way, protected from further damage, and, preferably, out of view. Only in the extreme conditions would we attempt to set up a morgue.

What about your neighborhood? Do you have what it would take to store bodies? Setting up some sort of morgue requires space, appropriate furniture, likely electricity for cooling, etc. That’s a topic for further discussion.

“Deal with it.”

Even well-staffed CERT groups often neglect this issue. Why? Because it’s a very negative situation to imagine or to dwell upon. And in reality, few people know how to deal with dead bodies in a disaster situation.

But it is part of preparing for a major disaster. Ignoring it will not make it go away. As with everything associated with preparedness, the more you know abut something, and how best to cope with it, the less upsetting it is.

Here’s what our neighborhood group has done in this regard.

We have a number of CERT graduates and a whole team of pretty sensible folks. At the same time, we’re a senior community. We know dealing with dead neighbors might become an issue.

We purchased a dozen body bags of various sizes, and at one of our training sessions we opened one up to test it. Our smallest female member climbed up on the table and crawled inside. We zipped her in and then tried lifting the bag. Surprise! Even 6 able-bodied group members had some trouble handling the weight!  (Mostly because the bag we were testing was soft-sided, not like a door or a box or a stretcher where there’s something to grab hold of.)

Yes, there were expressions of distaste as this training started. Lots of nervous laughter. But everything settled down quickly when it came to really handling the bag.

My recommendation for YOUR group? Don’t overlook this important preparation for a disaster.

Share this Advisory. Bring up the subject at a training meeting. And if at all possible, lay in a supply of body bags. They can be bought individually at a cost of $15 – $35 or so, depending on the size, thickness of the material, type of closure, how many handles, etc.

Below is what looks like an excellent choice, available at Amazon where we are Associates. I selected it because it is extra long, has 8 handles, and a central zipper. I include it here as a start for your shopping list, because you may wish to have a selection of bags of different qualities and sizes.

Primacare BB-3201 Body Bag Stretcher Combo with 8 Side Handles and Center Zipper, Waterproof Bags for Outdoor Camping Hiking and Sleeping, Polyethylene Cadaver Disaster Pouch, 90″ x 36″, Black

As I said, we haven’t experienced a major disaster here — yet. If you have experience with dead bodies and body bags that would be appropriate to share, please do.

In the meanwhile, please make plans to add this topic to your disaster preparedness planning.

Virginia
Your Emergency Plan Guide Team


Building a Prepared Community

Share
Do neighbors know what to do in an emergency?

Dear Friend,

Would you be willing to participate in an exploratory discussion about what it takes to build a better prepared community?

We all know that in an emergency, the real “first responders” are going to be the people right there next to us – our neighbors or our co-workers. The more they know, the better everyone’s chances of making it through!

In our experience, though, success in building a prepared community is the exception, rather than the rule. In fact, we’d estimate that only 1 in 10 communities succeed. Most fail not because of lack of effort, but because they’re missing key organization and communications skills.

(FEMA’s 2021 National Household Preparedness Survey supports our estimate when it reports that only 16% of individuals say they have been involved at the community level!)

Over the past 20 years Joe and I have had some success building a more prepared community. And we’ve talked to many other people working to get their neighbors or businesses involved in preparedness.

We believe we’ve identified some of what it takes. We want to share what we’ve learned and hear from you what YOU have learned!

Let’s start with a virtual meeting!

It could be the first of many, but let’s test it first, with these guidelines:

  • Goal: Exchange ideas about how to build a more prepared community.
  • Aimed at: People leading preparedness groups, or wanting to build a group around the topic.
  • Format: 45 minutes of stories and discussion (To make sure we hear from everyone in the room, we’re looking for no more than 15 participants.)
  • Date and time: Friday, November 19, 2021, 9 am (Pacific), 12 pm (Eastern)

Interested in joining us? Just let me know. I’ll send you the zoom link along with some advance questions to help us get started quickly.

I look forward to hearing from you.

Virginia
Your Emergency Plan Guide team

Emergency Whistle Give-Away

Share

(Emergency Plan Guide stands out in the world of preparedness and survival for its emphasis on building community. The Emergency Whistle Give-Away is an example of an event aimed at awakening new interest and rebuilding enthusiasm among your neighbors!)

Old-fashioned sign announcing whistle zone
Old sign – new inspiration!

Months of shut-down due to Covid continues to have an impact here in our Southern California senior community. Two months ago we cautiously began the rebuilding of our emergency preparedness program – remember the Advisory about how we began to revive our group after months of inaction?

Our work is still hampered by uncertainty regarding just how closely we want to gather, whether masks should be required, and by a general wariness about making any long-range plans.

However, even with interruptions, I think we can already call our first “campaign” a success! I am excited to bring you the update on “The Emergency Whistle Give-Away.”

Our 2021 re-building process started with new inclusive positioning.

In the past, our group has been made up of volunteers who chose to join because they had an interest in preparedness, learning about emergency gear, etc. In marketing terms, a self-selecting audience. But what with normal attrition, aging out, moving away and isolation caused by COVID, our membership has shrunk dramatically over the past few years! 

So this year we were forced to came up with a whole new positioning. 

Starting now, everyone in our community is automatically a member of our group! Our emphasis will be on providing info and training to everyone, not just members of a self-selecting team.

How do we reach out to our community?

In our senior community of over 300 homes, the most successful social events pull a maximum of 80 people. This means that the majority of people never come to any given event.

We have to take our info and our programs to them. We have used various delivery methods. (Which have you used? With what results?)

  1. Community-wide meetings (Fire Dept. is always the biggest draw.)
  2. Division-level meetings (We have divided our community into 6 divisions for emergency planning.)
  3. Face to face delivery of info, flyers, etc. within each Division
  4. Printed newsletter going to everyone (Some neighbors don’t read English.)
  5. Email notices (Limited number of people on this list.)
  6. Reverse directory telephone call messages (Some people opt out.)
  7. Zoom calls (Even more limited number of participants.)

As you can see, during the Covid shut-down, the first three delivery methods were unavailable!

The 2021 solution? Attract new interest by delivering a physical gift related to emergency preparedness to every single home!

One of our group members came up with the idea of an Emergency Whistle Give-Away. A whistle is a winner! Not expensive. Small and neat. FEMA recommends them. People already know what they are and how to make them work.

Together we developed a “gift package.” It included a bright orange flat plastic safety whistle in a black plastic baggie holding a blue instruction sheet. Simple, easy, appropriate for our audience.

Whistle gift: baggie holding instructions and whistle

Here’s the gift, and our process . . .

  • Step 1: Order whistles and baggies. (See below for what we ordered.)
  • Step 2. Draft and trim blue instruction sheet to fit the baggie. (We made a separate version in Mandarin.)
  • Step 3. Stuff the baggies.
  • Step 4. Draft and print a wrapper (A flyer introducing the Emergency Response group)  for each whistle package.
  • Step 5. Roll and wrap and rubber band!
  • Step 6. The last step is to deliver a wrapped whistle package into the “tube” at every single home in the neighborhood. (The tubes are a section of pvc pipe fastened to the mailbox post and owned by the HOA. Can’t use the US Mail boxes for a distribution like this!)

All this effort attracted stuffers who found rolling and stuffing and chatting a welcome hour away from home. The bonus — we met several neighbors who had never attended one of our meetings before!

Images of senior citizens stuffing gift bags with whistles

Joe and I just finished delivering to our Division. Along the way we waved as we passed two other Division Leaders doing the same thing. All the whistles are scheduled to be in our neighbors’ hands by tomorrow noon!

The results of our rebuilding activities — so far?

We’ve been working on this, and holding stuffing parties, for several weeks. As you can imagine, the word got out.

People have already been asking:  “When will I get my whistle?”  “Can I take a couple extra for friends who are house bound?” “Did the property managers get whistles, too?” “Will the whistles scare away coyotes?”

To all questions the answer is YES!

After tomorrow, I expect more questions. We intend to bring the whistles into all our future planned discussions, starting early next year on reminders about earthquake preparedness.

In any case, even though the project isn’t completely finished, I think it’s safe to say our “Revival Campaign starring the Emergency Whistle Give-Away” has already been a big success. It has aroused interest. It attracted a handful of brand-new volunteers. And it is reaching everyone in our community.

If you’re looking for a fun activity to engage your own neighbors, consider an Emergency Whistle Give-Away!

What we purchased for our gifts.

Flat Orange Safety Whistle with Lanyard

We looked for a flat whistle because it’s convenient to tuck into a purse or pocket. The one we chose has a clip plus a lanyard to make wearing easier. Bright orange or red? Of course! And if it goes missing? Not a great loss.

The Black Mylar Gift Bag with See-through Window

This version of a gift bag comes in various sizes. The one you see in the illustration above is 4.7 x 7.9 in. The bags are resealable, and they came sealed. It took us a while to get the hang of opening them.

We have already had fun with this project. It has been perfect as a way to “get back into the swing of things” after our way-too-long hiatus. I hope you’ll consider something as simple and as effective to help rebuild YOUR group!

Virginia
Your Emergency Plan Guide team

P.S. If you’d like a copy of what we wrote on the blue Instructions sheet, just drop me a note. I could send you the version in Mandarin, too!

Emergency Tools are Critical to Survival

Share

Bare hands won’t work.

Emergency tools require heavy work gloves
But do they fit?

Clearing roads, walkways and corridors, prying open locked or distorted doorways, freeing victims pinned beneath fallen debris — just a few of the scenarios you might experience in an emergency. You’ll want the right emergency tools in your hands — and you’ll want to protect those hands!

So the solution? Heavy, well-fitting gloves!

This is particularly important for women, because most off-the-shelf gloves — even those provided via a CERT class — are JUST TOO BIG. If you’ve been visiting here a while, you’ll have seen some of our gloves. They make for good photos, but the extra space across the palm and at the end of my fingers means I just can’t wear them. In the presence of tools they are just plain dangerous!

The image at the left shows some of the gloves I do like for myself. Heavy-duty construction. Leather. Separation between fingers. Elastic at wrist. And you can select SMALL.

Whatever size you wear, find good ones and get several pairs. In wet or heavy work, you can damage them or even just wear them out. Here’s the link to Amazon so you can take a look for yourself.

OZERO Leather Work Gloves Flex Grip Tough Cowhide Gardening Glove for Wood Cutting/Construction/Truck Driving/Garden/Yard Working for Men and Women 1 Pair (Gold,Medium)

Essential emergency tools for turning off utilities.

Water shut-off.

In an earthquake or storm, you may face broken pipes — somewhere in the system or even inside your house. (Remember those terrible photos from the ice storm in Texas?) If you don’t know where or how to shut the water off, every minute increases the chance of damage or even danger.

Do you know where ALL THREE water supply shut-offs are located?

An Individual appliance may have its own shut-off valve. Check the water lines leading to the toilet, for example. Easy enough to shut off.

Turning off water to the whole house can keep water in your tank from becoming contaminated! Your home has a master shut-off valve. It’s usually in the basement, crawl space or maybe in the garage. It may be located outside by the foundation. These valves usually can be shut off by hand — just turn the faucet handle (clockwise) or the lever (until it’s crosswise to the pipe).

You may also want to turn off water at the street. This valve is probably buried in a concrete box some distance from the house. Use a big screw driver to pry off the cover. (Gloves, here!) Then use a special water shut-off tool that has a sort of hook at the bottom. (You may have used one for your irrigation system.)

Here’s an article with a number of illustrations that may be useful.

ACTION STEP: Plan a time for a family tour to find all your water shut-off valves! Do you need an emergency tool to turn any of them off? (See below for a suggestion.)

Natural gas shut-off.

Here where I live our scariest danger is fire after an earthquake. Fire fueled by gas leaking from broken gas lines! So on a regular basis our neighborhood group puts out information about where and how to turn off the gas if you smell that rotten egg smell!

Just like water, there are a variety of valves to shut off the gas. At the street (distribution pipe), in the neighborhood (smaller pipes) and directly to your home (low pressure pipe). Generally, you can only control the line that leads into your home.

You’ll need a sturdy wrench or specialty tool to turn off the gas! And you’ll need to know HOW to turn if off. (See below for a gas wrench suggestion.)

ACTION STEP: Find your gas shut-off valve. Store a gas shut-off wrench permanently near the valve.

DO NOT PRACTICE shutting off the gas! Once it’s off, you’ll need the gas company to come turn it on again! (All pilot lights will have gone out, remember . . .)

A convenient, all-in-one tool for shutting off water and gas.

Get at least one, have a permanent place for it so it doesn’t go missing. Know you’ll be ready when you need to use it!

4 in 1 Emergency Tool: Gas & Water Shut Off, Pry Bar, 4 in 1, Non Sparking, Emergency earthquake Gas Shut Off Valve – Fireman Tools – Tool Emergency – Emergency Tools – Gas Turn Off Wrench – Tern Tool

Will you be able to use your power tools?

The image at the top of the page shows a standard power tool. But when you’re planning for an emergency, you have to assume that power will be out. So what are your options?

Battery-driven tools (power drills, chain saws) will have a limited useful life span if they can’t be re-charged. These days, many tools come with multiple change-out battery packs, which gives the tools a lot longer useful life span. And there are small Power Banks for small devices. Still, at some point, batteries will run out. So to be useful, they’ll have to be recharged.

What are your recharge options for emergency tools?

  • Some people and businesses keep gasoline or butane-powered generators to supply emergency power. They can be really useful — but generally, they’re big, heavy and noisy. And they can be dangerous.
  • If you live in the right location, and can afford it, you may want to consider using a solar system to charge your tools. Solar works well for small-ish devices and lighting, but it takes a big system to actually drive anything with a motor.
  • Power inverters can take the output of a 12-volt battery and convert it to 110 volt AC, but in an emergency you’ll probably want more power than your inverter can give you. Still, worth another look.

Here’s an updated discussion of generators and inverters.

What about emergency lighting?

And let’s not overlook lights as emergency tools! Without them, you won’t be able to do much with the other tools you may have that still work!

Small flashlights are appropriate for getting around in the dark but may not provide adequate lighting for working in an emergency situation. Some newer flashlights offer more options, fortunately. Some have a side panel of lights, not just the main light. Some have magnets that can stabilize the light so you have both hands free. Flashlights are essential emergency tools — as long as their batteries hold out.

Lanterns can be even more useful, since you can set them down while you work. Low-level lighting is adequate for moving around in a space, and many lanterns adjust to meet that purpose. Other lanterns even have red or blinking emergency signals. From an emergency standpoint, it makes sense to have a couple of solar-powered lanterns, too, since batteries will ultimately fail.

Headlights from cars or trucks often suffice, but they may not be able to maneuver into position to be of help in all situations. There are large battery-operated candlepower spotlights available that can overcome this challenge, but most people don’t have these on hand. And again, they ultimately run out of juice.

Emergency lights keep getting better and better. Here’s our latest review of heavy duty lanterns. And for power tools that will last, take a look at this Advisory about solar-powered lights and tools.

What tools do you need to add to your emergency supplies?

ACTION STEP: Start now to put together an inventory of what emergency tools you have on hand, and what tools are available in the neighborhood.  Make sure you have the essentials. Consider whether an auxiliary power source will be required for tools to be effective.

Joe Krueger
Your Emergency Plan Guide Team

Buy Batteries On Sale

Share

Is getting batteries “on sale” a good idea?

Batteries

Check out this article before you buy! Price isn’t the only factor. In the world of batteries, it seems you get what you pay for, and you’d better know in advance just what you need.

Some Background on Batteries (Skim if you already know all this!)

How batteries work

Batteries use a chemical reaction to do work. Alkaline batteries, the AA, C and D batteries we all know, typically depend on zinc interacting with manganese (through an alkaline electrolyte solution) to produce electricity.

Other batteries use different chemistries to achieve a higher “energy density” so they will last longer and perform better. Some of them: nickelcadmium (NiCd), nickelzinc (NiZn), nickel metal hydride (NiMH), and lithium (Li-ion),

In a regular alkaline battery, the reaction ultimately consumes the chemicals (leaving behind hydrogen gas as a “waste” product) and the battery dies.

When to recharge

While an alkaline battery can be recharged, the process is inefficient and dangerous because of the hydrogen gas buildup. Recharging non-rechargeable batteries can result in a leak or even an explosion.

Rechargeable batteries are designed differently. First, they use specific chemicals (most popular seems to be Lithium Ion, which is being used in Tesla batteries) that can undergo a “reverse chemical reaction” easily and efficiently. They contain a catalyst to keep hydrogen gas from forming. They have vents to prevent pressure from building up during recharging.

As you might expect, rechargeable batteries are more expensive because you have to buy that extra “charger.” However, studies suggest that you will save money over time using rechargeables, but they need electricity to work, so IN AN EMERGENCY SITUATION you will probably want to have regular disposable batteries on hand, too.

Getting the most out of batteries

No matter where they are stored, all batteries will ultimately die. Eventually, the steel casing will corrode and rust and leak. (Heat like we’ve had over the past several weeks can speed up the deterioration!)

Still, there are things you can do to preserve the life of your device batteries.

  • Don’t attempt to recharge non-rechargeable batteries.
  • Remove batteries from a device that you won’t be using for a while.
  • Replace all the batteries in a device at the same time. (Clean the contacts with a cloth before you install the new batteries).
  • Don’t mix different kinds of batteries in the same device. Use the same manufacturer, same type, same manufacture date.
  • Store batteries in a cool, dry place. (Your car, in the summer heat, is not so good for preserving the life of whatever battery-operated device you store in there.)
  • Don’t mix loose batteries with metal objects – like in your pocket with change. They can short-circuit and burn or explode!

Oh, and that story about storing batteries in the refrigerator? Keep batteries cool, but there’s no need to refrigerate modern batteries.

My phone’s my most important survival tool! What’s the best solution for it?

The battery already in your phone or computer may have to be replaced as some point. If so, you’ll probably have to get whatever the manufacturer requires.

But, you’ll be recharging that device many times before you have to get a new battery! In an emergency, of course, electrical power for recharging may be out or you may be nowhere near a wall socket. One back-up option is a device that holds an extra charge, just ready for you to plug in to when you need it.

So let’s look at portable chargers or Power Banks.

Power Bank with Flashlight
My Power Bank has a flashlight, too.

If your goal is to extend the life of your electronic devices, consider a Power Bank,  otherwise known as a “mobile power supply,” mobile battery, external battery, spare battery, charging stick, or portable charger. These devices can keep you operating for days at a time!

If your time is worth anything, a power bank will be an inexpensive boost to your productivity and, in an emergency, to your peace of mind.

Power Banks are sized from something similar to a small flashlight to a device that resembles a small external storage drive. They all fit in a palm, pocket or purse, but may be a bit heavy to carry around all day. (Check the weight.)

As you compare them, look for:

  • Capacity (measured in mAh, or milliampere hours). The higher the mAh, the more stored power.

    IS THE POWER BANK BIG ENOUGH TO DO THE JOB?  Some negative reviews come from people who expect a small battery to recharge a much larger device. Doesn’t work!

    You want enough juice to reload your phone or tablet completely, at least once and preferably more often than that! For example, one power bank model declares its 15,000 mAh are able to charge an iPhone 6 more than 5 times. To know how much capacity you need, get the specs on your device from the box it came in, or search online for “technical specs.”
  • Output (measured in V, or volts). Generally, you want the power bank output to be the same as the input to your device. For example, your phone and Bluetooth headset probably each have 5V input.
  • How many ports? Some of the chargers can “feed” as many as 4 devices at the same time. (You’ll need the right cord for each device.)
  • What security against short circuits, over-charging or over heating?

The chart below will gives you a quick idea of features, options and prices. These models range from $20 – well over $100. Click on the image to go directly to more details on Amazon.

BASIC

10,000 mAh. Two different charging speeds. Slim and lightweight.
FASTER CHARGE, MORE POWER

20,000 mAh. Charge multiple devices at once.
CHARGE LAPTOP

About the size of a small book. LED lights show status. Charge laptop 2 1/2 times, phone 11+ times.

What are the best batteries for our other emergency devices?

Disposable batteries

Understanding all that basic information listed above, we have tested disposable batteriesEnergizer, Duracell and Kirkland (Costco brand) — multiple times for our emergency radios. These radios are used once a month for our Emergency Response Team drill, and then very lightly, so we don’t go through the batteries quickly at all. We do automatically replace them regularly (usually twice a year at the time change.)

Re results of our testing? There doesn’t seem to be too much difference in manufacturers, although our current favorite is the Duracell Coppertop with Duralock.   You can get what you need at your local hardware or big box store, or add them to an Amazon order. Some packages have both AA and AAA sizes in one.

Rechargeable batteries

For multi-use devices, like our emergency radios, we prefer rechargeable batteries. We’ve found that rechargeables are often specified BY NAME by the manufacturer of the product. If specified, use ‘em. Other raters for rechargeables have consistently come up with Eneloop NiMH. These are made by Panasonic, and come in AAA and AA sizes.

Panasonic says these can be recharged 2,100 times!  For that reason alone I would try them!

Solar chargers

Finally, don’t overlook the small solar devices designed to recharge your phone and/or other devices. Some emergency radios have small solar panels, and can recharge a phone.

There are also small, handy solar panels you can attach to your backpack and recharge while you go! They cost somewhere between $20 and $40. Here’s an example – click on the picture to get full details.

Whew, this is a lot of info, but given the fact that we all seem to invest in batteries on a consistent basis, it’s worth it to get the right battery for the job. Oh, and buying on sale? A good idea if you know what you’re buying.

But buying just on price alone makes no sense.

Virginia
Your Emergency Plan Guide Team

If you’re part of a Neighborhood Emergency Response group, you’ll need a budget for batteries for your walkie-talkies. Here’s an article with some ideas about financing your group’s efforts.