

Don’t you love lists? I see them everywhere I turn online.
And I read a lot of them, particularly those in the survival niche. Mostly, they confirm what I already know. But every once in a while I find survival ideas I hadn’t really considered before.
What follows are some ideas using everyday household supplies as tools for survival. Maybe you can add them to your list, too!
Six reasons to have aluminum foil in your survival supplies.
Who knew all the things it can do in an emergency – and, for that matter, every day!?
- Cooking over a campfire? Wrap smallish pieces of food in a foil pack, cook over or buried in coals.
- Add a foil reflector to block the wind from your fire, and to direct its heat.
- Position a foil sheet to reflect and enhance the light from the sun or from your lantern.
- Use crumpled foil under a bar of soap and under a scrub pad to keep them from getting gunky or rusting.
- Fold a small piece of tinfoil and stick in your flashlight between the battery and spring to improve a loose connection.
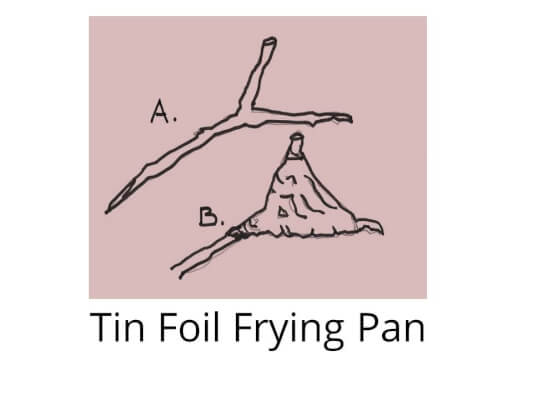
- And this, from Reader’s Digest. (And see my image, above.) Make a temporary tin foil frying pan by covering a forked stick with a double layer of foil. Make a slight depression in the space in the V of the fork — that’s where you’ll put your food for frying!
Four more survival uses for everyday household supplies using everybody’s favorite — duct tape.
I’m sure you have plenty of duct tape at home. I hope you have some in your survival kits, too. The “flat packs” are much lighter and more convenient than the heavy roll. (See below.)
You can use duct tape to fasten just about anything, but here are a few more ways to use it as a survival tool:
- First aid supply – Use thin strips to close a wound. Use thicker strips of tape plus small branches or pieces of wood to create a splint for a sprained ankle.
- Twist a length of tape to create a rope for tying anything. Fold a length of tape in half onto itself to create a strap – for a belt, a sling, a carrying handle.
- Keep out cold air by closing leaks in clothing using tape. (Don’t tape to your skin. )
- Tape together Mylar blankets or large size plastic bags to make a sleeping bag or a shelter.
And while we’re on plastic bags, here are seven ways to put these everyday household supplies to use as survival tools.
Different weights of plastic have different uses. And, of course, the heavier the weight, the more they add to the weight of your survival kit. Here are some often overlooked survival ideas using bags and baggies. (More info, with prices, at the end of this Advisory.)
- Trash compactor bags are very thick – and thus work well to manage human waste in a survival situation. Place the bags in the toilet, or in a plastic bucket. (When full, add kitty litter or some disinfectant, close and dispose of.)
- Use ordinary plastic bags from the grocery store to line boots (over socks, inside boots) to keep your feet dry. (Probably won’t work in a stream but does fine through wet grass and puddles.)
- Use plastic bags as temporary gloves to protect your hands from germs, blood, yucky stuff, etc. (I used one just last week to dispose of a dead rat.)
- Large garden size bags can be used to line your pack to keep it dry. Raining? Cut a hole for your head and turn the bag into a poncho. Tape a couple of bags end to end for a makeshift one-person tube tent.
- Ziploc bags of different sizes are helpful for sorting clothing (clean, dirty, wet), protecting foodstuffs and matches from the damp, and keeping first aid items readily visible. And you can use a baggie to start a survival fire. A fire?
- Fill the bag with water.
- Twist to create a tightly filled plastic water “ball.”
- Position the ball over fine tinder and use like you would a magnifying glass. The sun shining through the ball of water can heat tinder sufficiently to start a fire! Here’s a great YouTube video from the King of Random showing just how to do it: https://youtu.be/vMcgs7Tx3Hs
- And from Primal Survivor, this idea for using a plastic bag to catch fish. Find a stream with fish. Create a sort of funnel in the stream by building a V with stones. (Open end upstream. ) At the tip of the V fasten a plastic bag with its mouth open and a few holes cut in to allow water to flow through. Go upstream and scare the fish so they head downstream – into your funnel and then into your plastic bag!
- And a final idea – using a clean clear large-sized plastic bag to capture water from a plant or tree. Pick a NON-TOXIC plant with large leaves. Pull a bag over a large branch with lots of leaves and tie it tightly. Be sure the lowest point in the bag is below the tie. Over time, the plant will release water vapor. The vapor will condense, run down the sides of the bag and collect in the bottom, where you can capture it to drink. This will take time and patience, but could save your life in an emergency. You can find an easy to follow picture-by-picture explanation here. https://www.instructables.com/id/Extract-Clean-Drinkable-Water-From-Plants/
I’ll soon be testing both the baggie-full-of-water-as-magnifying-glass and the bag-to-collect-transpiration-from a tree. (No streams with fish near me . . .) I’ll let you know how it goes.
Maybe YOU can test these two ideas with your own kids or other members of a group – Scouts? Sunday school? Your neighborhood emergency response team? (Watch the video and check the how-to-pictures first. They include a couple of safety messages you don’t want to overlook.)
Three ways to get everyday household supplies for your survival kits.
- Start by going through your cupboards and pull from your regular supplies. You’ll probably have aluminum foil, duct tape and a few assorted bags. If you find ties, pull some of them out, too.
- Make a list of other items you might want: flat packs of tape, trash compactor bags, heavy-duty large black trash bags, maybe even that very light-weight see-through bag that will work to capture water from a plant.
- If you are part of a group, consider pooling your money and making a bulk buy. By buying in bulk you’ll be able to save money and give everyone a chance to get a few of what they need and not overbuy.
Here are some suggestions from Amazon, where we often go first for our shopping. Since most of these everyday household supplies are probably readily available in your local stores, you may want to shop specials. I’m including price info from Amazon so you can get an idea of costs if you’re shopping for a group. And if you are a prime member at Amazon, all the supplies could be delivered at once, making it easy to get everything distributed.
- Aluminum foil:
Reynolds Wrap Aluminum Foil (200 Square Foot Roll)
- Trash compactor bags: Whirlpool W10165294RB 15-Inch Plastic Compactor Ba, Pack of 60
— 60 bags may seem like a lot, but think how often you and your family go to the bathroom every day! .! About $45.
- Black garden bags (38): Hefty Strong Large Trash Bags 39 Gallon – Lawn – Yard – Drawstring – 38 Count
Just under $13.
- Clear bags: Clear Trash Bags, 33 Gallon, 100/Count, Large Clear Plastic Recycling Garbage Bags, 33″H x 39″W, 1.2 Mil (Clear)
These were only $13 when I last checked. I like clear bags because I can see what’s in them.
- More clear bags, but a handier size: 12″ x 15″ 2 mil. – Clear Plastic Reclosable Single Zipper Poly Bag (100 Pack) | MagicWater Supply Brand
Just under $20. I also found a collection of 400, in 4 different sizes, for about $25: Retail Supply Co Combo Pack – 400 Clear Poly Bags with Suffocation Warning – 6×9, 8×10, 9×12, 11×14 – Resealable
- Flat packs of duct tape come in 1″ and 2″ widths. This is the best stuff! I’d get some of each size!
- RediTape 10934 Travel Size Flat Fold Duct Tape, 3-Pack, Black
Around $11. RediTape also has a fatter, 2-pack for around $25.
- Gorilla Tape, Mini Duct Tape To-Go, 1″ x 10 yd Travel Size, Black, (Pack of 2)
This is the smaller size, less than $10 a pack.
- RediTape 10934 Travel Size Flat Fold Duct Tape, 3-Pack, Black
- Mylar Space Blankets: Finally, don’t overlook these inexpensive survival items if you don’t already have them. This package has 50 blankets in it: BH Lot of 50 Emergency Mylar Blankets – 84″ x 52″
Less than $2. 00 each.
Buy over time!
Not everyone can run out and immediately buy everything on every survival list. But items like the ones on this list are pretty inexpensive, so you can buy one or two every so often until you have everything you need.
It’s the same with assembling ALL your survival supplies — emergency radio, batteries, food, etc. Slow and steady means when the disaster hits you may not have everything, but you will have more to help you get through than you did last month . . .!
Good luck with your shopping!
Virginia
Your Emergency Plan Guide team
Don't miss a single Advisory.
Thank you for subscribing.
Something went wrong.