Because you are reading this, I can bet you’ve already done a pretty good job of the first step in preparing for an emergency – that is, preparing for your personal safety and security. I trust you can answer confidently questions about your extra food supplies, your family’s Go-Bags, stored water, and emergency communications plans. Focusing on personal safety is step one for everyone. But where do you stand on the second step — working with your neighbors?
(Have you seen recent news reports about families spontaneously getting together to save each other during this recent Texas winter storm? Proof of what we repeat here at Emergency Plan Guide: “In an emergency, the real first responders are your neighbors, because they are already on the scene!”)
So for us, once you’ve taken care of your personal planning, it just makes sense to look at how your neighbors are doing. And to ask yourself, “To what extent will you be able to count on them in an emergency?”
You can’t assume that your neighbors have the attitude, the skills and enough supplies and equipment for you all to get through any disaster that hits. You have to find out!
Step Two in preparedness planning is a process to give you confidence as you start working with your neighbors.
After 20 years in our current neighborhood, we’ve had to repeat the process several times because neighbors come and go. Team members get older and drop out.
In fact, now that the pandemic looks to be loosening up, it’s a good time for us to start getting to know our neighbors once again!
Here are the steps we’ll be following to improve neighborhood cohesiveness and resilience. See if you can make use of them too.
Define the neighborhood.
Whether this is a new group or an existing one, invite neighbors to get together and start by building a map of your neighborhood. Your map may show just one street, several streets, one building or just one floor of a building. The idea is to keep the “neighborhood” small enough so that you can get to know the other neighbors. (Some experts recommend a maximum of 20 families per neighborhood.)
You will probably want to hand draw the first iteration of your map, so everyone at a group meeting can see and agree. It’s really fun to get a giant piece of butcher paper or a big white board, with colored pens, and turn people loose!
If you have access to a drone, consider using it to get a better overhead view of your neighborhood’s layout!
Add more details to your map. Details might include streams, driveways, landscaping, common areas, parking, playgrounds, stairways, entrances and exits.
For the next layer of detail, note the location of safety equipment: fire extinguishers, fire hydrants, utility shut-offs, emergency exits. You may want to use standard icons for fire fighting equipment or emergency exits, etc.,
Once your map is drawn, you can take a photo and scan it so the image can be shared digitally with everyone in the group.
Review your list of threats.
This is a great topic for a subsequent group meeting. Invite people to come up with every threat they can think of, and make a list of them. Again, easel paper works well, particularly the kind you can stick to the wall.
Capture as many threats as you can.
Here are suggestions to get the conversation started!
- What threats do we face because of our location?
Probably everybody knows about threats from the weather; either you live in a flood plain or you don’t. If you’re in an area safe from earthquakes but on the wildfire-urban interface, you have different priorities than a property bordered by mainline train tracks or in the flight path of a local airport. Your map will point to some of these vulnerabilities. - What about the property itself?
How old are the buildings? How well maintained is the infrastructure? (Lighting, gas lines, etc.) Are there tunnels or bridges on the property that could collapse? What will happen to gates and elevators if the power goes out? - Do our neighbors need special consideration?
For example, do we have children or pets to plan for? Any aged or physically impaired residents? What about neighbors who only speak languages other than English?
Once you’ve listed all the threats you can think of, go back and prioritize them. Pick the top 5 or 6 threats that are most likely to materialize. Talk about the impact of that threat on each aspect of the neighborhood.
Again, this is only the beginning, so rough estimates are all that you need.
Identify your neighborhood assets.
Once you know what you’re watching out for, you’ll find it easier to know what you need to improve your response.
How close are you to fire and police stations? What kinds of businesses (if any) are close by? What is the status of the water supply to the neighborhood or to the building? Where do able-bodied residents live? Are they likely to be home? Do you have a number of retirees? Do they have specialized skills? How many are likely to be available in an emergency?
How many people have first aid or medical experience? How about people skilled in trades? What tools are available? How about working vehicles (trucks, vans, etc.)? Motorhomes (with AC electrical supply generators)? Boats? Snow blowers? Golf carts? Here’s one of the lists we use to identify assets.
(Singing) “Getting to know you, getting to know all about you . . .”
In your first meetings, you can only estimate the answers to some of these questions. While many city programs suggest identifying assets at the very first meeting, we have found that at the beginning, people are reluctant to share details of their personal lives.
Later, though, working with your neighbors becomes easier and easier as they start to know one another, have heard from each other about training and commitment, etc.
And people recognize right away that by working together they can avoid the costs of duplicate effort.
For example, in the aftermath of a hurricane, there’s really no need for every house on your block to have a chainsaw, When the power is out, one or two families with BBQ grills can host the others for an outdoor dinner! Not every household needs to have a trained ham radio operator; a couple of enthusiastic hams can provide important emergency communications for the whole neighborhood.
Having an understanding among neighbors improves the situation for everyone!
Of course, you’ll want to discuss the need for protecting the privacy of this personal information. The best way is to keep the group small enough and personal enough that every member will respect the other members. Don’t post obviously private info where people outside the group can see it.
The Step Two Process can lead to more, including Building a Written Plan that will endure.
The three actions we’ve talked about here — mapping your neighborhood, reviewing likely threats, and getting a handle on assets you already have in place – will be a great introduction to emergency preparedness for a newly forming group. They can serve just as well as a refresher for an already existing group.
The process will reveal areas where you want more information, and thus provide suggestions for upcoming meetings or for recruitment.
The process may also provide an opportunity to sign neighbors up to take the CERT training!
In our estimation, the Third Step in Preparedness Planning is to actually build a written plan for your neighborhood, using CERT as a foundation.
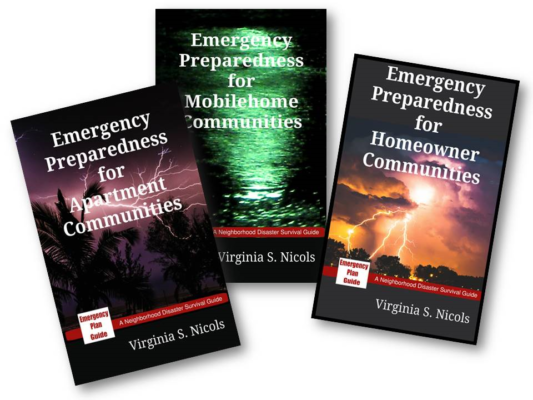
Building a written plan is another whole topic. If you’re eager to get started right away, please take a look at our Neighborhood Disaster Survival Guides. Each book is divided into the three parts we’ve mentioned in this Advisory: (1) personal preparedness, (2) working with your neighbors, and (3) building your neighborhood plan.
We’ve put years of experience into these books (having lived in all three types of communities!) and we think they’ll help you work effectively with old and new neighbors at all levels of preparedness. Just what you need as we return to active life after months of COVID inaction!
Virginia
Your Emergency Plan Guide team
Don't miss a single Advisory.
Thank you for subscribing.
Something went wrong.

