Category: Action Items

Too humid! Too wet! Too much mold and mildew!

Share
hot and humid bathroom mold and mildew

The weather news is filled with stories about too much water.

So when I found a couple of nasty black spots in our shower, it was a sign that I needed to take another look at water conditions right here in my own home! I plunged into some research. Here are my questions and the answers I found.

I hope you will share this info with family and friends. I’m afraid everyone is likely to find mold or mildew in their home at some point!

Mold or mildew in my shower? Which is it?

Turns out that both mildew and mold are fungi that reproduce via airborne spores. Mildew is the wimpy adolescent, mold is the full-grown bully. Mildew is white or gray and often looks like dust; mold is red, black, blue or green and looks stubborn. Either of these is likely to give off a musty, wet-sock smell – you are likely to smell them long before you see them. Both grow on “organic materials” like wood or wood products like paper or drywall, and plants. (And obviously mold can grow on fiberglass shower walls, too!)

How dangerous are mildew and mold?

Most people exposed directly to mildew – like breathing it in – may experience mild symptoms like sneezing, itchy eyes and coughing. If you have asthma it might flare up.

Mold symptoms are worse if people have a mold allergy.  Afew types of mold do produce toxins – like black mold. (Shiny, black, looks like tar – get out now) – but for most people the problem is when they are allergic and/or already suffer from asthma.

Obviously, people exposed to large amounts of mildew or mold, and who already have chronic lung disease, could experience a severe reaction including infections in their lungs.

What makes mold grow?

Mold spores are always in our environment – you can’t escape them.  They only become dangerous when they find perfect growing conditions: a nice porous organic surface to land on, warmth, oxygen, AND the right amount of water. Not all the sources I found were in total agreement, but FEMA and the CDC say that mold can develop within 24-48 hours of finding those conditions!

So how do I avoid mold in my home?

We’re not talking here about coping with the aftermath of a flood. Rather, the next few paragraphs will be about more ordinary conditions.

Here are specific recommendations:

1-Start by checking for leaks and/or signs of mold.  You will know if your roof or windows are leaking. You may never really have looked for leaks under the sinks or behind the washing machine, etc. Check – if those areas are dry now, clean up any mold and fix the leak. If the area is not dry, you may have to call for professional help to replace rotted or moldy wood. If you discover mold in AC ducts, don’t run the HVAC system until you’ve got them cleaned out by professionals.

2-Wipe up spills immediately. Whether it’s a glass of lemonade, a whole bucket of soapy water, or spaghetti sauce that boils over, wipe it up immediately!  Make sure the area is totally dry and clean before you walk away. If the spill is in the bedroom, clean and dry the area immediately. Use a HEPA vacuum cleaner on your carpet. (HEPA stands for High Efficiency Particulate Air and a HEPA filter traps 99% of particles over 0.3 microns in size.)

3-Note and deal with condensation. Just like in the image at the top of this article, our bathroom mirrors fog up when Joe takes a long shower. Yes, we open the window and run an exhaust fan, but it’s still damp. And that must have contributed to those black spots this week!

In the past, I’ve had bedroom windows get wet from condensation, too!  (Though not in this house.) If you experience condensation, the steps to take include:

  • Clean up moldy spots in shower.
  • Squeegee and wipe dry the glass door and tile walls and/or windows after showering.
  • Make sure you have an exhaust fan – run it for 30 minutes after a shower.
  • Consider a dehumidifier.  See below.

4-Your refrigerator could harbor mold. Forgot that meatloaf in the back of the frig? “Expired” food grows mold! And dripping ice maker tubes can, too. Keep your refrigerator cleaned out – and clean!

5-Check houseplants regularly for mold. Gray stuff in the pot? Repot with new soil, treat with fungicide.

6-Don’t forget closets. You can bring in spores on clothing and shoes, particularly if they are damp and don’t get properly dried and aired out before being put away.

If you discover mold, get rid of it!

Alert: Everything I read about mold suggests that you can take care of small mold growths by yourself, but you need professional help for a big job.  What is “big?”  Probably a mold growth greater than 10 sq. feet in size. You may also need professional help if your water and/or mold damage came from contaminated sources (sewage, flooding), or if you know you have health concerns.

If you plan to do the cleanup yourself, wear the right protective gear. I recommend you click on the links below of any products you don’t already own to see if they make sense for you or family members.

  1. Avoid breathing in the spores by using a respirator. Earlier we  wrote about the importance of N95 respirators for managing particles from wildfire smoke. (The 95 means they block up to 95% of airborne particles.) There are also N99 respirators. Even better for a mold clean-up job. Here’s a 12-pack of N99 respirators from Amazon that have all-important exhalation valves.
  2. Protect your eyes from dust and floating spores.  CERT volunteers often are supplied with safety glasses, but if they are just glasses, or goggles with air holes, they’re not right for this job!  You want safety glasses or goggles that fit all around your eyes.  I personally need a model that fits over regular glasses; this link takes you to over-regular-glasses goggles that actually come in a package with N95 respirators, too. I consider this a smart buy.
  3. Wear gloves. Never touch mold with bare hands!  You’ll want sturdy gloves that come well up past the wrist.  The ThxToms  company makes heavy duty gloves in both rubber and latex. (Their rubber gloves are longer and cheaper!)
  4. Wear long sleeves, long pants, and closed shoes.

As for cleaning materials, you can buy commercial products or use common household cleaners.

Some recommended anti-mold products that are made specifically to kill the mold or mildew and also remove stains. In each case you leave them a while to work their magic and then rinse off.

You may already have on hand one or more of the natural cleaners listed below.

  • Scrub mold spots off with a brush and spray with white vinegar. Let dry. No need to rinse. Use the spray and let dry after every shower.
  • Same approach using a mixture of 1 cup Borax with 1 gallon water, spray on, let dry.
  • As a last resort, mix 1 part bleach to 10 parts water, spray and let dry. Bleach is more toxic.

For all the above, be sure to wear gloves and eye protection and make sure area is ventilated.

A final note about humidity.

Every article I read about mold mentioned the role of humidity in mold’s growth. Of course, humidity is important to our overall health and sense of comfort. Several different sources rated the ideal relative humidity for health and comfort as being about 40-50%. In the winter, humidity may have to be lower than that to avoid condensation.

How do I know how humid it is?

The answer to this question is simple. Buy a hygrometer so you can check! Get a simple one with big print and carry it around with you to test bedroom, bathroom, etc. The one below costs less than $10! (Click the image to get exact price and details.)

And if the relative humidity in your bedroom or bathroom is too high?

A dehumidifier can make all the difference to health and comfort.

Dehumidifiers work rather like refrigerators. They suck in the humid air and run it over refrigerated coils. The water condenses on the coils and drips down into a bucket, and warm dry air is blown back into the room.

The capacity of a dehumidifier is measured in how many PINTS of water it can remove from the air per day! A one-smallish-room may require a 30 pint machine; a large basement might require a 70 pint machine. Here are positively-reviewed examples from Amazon. Click on the links to get details and prices.

hOmeLabs 70 Pint Dehumidifier Featuring Intelligent Humidity Control – Energy Star Rated, Ideal for Large-Sized Rooms and Basements to Remove Moisture-Related Mold, Mildew and Allergens

And a smaller version:

Vremi 30 Pint Energy Star Dehumidifier for Medium to Large Spaces and Basements-Quietly Removes Moisture to Prevent Mold and Mildew, White

Too much humidity, too much mold, too much mildew! Not good! If you have any of these in YOUR home, you will want to make a plan to deal with them starting now.

Good luck!

Virginia
Your Emergency Plan Guide team

P.S. I cleaned up my shower with white vinegar and an old toothbrush. The spots have not returned!


How to Inspire Readiness

Share
Do your neighborhood group meetings feel like this???

If you are what we could call a “solo preparedness devotee” (or perhaps “voice in the wilderness?”) you know it’s hard to stay inspired and to maintain any momentum in learning new stuff, keeping your supplies up to date, etc.

And if you are involved with a group of neighbors or even trained citizens, you experience the same problem — only worse!

How to keep people interested and inspire readiness?

A close call works.

For example, a 4.5 earthquake works well here in California. News of disasters in other parts of the country or even the world also catches people’s notice and can inspire readiness. Even an announcement about a change in course of FEMA can be useful.

But close calls usually indicate that someone is suffering, so we certainly don’t like waiting for them or depending on them . . .

For a group, we look to regular meetings for inspiration and engagement.

So then the question: What should be on our meeting agenda this month?

I’ve been organizing or helping organize our neighborhood emergency response group meetings for about 16 years now. Even if we figure only 4 meetings a year during that time, that adds up to A WHOLE LOT OF MEETING AGENDAS! Every meeting is an effort — and a challenge! – to inspire readiness through training, door-prizes, entertainment, examples, stories . . . whatever works.

Fortunately, other groups share their meeting agendas with me.

If you’ve been sticking around here at Emergency Plan Guide for a few years, you’ve read about a number of meetings – and not just ours, but also meetings I’ve heard about from other CERT or neighborhood groups. For example, just this week I got these three reports that have already helped suggest meeting topics here in my neighborhood:

  • A friend in a Northern California coastal town reported that she is putting on an earthquake tabletop exercise for a neighboring town. Both those towns are in the way of tsunamis if/when there’s a big Pacific Rim earthquake. Here in Southern California a tsunami is less likely, but an earthquake?  You bet.
  • Another leader in a different Northern California city wrote to tell me that her neighborhood group had planned and executed a Fire Prevention Clean-up Day – removing Juniper trees (very flammable), trash, leaves, fallen branches, etc. from around the homes in their mobile home park. Hearing about this group’s enthusiasm was certainly inspiring to me! We’re working on a similar project right now! (Watch for more.)
  • Still another formal CERT group got this media mention yesterday: Lafayette, CA: The Lamorinda Residents Guide to Wildfire Preparedness & Evacuation. a joint effort that included the Lamorinda Citizens Emergency Response Team (CERT) was mailed to more than 62,000 residents in critical wildland fire hazard areas of the East Bay (CA).

Emergency Plan Guide tries to share as many good ideas as possible!

In the past I have put out many individual Advisories about successful meetings we’ve held. And I’ve also published two downloadable books with meeting planning ideas, with about 75 plans for easily-repeatable neighborhood meetings.

Note – these aren’t official CERT trainings. Rather, they are ideas stressing readiness that can be used with “ordinary” groups of neighbors, some of whom have had CERT training but most of whom have not.

I am in the midst of updating them with more meeting agendas and will soon be republishing them in a new format.

And this brings me to a request.

What can YOU add to our list of meeting resources that will help other neighborhood groups inspire readiness within their own ranks?

Have you held meetings that have been particularly interesting, fun or productive? And that lend themselves to being copied? If so, could you please send a description so I can include it in the next version of the book?

I’m thinking that together, we can produce something like “Chicken Soup for Great Emergency Preparedness Teams!”

Here are some simple questions that might work for telling your Great Meeting story:

  1. What was the title/theme of the meeting and what was your objective?
  2. How did the meeting unfold? Any surprises? Any laughs? Any hiccups? What was particularly inspiring or engaging?
  3. Did you need props, handouts, show-n-tell items, other materials?

Please send a story! If you want to remain anonymous, or your group wants to remain anonymous, just say so/ But let us know what sort of neighborhood you’re in, to help readers adapt your great meeting to their neighborhood.

Sharing strengthens volunteer groups and thus whole neighborhoods!

As you know, FEMA’s most recent push has been for Community Resilience – as opposed, I guess, to national response capability. I’ve been working at the community level for years, and I think most of you have been, too. Sharing ideas to help organize communities and inspire readiness among their residents is what we’re about.

I welcome your ideas for great meetings to share!  Please send them to Virginia@EmergencyPlanGuide.org.

Virginia
Your Emergency Plan Guide team

In case you’ve missed them, here are a couple of Advisories from the past about meetings that worked to inspire readiness. At least, I have received repeated assurances that they made a difference!

Personal Information Databases and Your Privacy

Share
Privacy - Image of person being examined by magnifying glass

My shocking personal information story

Last weekend I got a text message from my daughter. She had been online and had found one of the personal information databases that had my name in it.

There are a couple dozen popular sites like the one she checked. They all offer background and personal information about anyone, usually including phone number, address (and past addresses), email address, relatives, pictures, social connections, court records, etc. While you usually can get one or two pieces of information just by typing in someone’s name, for a fee you can get all the records.

Well, my daughter got my whole record and sent it to me. IT WAS SO, SO INACCURATE!  Wrong birth date. Unknown foreign “friends.” Places I’d never been to! When I got to the (false) court records I shut the phone in horror!

(Now my daughter being who she is, she sent me specific instructions of how to cancel the account, which I was able to do within 24 hours. At no charge.)

Still, it was a shock. While I spend a lot of time online, I simply don’t use personal information databases and have never looked myself up.

But since we talk about cyber-security a lot here at Emergency Plan Guide, it seemed important to share more about it today. These personal information databases are legal. They have found information about you without breaking any laws. There have been no “leaks.”

But your privacy is certainly threatened by them.

The Big-Daddy Personal Information Databases in all our lives – the Credit Bureaus

Most everyone is familiar with the credit bureaus that track 9 of every 10 adult Americans: Experian, Transunion and Equifax. A fourth seems to have been added to this list: Innovis.

While we often speak of “your credit rating,” or your “credit score,” you really have one from each company.  

But each credit report will be different. Why?

All four companies track money that you owe: mortgages, bank loans, car loans, student loans, and credit card debt. Credit bureaus also get information from public records, like property tax rolls or court records.

But businesses are not required to report the loans they make to you, so many businesses report to only one or two of the credit bureaus. That explains the variations in the reports

Action item: Check your credit reports.

If you haven’t checked your credit scores lately, you may want to. According to the Federal Trade Commission “You’re entitled to one free copy of your credit report every 12 months from each of the three nationwide credit reporting companies. Order online from annualcreditreport.com, the only authorized website for free credit reports, or call 1-877-322-8228. You will need to provide your name, address, social security number, and date of birth to verify your identity.”

According to the Innovis website, they offer a free credit report, too.

I have checked my own records in the past. Every time I found errors. Once it was a misspelling that dropped someone else’s debt into my file. If you see debts you don’t recognize, or other strange information, you can work with the credit bureaus to get your report cleaned up.

The “people-finder” sites track even more personal information.

Wikipedia says there are close to 4,000 “information brokerages.” This probably includes the credit bureaus. All of these companies are for-profit organizations that make money by charging for certain services and by selling your personal information to marketers – and to each other.

The people-finder sites are giant personal information databases. They start with names and aliases. They list addresses where you have lived and currently live. Some have reverse directories – enter an email and they’ll give you a phone number to go with it, or enter a phone number and you’ll get an address.

That is just the start. You may find lists of your children. Other relatives and ex-relatives. Lists of friends. Where you’ve traveled. Property you own. If you’ve been in trouble with the law or owe taxes. If you are a sex offender. Have declared bankruptcy. You may find photos of yourself!

How much of this information do you want to be available to anyone willing to shell out a few dollars? What if there are errors in the data? How can you protect your privacy?

When I found out about being on one of these sites, I immediately jumped into action to find out more.

How the people-finder information databases work:

  • You usually can’t get a complete look at your people-finder record  — or the record of someone else — without paying at least $1 for a “trial.” If you sign up for a trial, read the fine print. Trials typically turn into a “regular monthly subscription” unless you cancel within the specified time, which may be just a few days.
  • If you want to update or clean up your record at the people-finder site, you will run into challenges. They get your information by scraping the web – that is, by finding publicly available info. Obviously, you can’t “change” public information, although you can delete some of it. (Looks as though you can’t delete court records that aren’t officially expunged.)
  • Once the site is updated, you will be offered the option to subscribe for a monthly fee to monitor your account to keep it clean and also to be able to search for other people. Subscription prices seem to vary starting at as little as $5/month (for a multiple-month contract) but most are more in the $20-30/month range, with an extra fee for what has been termed the “juicy stuff” – criminal records, tax records.
  • Like me, you may want to close the account and remove all the information. Every site’s requirements for opting-out of the site are different – but from what I am reading, it is possible but your patience will be tried. You should not have to pay anything to get off the site but you may have to jump through hoops.
  • Even after you are successful at having the account closed, it may reappear again in the future when they “find” new information . . .

Here are some of the sites I came across in my research.

 I used an old email to check on a couple of them and found myself in every one I looked at. My photo was there, too! I am not recommending any of these sites — they are just to help you get started on your own research!

  • Peoplefinder
  • Beenverified
  • Mylife
  • Instant CheckMate
  • Spokeo
  • Anywho
  • Truthfinder
  • Whitepages
  • People
  • Peoplesmart
  • Intelius
  • US Search
  • Radaris
  • SeekVerify
  • Pipl

Can you remove yourself from these online databases?

How to get off the credit bureaus. The only way to get off them entirely is to become one of the 26 million or so people in the U.S. that have no debt profile. That means they have no credit cards. No mortgage. No car payment.

Most of us couldn’t function without at least some of these. So the best thing to do is to be sure your credit report is at least accurate.

How to get yourself off the people-finders. It looks to me as though getting totally off is impossible. You would need to have no online banking accounts. No social media accounts. No websites. You’d have to avoid using public wi-fi, and if you went online, use a Do Not Track browser. (Apparently Google does have a Removal Tool but it sounds as though they make it tough to use.)

Best thing to do here? Go to as many of the people-finder sites you can and ask that your information be deleted. Go there regularly. This is a lot of work.

Hire a “reputation manager” to help?  You can hire a “reputation manager” company that will search out negative info on your behalf, then remove or suppress it. Some of these companies specialize in business reputation management, others work for individuals. Fees for their services depend on the complexity of your situation, but customized plans seem to start at around $400 – 500/month.

“Privacy is dead. Get over it.”

You have probably heard this quote. It is attributed to the co-founder and CEO of Sun Microsystems, Scott McNealy – and he said it way back in 1999!

Obviously, the more we rely on digital communications to run our lives – essentially everything on the Internet of Things — the less privacy we will be able to maintain. Is there an answer – or is the genie out of the bottle, never to be returned?  I’m afraid the genie is dancing in triumph right now!

But in being conscious of what data you’re making available by participating in the digital society, you can at least be better prepared for what might come!

Virginia
You Emergency Plan Guide team

P.S. I am not an expert in this topic. If it interests you, YOU need to become your own expert. If you already have stories to tell, please share them with us by leaving a comment below!

P.P.S. We have written pretty regularly about security and privacy. Here’s an earlier Advisory that talks about why home electronic devices are so vulnerable to hacking.

Power Outage in the Workplace

Share

Updated March, 2019

Power Outage in the Workplace

A Common Emergency Than Can Turn Into a Disaster

It’s Friday morning, you arrive at work and are greeted with . . .

“Guess what! Power is out!”

As people pull in and start to crowd around the front door, questions ring out. . .

  • “Who’s in charge?”
  • “Don’t we have a generator somewhere?”
  • “What about next door, is their power out, too?”
  • “Has the outage been reported?”
  • “How long will it last?”
  • “Does the boss know?”
  • “Shouldn’t we turn stuff off so it doesn’t all go on when the power comes back?”
  • “What was on?”
  • “What about the deliveries we’re expecting?”
  • “I have appointments today. Should I cancel them? Can we meet somewhere else?”
  • “Who’s in charge?”

Power outages are happening more often and lasting longer.

Inside Energy reported that in 2014 in the United States, the five-year annual average number of outages doubled every five years from 2000 to 2014.

Three years later, according to the US Energy Information Administration, the length of the average power outage nearly doubled from 2016 to 2017 – to almost 8 hours. Then came this addition: “. . .and the total duration of interruptions caused by major events was longer.”

Why the increase? Most notable: more and stronger hurricanes, massive winter storms, raging wildfires.  And lurking behind it all, the vulnerability of the grid itself.

We’ll be watching for statistics from 2018, and later for 2019, which has started out as bad or worse than ever before.

Note: Are you familiar with Allianz, the global insurance company? Their 2019 Allianz Risk Barometer now adds cyber incidents to the list of top business interruption risks.

A power outage in the workplace is a lot more problematical than one at home.

You may be able to get along at home because you have immediate access to extra food, clothing, etc. But to respond to a power outage in the workplace YOU NEED TO HAVE PREPARED IN ADVANCE!

Here are three simple questions you can use to start the preparedness conversation.

  1. What equipment will go off? Will it be damaged or dangerous if it shuts off suddenly?
  2. Who needs to know about the power outage? How quickly do they need to know?
  3. How will we communicate with employees, customers, suppliers, regulators and the news media when the power is out!? Who will do the talking?

Resources for planning for workplace outages.

Fortunately, there are some super resources out there to help out in this regard. One of the best is: Agility Recovery. Started 30 years ago, Agility is now serving businesses of all sizes in 44 states. While you may or may not be a candidate for their services, be aware that their website’s library has excellent videos and checklists for every business. The case histories of specific industries (banks, healthcare) are particularly interesting.

Agility has been on my radar for a couple of years now. I’ve attended their training webinars online and talked to several of the sales people, with very useful results.

Four suggestions for taking action to prepare for power outages in the workplace.

1- If the questions in this Advisory have hit any nerve at all, head over to Agility and grab Agility’s free Power and Generator Checklist. You’ll see a complete list of things to do BEFORE an outage, with specific questions to ask your electrician. The checklist adds safety recommendations as well as steps to increase security during an outage.

2- If you’re concerned about having some basic equipment available to help you through the outage — like lighting, power for computers, or a generator — check out our Emergency Plan Advisory: Fire related power outage

3- If it’s time your company considered the bigger picture, I recommend our own book: Emergency Preparedness for Small Business

It too has checklists – many of them! They start at the very beginning to help you get over procrastinating, identify ALL the possible risks (not just power outage), and get you started on pulling together a real business continuity plan step by step. (We describe Joe’s secret weapon that he discovered and developed when he was in military intelligence.)

4- In any case, consider assigning someone from your company to attend the upcoming webinar being offered by Agility on May 15, 2019, 12 – 1 p.m. MT. These webinars last just one hour, and are crammed with interesting info. May’s topic:  Ask the Business Continuity and Disaster Recovery experts. You can reserve your spot here: https://www.agilityrecovery.com/event/free-webinar-ask-the-bcdr-experts/ 

(In case you’re wondering if I have any particular affiliation with Agility Recovery, I don’t. As you know, I am constantly researching resources, and I simply feel very comfortable recommending them.)

With 70% of businesses anticipated to lose power sometime in the next 12 months, this is an important topic for all of us at Emergency Plan Guide. I urge you to take steps now to protect yourself and to keep an outage from becoming a disaster.,

Before you leave, please read the P.S. for just a few more examples of what happens when power goes out at work!

Virginia
Your Emergency Plan Guide Team

P.S. We all have a good idea of what happens when the power goes out. At least, what we notice immediately. BOOM!  No lights! Meeting rooms, offices, halls, closets, bathrooms, stairwells – all dark except for emergency lighting.

But look a little further, and you may discover . . . .

  • Automatic gates and doors are frozen open, so you have no security.
  • Communications are down.  No landlines, no internet access, and the heightened potential for increased cyber vulnerability.
  • Bathrooms don’t work if you have power assisted toilets or water faucets.
  • UPS systems everywhere are pinging, pinging, pinging. (How long will they last?)
  • There’s no power to the kitchen = no coffee, no microwave, no refrigerator. (Medicines may be compromised, food starts spoiling immediately.)
  • Time clocks and timers may shut off.  (How to track employee time, industrial processes, scheduled communications?)
  • A/C and air handlers go off, same with pumps in the basement and any electricity-driven medical devices (Environment may become uncomfortable, even unsafe.)
  • Your out-of-gas vehicles can’t refill their gas tanks or recharge their batteries.
  • The only tools or pieces of equipment that work are those with battery backup or that run with rechargeable batteries. (What about dental drills? Auto repair tools? Restaurant stoves and freezers?)

What will happen in YOUR workplace when the power goes out? You need to know, so you can be prepared. Otherwise, this outage could truly become a disaster for the business.


Automatic Survival Habits

Share
Automatic survival habit - looking for exits at the theater

How would you rate your everyday survival habits?

It’s such fun to get caught up in whether your next knife should be full tang or folding, or maybe assisted folding. Whether you need a sleeping bag that has synthetic insulation or goose down. Whether to buy last year’s model hand-held radio (to save a lot) or splurge on the very latest version.

These are fun decisions and here at Emergency Plan Guide we engage with them just like you do.

But these decisions are one-time. What we want to talk about today are:

Simple survival habits as second nature.

As you know, we are part of a neighborhood emergency preparedness group. A lot of what we do is aimed at getting other neighbors to take even their FIRST step toward preparedness!

Actually, we work on at least a dozen survival habits, trying to turn them into second nature to improve the readiness and resilience of the whole community.

Below is a recent list of survival habits we’re trying to instill in everyone around us. As you look through the list, ask yourself.

  • How well do you measure up?
  • What steps would you add for your neighborhood group?
  • How will you share the list with them?

20 Easy and Smart Automatic Survival Habits

1 – Heading to the grocery store? Buy just one or two extra cans of food for your emergency supplies. You don’t have to stockpile everything all at once!

2 – Adding to your emergency food supplies? Be sure to get things you like and eat regularly. That way, you can eat from the front of the shelf and replace at the back.

3 – Building a better emergency kit for your car? You may be able to get a used backpack or tote bag at Goodwill – cheap, serviceable, and unnoticeable.

4 – Keep your car half full of gas all the time. (I keep mine 3/4 full!) Nothing worse than being caught in a traffic jam, watching that gas gauge go down and down!

5 – Keep your car locked when it’s parked, even at home. An unlocked car is an invitation a passerby might not be able to resist.

6 – Whenever you go into a building – theater, store, school – get in the habit of noting the location of other exits. In an emergency you may want to avoid the way you came in. This survival habit may save your life in an active shooter situation.

7 – Update the emergency info on your refrigerator at least twice a year, when the time changes. Have there been changes in your medications? The phone numbers of your emergency contacts?

8 – Don’t have the Vial of Life info on your refrigerator? Here’s what we did with our group.

9 – Need help? Can’t call loudly enough to be heard outside your home? Consider adding a simple whistle to your key ring or someplace else where you can reach it in an emergency.

10 – Flying? Keep your shoes on for the first 3 minutes after take-off. That’s the most dangerous time, and if you have to evacuate you don’t want to do it bare-footed!

11 – Teach your grandchildren their first name and last name. Absolutely necessary if they get separated from their parents.

12 – When you’re planning for emergencies, start your planning with the most likely emergencies, not the most severe. For most people, the most likely emergency is a power outage. Not too hard to plan for! All you need right away is emergency lighting and a way to keep warm.

13 – Heat wave and no A/C? Don’t try to tough it out! Put up shades to block the sun coming in the windows. Take a cold bath. Drape yourself with wet washcloths and towels.

14 – Power out during cold weather? Pick a small room, hang or tape blankets over the windows and door, get into bed with blankets.

15 – Best emergency lighting? Inflatable solar lanterns and/or battery-powered lanterns. It should go without saying that you have a flashlight in every room, with extra batteries handy.

16 – After a couple of days of eating out of cans, you’ll really appreciate having condiments to spruce up the taste! When you are out, collect packets of BBQ sauce, honey, jelly, soy sauce, ketchup, syrup, etc. for your emergency food stash.

17 – Canned meat may not taste so good, but it will give you the same protein as fresh meat – and will last for years. Add canned chicken, tuna in oil, and spam to your supplies.

18 – Don’t forget to refresh your first aid kit. Throw out dried up bottles or anything that’s gotten wet. You may want to add liquid skin as a new way to treat scrapes and cuts.

19 – Be sure to store an old pair of shoes, comfortable for walking, in your car. Heels or flip-flops won’t work if you have to hike for help!

20 – If you haven’t done it yet, freeze some plastic containers filled with water. (Leave space at the top for the water to expand.) Use the containers to keep your freezer fully packed. Saves energy when you have electricity, provides emergency water when you don’t!

Do all these ideas sound familiar?

Have you taken any of these steps and/or practiced them more than once? Have they become automatic survival habits?

I hope the answer is yes!

Virginia
Your Emergency Plan Guide team

P.S. Here’s something that you may find it interesting in light of the things we’ve talked about lately.

It turns out that Amazon (where we are Associates) has a service called PRIME PANTRY where you can buy everyday first aid, household, cereals, packaged items, etc. – what they call “everyday essentials” – and have them delivered for free. You don’t have to buy huge quantities, either.

Click on the ad to find out more. This may be a convenient way for your group to stock up on some of the things you want for your survival kits.


Specialty First Aid Kit

Share

Are you ready for these unusual threats?

First Aid for Everyday Emergencies

Before we get to our specialty first aid kit discussion, here are a couple of safety rules to live by:


Do not allow a large knife to fall handle first into the garbage disposal while the disposal is running.

What you will discover, if all the stars are aligned, is that that knife will fly out of the disposal and scythe its way through the kitchen, slicing anybody in its path.

In our case, the person in the way was Joe. Specifically, the back of his right hand. (Do not ask for more details.)

And here’s another rule based on personal experience plus a LinkedIn post I read earlier this week:


Assume that, as you set up for an important business presentation, the hinge of a piece of equipment will strike back, gouging a nice chunk out of a finger.

Not exactly everyday accidents, but not unheard of, either! Certainly, breaking the first rule, and then reading about the second rule, made us rethink our own first aid kits — and consider at least one specialty first aid kit as our next project.

Have you considered the state of your own first aid kits?

Where are they?

If you are at home when the wayward knife strikes, your first aid kit is probably in the bathroom. So before you head there to get it, you grab a clean dish towel or a handful of paper towels, and tell the injured person to “apply pressure” to keep more blood off the floor.

If you are in the conference room of a client when the equipment attacks, you may have NO first aid kit handy!

 You certainly don’t have a dish towel and probably don’t have paper towels, either!  (Maybe there will be some napkins over on the table with the coffee.) You grip your bleeding hand with the other hand, getting both of them covered with blood.

Now, if you’ve been through a CERT course, you may have a first aid kit in your car, which is about 2 blocks away in a parking structure. In this case, 2 blocks away is too far away!

How about adding a specialty first aid kit?

Since experts seem to agree that the kitchen and the bathroom are the two most dangerous rooms in the house, why not have kits in each room?

A kitchen kit

In the kitchen, cuts and burns are probably your most likely emergencies.  Your kitchen kit has to have the necessary to respond for all sizes of each.

In our case, a simple band aid wasn’t adequate for the cut on Joe’s hand. And the cut seemed too deep for that handy liquid skin.  We needed to stop the bleeding and close the cut. So, we used folded gauze and several strips of tape, cut to fit. (Which means we had to have scissors, too.)

So, our new kitchen kit will include all those, plus band aids and burn spray.

Traveling kit for business meetings

Our event planning list always has a tool box (for larger events) and a first aid kit. But that’s when we expected a team to be in action.

Now even our smaller meetings – at least, those with presentations! – will contain a specialty first aid kit for pinches, gouges and scrapes! It needs to be small enough to fit into a tote or briefcase.

I picture a ziploc bag with essentials: gauze, tape, band aids, antiseptic cream.  And from the LinkedIn post that I mentioned, this great idea: a RED washcloth to absorb and/or wipe up blood and make it less noticeable!

Your “master” first aid kit — that one in the bathroom — can have dozens of items, depending on your location, your skill level, etc. The list below has suggestions for one of the simpler specialty first aid kits described here.

What do you need for YOUR kits?

Of course, by now you may have thought of a specialty first aid kit that YOU need – like for the kids’ sporting events, or for the woodshop, etc. Each kit might need other items, but you can start with the list below, and have them assembled and IN PLACE with little delay. Click on the image to go to Amazon where you’ll find other styles and sizes.

1-A selection of band aids. These are fabric, which I think holds better than paper.

2-Liquid skin is great stuff. (Some people use crazy glue, but I prefer the “official” item!) Use when a bandaid will get in the way, get dirty, or can’t cover the scrape. This is a pack of two.

3-Gauze pads for cleaning, absorbing. They come in sterile and in non-sterile packs.

4--Antibacterial cream. You probably already have a tube or two of your favorite cream. This one is ours.

5-Spray for burns. Comes in a pressurized can, like this, or in a pump version. If you’re building a specialized first aid kit that will be traveling a lot, you might prefer the pump version.

6-First aid tape comes in different widths, made of different materials, can be self-adhesive, etc. This one is basic, breathable and works pretty well for any use.

7-You may already have scissors at home, too. For your traveling kit you’d want a small, slim pair like these.

I don’t always show prices, but in this case I was trying to show that with a relatively modest outlay you can have WHAT YOU NEED – in the kitchen and in your briefcase — to stop the bleeding, relieve pain, and take the first steps to get the situation back to normal.

If you already have a good supply of everything you need, just divide things up and you’ll be set! Otherwise, grab a couple of the missing items and complete each specialty first aid kit on your list. It will be worth it!

Virginia
Your Emergency Plan Guide Team

Update from March 7. Following my own advice from last month, I went out last week and added a can of first aid disinfectant spray to my new kitchen first aid kit. I have already used it twice when I grabbed a hot pot handle with bare fingers. You can also get mini-sized sprayers, perfect for your purse or key ring. Click on one of these recommendations from Amazon and shop there to see what might fit your kitchen needs.


What To Do When You Discover a Gas Line Leak — Part Three of a Series

Share

(Part Three of a series aimed at neighborhood or workplace teams)

Gas main shut-off

Where and how?

“OMG, I smell gas!”

In the first two segments of this special article we talked about where gas lines run, why they leak and how to recognize a leak. Now, let’s talk about what to do if you actually discover a gas line leak!

What to do depends in large part where you find the leak.

When you discover a gas line leak in the home

Don’t forget Rule #1. If you detect a STRONG smell of gas in your home, leave the house immediately. Do not do not switch on or switch off lights or appliances. Do not make a telephone call from within the house.  Do not start the car.  When you are at a safe distance, now call 911 and/or your utility to report the smell.    

What’s most likely, though, is that you will get a weak smell of gas. In that case, remain calm. Think.

You may be able to solve this problem yourself and safely.

Possibility #1. Pilot light

Nearly every home has a couple of pilot lights – usually in the gas furnace or water heater, gas stove or oven. The pilot light is really a “starter” flame. When you turn on the appliance, the pilot light ignites the gas coming out of the main burner.

In older appliances, the pilot light burns 24/7. In newer ones, it is turned on when needed by an electronic igniter. (You may hear a clicking sound as it activates.) Fortunately, when the pilot light goes out, it triggers an automatic shutoff valve to the gas supply. So you won’t usually smell a gas leak from this source.

However, in older systems, your pilot light could go out from something as simple as a draft or spill. If the system doesn’t have an automatic shut-off valve you would smell leaking gas.

In this case, you can attempt to relight the pilot light yourself by following instructions on the appliance. They are likely to be something like this:

  1. Turn off the appliance and wait at least 5 minutes for any leaked gas to dissipate.
  2. Be sure you know where the pilot flame is located. (It may not be near the on/off knob.)
  3. Turn the knob from OFF to PILOT.
  4. Hold down the reset button (could be the knob itself) and light the pilot light with a long match.
  5. Keep holding the reset button until the flame is burning steadily, maybe a minute.
  6. Turn the knob to ON.

If the light doesn’t stay lit, try again. If it still doesn’t work after a couple of tries, quit and call for professional help.

Tip: You can’t light an electronic pilot system using a match! If the electronic system isn’t working, be sure the appliance is turned off and call for professional help.

Action item: Check all your home appliances now, before there is any leak!  See where you have pilot lights.  Are they ever-burning or do they have electronic ignition?

OK, so much for pilot lights. You’ve checked, they are working, and you still smell gas.

Possibility #2.  Appliance connection

Most often, if it’s not the pilot light, when you discover a gas leak in your home it will be from an appliance with poorly designed, faulty or damaged connection.

  • Sniff to see if you can detect where the rotten egg smell of leaking gas is coming from.
  • Coat a questionable pipe or connection with soapy water. Bubbles will appear where the leak is located.
  • Look at the color of the flame on the appliance. Is it blue (good) or orange (not so good, could suggest a leak)?
  • Check the outside of the appliance for soot or scorch marks.
  • Do you have excessive condensation on the inside of your windows?

In these cases, if you identify the culprit appliance, get assistance from a qualified expert – probably your gas company. You may be advised to shut off the gas to the appliance, or even to the whole house. In either case that expert will have to re-set the system once the leak is repaired.

Action item: Do any of your appliances have shut-off valves? Look for them when you’re looking for pilot lights. Usually the shut-off is a handle that turns 90 degrees.

When you discover a gas line leak in a larger pipe or larger system

If you discover a gas leak in a larger pipeline or facility, move to a safe distance and notify your gas system operator or property owner and/or 911. (Review signs of a major pipeline leak in Part 2 of this series.)

Do not attempt to find the exact location of the leak, to shut off the pipeline or to fight any gas main fire. Dealing with a large pipeline leak is the business of professionals.

However, in a BIG disaster . . .

You may be called upon to shut down an entire system to protect against fire or the spread of fire.

The more you know about where gas lines run and the shut-offs on those lines, the more options you will have.

1-Building or home shut-off. In an emergency, shutting off the gas to the building likely means shutting it off at the meter. To do this, you’ll need to know where the meter is. You will also need a wrench and an understanding of the ON vs. the OFF position of the valve. Here’s a sample of what a typical home shut-off valve looks like. The shut-off consists of a rectangular piece sticking out of a round valve.

Gas meter turn-off

And here’s an illustration showing the ON (open) and OFF (closed) positions of the valve.

Open or closed?

You can turn a shut-off valve using a regular crescent wrench. Or you can use a non-rusting tool specially designed for the purpose, like the one shown on the ground in the photo or the one below. (Click the image or the link to go to Amazon, where you can buy this tool — less than $15. As always, full disclosure: We are Amazon Associates and may get a commission.)  In either case, you must store the tool near the valve. And you may need to stand on the wrench to get the valve to turn!

SurvivalKitsOnline 515100 On-Duty Emergency Gas and Water Shutoff 4-in-1 Tool for Earthquakes, Hurricanes, Fires, Floods, Disasters and Emergencies

Action item: Find your home and building shut-offs and place a wrench at each location. Figure out a way to attach the wrench nearby to keep it from disappearing.  Suggestion: Consider a bulk purchase of shut-off wrenches for members of your neighborhood group. It’s an easy and valuable way to recognize their volunteer efforts. And it means they will be better prepared to help neighbors in an emergency.

2-Automatic valves. Some valves, such as seismic gas shut-off valves, operate automatically. They aren’t required, and many professionals don’t trust them – but you may have them on your system. Action item: Find out if any automatic valves are installed on gas lines leading to your home or in your place of work.

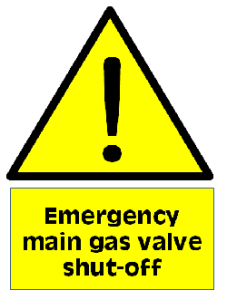
3-Gas main. When it comes to shutting off gas at a larger line, the shut-off may be a larger version of the wrench turn off, or it may operate with a large wheel and gear. It may be locked. Often, these valves are painted red. Action item for your group: locate the pipes and the shut-offs leading to your building or community. Larger line shut-offs may be marked with a sign like the yellow one at the start of this article. Or they may not be marked!

What procedures are in place for shutting off the gas?

As we have emphasized, shutting off the gas is a major event to be taken only with due deliberation. It will require professional assistance to get the gas turned back on again. It may take days for all gas service to be restored.

You or your group may have to make decisions about shutting off the gas. In our case, members of our community actually took official training in how to shut off the main valve. All residents have been shown how to shut off the gas to their own homes.

Questions you need to have answers to BEFORE something happens

  • Who is authorized to shut off the gas?
  • Which valves are they authorized to shut off?
  • What training and tools do these authorized people need? Do they have what they need?
  • How likely is it that authorized and trained people will be on hand in an emergency, when immediate action may be required?

With this info, you will be far more prepared in case of an emergency.

Getting even more answers

Over the years we have found that “the authorities” are loathe to share gas line information. However, as we have built up our own skills and knowledge, we have better luck at getting more. Above all, we have a better understanding of just what our role should/could be in an emergency.

One of our most effective guest speakers was a representative from the Fire Department who talked about the various gas lines in our neighborhood. (We have the usual mains and feeder lines PLUS a high-octane aviation fuel line running beside our community.) Action item: Get a speaker on natural gas safety from your own fire department or local utility. Prepare some questions in advance and send them to the speaker.

Your invitation will cause that fire official to update his or her knowledge about your neighborhood or building, as well as remind your neighbors and/or co-workers to be more alert. (In our case, the fire department speaker was NOT up to speed on gas mains that had recently been installed near us as part of a construction project!)

_______

We started this 3-part series with the question, “Are you sitting on a gas leak right now?” The question still is pertinent. We hope that by now you have a better idea of how to respond!

And one last disclaimer. We are not professionally trained experts on gas main construction, maintenance or procedures. We offer this special series for informational purposes only. Any time you consider messing with your gas supply or gas lines, we recommend that you do it with the assistance or under the supervision of professionals. Gas is inherently dangerous so treat it with all due caution.

But as emergency responders, you can’t ignore it!

Virginia
Your Emergency Plan Guide Team

Here are the three parts of this special series. Please read all three parts.

Part One: Are you sitting on top of a leaking gas line?

Part Two: Detecting a gas line leak

Part Three: What to do when you discover a gas line leak


Detecting a Gas Line Leak — Part Two of a Series

Share

(Part Two of a series aimed at neighborhood or workplace teams)

“Do you smell gas?”

“Could this be leaking? What is it carrying, anyway?”

If you are concerned about the potential for a gas line leak, you probably want to start by finding the location of gas lines in your neighborhood. You will discover that this takes some time and effort!

Still, using the online resources and your local utility, as described in Part One of this series, you can usually get a good start.

You will note that there are three main types of gas lines:

  1. Transmission lines — Long-distance lines, typically more than 10” in diameter (can be as big as 42”), move large amounts of gas under high pressure (200 – 1,200 psi).
  2. Distribution or main lines –- These lines operate at intermediate pressure (up to 200 psi) and are 2″ to 24″ in diameter.
  3. Feeder or service lines – These are the lines that actually connect to your home. They are not so easy to track once they disappear underground. Typically they are less than 2” in diameter, and they carry odorized gas at low pressures, below 6 psi.

For a local emergency response group, your feeder or service lines are probably what you’ll be looking for. But we have to repeat, utility companies are concerned about vandalism and sabotage or even terrorism, so they don’t publicize the location of these lines. Think persistence and relationships!  We were actually able to get the construction drawings showing location and sizes of the gas lines for our community.

Action item: create a map of your neighborhood, showing the different gas lines as you identify them. If possible, note the location of shut-off valves.

Should we assume we’ll experience a local gas line leak?

Yes!

The gas distribution system is made up of thousands of miles of pipelines, and they operate safely most of the time. Still, all of the time, the system is under one or another source of stress.

Stresses include:

  • Built-in weaknesses from poor connections, bad welds or incorrectly installed equipment
  • Corrosion or wear from aging
  • Weather-related shifts (winter freeze-thaw cycles) Think of the extreme weather events we’ve experienced in the past couple of years!
  • Seismic shifts or earthquakes

And, of course, there are construction accidents where a hand shovel or large piece of equipment punctures a line.

Just to give you an idea, I cut this out of the news yesterday.  There are notices like this every day!

Gas line leaks reported

. . . from the news yesterday

It is the responsibility of the system operators to monitor and maintain the pipelines under their jurisdiction.

In some states legislation has been introduced to require the utilities and/or operators to report on leaks and on their progress in fixing them. As you can expect, the utilities oppose this legislation, saying that the number of leaks is exaggerated and that fixing more leaks faster would be too expensive. Find out about legislation in your own state!

Can we prevent a gas line leak in any of these pipelines?

No.

But you can do your community a service by finding out what sort of gas line maintenance takes place.

And, you may be able to prevent a disaster by detecting and reporting a leak!

How can we tell if there’s a leak?

1-Use your nose in and around the house!

The most common indication of a leak is SMELL. An odorizer called Mercaptan is added to feeder lines for the very purpose of making a leak noticeable.

What does Mercaptan smell like? Most people compare it to “rotten eggs.” In any case, it is distinctive and obvious.

If you just aren’t sure what natural gas smells like, spend a few dollars for some “scratch n’ sniff” samples! Makes a great addition to a meeting about gas leaks! Here’s a link to Amazon – 30 stickers like the one shown as the left, only $3.00 when I checked today!

Natural Gas Mercaptan Stickers

2- A gas sniffer will help pinpoint the leak.

If your environment may have more than one suspicious smell, or if you sense you might easily get used to a smell and stop noticing it, consider investing in a gas sniffer. This is a simple hand-held gadget that can identify a leak for sure. Some sniffers tell you what gas is leaking. They use a meter and/or an audio sound (“tic, tic”). As always, the more you pay for equipment, the more functions you get.

Our local emergency response groups own a couple of different ones. The “pen” model (less than $40) is used by one group to check around their emergency gas generator when they start it up.

The “tube” model (around $150) adjusts from broad to fine sensitivity in order to pinpoint the precise location and type of gas that is leaking. We have used this model with startling success, using it to identify a propane leak from a gas BBQ, among other leaks. (We also have a neighbor who insisted she smelled leaking gas. It turns out it was smoke from marijuana coming from a nearby shed. We didn’t pursue to see if its use was legal or illegal!)


Pen style

General Tools PNG2000A Natural Gas Detector Pen


Tube model

UEi Test Instruments CD100A Combustible Gas Leak Detector

Action item: If you suspect or are plagued with frequent leaks, you may want to add a gas sniffer or two to your collection of safety equipment. They are easy to operate and can add a degree of confidence to your suspicions. In a big emergency, a gas sniffer might make it easier to decide to shut off the gas entirely.

Be on the lookout for signs of leaks from larger pipelines.

You’re not likely to find yourself walking along the route of a larger underground pipeline, but a leak can show up anywhere. (We experienced a gas-line break right in front of our community. A back-hoe hit a line that according to the construction crew “wasn’t on the map.” )

Here are some ground-level signs you might notice:

  • An unexpected hissing, roaring sound
  • Dirt or dust blowing up from the ground
  • Water bubbling or spraying
  • A spot of dead or brown vegetation when it’s green everywhere else
  • Flames coming from the ground

As a reminder, the gas in these larger pipes may have no odorants added.

What should we do when we discover a leak?

When you do identify a leak, you need to act quickly and decisively. Your goal is to avoid a build-up of gas around a leak or a build-up from gas “migrating” to a nearby area (such as a basement) – creating conditions for an explosion.

Your first response should be to get safely away from the area (hundreds of feet away!) and then CALL 911 or the gas line operator to GET THE GAS SHUT OFF.

As you move away, warn other people about the danger, too, and encourage them to move to safety.

Above all, DO NOT CREATE A SPARK by flipping a light switch, lighting a cigarette, starting an engine, turning on a battery-operated light, etc.

Action item: Discuss with your group where a break might logically occur in your neighborhood. Identify some ordinary actions that someone might take that could start a gas fire. In our community, starting up the car to “get away from the danger” is likely to be the most dangerous action possible. The catalytic converters of cars in a traffic jam can reach 1,600 degrees – plenty hot enough to start a fire if there is the right mixture of gas!

Is that all we can do? Shouldn’t we turn off the gas?

Calling 911 from a safe distance is the first and most important step. Not creating a spark is the second.

Every member of your family and of your workforce should know and be able to follow this rule.

However, as an emergency response group, there is more you should know and consider when it comes to getting the gas shut off.

We will address some of these options in Part Three of this series.

Virginia
Your Emergency Plan Guide Team

Got any stories about gas line leaks or explosions? Feel free to share . . .! And don’t miss the first article in this series.


Everyday Household Supplies as Tools for Survival

Share

Tin Foil Frying Pan

Don’t you love lists? I see them everywhere I turn online.

And I read a lot of them, particularly those in the survival niche. Mostly, they confirm what I already know. But every once in a while I find survival ideas I hadn’t really considered before.

What follows are some ideas using everyday household supplies as tools for survival. Maybe you can add them to your list, too!

Six reasons to have aluminum foil in your survival supplies.

Who knew all the things it can do in an emergency – and, for that matter, every day!?

  1. Cooking over a campfire? Wrap smallish pieces of food in a foil pack, cook over or buried in coals.
  2. Add a foil reflector to block the wind from your fire, and to direct its heat.
  3. Position a foil sheet to reflect and enhance the light from the sun or from your lantern.
  4. Use crumpled foil under a bar of soap and under a scrub pad to keep them from getting gunky or rusting.
  5. Fold a small piece of tinfoil and stick in your flashlight between the battery and spring to improve a loose connection.
  6. And this, from Reader’s Digest. (And see my image, above.) Make a temporary tin foil frying pan by covering a forked stick with a double layer of foil. Make a slight depression in the space in the V of the fork — that’s where you’ll put your food for frying!

Four more survival uses for everyday household supplies using everybody’s favorite — duct tape.

I’m sure you have plenty of duct tape at home. I hope you have some in your survival kits, too. The “flat packs” are much lighter and more convenient than the heavy roll. (See below.)

You can use duct tape to fasten just about anything, but here are a few more ways to use it as a survival tool:

  1. First aid supply – Use thin strips to close a wound. Use thicker strips of tape plus small branches or pieces of wood to create a splint for a sprained ankle.
  2. Twist a length of tape to create a rope for tying anything. Fold a length of tape in half onto itself to create a strap – for a belt, a sling, a carrying handle.
  3. Keep out cold air by closing leaks in clothing using tape. (Don’t tape to your skin. )
  4. Tape together Mylar blankets or large size plastic bags to make a sleeping bag or a shelter.

And while we’re on plastic bags, here are seven ways to put these everyday household supplies to use as survival tools.

Different weights of plastic have different uses. And, of course, the heavier the weight, the more they add to the weight of your survival kit. Here are some often overlooked survival ideas using bags and baggies. (More info, with prices, at the end of this Advisory.)

  1. Trash compactor bags are very thick – and thus work well to manage human waste in a survival situation. Place the bags in the toilet, or in a plastic bucket. (When full, add kitty litter or some disinfectant, close and dispose of.)
  2. Use ordinary plastic bags from the grocery store to line boots (over socks, inside boots) to keep your feet dry. (Probably won’t work in a stream but does fine through wet grass and puddles.)
  3. Use plastic bags as temporary gloves to protect your hands from germs, blood, yucky stuff, etc. (I used one just last week to dispose of a dead rat.)
  4. Large garden size bags can be used to line your pack to keep it dry. Raining? Cut a hole for your head and turn the bag into a poncho. Tape a couple of bags end to end for a makeshift one-person tube tent.
  5. Ziploc bags of different sizes are helpful for sorting clothing (clean, dirty, wet), protecting foodstuffs and matches from the damp, and keeping first aid items readily visible. And you can use a baggie to start a survival fire. A fire?
    1. Fill the bag with water.
    2. Twist to create a tightly filled plastic water “ball.”
    3. Position the ball over fine tinder and use like you would a magnifying glass. The sun shining through the ball of water can heat tinder sufficiently to start a fire! Here’s a great YouTube video from the King of Random showing just how to do it: https://youtu.be/vMcgs7Tx3Hs
  6. And from Primal Survivor, this idea for using a plastic bag to catch fish. Find a stream with fish. Create a sort of funnel in the stream by building a V with stones. (Open end upstream. ) At the tip of the V fasten a plastic bag with its mouth open and a few holes cut in to allow water to flow through. Go upstream and scare the fish so they head downstream – into your funnel and then into your plastic bag!
  7. And a final idea – using a clean clear large-sized plastic bag to capture water from a plant or tree. Pick a NON-TOXIC plant with large leaves. Pull a bag over a large branch with lots of leaves and tie it tightly. Be sure the lowest point in the bag is below the tie. Over time, the plant will release water vapor. The vapor will condense, run down the sides of the bag and collect in the bottom, where you can capture it to drink.  This will take time and patience, but could save your life in an emergency.  You can find an easy to follow picture-by-picture explanation here. https://www.instructables.com/id/Extract-Clean-Drinkable-Water-From-Plants/

I’ll soon be testing both the baggie-full-of-water-as-magnifying-glass and the bag-to-collect-transpiration-from a tree. (No streams with fish near me . . .) I’ll let you know how it goes.

Maybe YOU can test these two ideas with your own kids or other members of a group – Scouts? Sunday school?  Your neighborhood emergency response team?  (Watch the video and check the how-to-pictures first. They include a couple of safety messages you don’t want to overlook.)

Three ways to get everyday household supplies for your survival kits.

  1. Start by going through your cupboards and pull from your regular supplies. You’ll probably have aluminum foil, duct tape and a few assorted bags. If you find ties, pull some of them out, too.
  2. Make a list of other items you might want: flat packs of tape, trash compactor bags, heavy-duty large black trash bags, maybe even that very light-weight see-through bag that will work to capture water from a plant.
  3. If you are part of a group, consider pooling your money and making a bulk buy. By buying in bulk you’ll be able to save money and give everyone a chance to get a few of what they need and not overbuy.

Here are some suggestions from Amazon, where we often go first for our shopping. Since most of these everyday household supplies are probably readily available in your local stores, you may want to shop specials. I’m including price info from Amazon so you can get an idea of costs if you’re shopping for a group. And if you are a prime member at Amazon, all the supplies could be delivered at once, making it easy to get everything distributed.

Buy over time!

Not everyone can run out and immediately buy everything on every survival list. But items like the ones on this list are pretty inexpensive, so you can buy one or two every so often until you have everything you need.

It’s the same with assembling ALL your survival supplies — emergency radio, batteries, food, etc. Slow and steady means when the disaster hits you may not have everything, but you will have more to help you get through than you did last month . . .!

Good luck with your shopping!

Virginia
Your Emergency Plan Guide team


Wildfire Prevention Starts Now

Share

Wildfire hazardWildfires are now a year-round threat

We used to consider “fire season” to be summer into fall, and then winter rains came along. These days, wildfire season seems to be year round!  So we should be taking steps for wildfire prevention year round, too.

Here are 5 Action Items for wildfire prevention. Let’s look at them right now, even while cold January rain is falling outside my window . . .

Wildfire prevention on your own property

I hope that you are pretty familiar with what to do for your own property. Action item #1: Confirm you’re following these basics of wildfire prevention.

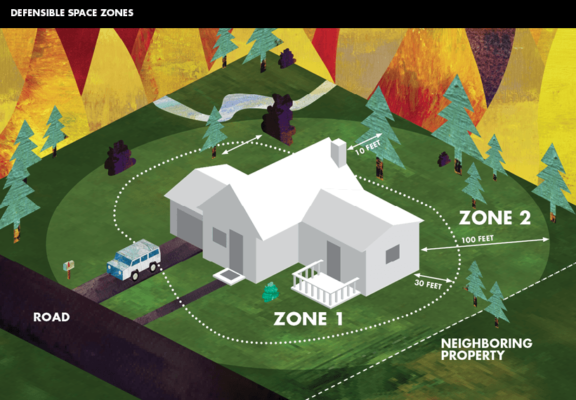
1Maintain defensible space. Maintain an area around the home cleared of brush, dead tree limbs, and flammable plants. In the areas close to your home, chose fire-resistant plants and keep all plants properly irrigated. The image below, showing different defensible zones, comes from the CalFire website: http://www.readyforwildfire.org/Defensible-Space/ .

CalFire zones

State law in California requires properties in wildfire areas to maintain a 100 ft. defensible space. In 2015, The Los Angeles’ Brush Clearance Program set more specific – and more stringent — standards for clearance:

  • 10 feet of roadways
  • 10 feet of combustible fences
  • 200 feet of structures

2Use fire-resistant building materials. Use brick or stone for walls and garden borders. Build decks of noncombustible materials. Re-roofing? Choose fire-retardant shingles. Obviously, you might not be able to make dramatic changes immediately. But at least be aware of changes you should plan for.

3Block embers. Most fires start from embers that catch on the house, not from a wall of fire! Install screens over vents and block access to eaves and under decks, etc.

This is only a partial list! 

I’m in California, where fire danger is particularly high. You may be in a less vulnerable location, or have different issues. So, Action item #2: Check with your own fire department for recommendations or programs for your neighborhood.

For another good overview resource, get this pamphlet from Farmers Insurance. https://www.farmers.com/content/dam/falcon/pdf/catastrophe-brochures/wildfire.pdf

And while we’re on insurance, be aware that your premium may reflect what you’ve done for fire prevention. Some companies may even offer a discount for defensible space and/or fire retardant building.

Action item #3: Talk with your insurance agent about your personal fire insurance coverage.

Wildfire prevention in your neighborhood

It’s one thing to take steps to protect your individual home.  After all, by law you are responsible for it.

But what if you live in a neighborhood of closely spaced homes, condos, or in a mobile home park? What about nearby community buildings? Local schools?  Parks? If they catch fire, you may be threatened, too.

Action item #4: Find out who is responsible for neighborhood properties. Do they know best practices for fire prevention, and are they following them?

You may need to contact a city or tribal agency, a property manager, or a neighborhood association. Once you have a contact, put on your leadership hat.

Are you on or can you attend a governing board that hires landscapers and/or gardeners? Make sure that your board and the landscapers are aware of basic fire prevention techniques for their site. Do they know what to plant, what to clear, what to trim – and do they do it? (Your fire department will surely be happy to send an expert to one of your board meetings.)

Your own HOA or emergency response team can help individual families understand the safest way to maintain private patios and gardens. Hold a meeting. Draft a notice to include with the rental invoice. Train a couple of your team members as “consultants” for people who have questions or don’t seem to get with the program.

Of course, even with well-maintained defensible space, a property can still burn. But if there’s a choice for fire fighters to protect a prepared space vs. an overgrown and unprepared space, which do you think they will choose?

Consider a community project for wildfire prevention

Since 2013, The National Fire Protection Association® (NFPA) and State Farm Insurance have been sponsoring Wildfire Community Preparedness Day.

This is a national campaign that encourages people to come together ON A SINGLE DAY to reduce wildfire risk. This year, Wildfire Community Preparedness Day is on May 4, 2019.

The idea is to get a group to work together on a project or event. Their efforts may be supported by $500 grants from State Farm.

Here’s what some groups have done in the past:

  • 20 volunteers from the Red Cross, AmeriCorps and the tribe prepared a defensible space around the residences of 3 tribal elders in San Diego County.
  • The local fire department and a youth organizations spent 3 days clearing out dead trees and underbrush from Colorado Mountain Zoo.
  • An elementary school created a “Firewise garden” in front of their school.
  • Boy scouts and local residents worked together on a clean-up day, cleaning roofs and gutters, removing vegetation and debris.
  • Four towns in Colorado banded together to rent equipment to remove 66 truckloads of slash from home sites!

What about your emergency response group taking the lead on a project?

A community project might be a great way to motivate your group! At the same time you could help promote wildfire safety and strengthen relationships among residents, local fire department,  community leaders and elected officials.

To get one of the 150 awards being made by State Farm, you’ll have to submit a plan for your project by March 1.

Action item #5: get all the info about Wildfire Community Preparedness Day, including the application for the grant, at this website:  https://www.nfpa.org/Public-Education/Campaigns/National-Wildfire-Community-Preparedness-Day

With the government shutdown still ongoing this week, the whole concept of reducing fire risks seems particularly important. Why? Because thousands of agency employees are not able to do the cleanup and training they would normally be involved in.

Time for us to step up ourselves. Even starting in the rain!

Virginia
Your Emergency Plan Guide team

P.S. This Advisory focuses on preparations you can make BEFORE a fire threatens. Evacuating and fighting fires are separate topics in themselves.

How to Improve Your Chances of Survival

Share

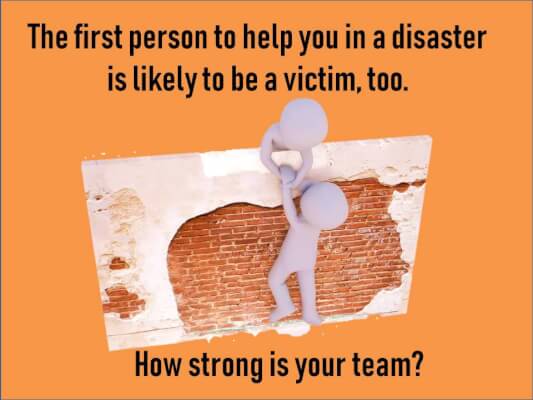
First person to help is probably a victim

Start a new year, strengthen your team.

The first rescuers in a disaster are others who are right there. Your neighbors. Your co-workers. They know you. They know where you are likely to be, and whether they should search for you!

Improve your chances of survival by building a stronger team around you – in your neighborhood and at work.

If you’ve got the start of a team . . .

Last year (2018 was so long ago!) we focused on creating what we think are some helpful blueprints for building that team. To make them more useful, we customized by type of neighborhood you might find yourself in.

Each of the books in our Neighborhood Disaster Survival Series addresses a different type of neighborhood:

  • An apartment or condominium neighborhood, where neighbors come and go, storage space may be limited, and since you don’t own the entire building, some preparedness options are limited. Improve your chances of survival by sharing and working together.
  • A mobilehome community, where building standards vary so homes may be more vulnerable to certain natural disasters and top infrastructure threats include broken gas and water lines.
  • A suburban neighborhood where options may be more varied but homes are so far apart you may not even know your neighbors or where families may have a “My home is my fortress.” attitude.
  • A small business whose owner is typically torn between meeting current profitability necessities and providing for what feel like only potential business or employee losses.

Steady wins the race.

You can’t build a team quickly. The guides go into great detail about building teams. They focus on identifying leaders to start the process, and suggest that the leaders get Community Emergency Response Team training so they share some of the same skills and approach emergencies in a systematic way.

Once this core group is ready to go, its members can begin to pull in other neighbors. The guides have plenty of ideas for ways to attract neighbors and get them involved. Your team will find it easy to arrive at emergency preparedness recommendations for the whole neighborhood. They may even come up with a written plan. All this will improve your chances of survival.

Many, many neighborhoods around the country have followed a similar road to improving their resilience.

But what if you don’t have a team?

What are you doing or planning, at home or at work, to improve your chances of survival?

  • If you have trained CERT graduates in your neighborhood, maybe they have stepped up to take on a leadership role. Or maybe you could encourage them to do so?
  • If you have a property manager or business owner who is tuned in to emergency preparedness, has that person taken some steps for more resilience? Maybe you could suggest and support those efforts? (Lots of ideas here at Emergency Plan Guide!)
  • What if nothing is happening in your neighborhood, and you feel like a voice in the wilderness?

Here in our community our team has shrunk. So we’ve decided that it’s time for a renewed neighborhood effort. We’re starting – again – from scratch!

Set the tone.

won't you be my neighborRemember this cartoon from the Advisory a couple of weeks ago? We’re using it to set the tone for our 2019 team-building effort. Friendly, not threatening or guilt-inducing.

Simple first step.

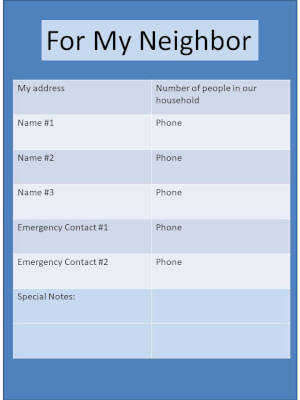
This week, we’re following up with the next step, providing neighbors with a simple form that they can fill out and share. The form is a simplified List of Emergency Contacts aimed at bringing neighbors together who may never really have met.

Emergency Contact InformationHere are instructions we’re sending along with the form:

Fill it out this form WITH YOUR INFORMATION.  Maybe your emergency contact is your daughter. Mention that. And under “Special notes” you could add your pet.

Make a few copies of this information about you, and make a few blank copies too. (You don’t need a form; a simple piece of paper will do.)

Then, step next door and introduce yourself and share this information. Ask neighbors to share their info in return. Exchanging info doesn’t mean you’re promising to be best friends. What you are doing, though, is making our neighborhood a friendlier place, and making it safer and more secure, too.  

A good way to start the year, don’t you agree?

Neighborhoods change, and neighbors change. Here in our own household we’ve noticed one thing that happened in 2018   – we’re getting older!

But no matter the exact circumstances, having good neighbors, and being a good neighbor, will improve your chances of surviving a disaster. We are all in this together!

Virginia
Your Emergency Plan Guide team

P.S. How well do you know your neighbors? Have you exchanged important contact info? Let us know how you went about it! We need all the suggestions we can get, because this seems to be one of the biggest challenges to starting a neighborhood group!

How do YOU shop for the holidays?

Share

holiday gift

Have you succumbed to the excitement of Black Friday?

Whether yes, or no,  how do you compare to other Americans when you shop for the holidays?

  • According to accounting firm Deloitte, 50% of last year’s holiday shoppers said they prefer shopping online to going into a brick and mortar store. Which do you prefer?
  • And although this is supposed to be the time to shop for the holidays (i.e., gifts for others), apparently much of the early spending is on things people want for themselves rather than what they’re buying for others. What’s on your personal list?

Do you shop for holiday gifts with a purpose?

Here at Emergency Plan Guide our major focus isn’t on selling things, but we we definitely believe in gifts.  That’s because . . .

We see gifts as a way to introduce more people to the importance of being prepared for emergencies.

So, following national trends, we take a few days – and particularly at this time of year! — to aim you toward some online purchases to emphasize the value of preparedness . . .

  • For family members
  • For employees or workplace colleagues
  • For yourself!

Let our Top Ten Lists help you shop for the holidays!

Last week we updated our TOP TEN lists to some of the latest best-sellers in the category of Survival Starter Gifts and also in the category of Exclusive Preparedness Gifts. Two different lists, two different price ranges, two different PURPOSES!

If you haven’t yet, please check them out!  Join in the holiday buying tradition!

And we also are pleased to introduce a whole new online source of interesting and inspiring items –a new website!

Announcing  — a new resource for shopping!

Over the years you’ve seen that we are eager, always curious readers. We go in depth into many topics to be sure we understand the whole science behind it. At the same time, we also enjoy not-so-formal articles and books, and we often include links to them.

Every once in a while we come across a book that is just too good to own and not share!  That’s what started EmergencyPreparednessBooks.com

Spread the word about preparedness

On the site we review books that we’ve enjoyed and books we think are essential for your library.

  • We add a new book every once in a while – you’ll see them under “Latest Additions.”
  • We also have a section with ideas for using books to “Help us spread the word” about preparedness. This section is written in particular for people belonging to neighborhood groups or who are part of a business where preparedness plays a role — or SHOULD play a role!

I invite you to find a few moments to browse through the website, read some of the reviews, learn more about why we created the site, and see if any of these ideas or these books fit your list as you shop for the holidays!

And I welcome any comments or recommendations YOU have for great, inspiring, engaging, educational, exciting or fun books YOU would like us to add to our list for your fellow readers!

Here’s the link to the new site. You’ll recognize it as looking just like the image above!

Thanks – and happy shopping!

Virginia
Your Emergency Plan Guide team


A Tsunami of Threats

Share

Too many threatsThe number of threats can be overwhelming.

In just the past 2 weeks we have been bombarded with stories of threats that turned into disasters and near disasters.  I’m sure you’ll remember these:

October 10, 2018Michael makes landfall as a Category 4 hurricane in the Florida panhandle. 50 people dead, billions in losses.

October 15, 2018 – 60,000 without power as PG&E shuts down lines over more wildfire fears.

October 24, 2018– Police intercepted suspected pipe bombs sent to high-profile Democrats, in what New York officials described as an act of terrorism.

October 29, 2018Eleven people were killed and six others were injured on Saturday when a gunman opened fire in a synagogue in Pittsburgh, Pennsylvania.

October 29, 2018 –Boeing jetliner crashes after take-off in Indonesia, all 189 aboard presumed lost.

This is just a short list. There were more. And throughout the country people suffered from local tragedies that didn’t make the national news.

How can we do a realistic job of preparing for so many threats?

Consider a systematic approach.

1-Start with a written list of threats.

In writing our Neighborhood Disaster Survival Series we found ourselves assembling multiple lists of potential threats. Ultimately we put together one list for homes and a different and considerably longer list for businesses.

You can build your own list. Get your team together in front of a BIG white board or easel (plenty of pages of paper) and brainstorm all the threats that you could possibly face. We have done this a number of times in our group, and we usually come up with 20-40 threats. (This is a great exercise to get people engaged. )

2-Narrow it down to threats that are realistic for you and your community.

Go back over your massive list (!) and start paring it down by removing threats that may be POSSIBLE but really aren’t PROBABLE.

Usually it’s simply a matter of replacing emotional response with common sense and some history.

For example, here’s a short list of threats with some thoughts that can get you started on the paring down process.

  • Every day challenges like power outages – the most frequent disaster in the U.S. (and increasing in frequency). In our local neighborhood we have to include water main breaks and gas line breaks and/or shut-offs, because of the age and quality of our infrastructure.
  • Potential localized dangers to your neighborhood, like transportation accidents – particularly high risk in industrial areas. If you live or work near an airport or beside train tracks, near chemical plants or certain industrial processing installations, threats of accident might be high; otherwise, you could probably take these threats off your list.
  • Natural disasters like floods or storms, earthquakes, tsunamis, and wildfires – likely tied to your geographic location. These are always first on everybody’s list, and their likelihood is pretty easy to evaluate.
  • Mass shootings and workplace violence – nearly always the result of personal motives and/or mental illness issues. Very difficult to anticipate or prepare for, but you could be blamed for negligence if you ignore the possibility.
  • Attacks with weapons of mass destruction – suddenly appearing on our list after decades of being absent. We’re talking here about the threat of nuclear explosion or biological or chemical attacks. If you live and work in a major metropolitan area, particularly a government center, your risk would be higher.
  • Cyber attacks – almost 3.25 billion data records were compromised in the U.S. during the first half of 2018; new vulnerabilities are being exploited as data moves to the cloud. As you read this, attacks ranging from simple virus infections to ransom claims are happening to individuals and businesses around the world.
  • Lawsuits – becoming more frequent but one of the easiest threats to protect against.
  • Terrorism – Whether international or domestic, terrorism results in dramatic news coverage. It is still relatively rare in the U.S., but the number of incidents has been rising.

3-Begin preparing for these selected threats.

Pick the most likely threats and start with those. What can you do to find out about the threat in advance? Can you mitigate (lessen) the impact by making changes NOW? What processes, tools and people might you need to recover once the threat has materialized? What’s the plan for assembling these resources, training, etc.?

Warning: Don’t let your emotional reaction prejudice your efforts.

During the “threat analysis” exercise you may find that people’s individual biases and emotional reactions are likely to emerge. Their experiences may make it tough for them to think dispassionately about a given threat.

Moreover, research has shown that most people seem to find man-made disasters more frightening and rate them as more severe than natural disasters. Terrorism tops the list for emotional reaction, even though it is very low on the probability list.

Try not to let these biases get in the way of making good decisions as to which disasters you actually prepare for!

Reminder: Plan to repeat.

Analyzing threats is something you’ll want to do more than once, because circumstances change. Build a repeat look at threats into your plan!

Virginia
Your Emergency Plan Guide team

P.S. We were hit this week by another of those “local” disasters. It had to do with a Windows 10 update. Our entire network just threw up its hands and quit.  So while I would normally have offered you our list of over 80 threats to business, I just haven’t been able to make it happen!  If you can’t wait, please just buy a copy of Emergency Preparedness for Small Business and you’ll find that list in the Appendix, along with a multi-page Risk Analysis Worksheet that can help you set priorities!  I’ll report in later about how we recover!

Prepare Your Pet for an Emergency

Share

Pet in emergency

Last night our neighborhood response group hosted a special presentation from a local non-profit, SoCal Animal Response Team. The group’s mission is to help animals in disasters and to educate owners to have a pet emergency preparedness plan.

They stress preparing yourself but also how to prepare your pet to come safely through an emergency!

Here are some things to keep in mind as you prepare your pet for an emergency.

Everyday emergencies can keep you from getting home to your pet.

Even on a regular day, there are a lot of reasons why you might not make it home to your pet . . .

  • There’s a broken pipe at work and you have to stay to help clean up.
  • You get in a traffic accident on the way home and end up in the hospital.
  • A gas leak threatens your home neighborhood and you are trapped OUTSIDE the safety perimeter. No one is allowed in.

OK, so this emergency lasts all day and all night and well into the next day. In the meanwhile, what is going on with your small house pet?

Baby is wandering around in the dark, no lights, no heating. Baby finished off food and water a long time ago. Time to pee – where to go?  Time to poop – no one to take Baby for a walk! Baby whines, whimpers, howls and then gets mad and tears into a few pieces of furniture and starts destroying them.

You get the idea!

Prepare your pet with a Pet Buddy.

This is a friend or neighbor, someone who . . .

  • Knows you have a pet and notices you don’t get home as usual.
  • Knows and likes the pet, and the pet knows the Buddy.
  • Has a key to your house, knows where food, leashes, and pet medicines are kept.
  • Would be willing and able to get your cat into a pillowcase and thus into the carrier.
  • Has been authorized to take your pet to the vet for medical care if the pet gets injured. (Probably the vet will require a signed release for this.)

Being a Buddy is a big responsibility. But if you don’t find and train that Buddy, you could arrive home to a sick and hostile pet and a wrecked and reeking house.

Action item: Plan a meeting of a few neighbors (with pets) to see if you can come up with some Buddy pairs. Everyone’s pet will be safer and you will all feel better!

Prepare your pet for immediate evacuation!

Some emergencies hit without warning, but in many cases you will have some time to get packed up and into the car and headed for safety.

If you have 15 minutes, you will not have time to run through the house to grab everything you need, much less what your pet will need.

Heck, in 15 stressful minutes you may not even be able to find your pet! (Our speakers told horror stories of pets crawling into unreachable spaces.)

The plan for bigger emergencies:

  • Have your pet’s emergency kit already packed and sitting right there next to your own survival kit. (Need a reminder of what all should/could go into that kit? Here’s our recommended supplies list.)
  • Know where your pet is likely to hide and have a good way to call it to come out – for example, shake the food bag!
  • Keep important ID papers in a waterproof container (folder), along with the pet carrier. (See list of important pet papers here.)

If you are directed to a shelter, keep in mind that no matter what the law says, not all shelters will accept pets. If you’ve done your homework, you will already have a list of “pet friendly” hotels or kennels in the region. Clearly, if the disaster is widespread, these facilities will fill up fast. If you can, evacuate early to have the best chance of finding shelter for your pet.

Two-week plan for managing your pet after the hurricane, earthquake, etc.

Of course, there’s no one-size-fits-all for disaster response. Your home could be fine, but the power is out. Your home could be partially damaged, or cut off by floods, snowed in roads, etc.

To prepare your pet for a two-week emergency, at a minimum you’ll need food, water and medicines not just for yourself but also for your pet. How much will depend mainly on the size of your pet. Of course, you’ll need warmth, light, etc.

In addition, our speakers gave us important reminders about what we might watch out for in the way of expected pet behavior in an extended emergency situation.

If your home is damaged, your animal will be disoriented, just like you are. Long-standing pet “markings” (with urine) may have disappeared or moved so your pet won’t recognize his or her territory.

Remember – your house pet is likely so domesticated it cannot protect or defend itself from danger. You have chosen your pet to be your companion. Now it’s your job to be your pet’s protector.

Some things to keep in mind:

  • Inside, keep the pet in a bathroom. Safe, able to be closed up and cleaned up, no place for pet to hide.
  • If you go outside, keep the pet closely leashed to protect it from injury or from being attacked by other animals. If there is debris — broken wood, broken glass — make sure your pet is wearing booties.
  • If you’re in a group setting, you may need to muzzle your dog to be sure it doesn’t injure other people or animals. (If your dog is injured, it may bite YOU. Muzzle it.) Your cat can’t be muzzled, but injuries caused by a cat’s scratches or bites are particularly dangerous. Our speaker said that anytime their workers are bit or scratched they go immediately to the emergency room! Control your cat.
  • If your pet does escape, a couple of things can happen very quickly. First, your small pet is likely to become a victim of other hungry animals. Second, it may take only a few days for it to “revert to wild.” If you see the pet again later, it may not recognize you, may react aggressively, and may have become part of a dangerous pack of other animals. Approach with extreme caution.

Action items to prepare your pet to make it through an emergency

1-Have a pet emergency kit packed and ready to go. Include items you might not normally need, such as booties or muzzles.

2-Build and maintain a list of pet-friendly hotels and kennels – not just in your own town but wider afield in case you need to evacuate some distance away.

3-Update important identification papers for your pet, including medical information and photos.

4-Familiarize your pet with its carrying container. (Many animals find their cages/containers a very comforting place to sleep in, particularly when they have a favorite blanket or piece of your clothing.)

5-Plan a way to help organize neighborhood Pet Buddies.

Clearly, this Advisory does not cover the whole picture. But it’s a start –  with more to come! Please share with others who have house pets – and that probably means over half of your neighbors!

Virginia
Your Emergency Plan Guide team

P.S. Knowing your neighbors’ pets is important. If the pets are always in the house, you may not realize just how many of them there are, or what KIND there are, until the walls fall down!

Where to put Mom? Emergency Preparedness in Care Facilities

Share

What are the chances of you or Mom ending up in a nursing home?

Man with disability in wheelchair

Updated statistics will be coming out after the next census, but right now it looks as though the chances of a senior citizen spending time in a nursing home or skilled care facility are about 1 in 4.

This should immediately bring to mind the 14 people who died last year in Florida when their nursing home air conditioning failed. You may even remember tragic images from Katrina.

Reassure yourself about emergency preparedness in care facilities you are considering!

I’ve been searching for professional advice on this topic, and I found it on one of my LinkedIn groups.  After a series of back and forth messages, Nicholas Thorpe kindly agreed to provide Emergency Plan Guide readers with questions to ask.

You’ll see that his questions fit right in with the way we try to learn more about being better prepared.  Please check out his expert article below, and share with other family members and friends. 

Long-Term Care and Emergency Preparedness — Knowing the Right Questions to Ask

By Nicholas Thorpe,  8/2/2018

When considering long-term care facilities, we all look to ratings, accreditations and high standards.  One of the most overlooked considerations, however, is emergency and disaster preparedness.  Does the facility you are considering have plans in place for adverse conditions, be it man-made or natural disaster?

New rules for emergency preparedness in care facilities are now in effect.

Following Hurricane Katrina, the Center for Medicare/Medicaid Services (CMS) began to work on new rules to govern how emergency preparedness should be handled at various medical facilities. In the fall of 2017, the new rules for emergency preparedness went into effect for seventeen (17) health care provider types (to include long-term care facilities). These rules are meant to correct the lack of preparedness that was seen following Hurricane Katrina and other major disasters.

These seventeen (17) provider types are now required to be in compliance with the emergency preparedness rule as part of their eligibility to receive reimbursement for services and care through Medicare and Medicaid. These rules can be found on the CMS website at New Rules .

My role now in a health care preparedness coalition in central North Carolina is to work with health care facilities so they are better prepared for emergencies and disasters and to help them comply with the new CMS emergency preparedness rule.

Ten questions to ask as you evaluate emergency preparedness in care facilities.

The following questions will help you evaluate the level of emergency preparedness as you consider care facilities for your family member:

  1. Are you regulated by CMS and do you comply with the new Emergency Preparedness Rule?
    1. Have you been surveyed recently?
  2. What methods will you use to contact me should something happen to my family member or following an emergency or disaster?
    1. Do you have any additional methods you can utilize to contact me?
    2. Who/how can I contact the facility to learn the status of my family member during/following an emergency or disaster?
  3. Does your facility have a way to transport residents that is not reliant on local emergency services agencies in the event an evacuation is necessary?
  4. Does your facility have any agreements in place with other sites to relocate residents in the event of an evacuation?
  5. Does your facility have a generator that powers the HVAC system (heating and air conditioning) and refrigeration for the entire facility?
  6. How many extra days of food do you have on site should your supply chain be disrupted?
  7. How is security maintained in the facility?
  8. Has your staff had active shooter response training?
  9. Is your staff trained in providing first aid, CPR, and applying tourniquets?
  10. How often do you practice emergency procedures that aren’t fire drills?

Choosing a facility should not be solely based on how prepared it is for an emergency. How it is prepared, however, should be high on your list of criteria when deciding who should take care of the people who mean the most to you.

Nicholas Thorpe works for the CapRAC Healthcare Preparedness Coalition in Raleigh, North Carolina.  He has completed more than 1,000 hours of emergency preparedness training, trained over 200 first responders and over 1,000 volunteers in emergency management procedures. Nicholas holds a Graduate Certificate in Homeland Security from the George H.W. Bush School of Public Service at Texas A&M University, and a Bachelor of Arts in history with a minor in political science from The American University in Washington, DC.

Please share this important information widely. There are other questions you can add to this list, but these will get the conversation started.

Thanks again to Nicholas!

Virginia
Your Emergency Plan Guide team

A couple of years ago we wrote an article that’s a good companion to this one: Leave the disabled behind? 
This is a topic we’ll be addressing more in the future.