Category: Action Items

A New Source of Fear

Share
Malcolm Nance Gooks

Recommended Resources

A Dose of Reality on ISIS and the Terrorism Risks

Virginia writes: “Terrorism is not a favorite topic of ours. A couple of months ago I wrote to provide some updated statistics. I figured that would hold us for a while. Today, though, recent news has compelled us to write again on this topic, from a different perspective. You may recall that Joe has background in military intelligence, so he has authored this Advisory.”

The 17th of May, 2015 was one of the most important days in the battle to defeat ISIS.

It marked the successful conclusion of one of the most important missions undertaken by US Special Forces – a raid on the operational center for the entire ISIS organization.

The center housed comprehensive files on the ISIS government and fighting forces in Iraq and Syria, from the leadership right down to the rank and file of their organization. And it was all on computer.

The Obama Administration authorized the undertaking. The target, located in Eastern Syria near Deir ez-Zor directly in the heart of ISIS occupied territory, was heavily fortified. Despite the defense of the target, it was completely overrun.

Our Special Forces returned with the electronic keys to the kingdom in the form of as much as seven terabytes of data that included virtually all of the financial transactions, resources (including payroll and biometric records) on their officials, their army and captives as well as addresses, cellphone numbers and the IP addresses of their remote locations.

This coup yielded the battlefield intelligence our forces needed to begin a systematic program to eliminate (or “vaporize”) — in the place and time of our choosing – ISIS leaders and key personnel.

This 2015 mission marked a turning point in the fight against the ISIS terrorist organization.

As the operation continued, it has had particular importance to us on the home fronts in the US, Europe and the Middle East. It means that there will be fewer skilled terrorists re-entering the country, and because we have more complete data on many of those who manage to escape the lethal battlefield, they are easier to apprehend.

Thus, as might be expected, we can expect more terrorist strikes by “amateurs.”

They will choose targets of opportunity, selected at random – which makes such attacks harder to anticipate and defend against. And, while any one person’s odds of being a victim of terrorism are small, each attack that appears on the news meets a goal of the organization, to frighten the populace and inspire the gullible.

On the news today we heard an interview with Malcolm Nance, expert on intelligence and terrorism, speaking about the latest ISIS recruiting effort using a 10-year old “American Boy.” Details are still sketchy, but Nance’s comments followed the theme developed above. Now that ISIS fighters are systematically being removed, ISIS propaganda is aimed at widows and children, hoping to turn them into suicide bombers!

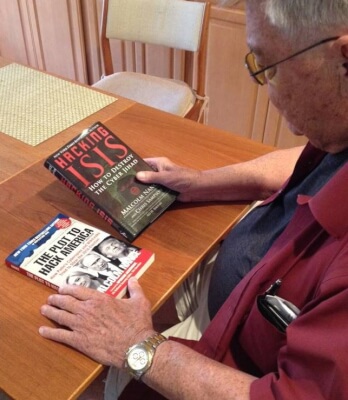
I have confidence in Nance’s assessments, and have gone so far as to purchase and study three of the many books he has written over the past 10 years or so. (The image at the top of this Advisory shows me with two of his most recent books.) If you want to understand more, I recommend these three highly:

Hacking Isis focuses on the “cyber” aspect of ISIS’s recruiting and communications, and what we are doing to track and defeat them in cyberspace.

The Plot to Hack America details how Putin and WikiLeaks “tried to steal the 2016 election.” Obviously we learn more about this story every single day . . .

The Terrorist Recognition Handbook, first written in 2003 and updated in 2014, is a heavy-duty 394 page textbook on terrorist activities, with a particularly compelling chapter about suicide terrorism.

What can we do to protect ourselves, here at home and abroad?

For you and us, the best defense is the advice we have given repeatedly . . . “Situational Awareness!”

Train yourself to constantly take stock of where you are and what is going on around you. Always be cognizant of vulnerable crowd situations, how and where to exit dangerous situations and, above all, exercise caution and intelligence about how, when and where to bury your nose in your tablet or smart phone.

As for self-protection in random attacks, it is highly unlikely that any weapon or self-defense training will prove more useful than fleeing the scene or finding some place to hide and letting the professionals handle the attacker.

You may have a chance against a single attacker whose motive is intimidation, harassment or burglary, depending of course on your age, physical condition and self-defense skills. We have written before about simple weapons that you can use competently and conveniently. One of the simplest and most effective is a sturdy mechanical pen or pencil. Better yet is a “tactical pen” that is an actual ball point pen made of sturdy steel. Proper use of this “weapon” can effectively wound an attacker, seriously enough to make escape possible . . . or, even mortally wound the assailant.

But the story is different when faced with an active shooter or a knife-wielding assailant whose sole motivation is to kill you – and who isn’t worried about his own life. Even a citizen carrying a knife or gun may find it ineffective or worse, may lose control of the weapon and find it turned on them.

The bottom line — the more aware you are, the less likely you will be caught up in a dangerous situation, and the less likely you will need a weapon.  Practice awareness!

Joseph Krueger
Your Emergency Plan Guide Team

Are you sabotaging yourself?

Share

Hiuding in the woodsDo you ever roam the internet, checking out different survival forums and blogs?

Well, naturally, I do – to better understand “the communities,” learn about new products and practices, and stay up to date with some of the latest science regarding emergency response.

When I find interesting or exciting new ideas, I try to share them on our Advisories.

One theme I don’t share very often – the paranoia I see out there.

Here’s sort of how it goes:

“When the SHTF, expect bad guys, marauding gangs, vigilantes, even government troops, to start roaming the streets coming for you and for your supplies so you’d better be ready with weapons and lots of ammunition and be able to turn your home into a fortress or better yet, escape to a hidden, hardened survival shelter where you can wait it all out.”

I’m not saying some bad stuff couldn’t happen, or that having an escape plan doesn’t make sense. What I do question, though, are the implicit recommendations in this scenario. I see three of them:

  1. “Treat all others as potential aggressors.”
  2. “Arm yourself with serious weapons.”
  3. “Pull yourself into your shell and close the doors after you.”

As I see it,

The reality of the most likely emergencies is going to be very different.

For example, last week we talked about an emergency that shuts down your work completely, like a fire or flooding. In a situation like this, you may suffer a personal disaster because you don’t have money in the bank to meet your bills while you are out of work. Others you work with may suffer, too. But roving gangs as a threat? Probably not.

We’ve often talked about the most frequent emergency at work – a power outage. Statistics suggest that as many as 70% of businesses can expect to experience an outage during the next year, whether weather-related or from equipment breakdown. Once again, your company, its customers and maybe even shareholders will suffer – but all of you being well armed won’t make a bit of difference.

In fact, in the U.S., disasters have seldom left people on their own and scrambling for supplies, for more than a few days – the exceptions being Hurricanes Katrina and Sandy.

So, our recommendations at Emergency Plan Guide are built on a different set of assumptions.

Neighbors. I know them, their kids and their dogs. I may not consider them “best friends,” but they’ve never hesitated to lend a helping hand. They’ll be the first to show up in an emergency. Why wouldn’t I look to them for help?

Self-defense. Yes, as I wrote in my bio, I grew up with guns and I’m comfortable with them. But I think the emphasis on guns (handguns, shotguns, automatic weapons) — and also tomahawks, and machetes — encourages people to arm themselves who have no business having weapons. They will make an emergency situation even worse.

(As embarrassing as it is to admit, when Joe went through specialized weapons training with the military, he learned how to shoot all sorts of weapons. Unfortunately he couldn’t qualify as a marksman with any of them! So weapons may be more dangerous for us than for intruders . . .!)

Self-reliance. Yes, be sure you have a sensible stash of food, medicines, etc. But to count on one family to have everything it needs? How much easier to share the cooking, child or elder care, and medical knowledge and skills. How much more effective to share tools and work together on repairs. Share the fear — and share confidence and hope when you can. Self-sufficiency is positive; isolation is lonely and negative.

And as for the government . . .

Again, some survivalist blogs and forums have members who are passionate about hating the government, the police, and, in fact, any “authority.”

Here at Emergency Plan Guide we have been fortunate to build good relationships with all kinds of “authorities” in our community. I write often about the fire fighters and police and the CERT team members with whom we work closely.

One of the advantages to these relationships is that we have a pretty good idea of what to expect from the authorities in an emergency. In an emergency, we won’t be guessing – or second-guessing – what they are likely to do.

For example:

  • We know how our police department has been trained to respond to active shooters – and how their procedures have changed in the past year or so. (We’ve even been invited to participate in a drill as civilians caught in an active shooter situation.)
  • We know what emergency facilities our local first responders have. Heck, we’ve been inside most of them, and seen the equipment in action!
  • We’re tuned in to local emergency services that deal with homelessness, missing people and drug overdoses. We know who to call and what to say to get an appropriate response.
  • We’ve checked and are clear on how our local police force is handling coordinating with ICE on immigrants in our community.
  • We receive regular bulletins on how local schools plan for emergencies.

This isn’t everything we’d like to know, but it’s a pretty good start!

What does it take to get up to speed about local policies and procedures?

Here’s some of what our local group members do on a regular basis.

  • We follow what our city is doing by going online to the city website.
  • We take tours when there’s an open house at a fire station or the police department.
  • We sign up for official emergency alerts (AMBER alerts, etc.).
  • We track the police department via its Facebook page.
  • We’re on the list to get invitations to CERT follow-up trainings. (The most recent one was on terrorism.)
  • We invite “the authorities” to come to our local emergency response team meetings as guest speakers – and then ply them with questions. (Yes, we have put them on the spot from time to time!)
  • We subscribe to various online industry news feeds.

If you’ve been reading our Advisories, then you know we also share what we learn from these various field trips and events – so our immediate neighbors and several hundred Emergency Plan Guide subscribers from across the country know what we know.

In our estimation, by choosing NOT to know details like those above, and NOT being open to working with a group,  you are sabotaging yourself and your chances of coming through a disaster.

No, I don’t expect the authorities to “save us” in an emergency. In fact, they have made their limitations clear. Frankly, I’m glad to know that they WON’T necessarily show up immediately . . . because it gives me an incentive to do a better job of my own preparedness.

But our philosophy has been, and continues to be, to include family, friends and co-workers in our planning, because . . .

The more we all know, the safer we all will be.

Thanks for reading.

Virginia
Your Emergency Plan Guide Team

How to Light a Flare

Share

Accident in Darkness

Winter darkness makes accidents on the road hard to see and even more dangerous.

Having a good accident kit in the car can help protect YOU, and might help protect others if you come across an accident scene.

An accident kit is different from a car survival kit. The survival kit has stuff for YOU – warm clothing, flashlight, food, water, etc.  The accident kit has stuff for the CAR, like jumper cables, emergency reflector triangles, flat tire inflator, and flares.

Does your car accident kit have road flares?

When it’s dark, there’s nothing better than flares to warn oncoming vehicles of an accident, a stranded car or even an injured person. Flares are easy to get, easy and safe to store, and they last a long time. The problem that people have with ‘em is . . .

How to light a standard industrial flare?

Our CERT group had the opportunity to practice one evening with the police department. We hung around in our official vests, enjoying the cool evening and the chance to see each other again. When it came time to light the flares, however, some of us looked pretty dumb.

It’s not as simple as you might think!

Here are some guidelines that I took away from that evening.

1Have more than one flare so you can warn oncoming vehicles and direct them around the accident.

2-Pick where you want each flare to go BEFORE you attempt to light it. Once the flare is burning, you will not want to carry it around to be positioned! It’s BURNING and shooting off white-hot bits!  Some things to keep in mind:

  • If there’s spilled gas, don’t use a flare nearby at all.
  • Keep flares on the road so they don’t roll into a ditch or catch vegetation on fire.
  • Go to where you’ll place the flare, and then light it.

3-Remove the cap on the flare to expose the rough striking surface.

A flare has a plastic cap. Part of the cap contains a rough “striking surface.” Under the cap is the “igniter” end of the flare. You want to hold the striking surface in one hand and the flare in the other.

4-Light the flare by scratching it across the striking surface.

Extend both arms and scratch the flare across the striker in a movement going away from your body.

It’s rather like striking a very large match. Too soft a strike, nothing happens. Too hard, and you can break the “head” off the match.

In our group, most people had trouble getting the right amount of pressure and speed to get the flare to light. One person actually broke the head off the flare because he “scratched” too hard.

5-Place the ignited flare where you had planned to place it.

Put the cap back on the non-burning end of the flare. If you’re carrying it, keep the flame pointed down so you don’t get any drips on your hand.

Don’t drop the flare – you could break or extinguish it. Don’t place the flare in a puddle – it could go out.

If it’s raining, place the flare so any running water goes around the base of the flare and not directly against the flame end. You can prop it up to keep it dry.

6-The flare will burn for 10-30 minutes.

When you’re ready to extinguish it, break off the burning end and let it burn out. You cannot easily smother this flame.

(In our group, we picked up the burning flares and carefully tossed them a little ways down the road. When they landed the burning end broke off.)

After practicing, we all felt more competent.

It’s like so much else. Until you’ve practiced, you really can’t count on being able to make it work! So here’s a suggestion:

Buy a supply of flares and set up a practice. Even if everyone doesn’t attempt to light a flare, everyone in the group will clearly see how it’s done – and what NOT to do! A great CERT group exercise, and a great family exercise, too.

Hi-tech No-Flame Alternative  — LED, Battery-driven Flares

Obviously, First Responders use “real” flares because they work! Everyone recognizes just what they mean, and starts paying attention as soon as they become visible.

But not everyone is ready to handle industrial flares as described above!

If you find this just too challenging, consider a good alternative: plastic strobe light flares that are safe and comfortable to use.

These flashing, reusable flares come in two styles – stand-up flares with a tripod base, and round, disc-style flares that lie on the ground or attach magnetically to a car.

I personally prefer flares that are really bright and can be seen from all sides – so the disc style would not be my first choice.

In fact, here are flares that we own. (We also own reflective triangles made by the same company). I particularly like that they come in their own case; otherwise, the flares (and their bases) can get lost in the trunk of the car.

Click on the link or the image to get full details. (As you know, we’re affiliates at Amazon so this link will take you there.)

Magnatek LED Flashing Roadside Emergency Beacon Flares-Two RED Flares with Solid Storage Case

A couple of hints if you’re considering flares like these.

  • Each flare has 3 different settings, one of which converts it to a flashlight. Handy.
  • The flares use AAA batteries. If you leave the batteries installed in the trunk of your car for weeks and months, ultimately they will corrode. So, store the batteries in a baggie UN-INSTALLED but in the package with the flares. Of course, it makes sense to PRACTICE installing them as soon as you get the flares so you’ll be able to do it in the dark and when you’re nerves are frazzled because of an accident.
  • These flares also have magnetic bases so you could place one on TOP of your stranded vehicle for more visibility.

(This image – for one order — shows the front and back of the case. It’s misleading. Each individual case comes with two flares. If you want more than two, then you’ll have to order more cases.)

Another good idea for a stocking stuffer!  (A very large stocking, perhaps!)

Virginia
Your Emergency Plan Guide team

P.S. Again, a reminder to check the status of the batteries in your emergency lights, flashlights, etc. They ultimately do go bad if not recharged or replaced. Now’s a good time to do that.

Communication Challenges in an Emergency

Share

Once again, Emergency Plan Guide offers some tips for business or neighborhood CERT teams.  Today’s subject: communicating with people in a disaster situation.

 Last month we talked about the importance of succinct and clear radio communications. Today, succinct and clear are just as important, but this is a situation where you are dealing with a non-professional. It’s a situation that may be uncertain and unfamiliar to you both. Communication is going to be a challenge, no matter what.

Action Item: Use this Advisory to start a discussion in your group on potential problems. You are likely to be able to add more specifics based on your environment.

Person with disabilities

“Not getting through?!” 

In a big emergency, whether you are a concerned citizen, an Emergency Response Team member, or a First Responder dealing with victims or potential victims, you may find your words just not getting through!

You are asking urgent questions or giving urgent commands.

But the people you’re dealing with just aren’t responding!

Before you overreact and start yelling, run through this list in your mind. If you can identify one of these problems, and its solutions, you’ll have a better idea of what to do next for better communications.

Don’t forget to start by introducing yourself!

In any emergency situation, start by introducing yourself and why you are there.

For example: “My name is Joe, I’m a member of CERT, and I am here because there’s been an explosion and we need to move you to a safer location.”

Tell the person where they are going and what they need to take with them. If you know, tell them how long this move is likely to last. Repeat that it’s urgent that they get started . . . and that you are there to help.

If you know the person’s name, use it to start your sentences.

If the person has a care-giving companion, address your remarks to the person, not the companion!

What to do if the person doesn’t respond to your commands.

There are a number of things that could be preventing your audience from understanding your words and/or what they should do. Here are a few problems, with tips for how to address them.

The person doesn’t understand what you are saying.

1- Whether the person doesn’t hear well, doesn’t speak English well, or has mental health issues, here are some ideas for improving communication:

  • Make sure they know you are there to help. Get their attention by calling out and flicking the lights.
  • Get face to face with the person and at their level; don’t yell down at them or across the room.
  • Speak simply, clearly and slowly. Use hand gestures in speaking.
  • Repeat your commands or requests as necessary. If still no understanding, use DIFFERENT words to explain; don’t just repeat the same thing over and over.
  • Write your message on a paper, and let the person write back.

2- You are dealing with an elderly person who is resisting or confused.

  • Tell the person you are there to help.
  • If the person needs to leave the home, reassure them that this will only be temporary.
  • Gather medicines (or at least a list) and any portable medical equipment.
  • Let them know how and when they will be able to contact family.


What if the person isn’t able to follow your commands?

1- Person has a service animal and you aren’t sure how to proceed.

  • The animal must be kept with its owner. A service animal is like an extension of the person – it is not a pet.
  • The service animal must be on a leash or in a harness but does not need a muzzle.
  • Don’t try to give the animal instructions or use its harness to direct it. The animal will respond only to its owner.
  • Do not feed or pet the animal.

2- Person has mobility problems (walker or wheelchair in room).

  • Ask to be sure you understand the person’s capabilities. For example:
    • “Can you stand or walk without your walker?”
    • “Can you get down the stairs without my help?”
  • Assume the person knows how you can help. Let her tell you the best way to do it.
  • Assume the person knows how her equipment works. Let her give instructions about how to attach or detach parts, move the chair up or down stairs, etc.

3- Person declares or you think he is visually impaired.

  • Announce your presence.
  • Visually impaired does not mean hard of hearing. Speak in a normal tone of voice.
  • State the nature of the emergency, tell him what needs to happen, and offer assistance.
  • Do not reach out and grab the person to move him. Let him take your arm or rest his hand on your shoulder and then lead him.
  • Warn of stairs, doorways, ramps, etc. before you reach them.
  • To help a person sit down, place his hand on the back of the chair.


Communicating in a disaster takes extra thought.

By and large, we understand and are able to automatically put many of these tips into use. In an emergency, though, we may allow our own excitement to make the situation more challenging than it needs to be.

Take a deep breath, think it through.

It will be so much easier dealing with someone who (finally) understands than trying to force them, confused and frightened, into action.

Virginia
Your Emergency Plan Guide Team

P.S. The best resource I’ve found on the topic of communication with people with disabilities is called Tips for First Responders, from the Center for Development and Disability at the University of New Mexico. You can get copies of the booklet here: http://cdd.unm.edu/dhpd/tips/tipsenglish.html

P.P.S. Resources for dealing with people with disabilities all echo this point: these are PEOPLE FIRST.  Start with the assumption that they have many abilities. For an interesting perspective about the concept of “People First” – written by a person with disabilities — check out this article from the Huffington Post.  http://www.huffingtonpost.com/2013/07/15/disability-etiquette_n_3600181.html


Gift That Will Save a Life

Share

Vial or File of Life – a Great Gift Idea for Family or Employees

We are constantly looking for ways to engage our communities in “preparedness thinking.” It’s not always easy. For some reason, many people prefer to fall back on “It won’t happen to US!” as the reason they don’t do any planning.

However, everyone has seen an ambulance pull up to a home or business, lights blazing. Everyone stops for at least a moment to wonder what is happening inside.

We can use this fact to raise awareness in our neighborhoods or workplaces. Here’s a GIFT that you can arrange for that people will value – and that could make a difference between life and death.

The Gift: The Vial of Life

At a recent meeting with the Fire Department we were reminded that when First Responders are called to an emergency in a home, they automatically look for the victim’s VIAL OF LIFE.

Vial of Life
What is the Vial of Life?

The Vial is really simply a container that holds essential medical information for the people in the house – information that First Responders will want to know if they have to give emergency treatment.

Originally, the info was put into an actual vial (like a medicine prescription bottle) but these days, the preferred container is a simple zip lock Baggie. You can see the plastic baggie in the image (blue stripe).

What goes into the Vial of Life Baggie?

The Baggie holds a filled-out Medical Information Form. It’s the form in the picture, with places for info such as:

  • Name of person in trouble
  • Name of Doctor
  • Medical conditions
  • Current medicines/prescriptions
  • Allergies
  • Contact information for family

Where do I put the Vial of Life Baggie?

Identify the Baggie by placing a decal with a red cross on the outside. Fold the Medical Information Form and place it inside.

Then fasten the baggie to the refrigerator door with tape or a magnet.

(Naturally, you’ll want to keep the Medical Information Form updated – that’s why it’s best to use a zip lock style baggie so you can take papers out and replace them.)

How does the Fire Department know I have this information on my refrigerator?

Depending on the layout of your home, place the second decal with a red cross on the front window or door to your house. This will let the Fire Department know you have a Vial of Life Baggie on the refrigerator.

Even without the second sticker, they will likely automatically look there for medical information.

Anything else I need to know?

Depending on your circumstances, you may want to put other information into the Baggie. For example . . .

  • If you have appointed someone else to make medical decisions for you in an emergency (common for senior citizens), you may want to include that info along with directions to where the full document can be found.
  • Your Advance Health Care Directive, which tells what emergency life-sustaining treatment you want, can also be included. (That form is available online and must be witnessed by your doctor.)
  • Finally, if you have specific end of life wishes, such as the desire to donate your body, you may want to include that info, too.

These documents are important.

Without the Vial of Life information, emergency personnel will follow their STANDARD PROCEDURE – which may NOT be what you want or can even survive.

How to Use the Gift with Your Group

If you want people to participate, you have to make it easy for them.

The “easiest” is to create Vial of Life kits, already assembled, and pass them out to all the members of your group. Each member of the family needs one!

You can go to http://www.vialoflife.com to get the masters for everything you need.

Assemble into individual kits:

  • Instruction sheet
  • Baggie
  • 2 Decals (print your own using color printer onto white labels), one for the Baggie and one for the door
  • Medical Information Form

If you prefer, turn this into a group activity. Provide sheets of decals, piles of forms and instructions and the baggies and have group members set up an assembly line to separate and assemble the kits.  Next step is to distribute kits to neighbors, family members, etc. (You could add a pen as an extra incentive to get the form filled out!)

We distributed Vial of Life kits to our community about three years ago. Many of our neighbors, who don’t participate in any of our neighborhood emergency response team activities, still have their Baggies and point proudly to them.

The Vial of Life has been a successful and inexpensive awareness builder for our team. Add it to your own group’s agenda!

Virginia
Your Emergency Plan Guide Team

If you are looking for other emergency response team ideas for group activities, please don’t overlook the book of CERT Meeting Ideas I put together earlier this year. You can get details here.

Secure Your Space

Share

The Great ShakeOut Hits California

Our community is “celebrating” the annual earthquake drill here in California on October 20. We are joining a crowd of 9.4 million participants (so far).

Secure Your SpacePlus, just two days ago we emerged from a heightened earthquake alert resulting from a swarm of 140+ small quakes near the base of the San Andreas Fault. That’s the seismic fault that’s going to give birth to the long-overdue “Big One.”

So it seems time to take another look around the house to Secure Your Space, as the ShakeOut people say.

We put together a worksheet for our neighbors, and I thought it would be a good tool to share with all our Emergency Plan Guide readers.

(The form I created for our neighborhood group has a space for recommendations to be made by a handyman that we’ve engaged to go to people’s homes. The version shown at the left in this Advisory is a little different. It figures YOU will be making the changes, hence the “to-do list” terminology!)

No and Low Cost Recommendations for Quake Safety

These are all pretty straightforward. It just takes setting a time for a “walk-through” and then making obvious changes to your living space.

As you do your walk-through, look at furniture placement, and not just heavy or decorative items that could fall and break.

When we returned home after the San Francisco quake in 1989, one of the most dramatic things that had happened was we couldn’t get into the bedroom because a bookcase had fallen over, completely blocking the door.

Handyman Help for Quake Safety

You may or may not already be a handyperson, so some of these suggestions may require that you get a few simple tools. Generally, the idea is to stand in the middle of the room and imagine that everything loose starts flying at you.

How do you tether or fasten down the items that could hurt you?

Keep in mind:

• Flexible fasteners may be better than stiff ones, which can break in a large jolt.
• Rubberized pads may stop heavier items from shooting across the room, but of course won’t keep them from falling to the floor.
• A wire barrier or a lip may keep items on a shelf as long as the shelf stays on the wall.

This Secure Your Space list is aimed at simple things you can do to improve your chances. It doesn’t get into major improvements, like blocking and strapping your water heater, or reinforcing your foundation. We’ve covered some of those elsewhere.

Today, let’s just take care of a few items that should not be left unaddressed.

Need a shopping list of earthquake safety items?

Here are some items from Amazon. You could click on the links, order them all, or items like them, get them delivered within just a couple of days, and have everything you need for an earthquake safety family activity!

Picture or Mirror Hanger

The usual hardware or hobby pack of picture hangers is designed for light pictures, but the sawtooth version of a hanger, or any hanger that counts on simple gravity to hold the wire on the hook, will not be adequate in an earthquake. You are looking for something that can carry 50, 70 or maybe even 100 pounds, and keep it on the wall!  Here are some ideas for hanging heavy items.

Hangman 3-Inch 100-Pound Walldog Wire Hanger (WDH-100-2)

And the wire to go with it . . .
Hillman Fasteners 121128 Mirror Hanging Set Heavy Duty

Big Stuff on Shelves

When it comes to electronics on the shelves in our office, we start with rubberized mats under our printers and computers. We also have a mat under the one desktop tower that is still on the desk. (The other tower is on the floor.) I also use rubberized shelf paper in the kitchen under my plates, and actually between some of the serving platters.

I really love this stuff. Get enough of it because you’ll find many uses for it.

VViViD Non-Slip Rubberized Plastic Mesh Shelf and Drawer Liner Non-Adhesive Sheets (12″ x 20ft, White)

Appliances and Furniture

I said above that for our computers, we “start” with rubberized mats. The next step is to fasten all appliances and furniture down with flexible safety straps, so they won’t go anywhere when the world starts shaking.  Of course, what you use to fasten things down depends on their size, their weight, where they are located (how far to a wall stud), etc.

TV monitors are probably the most likely thing to fly in an earthquake. Tie ’em down! Next most important are bookcases, appliances and other furniture. Here are several models of straps and cables to consider.

QuakeHOLD! 4520 Universal Flat Screen Safety Straps

Quakehold! 4163 15-Inch Furniture Strap Kit, Beige

Quakehold! 2830 7-Inch Steel Furniture Cable

And one model of strap (not from Quakehold!) that seems to be all-purpose:

TV and Furniture Anti-Tip Straps | Top Quality Heavy Duty Strap, All Metal Parts | All Flat Screen TV/Furniture Mounting Hardware Included | Lifetime Guarantee (2 Pack, Black)

Objets d’art and Collectibles

Every home has a shelf or cupboard with beloved figurines, plates, vases, whatever. If the shelf falls, or the cupboard opens, these precious items will be destroyed. So, some suggestions:

  • Can you place these objects in a closed cupboard instead of on an open shelf?
  • Run a wire or fishing line barrier along the front of the shelf to keep books from falling.
  • Add a simple lock to be sure the cupboard or cabinet door won’t swing open in an earthquake. (Check under “child-proofing your kitchen.”)

Most important, “glue” treasures down with museum wax from your local hardware or craft store. It holds!

Quakehold! 66111 2-Ounce Museum Wax

Kitchen

I mentioned above what we found in the bedroom when we got home after the 1989 earthquake. In the kitchen was an astonishing mess of broken dishes, broken jars of pickles and peaches, flour and spices, appliances and potted plants.

Again, all kitchens are slightly different. Do a kitchen walk-through. What could fall or move? What will happen if cupboard doors come open? Moving heavy items to lower shelves is the obvious first step. Selectively applying child-proof locks or safety straps may be the next best improvement.

A Weekend’s Worth of Work

Doing the appropriate moving, measuring, drilling and installing will take more than 5 minutes. Depending on your level of skill and interest, it might take all day or even all weekend.

But all it would take is one good shake and EVERYTHING ON THIS LIST  — mirrors, pictures, bookcases, furniture, computers, cupboards, TVs, food, glassware, souvenirs, collections — could end up in a jumble of broken trash in the middle of the room. And you’ll be lucky if you aren’t in it somewhere.

So, join in your own region’s Great ShakeOut and make some safety improvements. You’ll sleep better for your efforts.

Virginia
Your Emergency Plan Guide Team

I mentioned some articles on more serious infrastructure improvements for your home. Check these out:


What Will You Take When You Evacuate?

Share

Emergency exit


Remember the movie “Sully”? Talk about emergency response!

Sully tells the story of the emergency landing of a commercial airliner on the Hudson River in New York in 2009. Captain Chesley “Sully” Sullenberger brought the plane down on the water after engines were lost when the plane hit a flock of geese.

Two great moments from the film.

The day after the movie we used it at our neighborhood meeting to highlight crisp and clear emergency radio communications.

Remember when Sully was asked if he wanted to attempt a landing at Teterboro (NJ), and we all knew that it was just too far given how low they were, how they were losing altitude, how the motors wouldn’t re-start, etc.?

Sully responded to the complicated situation and to the question with just one word: “Unable.”

The movie had another wonderful moment that inspired me to write. At the last minute, after Sully had checked the entire sinking plane twice to be sure no passengers were left, he made his way back up to the cockpit. He grabbed a clipboard, then turned and jumped out of the plane.

I don’t know what that clipboard had on it.

But it was obviously important. And since everything he and co-pilot Stiles had done so far was “by the book,” grabbing that clipboard was obviously on his list.

And thus today’s Advisory.

If YOU have to evacuate your office or workplace, what would YOU take with you?

Do you have a list? Below is one you can start with. I say “start with,” because obviously every business setting is slightly different.

But every business, no matter how big or small, has certain legal obligations to its employees.

And when the business needs to restart after the evacuation, in the same location or in a different one, it will need certain vital information. Your list needs to have your company’s vital info on it.

What to take in an emergency evacuation

If you would like a full-size copy of the list, click here.

Action Item: Build a customized list.

Again, I recommend that you use this list only as a start. Take the time at your business to build a customized list. Some thoughts:

  • Keep it to one page! Use big print, simple language and the words you use in YOUR business.
  • You may want one list for employees and a different list for management.
  • Be sure employees keep their list handy/visible at all times.
  • You may want to assign certain employees as monitors to be sure certain areas of the office or workplace get evacuated.
  • You may also want to add to certain lists instructions about systems or machinery that need to be SHUT DOWN in the case of an evacuation.

We all use lists for everyday activities. But they work particularly well in the case of an emergency, when people can be rattled and in a hurry. Put some time into building your “What to take” list for your business, and you’ll feel and be safer.

Virginia
Your Emergency Plan Guide Team

P.S. The list, and this Advisory, assume you have a more comprehensive Business Continuity of Business Continuation Plan. If you haven’t really started to build one yet, sign up for our Advisories, because we’ll soon be announcing the 2018 version of our Guide to a Simple Business Continuation Plan.


Why are you a prepper?

Share

My neighbors vote on preparedness. The result?

Preparedness

“Raise your hand . . .”

At our recent homeowner’s association meeting, I asked for a show of hands:

“How many of you have set aside food and water for an emergency?”

Response was good. About 80% of the 100 or so people there raised a hand.

Next question:

“How many of you are prepared to provide your neighbor with food and water?”

Hands that had been raised to answer the first question went down immediately.

We all looked around. Not a single hand was visible. The sound of weak laughter was heard, then it died away.

Even after years of effort in building a neighborhood emergency response group, we recognize that . . .

Being prepared seems mostly to be a commitment to oneself.

On the other hand (pun!), a number of our neighbors are willing to encourage and even help others prepare. Based on the “vote” above, you might not expect this commitment. What’s behind it?

What gets and keeps a neighborhood emergency response group going?

Every so often we quiz everyone in our own neighborhood group about why they are a part of it – when we really don’t have many emergencies to respond to!

Here’s what we know about our members.

  • They have a “social conscience.” The most common answer to why they participate is always the same: “I want to give back.”
  • They feel a sense of responsibility for the community, and typically are engaged with other neighbors one way or another.
  • They acknowledge the risks that face the community. In our case, those risks include earthquake, wildfire, and, more frequently, loss of electricity and water. And, in an earthquake, broken gas mains.
  • They like feeling empowered. Our group members are familiar with the infrastructure of our community. They know where First Responders come from and how long it takes them to get here. They understand how our mobile radio station works and who we’ll be calling in an emergency. And they know the limitations that our property managers operate under.
  • They like their gear. Our members use their walkie-talkies every month, and bring battery-operated lanterns, first aid kits and fire extinguishers to meetings when we advertise a “show and tell.” (And they really like winning the door prize – even if it’s a simple $2 LED flashlight.)


How to encourage more people in the neighborhood to prepare for themselves?

We have found that people who aren’t willing to take steps on their own to prepare for emergencies will sometimes respond – slowly and maybe begrudgingly – to repeated messages of . . .

  • Guilt (“What will your children say when they are hungry and you didn’t think ahead enough to provide for them?”)
  • Fear (“Imagine being trapped under debris, in the dust and dark, unable to move . . .”)
  • A friendly helping hand (“Here’s a simple list of the top 5 things to do, and a bottle of water to get started.”)


How to encourage more people to join in the neighborhood emergency response group?

To be successful, any group has to offer benefits to its members. We try to focus on some of these in our communications and monthly meetings . . .

  • Make it fun! (I mentioned door prizes above. They do work at meetings! And we try to include a joke once in a while in our “educational” pieces.)
  • Give everybody a job that helps make a meeting a success – set up the room, be a greeter, take notes, whatever.
  • Recognize accomplishments – new CERT graduates, someone who used a skill learned in the group in a real life situation. Last month one of our members connected with a relative in another state and got some good preparedness info passed along to a whole new audience!
  • Keep training. Our members like to keep learning new stuff. (They particularly like learning from new instructors – some of whom are now coming from videos on YouTube.)
  • Make it easy to join. Have a welcome and orientation package for new group members. Ease them in; they don’t have to know everything you know on their very first day.

As I write this, I realize I’m writing in part for myself! Having been actively involved in our neighborhood group ever since I took the CERT training in 2002, I’ve observed and tried every one of the suggestions above! Over the years, the size of our group has varied from 15 or so to as many as 85, and then come back down again.

As we have said many times, preparedness is much more a STATE OF MIND than a stash of emergency supplies. And in a real emergency, it’s the people closest to you – that is, your neighbors – who will be the true First Responders. The more THEY know, the more prepared THEY are, the safer YOU will be!

So, I guess we just keep keeping on!

Please add your comments to this post, and your suggestions for inspiring people to take action for themselves and to take action for their neighbors, too.

It’s the best we can do!

Virginia
Your Emergency Plan Guide Team

P.S. If you are building a neighborhood group, please take a look at the manual I put together a few months ago. It details many of the successful meeting we’ve held over the past few years. If you’re in the midst of planning a neighborhood meeting right now, it will be a big help!


Coconut Oil for Your Survival Kit

Share

“Good to know about” or “Essential” ?

When I’m writing about items for a survival kit, I often have to distinguish between “good to know about” and “essential to have.” Today, I’m writing about coconut oil. It straddles the line between “good to know about” and “essential to have.”  I’ll let you decide!

Coconut Oil

From my stash . . .

Coconut oil has been popular in health and beauty news for several years, and a couple of years ago coconut water emerged as a very popular drink. (I don’t care for it, myself.)

Coconut Oil for Emergencies

Lately articles about coconut oil as a survival item have jumped out at me. Then, when I got a sample recently — as a unique favor at a wedding party! — I looked into it at more depth.

Here’s what I’ve found out, and tested for myself. See if any of these work for you – then try some of the oil!  It’s inexpensive and available everywhere.

First Aid with Coconut Oil

Coconut oil is claimed to have antiviral, anti-fungal, antimicrobial, antioxidant, antibacterial and anti-inflammatory properties!  Whew! Makes me wonder how I got along without it so far!.

Some simple ways to use it that certainly sound sensible:

  • Apply to a cut to prevent infection.
  • Dot on bites, stings or rashes to relieve itching.
  • Rub between toes to prevent athlete’s foot (a fungus).
  • Relieve chapped lips with a thin coating.
  • Apply to scalp to kill lice (and get rid of cradle cap).


Shelter-in-Place with Coconut Oil

Coconut oil has an extended shelf life (up to two years, maybe longer), doesn’t need refrigeration, hardens at temperatures below 76 degrees and is liquid at temperatures higher. The image above shows my two bottles — the one I’ve been using and the one I stuck in the refrigerator.

Some excellent survival or camping ideas:

  • Rub into wood or leather to condition and protect.
  • Use to season pans and in fact, as a substitute for butter or oil for frying.
  • Use as the basis for a candle. Just add a wick to liquid oil, then allow oil to harden.
  • Use coconut oil to clean your hands – of dirt, wax, paint. (It works great as a make-up remover, too, but you won’t be needing that in an emergency!)


Eat Coconut Oil

I’m not a trained dietitian or a doctor, so I’m not making any recommendations about taking coconut oil internally. Certainly, there are many, many testimonials on the internet and on TV about its ability to improve your health. I suggest you simply research on your own. (Try looking up “coconut oil + _____” and fill in the blank with your own condition: constipation, diabetes, cancer, acne, etc.)

I did find an article that laid out healthy limits for a daily dosage of coconut oil based on your weight. Find out more about this, too, before you start taking it.

Finally, consider the quality of the coconut oil you buy. While there are no internationally agreed-upon quality terms (like “extra virgin” vs. “virgin” olive oil), it does make sense to read about how the oil is captured and processed. It all comes from the coconut — but can be washed, steamed, pressed, bleached, etc.  For our survival purposes, I would look for virgin oil for the best benefits.

Here are some examples of what look like good buys in three different categories. Click on the image to get full details and current pricing.

Island Fresh – Virgin

I selected this because its labeling specifically calls out some of the survival uses discussed above. Note that some other jars of coconut oil at Amazon refer only to their use for COOKING. In fact, some of them add extra flavors to the coconut! Anyway, this is the one I would start with for my own survival kit.


Majestic Pure – Fractionated

Note that this oil has been treated to remove certain fatty acids, rendering it odorless and greaseless and permanently liquid. So-called “fractionated” oils like this may be more convenient for cooking or general purpose beauty care, but may have lost some of their anti-oxidant properties.


Nativa – Refined, in Gallon size!

If you are planning on cooking with coconut oil (French fries!), you may want to purchase refined oil in much larger quantities. Here’s an example of an oil that has a high smoking point, no coconut smell or taste. The customer reviews are very positive.


Note: At Amazon many of the coconut oil product distributors assume you are going to want to sign up for a regular delivery, and they offer a discount for that purchase. My recommendation: try out ONE item first, or even better, try out at least TWO so you can compare, before you sign up for monthly delivery. Don’t accidentally click the wrong box!

I think you’ll end up adding coconut oil to your survival stash, just as I have!

Virginia
Your Emergency Plan Guide Team

P.S. If you have discovered great uses for coconut oil, write and let us know in the comments!


Stay or Go? Keeping Ahead of California Wildfires

Share

Take a look at these 2016 maps, from CALFIRE. On the left, the Current Incidents map shows 10 wildfires burning. Now, look at the map on the right. Just one month later, 17 fires are burning!

California Wildfires

And these are just the MAJOR wildfires burning.

Today, as I write this Advisory, there are 31 fires being fought and/or monitored by CALFIRE.

CALFIRE is the California Department of Forestry and Fire Protection. Its people respond to an average of more than 5,600 wildland fires each year. This year, as of 27 August 2016, they have already responded to 4,270 fires – above average due to significant drought conditions. (No, El Nino didn’t bring Southern California the much needed rain.)

What causes wildfires?

The simple answer: people. Yes, some are started by lightning or lava, but over 90% of fires are started by hunters, campers, tree trimmers and grass mowers, smokers, people’s cars’ catalytic converters and, of course, arsonists.

What can I do to protect my home?

Before you buy or build

Find out before you make an offer if that site is high-risk for wildfires! (If you have found what you think is a good deal, increased wildfire or flood risk may be the reason why.)

Plan for, or confirm, that the home is built from the ground up to the highest fire-resistant construction standards. Building standards vary, but you can get detailed information from your City’s Municipal Code Department and even more detail from the National Fire Protection Association. http://www.nfpa.org/codes-and-standards

Before a wildfire threatens

You’ve heard before about creating a defensible space around your house. Briefly, that means clearing combustible materials from around your house – trees, bushes, uncut grass, piles of wood, fences, sheds, etc. – to create a 100 foot buffer zone between home and fire. Find out full details of each of the 4 zones of defensible space here: http://www.napafirewise.org/index.html

Protect against flying embers by cleaning and then closing up or blocking off gutters, eaves and vent openings or areas under the deck or porch. Purchase or make custom-fitted vent covers.

Pay particular attention to windows and skylights, because they may be more vulnerable to heat. Consider upgrading them to more-resistant materials, and installing metal shutters for the outside of the house and fire-resistant curtains inside.

Fight a fire threatening your home

It is not always possible to protect your home from a wildfire.

However, you may be able to protect your home from a threat or until the fire department gets there by the use of a personal water supply and pump delivery system.

This does NOT mean a garden hose!

Your water source needs to be independent – a pool, dam or lake. Your pump needs to be gas-operated or otherwise stand-alone, since electricity may be out. The entire system – with hoses — needs to be big enough to cover your whole house and preferably the entire defensible space. At the same time, it needs to be portable.

Here is an example from Amazon of the kind of home system you may wish to consider. This model has two 50 foot hoses and can be expanded with more nozzles and hoses. It also delivers foam and comes with approximately 3 hours’ worth.
Home Firefighting HF-S14FC-100F-BK Pool Fire Pump Cart System with 1-Inch Fire Hose and 30 gpm Solid Cartridge Foam System

Obviously, you need to maintain a system like this and practice with it before you actually need it.

Know when to evacuate

For all the above recommendations about preparing for and fighting fire, be ready to go sooner rather than later.

Here are evacuation recommendations from CALFIRE. You can get their full evacuation checklists at http://www.readyforwildfire.org/Pre-Evacuation-Preparation/

Inside the House

• Shut all windows and doors, leaving them unlocked.
• Remove flammable window shades and curtains.
• Close metal shutters.
• Move flammable furniture to the center of the room.
• Shut off air conditioning.
• Shut off gas at the meter; turn off pilot lights.
• Leave lights on so firefighters can see your house under smoky conditions.

Outside the House

• Gather up flammable items from the yard (furniture, toys, trash cans) and put them inside or in your pool.
• Turn off propane tanks. Move propane BBQ appliances away from structures.
• Connect garden hoses to outside spigots for use by firefighters.
• Don’t leave sprinklers on or water running (can affect water pressure).
• Leave exterior lights on so your home is visible.
• Have a ladder available and place it at the corner of the house for firefighters to quickly access your roof.
• Seal attic and ground vents with pre-cut plywood or commercial seals.

We have seen the news footage of fire after fire, and, unfortunately, heard about not only property damage but death.

Preparing for the risk of a wildfire needs to be part of your emergency planning, particularly if you live in California.

Virginia
Your Emergency Plan Guide Team

P.S. Any more ideas you’d like to add to this list?  Just drop them into the comments!


Summer Water Shortage

Share

What I really meant: Summer Water Shortage Storage

Here in California, we’ve had drought conditions for 4 years. Throughout the state, people have cut back about 25% on water usage – sometimes voluntarily, mostly as a result of cost pressure.

But using less water for the landscape doesn’t mean we should drop storing water for an emergency!

So again, I want to promote . . .

The best water storage solution: the 4-item 55-gallon water barrel kit.

The kit has four components. You need all four!

You can buy them separately or all together, at Amazon, Walmart or at Costco or wherever you find the best price. In doing my research today I found that by shopping carefully I could get the same four items for a low of about $100 to a high of about $150.

The image shows a kit with the four items that need to be on your shopping list — the barrel, the bung wrench, the pump and the water preserver. You can click on the kit image — or any of the images below — and go directly to Amazon. But before you go there, learn more about each of the components so you know what you’re looking for.

1 – The 55 gallon water barrel

What you want is a standard blue polyethylene plastic food grade water storage barrel with a sealed top. (I’d want a new one. Even if it’s brand new, give it a good rinse with a diluted chlorine-bleach solution – one part bleach to 10 parts water. Of course, use non-scented bleach that contains no soap.)

What to watch out for:

When it’s full, your barrel will weigh 440 pounds so you won’t be able to move it by hand!  Pick the spot where you want to store it, lay down some boards or pieces of wood to keep it up off the ground or the floor, and set it in place. (Make sure your floor can hold this weight.)

2 – A “Bung wrench” to open the plugs in the top of the barrel

The stopper in a barrel is called a “bung” and you’ll need a special wrench to remove it. You can get a metal or plastic wrench like the red one in the photo to the right. Often, the wrench will be designed for a second function, like being able to turn off gas at your meter. Bung wrenches seem to go missing on a regular basis. You may want to fasten it to your barrel (tape?).

3 – A Pump to get the water out of the barrel

 These water barrels are designed with openings only at the top, so to get the water out you need to insert a pipe down through one of the bung holes and then pump the water up and out. Since this is for emergency use, you need a pump that operates by hand! Be sure your pump is BPA free since your drinking water will be flowing through it.

What to watch out for:

An inexpensive siphon hose can work but may take a lot of effort to get started. Other hand siphon pumps have a hand-operated sliding action and larger tubes, and are more efficient. The image shows the “vertical manual action” of the pump shown in the kit.

Once you get a siphon pump flowing, it will continue to flow until you stop it, so be sure you know how to start AND stop the flow. (Hint – you unscrew the cap at the top to break the vacuum.)

Here’s a great video from Robert Canning that shows just how to install and use a hand siphon pump.

There are also hand pumps with a lever that pump a certain amount with each press of the lever – best if you want to remove just a small amount of water.

4 – Water preserver liquid

We have written before about using 1/8 cup of plain bleach in your barrel full of water to keep the water clean for long-term (i.e. year-long) storage. You can also use a water preserver concentrate that will keep water clean for up to 5 years. Follow the directions on the bottle to get the right amount into your barrel.

And now, the question we overlooked . . .

How to get the water INTO the barrel? Three options.

If you’re like me, I want the barrel tucked out of the way, so it turns out not to be close to a faucet. So how do I fill the barrel?

Naturally, you’ll think about using the garden hose. But wait. That hose has probably been sitting around for who knows how long, getting dirt on it, spraying pesticides or soap, and gradually disintegrating. I wouldn’t want to use it to fill MY barrel!

So what are other options?

One way is to use new bottles of water or simply carry water from the kitchen in a clean container and pour it into the barrel. Works fine, takes many trips!

The other option is to purchase the right length of food grade, white plastic drinking water hose at an RV supply store and run it from the tap.

And finally, store the barrel properly.

Some hints:

  • Label the barrel with the contents and the date you fill it, so you’ll know when it’s time to empty, refresh and refill.
  • Store in a cool dark place, out of sunlight; keep it clean.
  • Camouflage the barrel to prevent someone from stealing your water. Cover it with a tarp or canvas, turn it into a workbench, whatever.

This water can keep you alive in a crisis, so consider this big purchase as a gift to the family for the summer!

Virginia
Your Emergency Plan Guide team

P.S. You will likely want to have smaller containers of water, too, so you can store them more easily, move them, pour out just a glass of water, etc. Here are a two more articles from Emergency Plan Guide you may find useful as you consider how to store the water YOU need:

Are Your Employee Communications a Disaster Waiting to Happen?

Share

Many companies are being forced to set up or beef up their emergency employee communications plans. Those that don’t may be courting liability.

Being sued for no disaster plan

Being sued . . .

Read on.

In today’s news, we learn from a simple press release that “The Boston Globe is making customized comprehensive safety guidelines available to all employees via a mobile app.” (That’s my emphasis.)

What does this have to do with YOUR company?

Start with these questions:

  • What has your company done about emergency response and emergency communications? Does it have a plan?
  • Is your company keeping up with what others are doing?
  • Is it meeting its legal responsibilities?


Managing emergency communications is an ongoing challenge.


1 – You face threats today that may never have been threats in the past.

Again, recent news stories tell of oil train explosions, once-in-a-lifetime flooding, live shooter events and cyberattacks that can cripple entire enterprises.

Is your workplace communications system set up to respond to “new” disasters as well as the usual ones? When did you last do a “risk analysis?”

2 – New technology means the world may hear about your emergency before your front office does.

What’s your procedure for making sure employees get instructions and the public – including suppliers and customers – gets factual information that will staunch rumors?

As Paul Barton, a business communications specialist says, “Rumours are created for a specific reason: they fill in the information void. If an organization does not tell staff what is going on, they will make up their own story.”

And today, that “story” will be out via YouTube and Twitter before the smoke has a chance to clear!

In the past, companies usually assigned one person to be the spokesperson in an emergency. Today, every employee can instantly reach a huge audience. You can’t stop that, but you can train employees in how to communicate.

3 – Employee turnover means your “communications plan” must be continually updated and employees must be regularly trained or they won’t be able to use it.

Not only does your workforce change, but the company premises themselves change. You may change your phone system, switch to a different internet provider or IT set-up, add a new website or a new office, invest in mobile devices for the whole staff, etc.

All these give the business and employees new communications options that must be considered in the emergency communications plan.

4 – Don’t overlook the families.

You may expect your employees to be ready to step up to protect the business and pitch in to get it back on its feet in an emergency.

Guess what. You may be wrong.

Over and over again in disasters, employees – even First Responders! – have abandoned their posts because they were desperate to find out if their families were safe.

If you can reassure employees about their families, your business continuity plan has a much better chance of working.

What this means is your emergency communications plan has to put family communications right up at the top. It must ask and help answer questions like:

  • How will the company communicate with employee family members regarding the status of the business and the employee?
  • What plan does the family have to get in touch with each other in an emergency?
  • Does the family have an out-of-state family contact person?
  • Has the family designated a place to go if they get separated and/or they can’t get back to their home?


5 – What responsibility does the company really have?

The “Prudent Man Rule” (now probably referred to as the “Prudent Person’s Rule”) has been around in the financial world for nearly 200 years. It says that someone responsible for another’s interests should exercise the same care, skill and judgment that other “prudent men” in that position would exercise.

When articles like the one about The Boston Globe appear in the daily news, you must ask yourself,

“If others are setting up new ways of communicating with employees during emergencies, could we be found deficient or even negligent if we haven’t updated our own plans?”

Here at Emergency Plan Guide we’re not offering legal advice. But we do know that businesses and particularly owners get sued. We believe they can improve their chances of coming through the legal system safely by demonstrating that their decisions with regards to emergency response planning are consistent with good practice.

Two more resources.

Action Item:  If your company’s emergency response plan needs updating, take a look at these for inspiration.

This article reviews the different groups that may sue you after a disaster, and suggests three steps you can take immediately to protect yourself from legal fallout.

If you haven’t thought about physical security, this article will list some “prudent steps” that other companies are taking in this regard.

Once again, this isn’t legal advice, but I hope it falls into the category of “good business” advice.

Virginia
Your Emergency Plan Guide Team


Don’t miss any of our free Advisories. They’re a quick read and come right into your email box. Sign up below.


Off to College? What’s in your survival kit?

Share

Pretty exciting, isn’t it? New freedom, new friends, new food (!).

And, new dangers.

Survival kit for collegeWe can’t deal here with all the social issues on campus. But there are some things you can do to make your life away at school a bit safer and more secure. Take the time to check these out.

1-Be Ready For An Active Shooter on Campus

The news has been full of shooter incidents lately, so perhaps you’ve spent time talking about what YOU would do in that situation. But maybe you haven’t.

People most at risk are – OBLIVIOUS!

  • Walking around with their eyes glued to their cell phones.
  • Chatting or goofing off with friends and not paying attention to their surroundings.
  • Half asleep, waiting for somebody else to tell them what to do.

Time to change those habits!

Here’s a video put out by the University of Alberta that is pretty effective at reminding you what to do in case you hear what sounds like gunfire. The best stuff comes after the 2 minute intro.

Action item: Take 8 minutes right now and watch this video.

https://youtu.be/gHNApS-MC18

And then consider these actions for when you get to campus:

2-Secure Your Dorm Room or Apartment

Let’s assume that any room you are sleeping in has normal locks, and that you use them. However, if you want to be more secure – and particularly if you have been notified of danger on campus – you want to be sure you are extra safe inside.

Depending on the construction of the door, here are three things to consider.

= = > Barricade the door.

Somebody dangerous threatening you? The classic chair under the door handle really DOES work, as long as the angles are right. In an office setting, though, you may not find the stiff chair you’re looking for. So, in an emergency, don’t hesitate to pull a HEAVY piece of furniture (table, copy machine) in front of the door. Add a second heavy piece behind it.

= = > Disable the mechanism.

Keep door from openingThe working of a typical commercial door hinge may be defeated by use of a belt. Tighten it down to prevent the door from opening, as shown by Bill Stanton, safety expert.

= = > Get a door wedge.

In your bedroom or dorm room, a simple investment in a rubber door stop may be all you’ll need. (This one looks as though it will work on any surface.) Click on the image for details.

Keep intruders from coming in through a balcony with the help of a sliding glass door bar – you can place it in the track of the door, or, if you’ve bought one for that purpose, lock it across the center of the door. Obviously, a determined intruder can break a glass door if he or she has the tool to break it with.

3-Be Prepared For Evacuation or An Extended Lockdown

It’s far more likely that your college stay could be impacted by something less dramatic than an active shooter. But it might be equally serious – like a storm, flood, electrical outage, or even some sort of disease outbreak.

Be ready to respond to a call to shelter in place or to evacuate by having your own survival kit. Figure you need to take care of yourself for at least 72 hours – and remember, you will have no access to electricity, water or food. Or a toilet.

Stuff your kit (use a backpack) and have it handy so you can grab it at a moment’s notice.

What should be in your kit?

Basic Emergency Supply Checklist

  1. Water – 1 gallon per day. (Tough to fit in a small backpack, admittedly!)
  2. First Aid Kit with fresh supplies.
  3. Food – Canned or dried foods that you like and that don’t require cooking.
  4. Clothing – A set of warm, comfortable clothing. Extra sunglasses, glasses or contact lenses.
  5. Medicine – At least a two weeks supply of any prescription medicines.
  6. Sanitation – Garbage bags, including small, compactor-strength bags for waste. Sanitary supplies. Toilet paper, baby wipes, paper towels.
  7. Flashlights, emergency radio that operates with batteries, solar or by hand crank – NO CANDLES!
  8. Car – Always ready with half tank of gas.
  9. Cash – No electricity = no ATM, no credit card.
  10. Telephone numbers – Write on paper. Your cell phone and computer will run out of battery unless you have a solar charger.

You should be able to collect just about everything on this list right at home, before you leave for school. There’s one possible exception — the emergency radio.

Here’s a link to Amazon that will get you one of the best ones we’ve found. It operates using AA batteries, its own solar panel, or you can crank it for power. You can even charge it from your computer. Click on the image for details. (If you buy through Amazon we may get a small commission. It won’t impact what you pay.)

OK, we know you have put in a lot of effort to get to where you are. Don’t overlook some of these common-sense preparations that will KEEP you at school just the way you have planned.

Best of luck,

Virginia Nicols
Your Emergency Plan Guide Team


P.S. Please share this article with friends. It’s possible they won’t have thought of all these things, either!


What threat do you face from a nuclear reactor emergency

Share

Nuclear Power PlantWe have written before about the shadowy world of nuclear power plants. In last week’s news I found another of the disconcerting developments connected with plants that have been shut down and that are going through the “decommissioning process.”

This news comes from Vermont.

Briefly, the purpose of decommissioning is to remove and dispose of contaminated materials so that the property may be released for other uses. Since decommissioning can be a long and complicated. the plant owner is required during the plant’s lifetime to set money aside for that purpose.

Naturally, once the plant stops producing power, owners want to shut it down as quickly and as inexpensively as possible.

One of the steps they take is to petition to have the “emergency zone” around the plant reduced. We have written before about the 50-mile-zone vs. the 10-mile-zone; you can check that Advisory by clicking here.

It turns out that Entergy, owner of Vermont Yankee, has successfully petitioned the NRC not only to stop supporting planning in the 50-mile zone, but also planning in the 10-mile zone. In fact, it has petitioned to eliminate ALL its responsibility to the 18 towns around the plant.

Apparently the funds set aside for decommissioning have also been “used for other purposes.” Lawsuits are being filed, hearings held. It’s not clear what the outcome will be.

But this brings up the whole issue of emergency planning around nuclear power plants.

Can you answer these questions about living near a nuclear power plant?

Nuclear Reactors U.S.1. How far away is the closest nuclear plant?

There are about 100 operating nuclear plants in the U.S., and most tend to have a low profile. So if you don’t really know where the nearest reactor is located, here’s a link to a map from the Nuclear Regulatory Commission (NRC):  http://www.nrc.gov/info-finder/reactor/  *There’s a lot more info behind each pin on the map at the site.

2. In an emergency, how will you be affected?

The NRC defines two emergency planning zones around nuclear power plants: 1) a “plume exposure” zone with a radius of 10 miles, where airborne radioactive material would directly impact people, and 2) a second zone with a radius of 50 miles where contaminated food and water could be ingested by people within the zone.

(As a side note, Japanese authorities set a 20 km “exclusion zone” around the destroyed Fukushima Daishi power plant. That zone continues to be adjusted as radiation levels change as the result of government clean-up efforts and new weather events.)

3. What preparations can you make to protect yourself from a nuclear accident?

If you live near an operating plant, it’s likely that the first you’ll know of an emergency is when you hear a siren. (3-5 minute blast, repeated) Immediately tune to your local FM radio station or TV station, or to one of the Emergency Alert System (EAS) stations.

  • Plan to shelter in place. The major hazard in the plume area is direct exposure to the radiation cloud – through breathing, touching particles on the ground, or eating materials that have been contaminated.
  • Go indoors and stay there. Close doors and windows and shut off furnaces, fireplaces and air conditioners. Keep pets inside. If you’re in your car, close the windows and vents.
  • Keep listening for updates!

4. What will the authorities be doing?

  • An evacuation may be called. Grab your survival kit/evacuation kit and follow instructions. Hopefully your car’s gas tank is at least half full.
  • You may be advised to take potassium iodide (KI). KI is a nonprescription medication that blocks uptake of radioactive iodine by the thyroid gland. It is FDA-approved and readily available, coming in 65 and 130 mg tablets and liquid form; children need half or even a quarter of the dose for adults, so follow directions carefully. KI is effective for about 24 hours and you need to have enough to last every member of the family for several days or until you can get out of the affected zone. (See purchase info at the bottom of this article.)
  • You’ll be notified when it’s safe to return. (How can you be sure it’s safe? See “More resources,” below.)

5. What about the threat of a closed plant?

Here in Southern California, the San Onofre plant ceased operations in 2013 after a history of maintenance problems. The owner of the plant is just now putting final touches on its “decommissioning plan.” Spent fuel is being stored in one of the closed reactor containers — just hundreds of yards from the Pacific ocean (risk of tsunami?).  Since the 2010 U.S. census counts over 8 million people living within 50 miles of the plant, ANY emergency here will have a big impact!

Clearly, the chances of a nuclear disaster are far less for a plant that is no longer running, but as long as radioactive fuel is still being stored on site a certain threat remains, whether from a weather event (like what happened and continues to happen in Japan) or a terrorist event.

So it’s back to you and your emergency planning team, whether that’s your family, your local neighborhood emergency response team or your workplace leaders:

  • Are you near a nuclear plant?
  • Is it operating at full or reduced capacity?
  • Is it shut down or scheduled to be shut down?
  • What is the emergency plan for the site?

As an active and concerned citizen, it’s up to you to learn more. I hope this article can be the impetus. We’ll continue to share what we learn . . .

Virginia Nicols
Your Emergency Plan Guide Team

More resources:

Buy KI tablets. As you are shopping, consider the make-up of your family, and whether it would be easier for you to have smaller tablets (adults take two, child takes one) or even liquid (would have to be mixed with something). This is an inexpensive item so get a big enough supply that you don’t have to worry about running out. This particular item often goes on sale at Amazon — note its expiry date! (Click on image or link to get current price details.)


IOSAT Potassium Iodide Tablets USP, 130 mg, 14 Count


For more understanding of your circumstances, consider a Geiger Counter. You can learn more about them at this Advisory and take a look at two versions here:

SOEKS 01M Plus Generation 2 Geiger Counter Radiation Detector Dosimeter (NEW Model replaces SOEKS 01M)

GCA-07W Professional Geiger Counter Nuclear Radiation Detection Monitor with Digital Meter and External Wand Probe – NRC Certification Ready- 0.001 mR/hr Resolution — 1000 mR/hr Range


There are less expensive options, including this app that works with your phone. Its  low cost makes it attractive for people living or working in areas of moderate risk, or for people who want a backup unit to carry on the road.. . .

Smart Geiger Counter Nuclear Radiation Dosimeter “X-Ray” and “Gamma” Detector Smartphone Android iOS with App


Don’t miss a single Advisory. Sign up below.


Survival Vocab Quiz

Share

Survival VocabularyOK, so you’re in good shape when it comes to preparedness.

But can you talk to people about preparedness using THEIR words?

Here are three quick quizzes for three different groups. See how you do!

Group One: Your Prepper Relatives

While you may not be a red-hot survivalist, you probably have a few in the family. Maintain your dignity by knowing these prepper acronyms:

  1. EDC – Every day carry – collection of essential, small items that the survivalist has at all times in a pocket or purse.
  2. ATV – All-terrain-vehicle – A three or four-wheeled “buggy” that can carry preppers to safety through the woods or over the hills, when roads are impassible or too dangerous.
  3. BOB – Bug-Out-Bag – What you need to have ready to grab and go and that will keep you alive for at least 72 hours. At a minimum it contains shelter, water, and food.
  4. OTG – Off the grid – Surviving without access to electricity, municipal water, grocery stores, etc. Usually, it means setting up alternative living arrangements in an isolated area where you won’t be bothered by people who haven’t prepared in advance.
  5. SHTF – Shit Hits The Fan – All your preparations are made so that you will survive when the SHTF.

Group Two: Your Emergency Response Team Volunteers

These folks are committed and concerned. You owe it to them to provide good leadership by knowing what you’re taking about.

  1. CERT – Community Emergency Response Team member – Someone who has taken the (free) 24 hour course designed by FEMA (see DHS, below), offered by a city or other local organization. CERT members are volunteers who have received training in basic disaster response skills and who agree to provide emergency care until professionals arrive, and then support those professionals as needed.
  2. DHS – Department of Homeland Security – DHS was established in 2002, combining 22 different federal departments and agencies into one cabinet-level agency that now has 240,000 employees. FEMA, the Federal Emergency Management Agency, is part of DHS.
  3. EMT – Emergency Medical Technicians — EMTs are trained to provide emergency medical care before a person arrives at a hospital. EMTs may be associated with an ambulance company or a fire department; they may have different levels of training depending on their state or employer.
  4. SOP – Standard Operating Procedure – “The way we do things.” If you don’t have an SOP for your team, then you can’t expect any given outcome.
  5. Triage — Triage is the first step in an emergency. It is the process for sorting injured people into groups based on their need for medical treatment. Triage, by definition means that as a volunteer you don’t stop to help the first injured person you see.

Group Three: Co-workers

People at work deserve a plan for emergencies. If you’re involved, here are formal and informal terms you should be using:

  1. OSHA – Occupational Safety and Health Administration – OSHA is part of the Department of Labor. For our purposes, it is important to realize that OSHA’s purpose is to “provide a workplace free from serious recognized hazards.” Generally, this does NOT require any sort of emergency preparedness plan.
  2. BC/DR Plan – Business Continuity/Disaster Recovery Plan — These terms are often used interchangeably but they both contain an approach to (1) preparing for emergencies, (2) taking action to limit damage before anything happens, (3) understanding how to get through the disaster when it does it, and then, (4) how to get back to BAU (see below).
  3. BIA – Business Impact Analysis – This is the first step to a Disaster Recovery plan. It’s a process that will identify and evaluate the potential effects of a disaster, accident or emergency on your critical business operations. The BIA will help set priorities for your planning.
  4. BAU – Business As Usual — After an emergency, BAU is what you want to get to. However, it’s possible that today in your workplace, if changes aren’t made right away, your current BAU will lead to a worse disaster than was necessary!
  5. SOW – Statement of Work — If your organization decides to hire a consultant to help in developing your BC or DR Plan, you’ll likely ask for, or actually provide yourself as part of the consulting contract, a statement of work that outlines exactly what is to be done.

Ok, had enough?! Here are a couple of suggestions to make this exercise valuable for a bigger audience.

  • Action Item #1: Consider printing out these definitions for your emergency response team members. Go over them out loud at a training meeting so everyone knows how they sound and can say them easily. Some of this will be new to some of your members, I can guarantee it!
  • Action Item #2: At work, share this list with co-workers or with your boss. If emergency preparedness and emergency planning are relatively new subjects, people will get a sense of confidence having been exposed to this vocab.

Let us know how you used the list!

Virginia
Your Emergency Plan Guide Team

P.S. And one last acronym I just can’t resist putting in here: TEOTWAWKI:

If you’ve spent time on survival websites, you’ll know that this stands for The End Of The World As We Know It. TEOTWAWKI usually assumes a BIG disaster – total economic collapse, cosmic event, pandemic, etc. I don’t know how the acronym is pronounced, if it even can be pronounced!

P.P.S. More preparedness vocabulary for people who like this sort of thing: