Category: Family Survival

Holiday Security Mistakes

Share

Tempting Christmas window All ready for the holidays?

Here are 3 security mistakes people tend to make at this time of year. Take 2 minutes to check them out. It would be wonderful if you and your family could avoid them all.

  1. Packages are SOOOO tempting!

Sure, you know better than to allow packages to be delivered to an empty house.

Just a week ago I was stopped on the street by a patrolman who showed me a picture of a kid taking a package from a front porch. (The picture had been taken by a home security camera. More on those later.)

And when you’re shopping, take the time to put gift purchases into the trunk of your car. If they won’t FIT in the trunk, at least cover the back seat pile with a dark and preferably dingy looking blanket. Better yet, make an extra trip rather than let packages sit unattended in a parking lot in full view.

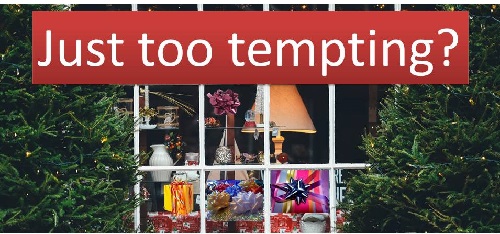
And at home, don’t position your tree and all the lovely presents right in front of a window as in the picture above. Someone could break the window, grab the presents and run.

Packages are so tempting — to thieves!

  1. “We’re so proud of our emergency preparations.”

The holiday season often means more visitors to your house. The guy to string the lights on the roof. UPS and Amazon delivery people. All the invitees to your Christmas party!

Every person who comes onto your premises has the chance to take a good look at what you have – and that includes some of your emergency preparedness items.

Your gardener sees the locks, the security cameras and lights you’ve installed. The delivery guy walking past your open garage door sees your tools and the cupboards and shelves packed with food and water. The computer guy you bring in to troubleshoot your new network sees your ham radio set-up, not to mention your laptop and printers.

It’s natural for a visitor to tuck this sort of information away. And in a big emergency, your house might become a target for one of those visitors, now turned desperate.

What can you do to cover or camouflage emergency supplies? Yes, be proud of the sensible steps you’ve taken. But with a bit of creativity you’ll get more of them out of sight. You can be just as satisfied and maybe a whole lot safer.

  1. Take out the trash!

We’ve all read the novels where the criminal is identified because of stuff he puts in the trash. (Harrison Ford left orange peels and fake ID photos in the wastebasket in The Fugitive, remember?)

If you’re making a lot of purchases and getting a lot of gifts, you are going to have more trash than usual. And it may attract the wrong kind of attention.

Save and/or shred receipts or statements that have account numbers. Some receipts for online purchases may show up in your email. Protect them from casual view. Don’t stuff empty cardboard boxes (with pictures of TVs and electronic games and security cameras and drones!) into the trash; break them down and recycle anonymously at the recycling place.

And if you’re traveling during the holidays, make sure newspapers, leaves or other trash doesn’t build up outside while you are gone. That trash, plus a dark and empty house, is a real invitation to trouble. (Ask a neighbor for help, and invest in some timers for lights and/or radios.)

Oh, and for heaven’s sake, don’t you or your kids announce via social media or on a phone message that “We’re away skiing for a week!” Ouch!

We wish you the pleasure of giving, and the excitement of receiving. But we sure hope it’s not spoiled because you overlooked taking these sensible precautions.

Virginia
Your Emergency Plan Guide Team

P.S. We’re writing an Advisory about “Hiding valuables in plain sight.” Sign up for all our Advisories to be sure you get it.


Better Home and Office Security

Share

“Who’s that at the door?”

Who is at the front door

If you hear someone knocking, can you tell who it is without opening the door?

As the days get shorter, more and more of us — business people, parents of busy children, everybody, in fact — find ourselves out and about in the dark. And while crimes can happen at any time, being in the dark certainly gives us less chance to see trouble coming.

I am all for simple and effective security solutions. Here are a couple of improvements we can all consider.

Better Perimeter Security at the Office

If you are alone in the lighted front office, and it’s dark outside, you may wish you had an extra layer of security around yourself.

(Now we’ve written before to business owners about the importance of securing entrances to the business. Upgrading your entire perimeter with mechanical or electronic security devices – fencing, gates, lighting, etc. – would be costly and time-consuming. Of course, it may be worth it to strengthen your insurance coverage and to avoid legal threats. If you’re interested, here’s a link to that earlier Advisory : https://emergencyplanguide.org/security-at-the-front-door/.)

But getting back to the convenience and safety of the person alone in the office . . . here is one easy upgrade worth considering.

Add a perimeter alert system.

What is it? It’s a wireless motion detector that sends an alert when, for example,

  • a delivery truck arrives at the freight entrance
  • a car comes through the front gate
  • a person appears at the back door.

The model below looks perfectly adequate and is not too expensive. A brief description is below the image — click on it, or on the link, to get all the details at Amazon. CAUTION: As always, compare prices carefully at Amazon! Prices vary considerably, since vendors set the price they think they can get. And sometimes, they’re looking for a quick sale, and you can benefit!

Wireless Driveway or Entry Announcer

This model has two parts. The motion detector — about the size of a baseball — attaches to a building or wall, where its sensitivity and visual field can be adjusted in a variety of ways to suit the location and your needs. It can send a signal for up to 2,000 ft. to the receiver, generating different tones to distinguish between the different alerts.

The receiver plugs into the wall; the detector operates off a 9 volt battery.

Naturally, you’d have to buy one sensor for each entrance you want to protect.

Would something like this make sense to the person alone at the front desk or in a back office at your workplace?

Better Perimeter Security at Home

Lately we’ve seen more and more internet-driven devices that offer home comfort, and now more home security.

Various companies offer “home security programs” that consist of multiple door and window locks, cameras and a console that connects to a remote monitoring office. You can set the alarm system to work while you’re away, or set it at a lesser level so it’s on at night when you’re asleep. In an alarm is tripped, the monitoring company or the police are called. Typically, these systems require professional installation and have a monthly charge (and a contract).

Again, for this Advisory I was looking for something simpler and less expensive.

Something focused on the front door at your house. 

  • If someone knocks at your front door, do your children automatically run to open it?
  • Do you have to peer through the curtain or a window to see if you can recognize who is there before you open the door?
  • What happens if someone knocks in the middle of the night?

Do these questions make you wince?

If so, you may want to consider installing a video door bell.

You’ve seen the ads. The scary-looking guy comes to the door with a questionable story. Without having to open the door, the mother see who he is, tells him she’s not interested and sends him away.

I took the time to look into these devices. Here’s some of what I learned.

First, there are at least a half dozen on the market. All have the same basic characteristics:

  1. A video camera films your entrance.
  2. The camera is triggered by a motion sensor or a person pressing the doorbell.
  3. The camera connects to your home wi-fi system.
  4. A downloadable app allows you to view the video and also to speak with the visitor via your smartphone or tablet.
  5. You can save and store the video for later viewing.

As you can imagine, different products have variations on these features. So, when you’re shopping, compare with the help of these questions.

  1. Consider the video quality you want or need. And how big is the image? What’s the resolution? The best video camera tends to be the most expensive, of course.
  2. What triggers the camera? Someone actually pressing the doorbell? Or simply approaching the door? From how far away?
  3. How much flexibility do you have in setting up the motion sensor? Range, multiple ranges, sensitivity, etc.
  4. What about its source of power? Is it hardwired through your regular doorbell, or battery operated? Do you have a choice?
  5. How well does the system operate at night or in other low light conditions?
  6. How is the video footage stored? How long? What do you have to pay for storage?

And a couple other things to consider to protect your system from being hacked.

  1. Can you set your own password?
  2. How will the security updates be provided by the manufacturer?
  3. Can you disable remote viewing (and just use your system while at home)?

With all this information in mind, and after reviewing the top doorbell video products, here’s the one that seems to be the best seller. I’d start by looking at it.

Ring Video Doorbell Pro

This model is at the upper end of the price range. It has to be hardwired. Since it looks like a regular doorbell, it doesn’t announce itself as would a mounted security camera. Oh, and it comes in four different colors.

Once again, look carefully at all the models, and at all the prices before you buy. Maybe it could be an early Christmas present?!

Virginia
Your Emergency Plan Guide Team

P.S. I’ve written before about outdoor lighting as a security device. When the light outside my bedroom window foes on at 4 am, I am pleased to know it’s working, and to know I can look out and see just what triggered it. That peace of mind is worth a lot — and that’s what I’m trying to achieve with the security recommendations in this Advisory!

Gift That Will Save a Life

Share

Vial or File of Life – a Great Gift Idea for Family or Employees

We are constantly looking for ways to engage our communities in “preparedness thinking.” It’s not always easy. For some reason, many people prefer to fall back on “It won’t happen to US!” as the reason they don’t do any planning.

However, everyone has seen an ambulance pull up to a home or business, lights blazing. Everyone stops for at least a moment to wonder what is happening inside.

We can use this fact to raise awareness in our neighborhoods or workplaces. Here’s a GIFT that you can arrange for that people will value – and that could make a difference between life and death.

The Gift: The Vial of Life

At a recent meeting with the Fire Department we were reminded that when First Responders are called to an emergency in a home, they automatically look for the victim’s VIAL OF LIFE.

Vial of Life
What is the Vial of Life?

The Vial is really simply a container that holds essential medical information for the people in the house – information that First Responders will want to know if they have to give emergency treatment.

Originally, the info was put into an actual vial (like a medicine prescription bottle) but these days, the preferred container is a simple zip lock Baggie. You can see the plastic baggie in the image (blue stripe).

What goes into the Vial of Life Baggie?

The Baggie holds a filled-out Medical Information Form. It’s the form in the picture, with places for info such as:

  • Name of person in trouble
  • Name of Doctor
  • Medical conditions
  • Current medicines/prescriptions
  • Allergies
  • Contact information for family

Where do I put the Vial of Life Baggie?

Identify the Baggie by placing a decal with a red cross on the outside. Fold the Medical Information Form and place it inside.

Then fasten the baggie to the refrigerator door with tape or a magnet.

(Naturally, you’ll want to keep the Medical Information Form updated – that’s why it’s best to use a zip lock style baggie so you can take papers out and replace them.)

How does the Fire Department know I have this information on my refrigerator?

Depending on the layout of your home, place the second decal with a red cross on the front window or door to your house. This will let the Fire Department know you have a Vial of Life Baggie on the refrigerator.

Even without the second sticker, they will likely automatically look there for medical information.

Anything else I need to know?

Depending on your circumstances, you may want to put other information into the Baggie. For example . . .

  • If you have appointed someone else to make medical decisions for you in an emergency (common for senior citizens), you may want to include that info along with directions to where the full document can be found.
  • Your Advance Health Care Directive, which tells what emergency life-sustaining treatment you want, can also be included. (That form is available online and must be witnessed by your doctor.)
  • Finally, if you have specific end of life wishes, such as the desire to donate your body, you may want to include that info, too.

These documents are important.

Without the Vial of Life information, emergency personnel will follow their STANDARD PROCEDURE – which may NOT be what you want or can even survive.

How to Use the Gift with Your Group

If you want people to participate, you have to make it easy for them.

The “easiest” is to create Vial of Life kits, already assembled, and pass them out to all the members of your group. Each member of the family needs one!

You can go to http://www.vialoflife.com to get the masters for everything you need.

Assemble into individual kits:

  • Instruction sheet
  • Baggie
  • 2 Decals (print your own using color printer onto white labels), one for the Baggie and one for the door
  • Medical Information Form

If you prefer, turn this into a group activity. Provide sheets of decals, piles of forms and instructions and the baggies and have group members set up an assembly line to separate and assemble the kits.  Next step is to distribute kits to neighbors, family members, etc. (You could add a pen as an extra incentive to get the form filled out!)

We distributed Vial of Life kits to our community about three years ago. Many of our neighbors, who don’t participate in any of our neighborhood emergency response team activities, still have their Baggies and point proudly to them.

The Vial of Life has been a successful and inexpensive awareness builder for our team. Add it to your own group’s agenda!

Virginia
Your Emergency Plan Guide Team

If you are looking for other emergency response team ideas for group activities, please don’t overlook the book of CERT Meeting Ideas I put together earlier this year. You can get details here.

Secure Your Space

Share

The Great ShakeOut Hits California

Our community is “celebrating” the annual earthquake drill here in California on October 20. We are joining a crowd of 9.4 million participants (so far).

Secure Your SpacePlus, just two days ago we emerged from a heightened earthquake alert resulting from a swarm of 140+ small quakes near the base of the San Andreas Fault. That’s the seismic fault that’s going to give birth to the long-overdue “Big One.”

So it seems time to take another look around the house to Secure Your Space, as the ShakeOut people say.

We put together a worksheet for our neighbors, and I thought it would be a good tool to share with all our Emergency Plan Guide readers.

(The form I created for our neighborhood group has a space for recommendations to be made by a handyman that we’ve engaged to go to people’s homes. The version shown at the left in this Advisory is a little different. It figures YOU will be making the changes, hence the “to-do list” terminology!)

No and Low Cost Recommendations for Quake Safety

These are all pretty straightforward. It just takes setting a time for a “walk-through” and then making obvious changes to your living space.

As you do your walk-through, look at furniture placement, and not just heavy or decorative items that could fall and break.

When we returned home after the San Francisco quake in 1989, one of the most dramatic things that had happened was we couldn’t get into the bedroom because a bookcase had fallen over, completely blocking the door.

Handyman Help for Quake Safety

You may or may not already be a handyperson, so some of these suggestions may require that you get a few simple tools. Generally, the idea is to stand in the middle of the room and imagine that everything loose starts flying at you.

How do you tether or fasten down the items that could hurt you?

Keep in mind:

• Flexible fasteners may be better than stiff ones, which can break in a large jolt.
• Rubberized pads may stop heavier items from shooting across the room, but of course won’t keep them from falling to the floor.
• A wire barrier or a lip may keep items on a shelf as long as the shelf stays on the wall.

This Secure Your Space list is aimed at simple things you can do to improve your chances. It doesn’t get into major improvements, like blocking and strapping your water heater, or reinforcing your foundation. We’ve covered some of those elsewhere.

Today, let’s just take care of a few items that should not be left unaddressed.

Need a shopping list of earthquake safety items?

Here are some items from Amazon. You could click on the links, order them all, or items like them, get them delivered within just a couple of days, and have everything you need for an earthquake safety family activity!

Picture or Mirror Hanger

The usual hardware or hobby pack of picture hangers is designed for light pictures, but the sawtooth version of a hanger, or any hanger that counts on simple gravity to hold the wire on the hook, will not be adequate in an earthquake. You are looking for something that can carry 50, 70 or maybe even 100 pounds, and keep it on the wall!  Here are some ideas for hanging heavy items.

Hangman 3-Inch 100-Pound Walldog Wire Hanger (WDH-100-2)

And the wire to go with it . . .
Hillman Fasteners 121128 Mirror Hanging Set Heavy Duty

Big Stuff on Shelves

When it comes to electronics on the shelves in our office, we start with rubberized mats under our printers and computers. We also have a mat under the one desktop tower that is still on the desk. (The other tower is on the floor.) I also use rubberized shelf paper in the kitchen under my plates, and actually between some of the serving platters.

I really love this stuff. Get enough of it because you’ll find many uses for it.

VViViD Non-Slip Rubberized Plastic Mesh Shelf and Drawer Liner Non-Adhesive Sheets (12″ x 20ft, White)

Appliances and Furniture

I said above that for our computers, we “start” with rubberized mats. The next step is to fasten all appliances and furniture down with flexible safety straps, so they won’t go anywhere when the world starts shaking.  Of course, what you use to fasten things down depends on their size, their weight, where they are located (how far to a wall stud), etc.

TV monitors are probably the most likely thing to fly in an earthquake. Tie ’em down! Next most important are bookcases, appliances and other furniture. Here are several models of straps and cables to consider.

QuakeHOLD! 4520 Universal Flat Screen Safety Straps

Quakehold! 4163 15-Inch Furniture Strap Kit, Beige

Quakehold! 2830 7-Inch Steel Furniture Cable

And one model of strap (not from Quakehold!) that seems to be all-purpose:

TV and Furniture Anti-Tip Straps | Top Quality Heavy Duty Strap, All Metal Parts | All Flat Screen TV/Furniture Mounting Hardware Included | Lifetime Guarantee (2 Pack, Black)

Objets d’art and Collectibles

Every home has a shelf or cupboard with beloved figurines, plates, vases, whatever. If the shelf falls, or the cupboard opens, these precious items will be destroyed. So, some suggestions:

  • Can you place these objects in a closed cupboard instead of on an open shelf?
  • Run a wire or fishing line barrier along the front of the shelf to keep books from falling.
  • Add a simple lock to be sure the cupboard or cabinet door won’t swing open in an earthquake. (Check under “child-proofing your kitchen.”)

Most important, “glue” treasures down with museum wax from your local hardware or craft store. It holds!

Quakehold! 66111 2-Ounce Museum Wax

Kitchen

I mentioned above what we found in the bedroom when we got home after the 1989 earthquake. In the kitchen was an astonishing mess of broken dishes, broken jars of pickles and peaches, flour and spices, appliances and potted plants.

Again, all kitchens are slightly different. Do a kitchen walk-through. What could fall or move? What will happen if cupboard doors come open? Moving heavy items to lower shelves is the obvious first step. Selectively applying child-proof locks or safety straps may be the next best improvement.

A Weekend’s Worth of Work

Doing the appropriate moving, measuring, drilling and installing will take more than 5 minutes. Depending on your level of skill and interest, it might take all day or even all weekend.

But all it would take is one good shake and EVERYTHING ON THIS LIST  — mirrors, pictures, bookcases, furniture, computers, cupboards, TVs, food, glassware, souvenirs, collections — could end up in a jumble of broken trash in the middle of the room. And you’ll be lucky if you aren’t in it somewhere.

So, join in your own region’s Great ShakeOut and make some safety improvements. You’ll sleep better for your efforts.

Virginia
Your Emergency Plan Guide Team

I mentioned some articles on more serious infrastructure improvements for your home. Check these out:


Will Your Pet Survive an Emergency?

Share

One out of every two people reading this message has a pet. Pet in snowAnd according to surveys, 90% of American pet owners consider their pet “a member of the family.”

So we’ve usually included pets in our articles about family preparedness, just like we include children.

But pets are not children.

So today I want to consider three pet situations that most prepper or survival blogs don’t seem to address.

1 – Pet phobias

Humans, even children, understand what a storm is, and can be calmed and thus make it through loud noises, lightning flashes, etc. They can recognize the need for evacuation.

Many pets, on the other hand, respond to a dramatic change not with understanding, but with real terror.

Their response can be so extreme that it can put them, other animals, and you or family members in danger.

We’ve told the story about a friend’s dog who attended a 4th of July celebration with us. The fireworks – not at all dangerous, and a couple of miles away – were enough to send Boo into a frenzy of barking, trembling, sweating, clawing, trying to run away, and peeing on everything and everybody. His terror lasted for the full 45 minute show. (Ruined it for us, of course.)

That was just one small dog. We kept him safe by holding him. (As you can imagine, Joe, who was doing the holding, needed a shower afterwards!)

As for cats, they are likely to go just as berserk — or just go missing.

Still, if you have the pet at home, what can you do to protect the animal, the house, and other people/pets nearby in an emergency?

Various online websites suggest ideas that I am passing along here. I’d love to hear YOUR story or suggestion.

First and most benign is to try to train your pet to manage his phobia. That can mean setting up a safe and protected place for the pet to get to during the trauma of loud thunder and intense lightning. This could be his crate, a closet, or even the bathtub. Practice having the pet rest there (with a favorite blanket and toy?) on a regular basis when there is no storm or rain; take him there when a storm threatens or the earth shakes. Pets can be trained!

Second, and again this needs practice beforehand, is to give your pet a so-called Thunder Shirt. It’s a jacket that fastens tightly around your pet’s body, applying constant gentle pressure (like swaddling a baby). The Thunder Shirt can be used to lessen separation anxiety, travel stress, fear of loud noises, If you were required to evacuate,a familiar Thunder Shirt  sounds like an excellent idea.. Here’s an example:  ThunderShirt Polo Dog Anxiety Jacket, Heather Gray, Large


Third, and only if you are confident in your pet and your own instincts (and have checked with your vet), you might consider giving your pet an anti-anxiety drug. Again, your vet can help with a prescription, but a well-regarded over-the-counter brand is Rescue Remedy. It’s a liquid that you add to your pet’s drinking water. My research showed prices at Amazon to be about HALF what they are elsewhere!

Click on the link to check prices – be sure you’re comparing the same size bottles (10 or 20 ml). Bach Rescue Remedy Pet – 20 ml


2 – Emergency rations and stomach upset

When it comes to putting together food for a survival kit, we find that for adults the best are (a) foods you know you will like and (b) foods that don’t need be cooked. Typical favorites: peanut butter, canned and dried fruit, canned tuna.

Do you eat this food all the time? No, but you probably know what to expect and thus would be able to put up with it in an emergency. (Heck, you’d be glad to have it!)

If your pet normally enjoys a particular gourmet brand of wet food, she’s not going to be happy being offered dry kibble in an emergency! She may even refuse to eat it!

And even if she does, you may discover what we all know: a sudden change in food can result in a dramatic change in digestion – and poop.

So, as you pack your pet’s survival kit, be sure to put in her usual fare (along with an appropriate bowl and, if necessary, a can opener). If you have time to prepare for a change of scene, and need to use dried food, introduce the new dried food gradually. Naturally, you want to pack water along with the food.

What experiences have you had with potty breaks or controlling your pet’s poop when she has to stay inside, needs to spend long periods in a carrier, etc.? I have seen a number of gadgets invented to try to catch poop before it falls, but none appears to have been a success! (Have you found one that really works?)

3 – Pets in the dark

While we always tend to think about emergencies in terms of storms, or earthquake, the chances are that a simple power outage is the emergency most likely to hit. Your pet will still need to be walked; to protect him from getting lost or being hit and injured, consider a lighted collar (and leash).

Reflective jackets and collars work fine but only when there is light to be reflected! We’re talking here about a total electrical blackout.

Individual battery-operated LED lights can be attached to a collar, or an LED tube can become a collar all by itself. The lights can be set to blink or shine steadily. Very small animals may not be able to wear all models, but here are several that look very practical and are inexpensive enough to add to a survival kit as well as use on a regular basis for night walks.

Note: The most popular styles come with rechargeable batteries. Remember that in an emergency you may not have electricity to recharge the batteries – so maybe regular batteries would be a better choice!

In any case, measure your pet carefully to be sure you get the right size. Here is an example to get you started:

Flat webbing with led lights embedded : LED Dog Collar – USB Rechargeable – Available in 6 Colors & 6 Sizes – Makes Your Dog Visible, Safe & Seen – Green, X-Small (9  13.7 / 23  35cm)


Other lighted pet collars for small animals look just like a piece of tubing that you cut to size!

This is just the start of an effort to focus more attention on pets in emergencies. Watch for a whole new section of our website, coming soon. In the meanwhile, if you have experiences or ideas regarding pets that you would like to share, please send them along via the comments to this post or by contacting me directly.

Do you have pets at work? I am particularly interested in their stories!

Virginia
Your Emergency Plan Guide Team

Be sure to sign up to receive our regular weekly Advisories, below. Don’t miss any of ‘em! Your family, including your pets, will appreciate it.


Coconut Oil for Your Survival Kit

Share

“Good to know about” or “Essential” ?

When I’m writing about items for a survival kit, I often have to distinguish between “good to know about” and “essential to have.” Today, I’m writing about coconut oil. It straddles the line between “good to know about” and “essential to have.”  I’ll let you decide!

Coconut Oil

From my stash . . .

Coconut oil has been popular in health and beauty news for several years, and a couple of years ago coconut water emerged as a very popular drink. (I don’t care for it, myself.)

Coconut Oil for Emergencies

Lately articles about coconut oil as a survival item have jumped out at me. Then, when I got a sample recently — as a unique favor at a wedding party! — I looked into it at more depth.

Here’s what I’ve found out, and tested for myself. See if any of these work for you – then try some of the oil!  It’s inexpensive and available everywhere.

First Aid with Coconut Oil

Coconut oil is claimed to have antiviral, anti-fungal, antimicrobial, antioxidant, antibacterial and anti-inflammatory properties!  Whew! Makes me wonder how I got along without it so far!.

Some simple ways to use it that certainly sound sensible:

  • Apply to a cut to prevent infection.
  • Dot on bites, stings or rashes to relieve itching.
  • Rub between toes to prevent athlete’s foot (a fungus).
  • Relieve chapped lips with a thin coating.
  • Apply to scalp to kill lice (and get rid of cradle cap).


Shelter-in-Place with Coconut Oil

Coconut oil has an extended shelf life (up to two years, maybe longer), doesn’t need refrigeration, hardens at temperatures below 76 degrees and is liquid at temperatures higher. The image above shows my two bottles — the one I’ve been using and the one I stuck in the refrigerator.

Some excellent survival or camping ideas:

  • Rub into wood or leather to condition and protect.
  • Use to season pans and in fact, as a substitute for butter or oil for frying.
  • Use as the basis for a candle. Just add a wick to liquid oil, then allow oil to harden.
  • Use coconut oil to clean your hands – of dirt, wax, paint. (It works great as a make-up remover, too, but you won’t be needing that in an emergency!)


Eat Coconut Oil

I’m not a trained dietitian or a doctor, so I’m not making any recommendations about taking coconut oil internally. Certainly, there are many, many testimonials on the internet and on TV about its ability to improve your health. I suggest you simply research on your own. (Try looking up “coconut oil + _____” and fill in the blank with your own condition: constipation, diabetes, cancer, acne, etc.)

I did find an article that laid out healthy limits for a daily dosage of coconut oil based on your weight. Find out more about this, too, before you start taking it.

Finally, consider the quality of the coconut oil you buy. While there are no internationally agreed-upon quality terms (like “extra virgin” vs. “virgin” olive oil), it does make sense to read about how the oil is captured and processed. It all comes from the coconut — but can be washed, steamed, pressed, bleached, etc.  For our survival purposes, I would look for virgin oil for the best benefits.

Here are some examples of what look like good buys in three different categories. Click on the image to get full details and current pricing.

Island Fresh – Virgin

I selected this because its labeling specifically calls out some of the survival uses discussed above. Note that some other jars of coconut oil at Amazon refer only to their use for COOKING. In fact, some of them add extra flavors to the coconut! Anyway, this is the one I would start with for my own survival kit.


Majestic Pure – Fractionated

Note that this oil has been treated to remove certain fatty acids, rendering it odorless and greaseless and permanently liquid. So-called “fractionated” oils like this may be more convenient for cooking or general purpose beauty care, but may have lost some of their anti-oxidant properties.


Nativa – Refined, in Gallon size!

If you are planning on cooking with coconut oil (French fries!), you may want to purchase refined oil in much larger quantities. Here’s an example of an oil that has a high smoking point, no coconut smell or taste. The customer reviews are very positive.


Note: At Amazon many of the coconut oil product distributors assume you are going to want to sign up for a regular delivery, and they offer a discount for that purchase. My recommendation: try out ONE item first, or even better, try out at least TWO so you can compare, before you sign up for monthly delivery. Don’t accidentally click the wrong box!

I think you’ll end up adding coconut oil to your survival stash, just as I have!

Virginia
Your Emergency Plan Guide Team

P.S. If you have discovered great uses for coconut oil, write and let us know in the comments!


Stay or Go? Keeping Ahead of California Wildfires

Share

Take a look at these 2016 maps, from CALFIRE. On the left, the Current Incidents map shows 10 wildfires burning. Now, look at the map on the right. Just one month later, 17 fires are burning!

California Wildfires

And these are just the MAJOR wildfires burning.

Today, as I write this Advisory, there are 31 fires being fought and/or monitored by CALFIRE.

CALFIRE is the California Department of Forestry and Fire Protection. Its people respond to an average of more than 5,600 wildland fires each year. This year, as of 27 August 2016, they have already responded to 4,270 fires – above average due to significant drought conditions. (No, El Nino didn’t bring Southern California the much needed rain.)

What causes wildfires?

The simple answer: people. Yes, some are started by lightning or lava, but over 90% of fires are started by hunters, campers, tree trimmers and grass mowers, smokers, people’s cars’ catalytic converters and, of course, arsonists.

What can I do to protect my home?

Before you buy or build

Find out before you make an offer if that site is high-risk for wildfires! (If you have found what you think is a good deal, increased wildfire or flood risk may be the reason why.)

Plan for, or confirm, that the home is built from the ground up to the highest fire-resistant construction standards. Building standards vary, but you can get detailed information from your City’s Municipal Code Department and even more detail from the National Fire Protection Association. http://www.nfpa.org/codes-and-standards

Before a wildfire threatens

You’ve heard before about creating a defensible space around your house. Briefly, that means clearing combustible materials from around your house – trees, bushes, uncut grass, piles of wood, fences, sheds, etc. – to create a 100 foot buffer zone between home and fire. Find out full details of each of the 4 zones of defensible space here: http://www.napafirewise.org/index.html

Protect against flying embers by cleaning and then closing up or blocking off gutters, eaves and vent openings or areas under the deck or porch. Purchase or make custom-fitted vent covers.

Pay particular attention to windows and skylights, because they may be more vulnerable to heat. Consider upgrading them to more-resistant materials, and installing metal shutters for the outside of the house and fire-resistant curtains inside.

Fight a fire threatening your home

It is not always possible to protect your home from a wildfire.

However, you may be able to protect your home from a threat or until the fire department gets there by the use of a personal water supply and pump delivery system.

This does NOT mean a garden hose!

Your water source needs to be independent – a pool, dam or lake. Your pump needs to be gas-operated or otherwise stand-alone, since electricity may be out. The entire system – with hoses — needs to be big enough to cover your whole house and preferably the entire defensible space. At the same time, it needs to be portable.

Here is an example from Amazon of the kind of home system you may wish to consider. This model has two 50 foot hoses and can be expanded with more nozzles and hoses. It also delivers foam and comes with approximately 3 hours’ worth.
Home Firefighting HF-S14FC-100F-BK Pool Fire Pump Cart System with 1-Inch Fire Hose and 30 gpm Solid Cartridge Foam System

Obviously, you need to maintain a system like this and practice with it before you actually need it.

Know when to evacuate

For all the above recommendations about preparing for and fighting fire, be ready to go sooner rather than later.

Here are evacuation recommendations from CALFIRE. You can get their full evacuation checklists at http://www.readyforwildfire.org/Pre-Evacuation-Preparation/

Inside the House

• Shut all windows and doors, leaving them unlocked.
• Remove flammable window shades and curtains.
• Close metal shutters.
• Move flammable furniture to the center of the room.
• Shut off air conditioning.
• Shut off gas at the meter; turn off pilot lights.
• Leave lights on so firefighters can see your house under smoky conditions.

Outside the House

• Gather up flammable items from the yard (furniture, toys, trash cans) and put them inside or in your pool.
• Turn off propane tanks. Move propane BBQ appliances away from structures.
• Connect garden hoses to outside spigots for use by firefighters.
• Don’t leave sprinklers on or water running (can affect water pressure).
• Leave exterior lights on so your home is visible.
• Have a ladder available and place it at the corner of the house for firefighters to quickly access your roof.
• Seal attic and ground vents with pre-cut plywood or commercial seals.

We have seen the news footage of fire after fire, and, unfortunately, heard about not only property damage but death.

Preparing for the risk of a wildfire needs to be part of your emergency planning, particularly if you live in California.

Virginia
Your Emergency Plan Guide Team

P.S. Any more ideas you’d like to add to this list?  Just drop them into the comments!


Flood Damage Not Covered by Insurance

Share

The devastating floods being shown on TV are often accompanied by this voiceover:

“And most of these people have no flood insurance.”

flood damageWhen you see the piles of ruined possessions out on the curb, as in the photo, you get a better idea of what “no insurance” really means. And, I hope, you are prompted to take another look at whether your own insurance will help cover flood damage.

After all, it seems as though in the last 12 months we have seen multiple floods labeled “thousand year floods.”  So even if you have never been flooded before it’s possible you’ll experience one for the very first time. And it could be any time.

Last year we were threatened by unusual rain from El Niño, so I took a closer look at flood insurance. Here’s some of what I found out about it.

Of course, you should check with your own insurance agent to confirm how YOUR home fits into the world of insurance coverage. Questions to ask:

What does my Homeowner’s Insurance cover?

Your standard homeowner’s policy doesn’t cover flood damage at all. It may cover some water damage from rain coming through a hole in the roof punched in by a storm, but if rising waters fill the house, you are out of luck.

Do I have to live in a flood plain to get flood insurance?

Well first, do you know if you even live in a flood plain?

Find out by going to FEMA’s map service at https://msc.fema.gov/portal If you need more info about how to manage the map there, here’s a short Advisory on it.

UPDATE: FEMA is redoing the flood maps, changing the boundaries of the different zones. Whether you are in a high risk zone or not, you may need flood insurance.  According to a Washington Post article, only about one in 10 Carolina homes in the counties hit in 2017 by Hurricane Florence had flood insurance!

If you do live in a flood plain, obviously flood insurance will cost more because the chances are higher that there will be a claim. (If you have been required to obtain flood insurance as part of a mortgage, the map can be a good “second opinion.”)

The fact is, though, that something like 1 in 4 claims for flood damage is for a home not on a flood plain. So this shouldn’t be your deciding factor.

And, to answer the question, anyone can get flood insurance, flood plain or not.

Where do I get flood insurance?

Start by checking with your current home insurer. Some of them have flood insurance available, as a separate policy. Most will refer you directly to the National Flood Insurance Program, administered by FEMA. NFIP was set up in back in the 60s, and it has been updated regularly so be sure you check for the latest limits and costs.

How does NFIP work?

Like all insurance programs, the NFIP must be financially sound. Its policies are priced based on two things. First, the likelihood of a claim (“Are you in a flood plain?”). Then, the amount of coverage selected by the homeowner – whether for the building, the contents, or both.

Does the NFIP have maximum limits?

Yes. (That’s why I included that question here!)

While limits have increased over the years, and coverage has been refined, there are distinct features to the policy. You will need to watch for:

  • Maximum for flood damage to the structure – currently $250,000
  • Maximum for flood damage for possessions – currently $100,000

If you have a more expensive home, you can get “excess flood insurance.” You’ll get it from a private carrier, and it will function rather like “a flood policy with a $250,000 deductible!”

What is covered by NFIP?

According to the Insurance Information Institute, “Flood insurance covers direct physical losses by flood and losses resulting from flood-related erosion caused by heavy or prolonged rain, coastal storm surge, snow melt, blocked storm drainage systems, levee dam failure or other similar causes. To be considered a flood, waters must cover at least two acres or affect two properties.”

Note that last sentence. An overflowing storm drain just in front of your house might not count!

What isn’t covered?

Read the following exceptions carefully, and confirm whether they apply in your case.

  • First, flood insurance doesn’t cover that build-out to your basement (although it may cover some of the air conditioning or heating systems). Nor will it cover stuff you may have stored down there. No basement coverage!
  • Second, it may pay replacement cost for your home, but it will only pay “current value” on possessions. This means the family “heirlooms” may be worth almost nothing as far as insurance coverage is concerned.
  • Third, this insurance doesn’t help cover living expenses during the time your home is being rebuilt.

And while I hesitate to say it, you may find that the way your insurer defines “not covered” is likely to be confusing and/or downright misleading. You need to become your own expert.

Should I get flood insurance?

I’m not going to recommend one way or another, but I would certainly consider it. The average price is somewhere around $600 a year for maximum coverage. (I looked into it for our house here in Southern California, built in what is essentially a desert landscape. Our quote was $371/year.)

What else should I know?

Here I WILL make some recommendations.

  1. Be sure to maintain your house whether or not you get a flood policy. Some water damage coverage on your current homeowners policy may be denied if you haven’t installed or maintained gutters, kept up with roof repairs, etc.
  2. No matter what kind of insurance you carry on your home and/or possessions, charge up your phone and do a deliberate walk through, video-taping the contents of every room. Having this record will be incredibly valuable in helping you remember what is missing or damaged in any kind of emergency. Put the footage on a flash drive and store it with a family member or at work, somewhere “off site.”
  3. If you are thinking to wait until the “real” rainy season hits before you buy flood insurance, don’t wait any longer! Remember that there is a 30 day waiting period after you sign up before the coverage goes into effect.

Finally, as with all insurances, I recommend you get at least two quotes. Flood coverage, just like earthquake coverage, is something the average insurance professional may not be experienced with. You need to become your own expert – after all, it’s your house we’re talking about!

Virginia
Your Emergency Plan Guide Team

P.S. I can hear some of our readers saying, “Heck, I know all this.” If that’s your case, how about forwarding the article to a family member or friend who might NOT know it all!  Thanks!

P.P.S. And if you haven’t already, subscribe to our Advisories below. Just let us know where to send them. You never know when one will come that has some new information perfect for you that week!


Summer Water Shortage

Share

What I really meant: Summer Water Shortage Storage

Here in California, we’ve had drought conditions for 4 years. Throughout the state, people have cut back about 25% on water usage – sometimes voluntarily, mostly as a result of cost pressure.

But using less water for the landscape doesn’t mean we should drop storing water for an emergency!

So again, I want to promote . . .

The best water storage solution: the 4-item 55-gallon water barrel kit.

The kit has four components. You need all four!

You can buy them separately or all together, at Amazon, Walmart or at Costco or wherever you find the best price. In doing my research today I found that by shopping carefully I could get the same four items for a low of about $100 to a high of about $150.

The image shows a kit with the four items that need to be on your shopping list — the barrel, the bung wrench, the pump and the water preserver. You can click on the kit image — or any of the images below — and go directly to Amazon. But before you go there, learn more about each of the components so you know what you’re looking for.

1 – The 55 gallon water barrel

What you want is a standard blue polyethylene plastic food grade water storage barrel with a sealed top. (I’d want a new one. Even if it’s brand new, give it a good rinse with a diluted chlorine-bleach solution – one part bleach to 10 parts water. Of course, use non-scented bleach that contains no soap.)

What to watch out for:

When it’s full, your barrel will weigh 440 pounds so you won’t be able to move it by hand!  Pick the spot where you want to store it, lay down some boards or pieces of wood to keep it up off the ground or the floor, and set it in place. (Make sure your floor can hold this weight.)

2 – A “Bung wrench” to open the plugs in the top of the barrel

The stopper in a barrel is called a “bung” and you’ll need a special wrench to remove it. You can get a metal or plastic wrench like the red one in the photo to the right. Often, the wrench will be designed for a second function, like being able to turn off gas at your meter. Bung wrenches seem to go missing on a regular basis. You may want to fasten it to your barrel (tape?).

3 – A Pump to get the water out of the barrel

 These water barrels are designed with openings only at the top, so to get the water out you need to insert a pipe down through one of the bung holes and then pump the water up and out. Since this is for emergency use, you need a pump that operates by hand! Be sure your pump is BPA free since your drinking water will be flowing through it.

What to watch out for:

An inexpensive siphon hose can work but may take a lot of effort to get started. Other hand siphon pumps have a hand-operated sliding action and larger tubes, and are more efficient. The image shows the “vertical manual action” of the pump shown in the kit.

Once you get a siphon pump flowing, it will continue to flow until you stop it, so be sure you know how to start AND stop the flow. (Hint – you unscrew the cap at the top to break the vacuum.)

Here’s a great video from Robert Canning that shows just how to install and use a hand siphon pump.

There are also hand pumps with a lever that pump a certain amount with each press of the lever – best if you want to remove just a small amount of water.

4 – Water preserver liquid

We have written before about using 1/8 cup of plain bleach in your barrel full of water to keep the water clean for long-term (i.e. year-long) storage. You can also use a water preserver concentrate that will keep water clean for up to 5 years. Follow the directions on the bottle to get the right amount into your barrel.

And now, the question we overlooked . . .

How to get the water INTO the barrel? Three options.

If you’re like me, I want the barrel tucked out of the way, so it turns out not to be close to a faucet. So how do I fill the barrel?

Naturally, you’ll think about using the garden hose. But wait. That hose has probably been sitting around for who knows how long, getting dirt on it, spraying pesticides or soap, and gradually disintegrating. I wouldn’t want to use it to fill MY barrel!

So what are other options?

One way is to use new bottles of water or simply carry water from the kitchen in a clean container and pour it into the barrel. Works fine, takes many trips!

The other option is to purchase the right length of food grade, white plastic drinking water hose at an RV supply store and run it from the tap.

And finally, store the barrel properly.

Some hints:

  • Label the barrel with the contents and the date you fill it, so you’ll know when it’s time to empty, refresh and refill.
  • Store in a cool dark place, out of sunlight; keep it clean.
  • Camouflage the barrel to prevent someone from stealing your water. Cover it with a tarp or canvas, turn it into a workbench, whatever.

This water can keep you alive in a crisis, so consider this big purchase as a gift to the family for the summer!

Virginia
Your Emergency Plan Guide team

P.S. You will likely want to have smaller containers of water, too, so you can store them more easily, move them, pour out just a glass of water, etc. Here are a two more articles from Emergency Plan Guide you may find useful as you consider how to store the water YOU need:

Off to College? What’s in your survival kit?

Share

Pretty exciting, isn’t it? New freedom, new friends, new food (!).

And, new dangers.

Survival kit for collegeWe can’t deal here with all the social issues on campus. But there are some things you can do to make your life away at school a bit safer and more secure. Take the time to check these out.

1-Be Ready For An Active Shooter on Campus

The news has been full of shooter incidents lately, so perhaps you’ve spent time talking about what YOU would do in that situation. But maybe you haven’t.

People most at risk are – OBLIVIOUS!

  • Walking around with their eyes glued to their cell phones.
  • Chatting or goofing off with friends and not paying attention to their surroundings.
  • Half asleep, waiting for somebody else to tell them what to do.

Time to change those habits!

Here’s a video put out by the University of Alberta that is pretty effective at reminding you what to do in case you hear what sounds like gunfire. The best stuff comes after the 2 minute intro.

Action item: Take 8 minutes right now and watch this video.

https://youtu.be/gHNApS-MC18

And then consider these actions for when you get to campus:

2-Secure Your Dorm Room or Apartment

Let’s assume that any room you are sleeping in has normal locks, and that you use them. However, if you want to be more secure – and particularly if you have been notified of danger on campus – you want to be sure you are extra safe inside.

Depending on the construction of the door, here are three things to consider.

= = > Barricade the door.

Somebody dangerous threatening you? The classic chair under the door handle really DOES work, as long as the angles are right. In an office setting, though, you may not find the stiff chair you’re looking for. So, in an emergency, don’t hesitate to pull a HEAVY piece of furniture (table, copy machine) in front of the door. Add a second heavy piece behind it.

= = > Disable the mechanism.

Keep door from opening
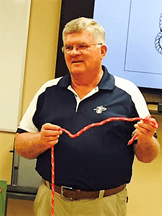
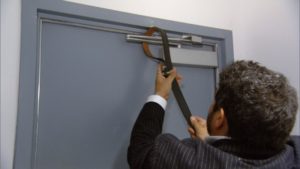
The working of a typical commercial door hinge may be defeated by use of a belt. Tighten it down to prevent the door from opening, as shown by Bill Stanton, safety expert.

= = > Get a door wedge.

In your bedroom or dorm room, a simple investment in a rubber door stop may be all you’ll need. (This one looks as though it will work on any surface.) Click on the image for details.

Keep intruders from coming in through a balcony with the help of a sliding glass door bar – you can place it in the track of the door, or, if you’ve bought one for that purpose, lock it across the center of the door. Obviously, a determined intruder can break a glass door if he or she has the tool to break it with.

3-Be Prepared For Evacuation or An Extended Lockdown

It’s far more likely that your college stay could be impacted by something less dramatic than an active shooter. But it might be equally serious – like a storm, flood, electrical outage, or even some sort of disease outbreak.

Be ready to respond to a call to shelter in place or to evacuate by having your own survival kit. Figure you need to take care of yourself for at least 72 hours – and remember, you will have no access to electricity, water or food. Or a toilet.

Stuff your kit (use a backpack) and have it handy so you can grab it at a moment’s notice.

What should be in your kit?

Basic Emergency Supply Checklist

  1. Water – 1 gallon per day. (Tough to fit in a small backpack, admittedly!)
  2. First Aid Kit with fresh supplies.
  3. Food – Canned or dried foods that you like and that don’t require cooking.
  4. Clothing – A set of warm, comfortable clothing. Extra sunglasses, glasses or contact lenses.
  5. Medicine – At least a two weeks supply of any prescription medicines.
  6. Sanitation – Garbage bags, including small, compactor-strength bags for waste. Sanitary supplies. Toilet paper, baby wipes, paper towels.
  7. Flashlights, emergency radio that operates with batteries, solar or by hand crank – NO CANDLES!
  8. Car – Always ready with half tank of gas.
  9. Cash – No electricity = no ATM, no credit card.
  10. Telephone numbers – Write on paper. Your cell phone and computer will run out of battery unless you have a solar charger.

You should be able to collect just about everything on this list right at home, before you leave for school. There’s one possible exception — the emergency radio.

Here’s a link to Amazon that will get you one of the best ones we’ve found. It operates using AA batteries, its own solar panel, or you can crank it for power. You can even charge it from your computer. Click on the image for details. (If you buy through Amazon we may get a small commission. It won’t impact what you pay.)

OK, we know you have put in a lot of effort to get to where you are. Don’t overlook some of these common-sense preparations that will KEEP you at school just the way you have planned.

Best of luck,

Virginia Nicols
Your Emergency Plan Guide Team


P.S. Please share this article with friends. It’s possible they won’t have thought of all these things, either!


What threat do you face from a nuclear reactor emergency

Share

Nuclear Power PlantWe have written before about the shadowy world of nuclear power plants. In last week’s news I found another of the disconcerting developments connected with plants that have been shut down and that are going through the “decommissioning process.”

This news comes from Vermont.

Briefly, the purpose of decommissioning is to remove and dispose of contaminated materials so that the property may be released for other uses. Since decommissioning can be a long and complicated. the plant owner is required during the plant’s lifetime to set money aside for that purpose.

Naturally, once the plant stops producing power, owners want to shut it down as quickly and as inexpensively as possible.

One of the steps they take is to petition to have the “emergency zone” around the plant reduced. We have written before about the 50-mile-zone vs. the 10-mile-zone; you can check that Advisory by clicking here.

It turns out that Entergy, owner of Vermont Yankee, has successfully petitioned the NRC not only to stop supporting planning in the 50-mile zone, but also planning in the 10-mile zone. In fact, it has petitioned to eliminate ALL its responsibility to the 18 towns around the plant.

Apparently the funds set aside for decommissioning have also been “used for other purposes.” Lawsuits are being filed, hearings held. It’s not clear what the outcome will be.

But this brings up the whole issue of emergency planning around nuclear power plants.

Can you answer these questions about living near a nuclear power plant?

Nuclear Reactors U.S.1. How far away is the closest nuclear plant?

There are about 100 operating nuclear plants in the U.S., and most tend to have a low profile. So if you don’t really know where the nearest reactor is located, here’s a link to a map from the Nuclear Regulatory Commission (NRC):  http://www.nrc.gov/info-finder/reactor/  *There’s a lot more info behind each pin on the map at the site.

2. In an emergency, how will you be affected?

The NRC defines two emergency planning zones around nuclear power plants: 1) a “plume exposure” zone with a radius of 10 miles, where airborne radioactive material would directly impact people, and 2) a second zone with a radius of 50 miles where contaminated food and water could be ingested by people within the zone.

(As a side note, Japanese authorities set a 20 km “exclusion zone” around the destroyed Fukushima Daishi power plant. That zone continues to be adjusted as radiation levels change as the result of government clean-up efforts and new weather events.)

3. What preparations can you make to protect yourself from a nuclear accident?

If you live near an operating plant, it’s likely that the first you’ll know of an emergency is when you hear a siren. (3-5 minute blast, repeated) Immediately tune to your local FM radio station or TV station, or to one of the Emergency Alert System (EAS) stations.

  • Plan to shelter in place. The major hazard in the plume area is direct exposure to the radiation cloud – through breathing, touching particles on the ground, or eating materials that have been contaminated.
  • Go indoors and stay there. Close doors and windows and shut off furnaces, fireplaces and air conditioners. Keep pets inside. If you’re in your car, close the windows and vents.
  • Keep listening for updates!

4. What will the authorities be doing?

  • An evacuation may be called. Grab your survival kit/evacuation kit and follow instructions. Hopefully your car’s gas tank is at least half full.
  • You may be advised to take potassium iodide (KI). KI is a nonprescription medication that blocks uptake of radioactive iodine by the thyroid gland. It is FDA-approved and readily available, coming in 65 and 130 mg tablets and liquid form; children need half or even a quarter of the dose for adults, so follow directions carefully. KI is effective for about 24 hours and you need to have enough to last every member of the family for several days or until you can get out of the affected zone. (See purchase info at the bottom of this article.)
  • You’ll be notified when it’s safe to return. (How can you be sure it’s safe? See “More resources,” below.)

5. What about the threat of a closed plant?

Here in Southern California, the San Onofre plant ceased operations in 2013 after a history of maintenance problems. The owner of the plant is just now putting final touches on its “decommissioning plan.” Spent fuel is being stored in one of the closed reactor containers — just hundreds of yards from the Pacific ocean (risk of tsunami?).  Since the 2010 U.S. census counts over 8 million people living within 50 miles of the plant, ANY emergency here will have a big impact!

Clearly, the chances of a nuclear disaster are far less for a plant that is no longer running, but as long as radioactive fuel is still being stored on site a certain threat remains, whether from a weather event (like what happened and continues to happen in Japan) or a terrorist event.

So it’s back to you and your emergency planning team, whether that’s your family, your local neighborhood emergency response team or your workplace leaders:

  • Are you near a nuclear plant?
  • Is it operating at full or reduced capacity?
  • Is it shut down or scheduled to be shut down?
  • What is the emergency plan for the site?

As an active and concerned citizen, it’s up to you to learn more. I hope this article can be the impetus. We’ll continue to share what we learn . . .

Virginia Nicols
Your Emergency Plan Guide Team

More resources:

Buy KI tablets. As you are shopping, consider the make-up of your family, and whether it would be easier for you to have smaller tablets (adults take two, child takes one) or even liquid (would have to be mixed with something). This is an inexpensive item so get a big enough supply that you don’t have to worry about running out. This particular item often goes on sale at Amazon — note its expiry date! (Click on image or link to get current price details.)


IOSAT Potassium Iodide Tablets USP, 130 mg, 14 Count


For more understanding of your circumstances, consider a Geiger Counter. You can learn more about them at this Advisory and take a look at two versions here:

SOEKS 01M Plus Generation 2 Geiger Counter Radiation Detector Dosimeter (NEW Model replaces SOEKS 01M)

GCA-07W Professional Geiger Counter Nuclear Radiation Detection Monitor with Digital Meter and External Wand Probe – NRC Certification Ready- 0.001 mR/hr Resolution — 1000 mR/hr Range


There are less expensive options, including this app that works with your phone. Its  low cost makes it attractive for people living or working in areas of moderate risk, or for people who want a backup unit to carry on the road.. . .

Smart Geiger Counter Nuclear Radiation Dosimeter “X-Ray” and “Gamma” Detector Smartphone Android iOS with App


Don’t miss a single Advisory. Sign up below.


Survival Vocab Quiz

Share

Survival VocabularyOK, so you’re in good shape when it comes to preparedness.

But can you talk to people about preparedness using THEIR words?

Here are three quick quizzes for three different groups. See how you do!

Group One: Your Prepper Relatives

While you may not be a red-hot survivalist, you probably have a few in the family. Maintain your dignity by knowing these prepper acronyms:

  1. EDC – Every day carry – collection of essential, small items that the survivalist has at all times in a pocket or purse.
  2. ATV – All-terrain-vehicle – A three or four-wheeled “buggy” that can carry preppers to safety through the woods or over the hills, when roads are impassible or too dangerous.
  3. BOB – Bug-Out-Bag – What you need to have ready to grab and go and that will keep you alive for at least 72 hours. At a minimum it contains shelter, water, and food.
  4. OTG – Off the grid – Surviving without access to electricity, municipal water, grocery stores, etc. Usually, it means setting up alternative living arrangements in an isolated area where you won’t be bothered by people who haven’t prepared in advance.
  5. SHTF – Shit Hits The Fan – All your preparations are made so that you will survive when the SHTF.

Group Two: Your Emergency Response Team Volunteers

These folks are committed and concerned. You owe it to them to provide good leadership by knowing what you’re taking about.

  1. CERT – Community Emergency Response Team member – Someone who has taken the (free) 24 hour course designed by FEMA (see DHS, below), offered by a city or other local organization. CERT members are volunteers who have received training in basic disaster response skills and who agree to provide emergency care until professionals arrive, and then support those professionals as needed.
  2. DHS – Department of Homeland Security – DHS was established in 2002, combining 22 different federal departments and agencies into one cabinet-level agency that now has 240,000 employees. FEMA, the Federal Emergency Management Agency, is part of DHS.
  3. EMT – Emergency Medical Technicians — EMTs are trained to provide emergency medical care before a person arrives at a hospital. EMTs may be associated with an ambulance company or a fire department; they may have different levels of training depending on their state or employer.
  4. SOP – Standard Operating Procedure – “The way we do things.” If you don’t have an SOP for your team, then you can’t expect any given outcome.
  5. Triage — Triage is the first step in an emergency. It is the process for sorting injured people into groups based on their need for medical treatment. Triage, by definition means that as a volunteer you don’t stop to help the first injured person you see.

Group Three: Co-workers

People at work deserve a plan for emergencies. If you’re involved, here are formal and informal terms you should be using:

  1. OSHA – Occupational Safety and Health Administration – OSHA is part of the Department of Labor. For our purposes, it is important to realize that OSHA’s purpose is to “provide a workplace free from serious recognized hazards.” Generally, this does NOT require any sort of emergency preparedness plan.
  2. BC/DR Plan – Business Continuity/Disaster Recovery Plan — These terms are often used interchangeably but they both contain an approach to (1) preparing for emergencies, (2) taking action to limit damage before anything happens, (3) understanding how to get through the disaster when it does it, and then, (4) how to get back to BAU (see below).
  3. BIA – Business Impact Analysis – This is the first step to a Disaster Recovery plan. It’s a process that will identify and evaluate the potential effects of a disaster, accident or emergency on your critical business operations. The BIA will help set priorities for your planning.
  4. BAU – Business As Usual — After an emergency, BAU is what you want to get to. However, it’s possible that today in your workplace, if changes aren’t made right away, your current BAU will lead to a worse disaster than was necessary!
  5. SOW – Statement of Work — If your organization decides to hire a consultant to help in developing your BC or DR Plan, you’ll likely ask for, or actually provide yourself as part of the consulting contract, a statement of work that outlines exactly what is to be done.

Ok, had enough?! Here are a couple of suggestions to make this exercise valuable for a bigger audience.

  • Action Item #1: Consider printing out these definitions for your emergency response team members. Go over them out loud at a training meeting so everyone knows how they sound and can say them easily. Some of this will be new to some of your members, I can guarantee it!
  • Action Item #2: At work, share this list with co-workers or with your boss. If emergency preparedness and emergency planning are relatively new subjects, people will get a sense of confidence having been exposed to this vocab.

Let us know how you used the list!

Virginia
Your Emergency Plan Guide Team

P.S. And one last acronym I just can’t resist putting in here: TEOTWAWKI:

If you’ve spent time on survival websites, you’ll know that this stands for The End Of The World As We Know It. TEOTWAWKI usually assumes a BIG disaster – total economic collapse, cosmic event, pandemic, etc. I don’t know how the acronym is pronounced, if it even can be pronounced!

P.P.S. More preparedness vocabulary for people who like this sort of thing:


Abandoned in a disaster?

Share

Helping people with disabilities.

This is my 5th year of writing weekly Advisories, and my 15th year of participating in my local neighborhood emergency response team. During that time I’ve attempted to address the challenges of helping people with disabilities during a disaster.

Not suitable for wheelchair usersThe first time the subject came up was after Katrina, when we heard the horrific stories of people left behind in their nursing home to drown. Then, after Hurricane Sandy, stories came out about people trapped in their high-rise apartments when the power – and thus the elevators – were out for days and days.

Most recently, I received an email from a reader asking if I had any advice for her newly-formed Emergency Team, particularly on how to plan to help neighbors suffering from dementia.

So for the past couple of months I’ve been reaching out again for resources.

Let me warn you – I have not found much!

But let me share what I have found, and invite you to comment or to incorporate some of this into your own local planning. I’m posing these as questions you can ask in your own community.

1 – Should we maintain a Registry of people with special needs?

Several online articles mentioned efforts to build lists of people who might need special help in an emergency. I found references to what looks to be a robust registry in Santa Clarita, California, and the Calgary Police (Canada) started a new such registry in 2015. However, other registries that I attempted to research have gone out of business!

I even posed a question online in a special LinkedIn group, and over two dozen people were kind enough to respond. The consensus: many people with disabilities do not want to be on any list – mostly because they don’t trust that their information will be kept private.

Check your local community for what’s available and confirm that it is secure.

2 – Does our city have special plans for First Responders when dealing with people with disabilities?

We have a great relationship with our City’s Office of Emergency Management, so we invited the head to speak to our group. One of the questions we posed was this one. His answer, “We do not have special plans because we don’t know exactly what will be needed.”

Since this answer wasn’t exactly satisfactory, I have dug deeper into training that is available for First Responders. In fact, there are resources available online, for free, that would be useful for First Responders and for ALL of us. We will be building them into our regular trainings starting in September.

Some simple and sensible guidelines:

  • Don’t make assumptions about people’s abilities or disabilities in an emergency situation. Ask.
  • Everybody will be disoriented in an emergency, so expect a range of emotional response.
  • Treat people with respect. Somebody who can’t see isn’t necessarily deaf or stupid. Be patient.

Tips for First RespondersTwo resources I found most useful:
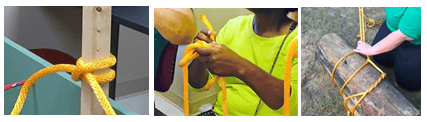
Tips for First Responders from the University of New Mexico. You can get a pdf that lists tips for dealing with 12 different situations: seniors, people with service animals, people with autism, etc.  The online link: http://cdd.unm.edu/dhpd/tips/tipsenglish.html

A set of training videos for First Responders comes from the Nisonger Center at Ohio State University. I found them thorough but long. This is the YouTube link:  https://youtu.be/VRa3oU09XIE?list=PLjdWYCi9CWHblC5668uTXiMoTHNEdyUaw

3 – What should people with disabilities do when it comes to emergency planning?

There is really only one good answer. If you have special needs, you are in the best position to plan for your own safety.

It’s up to you to build your own personal support network. Members of your network can be relatives, neighbors, friends and co-workers. You need more than just one person; you need people you can trust to check on you and people who know your capabilities and needs.

As part of my research I received many great referrals, but one document that appealed to me particularly comes from FEMA and the American Red Cross. Preparing for Disaster for People with Disabilities and other Special Needs is a brochure with a lot of basic information, but in my estimation, it’s the “Complete a Personal Assessment” section that is most valuable We will be using this assessment list with ALL our members..

Action Item: Get this Assessment; it starts on page 3 of the booklet: https://www.fema.gov/media-library/assets/documents/897

I have no doubt that we will be revisiting this topic many times. If you have a recommendation for EmergencyPlanGuide.org readers, please share it in the comments below.

Here’s to a better chance of survival for your entire community!

Virginia
Your Emergency Plan Guide team

I’ll be publishing excerpts from the materials mentioned in this Advisory. Don’t miss them. Sign up to get all our Advisories below.


Then The Knot Slipped . . .

Share

As simple as it seems, being able to use and tie the right knot can be the difference between life and death in an emergency.

This week we hear from an EmergencyPlanGuide.org reader about a recent CERT training class he led.

A SKILL WORTH KNOWING — by Sparky Wilson

CERT members practice knot tying

CERT members practice knot tying

Many skills learned by Community Emergency Response Team (CERT) volunteers can come together to make a huge difference in the success of a disaster response. The Lee County, North Carolina CERT actively studies and practices those things we learned in the CERT Basic Course:  individual preparedness, basic first aid, light search and rescue, light fire suppression, disaster psychology, CERT organization, effective radio communications, etc.  Those are all very important; but, there’s one important skill we have neglected until now – knot tying.

WHY KNOT?

Well, learning how to tie knots can save lives.  We all know that anyone can tie a knot; but, that is not the solution.  Knowing how to tie the right knot for the specific need is the solution.  There are dozens of different knots with hundreds of uses and all knots are not good for all purposes.

We began our knot tying efforts by studying different knots to determine those our team members would find most useful in an emergency.  As an added benefit we are finding that these same knots can make life a little easier around the house.

CERT VOLUNTEERS TIE KNOTS?

It is critical that we stay within the CERT scope of work.  We will never be first responders trained in the use of ropes and knots and that’s okay.  Staying within the CERT scope of work we feel that there are emergency situations where with the use of a few simple knots CERT volunteers can help their neighbors in trouble until the professionals arrive.

None of us want to think about a hurricane, tornado, earthquake, flooding, or any other major disaster hitting our neighborhood.  Unfortunately, hope is not a method and not preparing for likely disasters just won’t work.

Assume for a minute that a disaster hits your neighborhood – homes are damaged, residents are hurt, communications are down and you can’t reach the professional responders for help. So what can do you do?  You can activate your CERT team and start your response efforts.

Your search and rescue team deploys and discovers victims – some trapped under heavy objects.  You start extricating trapped victims and look for loose items overhead and around the scene that can possibly fall on to your team and/or the victim.

  • Can you secure these items with rope and knots to keep them from falling while you extricate the victim?
  • Can you fashion the right knot on the end of a rope and toss it to the victim allowing rescuers to stay safe and accomplish the mission?
  • What is the best knot to use?
  • Do you know how to tie a Bowline or a Figure Eight Loop?

Two knots for CERT training

Good for rescue loops at the end of a rope – the Bowline and Figure 8 Loop

You’ve extricated the victims and you set out to move them to the Medical Treatment Area.  You quickly discover that the roads are blocked with fallen trees and debris.

  • What knot should you use to move fallen limbs and logs?
  • Do you know how to tie a Timber Hitch knot? (The far right-hand photo at the top of this page.)

LEARNING TO TIE KNOTS ADDS TO OUR PREPAREDNESS SKILL SET

We built Knot Tying Stations and held our first training class on the use of knots in June.  Our team members were oriented on how and when to tie ten useful knots that can save lives.  Our “hands-on” training included tying and learning the best uses for the following knots:  Overhand, Figure Eight knot and Loop, Square, Sheet Bend and Double Sheet Bend, Round Turn with Half Hitches, Clove Hitch, Timber Hitch, and the King of all Knots, the Bowline.  As a memory jogger, every team member was issued a two page instruction sheet that pictures and describes how to tie each of these knots and when to use the most important knots.  These instruction sheets are to be carried in our CERT backpacks.

PRACTICE, PRACTICE, PRACTICE

Sailors, rock climbers, firemen, and boy scouts will tell you that tying a knot is one thing, but tying it properly is another. Our team members are no longer strangers to a few good knots.  We will master these knots by incorporating additional knot tying sessions into future training plans.  After all, practice makes perfect.

Sparky Wilson, CERT leader


Sincere thanks to our guest author, Sparky Wilson! He is a retired Army Colonel living in Carolina Trace, NC. In 2006 Sparky started a local CERT group and over two hundred volunteers have completed the CERT Basic Course since then. 


Do you have a volunteer group story to share? I’d love to feature you in one of our Advisories — just drop me a line and let me know! In the meanwhile, don’t let summer lull you into complacency. Preparedness is a year-round exercise!

Virginia
Your Emergency Plan Guide Team

P.S. If you are intrigued by rope tying, or have experienced first hand just how effective a few good knots can be and want to learn more, take the time to study both how to tie the knots and understand their weaknesses. Some knots slip if not under constant pressure. Some can tangle if they are under too much pressure. Select the right rope and the right knot for the job and this is a skill you’ll appreciate on a regular basis, not just when there’s an emergency.


Stay Safe in Hotels

Share

Summer may find you traveling to new places, and staying in new hotels.

Hotels have their own risks

. . . worth noting and being aware of.

Smoke in hotelFire:

High-rise hotels (or any high-rise building, for that matter) are vulnerable to fire. The causes? malfunctions in electrical equipment, carelessness, smoking (in bedrooms), temporary decorations for festivities, use of combustible cleaning materials, and, of course, arson and sabotage.

In a hotel, fire danger is increased because guests, people attending conferences, patrons at restaurants and bars, etc. probably don’t know the layout of the property and have no idea about security or emergency policies.

Terrorism:

Particularly in developing countries, hotels have become the popular target for terrorists. There are a number of reasons why.

  • Over the past couple of decades, embassies and military buildings have been “hardened” against attack.
  • Hotels remain areas where many people come and go, where entrance to the building is seldom restricted, and where politicians and other high-profile individuals are likely to be found.
  • Even when security is improved, by definition a hotel is a “soft target.”

If you are traveling and can make a choice about which hotel to stay in and where in the hotel to sleep or conduct your business, you may wish to consider these recommendations, culled from a variety of sources including the Stratfor Weekly, National Fire Protection Association, and Siemens Switzerland Ltd.

What to do to reduce the risks

Before you arrive

  1. Find out about hotel security. Is parking secured? Is the desk manned 24 hrs. a day?
  2. Ask about smoke/fire alarms and sprinkler systems. There is no guarantee that they will work, but if they are absent altogether, you may wish to look for another hotel.
  3. Choose a room between the 3rd and 5th floor, where terrorists can’t easily reach you from the street and fire department ladders can reach if you need to evacuate.
  4. Choose a room away from the street to avoid an explosion or violence at the entrance, which is where most terrorist activity occurs.
  5. On your floor, confirm the location of fire extinguishers. Have they been certified?
  6. Check on emergency stairs, exits and signage. Confirm that there are no items stored in stairwells.
  7. Keep emergency items next to your bed: shoes, a flashlight, and a smoke hood if you carry one. See below for more details.

If there is a fire in the hotel

  1. Grab your smoke hood and be ready to put it on if you smell smoke.
  2. Escape from your room if you can safely.
  3. Stay low and use walls as a guide.
  4. Use stairs; do NOT use elevators.
  5. Do not enter a staircase or hallway if it is filled with smoke. Try to find another path.
  6. If you must, stay in your room. Protect against smoke by sealing the door with duct tape and/or wet towels; stay low to the floor.

If you suspect terrorist activity

  1. Escape from the hotel if you can.
  2. If you are trapped in your room, protect yourself. Lock the door. Use a door wedge. If you can do it quietly, move furniture in front of the door for further protection. Turn off the lights. Turn off the TV and silence your cell phone. Close the drapes to protect from explosions that might create broken glass, and stay away from the windows. YOUR GOAL IS TO MAKE THE ROOM APPEAR EMPTY so terrorists will go on to an easier target.
  3. If terrorists are evident, and you cannot escape and cannot hide, you must fight. Improvise weapons with whatever is at hand – a lamp, a piece of furniture, a hot iron, a full water bottle, a battery charger at the end of a cord or in a sock, etc. In this case, your SURVIVAL MINDSET IS MORE IMPORTANT THAN WEAPONS. Fight, and don’t stop.

Emergency items for travelers

In this article we’ve mentioned just a few items that are recommended for travel safety. We haven’t used all of them ourselves, but it they make sense to you, check them out.

Door wedge

You may have a couple of these in the house already! Simple, small, easy to pack. Very effective at keeping any door closed — and you can get a couple of them for less than $10. Here’s an example from Amazon:

Shepherd Hardware 9132 Rubber Door Wedges, Brown, 2-Pack

If you’re traveling by car, you can also consider carrying a sliding glass door security bar. We always have one for peace of mind when we stay in hotels with balconies. Cost is right around $20. Here’s a link to a good one (no photo – I figured you know what a bar looks like!):

Master Lock 265DCCSEN Dual-Function Security Bar


Smoke hood

Rather like a gas mask, a smoke hood goes over your head and seals tightly to protect you from inhaling smoke. A filter allows you to breathe. Smoke hoods cost anywhere from $25 to $150 or even twice that, so you’ll want to shop carefully.

The filters in smoke hoods screen out particulate matter, fumes and gases. Unfortunately, the most deadly gas, carbon monoxide, can’t be filtered out. But carbon monoxide can be converted to carbon dioxide. Look for this feature in the smoke hoods you’re considering.

Other features to consider: How big is the hood — will it go over eyeglasses? Will it fit a small child? How good is visibility? Can others see you in the smoke? How long will protection last?

Here are three different models from Amazon, for comparison. Look at the photos (provided by the sellers) to answer some of the questions above. Click on the links to go directly to the detailed product page.

1 – FIREMASK

FIREMASK Emergency Escape Hood Oxygen Mask Smoke Mask Gas Mask Respirator for Industrial and Urban Survival – Protects for 60 Min Against Fire, Gas, & Smoke Inhalation . Great for Home, Office, Truck, High Rise Buildings. Get Peace of Mind 

Firemask

Firemask claims 60 minutes effectiveness. Of course, it is one-time use, replaced if you need to use it. Its Polycarbonate visor looks to provide good visibility.

Easy to put on, fits children as young as 3. Amazon low cost (as of today), $28.95.


2 – SAFESCAPE

Safescape ASE60A Fire Escape Smoke Hood Respirator Hard Case with Glow in the Dark Side Straps and Labels

safescape

From the photos and reviews, it looks as though the hood on the Safescape is bigger and perhaps more heat resistant than other hoods. The hard case can be mounted in a strategic place, and the glow in the dark strips would make it easy to find.  Any hard case might make packing a smoke hood more difficult.

60 Minutes of breathable filtered air. Easy to put on without special instruction.

Five year shelf life – Free Replacement if used in documented emergency.

Amazon price today: $69.95. Note that there is also a less expensive Safescape 30-minute hood.


3 – iEVAC

iEvac® the only American Certified Smoke/Fire Hood

ievac

This is most expensive and heaviest of the three hoods here. Notice the reflective tape top and sides, which will stand out in smoke and darkness.

This hood is the only “certified” hood. It gets top reviews and carries some strong endorsements:

  • Designated as an Anti-terrorism technology by the US Department of Homeland Security Safety Act
  • Tested by the US Army Research, Development and Engineering Command, Edgewood Chemical Biological Center
  • Currently being used by numerous Federal, State and local Government Agencies including every branch of the Military

The iEvac costs $149.95 at Amazon (and more in other places).


Of course, you can’t avoid every potential danger when you’re traveling. But some simple, common sense preparations may make your trip a lot more comfortable and safer.

Virginia 
Your Emergency Plan Guide Team

If you actually live full-time in a highrise building, you may want to take a much closer look at what would happen if a fire broke out. Here’s an Emergency Plan Guide Advisory with more ideas.