Category: Family Survival

First-time Driver Needs More Than Seat-time

Share

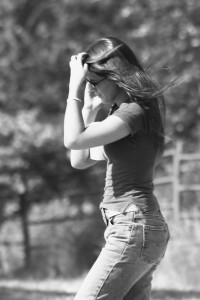
Our 16-year-old granddaughter got her first car just a week ago and is nervously practicing her driving. While Joe helps her master reverse gear (one of his favorites), I am putting together an emergency kit for her. Considering her skill and experience level, it needs to be different from the usual “commuter car kit.”

Key features of Emergency Car Kit: simple and unobtrusive.

Emergency kit for new driver

Assembling the kit for my granddaughter

Our driver’s parents have always had quite new cars, so I doubt she has ever experienced a breakdown or flat tire in the light of day, much less at night! And what if she’s driving when the anticipated earthquake hits, or El Niño (also anticipated) leaves her stranded?

So, first comes the lecture about getting the car to a safe place. Then there’s the phone call to parents and/or AAA or other emergency contact.

Now for the wait for help to arrive.

Here’s where the emergency kit comes in.

So far, I have assembled these 8 simple items, with one not yet decided on.

As always, where it makes sense I am including links to typical products — and usually products that I have bought myself — at Amazon.  Yes, I may get a small commission if you buy through the link. Of course, your price isn’t affected — and if you want to shop more, just use the link to get you to the right departments.

1. Orange Safety Triangles.  If you shop for these, you’ll discover than many come packed individually. Honestly, I don’t think one triangle serves ANY purpose for an inexperienced driver, who will tend to set the triangle too close to the rear of the disabled car. So, while Orion seems to be the leader in this category, I recommend this pack from Deflecto. It has three triangles in a carrying case: Deflecto Early Warning Road Safety Triangle Kit, Reflective, 3-Pack (73-0711-00)

(I would recommend flares for an adult, but they are not simple to light and require THOUGHTFUL decision-making before deciding where to put them. I will be writing about that in another post.)

2. Flashlights. Every car should have more than one flashlight, with extra batteries stored separately. I will have to test my granddaughter to see if she can put batteries in correctly!  (She normally uses her phone as a temporary flashlight . . .)

From a safety/visibility standpoint, inexpensive LED lights seem OK, although a better-quality light (at least 400 lumens) is preferable. This is one of our favorites: Duracell Durabeam Ultra High Intensity Tactical- 500 Lumen Flashlight 2-Pack with 6 C Batteries

3. First Aid Kit.  We have written extensively about first aid kits (See links to other posts, below.) ALL inexpensive pre-built kits are lacking – get the best one you can, then go through it and add more bandages, first-aid cream, moist wipes, etc.

4. Gloves.  She may not wear work gloves very often, and perhaps never has! But in a real emergency, protecting your hands is easy and essential. I prefer leather gloves to the rough fabric ones, and I like these because they adjust to the size of the wrist: Custom Leathercraft 2055M Split Cowhide Work Gloves, Medium

5. Emergency Radio. In the case of an earthquake, storm or other widespread emergency, your driver will need to find out what’s going on  — and cellphones may not work. Our favorite battery-operated emergency radio is the Ambient Weather radio: Ambient Weather WR-090 Emergency Pocket AM/FM/WB Weather Alert Radio with Digital Tuner and Flashlight

And since our granddaughter is pretty enterprising, I might consider the Weather’s larger cousin that operates via batteries, solar or crank: Ambient Weather WR-111B Emergency Solar Hand Crank AM/FM/NOAA Digital Radio, Flashlight, Cell Phone Charger with NOAA Certified Weather Alert & Cables

6. Blanket. My granddaughter seems to have several nice throws associated with various sports teams. If you don’t have any, or think your driver would like a new one, they are relatively inexpensive and easily packable. Here’s a link to where you can pick a fleece of exactly the right color!Super Soft Cozy Fleece Throw Blanket – 50×60 Fleece Blanket (Assorted Colors)

7. Water. Again, my granddaughter has plenty of plastic water bottles, and she can pick out the best one for her kit. However, I would recommend, as an emergency item, a bottle with a filter since we don’t know how long this water will remain untouched and unrefreshed. See the link below to our recent review of water bottle with filters.

8. Food. Teenagers seem to subsist on all kinds of snacks, so check with your driver to find the best combination of energy bars, dried fruit and candy for emergency food supplies. No use putting stuff in the kit that they won’t like or won’t touch.

9. Personal Safety. My granddaughter is tall, athletic and capable. I will discuss with her and her parents whether it makes sense to include any pepper spray in her kit (and it requires written permission). Waiting in the dark could be scary and dangerous; it may give her an added sense of security: SABRE RED Pepper Spray – Police Strength – Compact, Pink Case with Quick Release Key Ring (Max Protection – 25 shots, up to 5X’s more)

What to put everything in? Something unobtrusive.

All my teenaged friends seem to carry a variety of backpacks for school, sports, or just for hanging about. So, for the car emergency kit I selected a simple, inexpensive backpack that will attract no notice on the floor in the backseat or rear compartment.

Next step: Present the kit, take everything out, talk about how and when to use it, and have her repack it.

It will be a fun family activity, one I’m looking forward to!

Virginia
Your Emergency Plan Guide Team

Here are other posts with more info about emergency kits:


Security, Safety at Home with Exterior Lighting

Share

Suddenly, it’s October, and . . .

Getting darker much earlier.

Have you noticed?

Solar lights

Controls for motion-activated light

Our streetlights give the minimum legal light as part of our city’s attempt to lessen urban light pollution. That’s fine – but when I come home at night, I want to see the porch steps!  And, I don’t want to imagine someone standing outside looking in.  So we have installed several different night lights.

Hard-wired lights

One big light on the porch stays on all night long (hardwired energy-saver bulb). It’s bright enough that anyone coming up on the porch can see to navigate the steps safely.

In the carport, at the back door, we have a hard-wired motion-activated light. It goes on when we pull in or when anyone walks by.

I like this light!  The bulbs are big and bright (although not energy efficient) and we can adjust and have adjusted everything – direction of the sensor, aim of the lights, etc. In fact, the light is so powerful that we had to restrict its “sensitivity” because it was picking up people walking their dogs on the other side of the street. (It reaches out to 70 feet.)

Battery-operated motion-activated lights

It’s not easy to drill holes and run hard wire everywhere where we want it, so we’ve also tried a variety of small, battery-operated motion-activated lights for other areas around the outside of the house. (Most of these lights have been about the size of a TV remote.)

Some of these worked well, and they were pretty inexpensive ($10-$15). Most, unfortunately, seem to need constant attention, which is a nuisance since we have to get out a ladder to adjust them or replace the batteries. I don’t feel I can recommend any of these.

Solar-powered motion-activated light

So here’s the third option – a rechargeable battery-operated light that gets its power from the sun!

There are three pieces to this light.

First, there’s the solar panel.  It’s a thin-film panel and generates electricity best in bright sunlight, but also even when light is dim or it’s cloudy. Just be sure to mount the panel, which is about 7 ½ in. wide by 6 ½ in. tall, where it won’t be shaded. (Eaves and leaves are tricky this way, and change with the seasons! Check carefully before you decide where to put the panel.) The panel is weather resistant.

Second, the panel comes with 15 ft. of connecting wire.

Third, the light itself. It is made up of the light panel at the top, with 80 LED bulbs, the battery compartment in the middle, and the sensor at the bottom. (There’s another version with 60 LEDs.) The LEDs are powered by the rechargeable battery that has been charged by the solar panel.  (The battery will have to be replaced at some point, hard to say exactly when.  Depends on how often the unit is used.)

The sensor isn’t as powerful as the one on our hard-wired light (adjusts to 30 feet) but works fine for where we want the light.

The light actually has several adjustable components: the bracket that attaches to the wall, the sensor, and on the bottom of the sensor, three control buttons.  (Shown in my photo.)

The first button sets how dark it has to be before the light will go on. The second control sets how long the light will stay on each time it is set off.  The third control adjusts the range of motion detection.  (You may want to start by setting the lighting to a dusk condition at first, so you can set the rest of the controls while you can still see!  Then, readjust to full dark.)

The light was easy for Joe to put up. (I helped by pointing out potential shade!)  We followed the instructions to fully charge the battery before using it for the first time. And so far, it’s worked just as expected.

I consider light a safety feature (for us and for guests). Having some lights that stay on and others that go on also makes the house look “busier” than it might otherwise, which can act as a deterrent to unwanted visitors.

If you could use extra lighting, here are direct links to Amazon for the two lights I’m recommending.  Note that they come in different colors, different wattage, and sometimes have bulbs included and sometimes not. But if you click on a link you’ll get to the right place.

Hard-wired motion activated: Heath-Zenith 180 Degree Motion Activated Security Light with 2-120 Watt Bulbs

Solar-powered motion activated: Sunforce 82080 80-LED Solar Motion Light

And if you have tried some of the small motion-activated lights, and found them satisfactory, please let us know by leaving a comment!

Virginia
Your Emergency Plan Guide Team


Get out now! Your Home Evacuation Plan

Share

Sample family evacuation plansStop reading right now.

Look up. Look around.

What are TWO WAYS you could get out of the room?

  • Will that window open?
  • Can you really squeeze through?
  • Can you get down outside or do you need a ladder?

Did you have to pause and consider?

I hope not!  These are answers you should know before anything happens.

In fact, everyone in your family should know the answers to these questions BEFORE an emergency happens.

Are you leaving your children defenseless?

Unless you point these exits out, your children will never think of them. In an emergency, they will likely run to try to find YOU, even if evacuating would save them.

Here’s an exercise you can do on a Saturday that will answer questions and give you all a much better sense of security.

Design your Home Evacuation Plan together.

It’s a step by step process that everyone in the family takes part in. You’ll need a pad of paper and some colored pencils. And one BIG piece of paper to assemble everything on.

Step 1.  Sketch a plan of your home.

One sketch for each floor, or, if your young children are part of the exercise, let each child sketch a separate room. Approximate sizes are fine.

Be sure all doors and windows are marked on the plan.

Combine separate pieces into one master plan. (You can redraw or even cut and paste.)

Step 2. Mark at least two exits from each room on your plan.

Plan in hand, take a walk from room to room. Mark potential exits. You may want to use two colors, one for PRIMARY and the other for SECONDARY exits. You may be able to get out, but can all the children? What about grandmother?

If you need special equipment to escape (a ladder), note that on your plan and mark where it is stored.  (Obviously, if you don’t already have the equipment, start a shopping list on a separate piece of paper! More resources below . . .)

Step 3. Note the location of special safety shut-offs for your house.

Keep touring the house. Mark where utility shut-offs are located. Does everyone know when and how to shut off the water? The gas? Again, is a special tool required, like a wrench? Note where it is stored.

Where are the electrical shut-offs? There may be more than one panel. Talk about under what conditions you would shut off the electricity.

Step 4. Where are emergency supplies kept?

In particular, note on your plan the location of fire extinguishers, flashlights and lanterns, and first aid kits.  (You can use icons if your plan is getting crowded.)

Where are your evacuation/survival kits stored?

Step 5. Last step: mark on your plan the family’s emergency meeting place — OUTSIDE of the house.

On the sample plan below, the family has designated a particular tree as the meeting place. Be sure the meeting place is far enough away from the house to keep people safe in case there’s a fire. You may want to label a second meeting place if the first one isn’t reachable, even though the second place may be off the map.

evacuationplanwoodbuffalo(Thanks to the Regional Municipality of Wood Buffalo, Alberta, Canada for this drawing.)

A few more thoughts to help drive the point home:

  • Save and review your plan from time to time, particularly if you add new rooms, new equipment, etc.
  • Take a photo of the plan and share it with other family members (or maybe even with students at a show-and-tell session at school) to see if others will be inspired to follow suit.
  • If you will be shopping for emergency equipment, you may find more info in some of our special Advisories, listed below.

Can you get this done before the month is over?? Good luck!

Virginia
Your Emergency Plan Guide team

More Resources  from Emergency Plan Guide:

Escape ladders: Your healthy 12-year-old can get down any type of ladder, but what about others in the family?  We’ve looked at many of the escape ladders and think that the  Werner, 2-story version is a good place to start your shopping. It can carry more than one person at once. Here’s the link to Amazon: Werner ESC220 Fire Escape Ladder, Two Story (Be sure to look at the “product page” and scroll through the images to get a better idea of what the ladder is like.)

Fire extinguishers: We actually experienced a kitchen fire and used the extinguisher we’d just put in place!  Read the story and learn more about the different types of extinguishers. A good all-purpose extinguisher is this one, made by Kidde: Kidde 466227 ABC Pro Multi-Purpose Dry Chemical, Commerical and Industrial Fire Extinguisher, UL Rated 1-A, 10-B:C

First aid kits: Most kits you buy are woefully lacking. But you can start with a purchased one and add your own. We held a neighborhood meeting to discuss first aid kits — read about it here — and my search on Amazon for a good starter yielded this one by AAA: AAA 4180AAA 121-Piece Road Trip First Aid Kit


Special Terrorism Report, Part Two, now available.

Share

Part Two of Joe’s Terrorism Series is now out. It focuses on workplace violence.

“How can we possibly anticipate an attack by a terrorist or by a co-worker who suddenly snaps?”

Workplace violence warning signsThe truth is, there are warning signs for nearly all these acts of violence. When we look back, we almost always find a trail of anti-social or illogical behavior.

In the past, only law enforcement and some human resources professionals received training in identifying  these warning signs.

Today, with incidents happening more frequently, it’s time for all of us to know more.

Here’s the link to the article:

  Part Two of the Special Report  

And here are links to earlier Advisories from Emergency Plan Guide, in case you missed them.

Plus an article on workplace security: Security at the Front Door


Be aware. Take action.

Your Emergency Plan Guide Team
Joe and Virginia


More Live Shooter or Terrorist Attacks?

Share

When statistics show an increase in just about anything, we always have to question whether the numbers are higher because they truly are, or because reporting has gotten better.

In the case of live shooter or terrorist attacks, it seems that both are at play. That is, there are more incidents. And the reporting, almost instantaneous, is now “enhanced” by graphic video taken by security cameras or by people at the scene and shown over and over again on television and other media.

Here at Emergency Plan Guide, we can’t ignore this trend. In fact, the U.S. Department of Justice’s 2013 study clearly shows it.

Active Shooter EventsAccording to this FBI study, in 2000-2013 there was one live shooter event every three weeks.

How many incidents need to be added to this chart for 2014 and so far in 2015??

Special Report: Live Shooter and Terrorist Attacks

Emergency Plan Guide Co-Author Joe Krueger has written a special report on this topic. Part One, published today, is entitled:

“What are the chances of you being involved?”

Part Two will be appearing in a week or so. It will focus on Workplace Violence. With over 2 million incidents a year, this is something that many more of us run the chance of being involved in.

But that’s next week. While we wait for Part Two, please take the time to read Part One of the Special Report.

It starts with some observations about the recent heroic actions taken by the Americans on the train headed to Paris.

They were certainly inspiring, but before you think that they could easily be replicated, read Joe’s perspective on the event. (You may not realize that he was trained in counter-terrorism, and although it hasn’t been his career, that’s not information or sensitivity that you lose.)

What can you do to protect yourself?

As always, Emergency Plan Guide is looking for sensible, do-able actions we can all take to improve our chances of surviving a disaster, whether natural or man-made.

We do not advocate arming more citizens; the thought of having untrained, aggressive or worse, terrified, gun-toters anywhere near us is repugnant.

But we do believe that taking time to mentally prepare before anything happens will give you a much better chance of making the right snap decision if it becomes necessary.

To that end, the report recommends two inexpensive books that we think make sense for our readers.

Head over to Joe’s report and read it. Here’s the link again: Special Report: Live Shooter and Terrorist Attacks

Thanks.

Virginia
Your Emergency Plan Guide Team


Storing water in plastic bottles

Share
Survival water bottle

One of our favorites – find out why.

Is it safe?

“What’s that thumping noise in the back of the car? Oh, it’s that half-empty bottle of water, been in there since last week.”

I know you’re trying to be thrifty, but a half-empty plastic bottle of water is probably NOT something you want to drink from!

Not because it’s a plastic bottle, but because somebody’s lips were on it at some point and lips carry germs (probably bacteria of some sort, depending on what’s on your mouth or on your hands). Germs particularly love the threaded spout of that plastic bottle.

Give those germs a week or so to grow, in a nice warm environment, and . . . not so good!

Is there a difference in plastics?

The above paragraphs assumed a disposable plastic water bottle – the new thin kind, made of PET plastic. By being so thin, these bottles save energy (a lot less heavy to transport) and are recyclable. And they are not supposed to contain BPA, the chemical that created the concern some years ago and has been banned from baby bottles.

However, studies on water stored in PET bottles for a relatively long period of time (several weeks) at high temperatures show that chemicals from the plastic do leach into the water. Remember that the interior of your car, parked in the sun, can reach temperatures as high as 170 degrees!

In other words, pour that left-over water on a house plant, and then toss the bottle in the recycle bin.

A reusable sports bottle is a much better option.

Sports bottles designed for re-use are a much better option. They may be made of different materials — sometimes of steel or steel with a glass liner or of BPA-free plastic.  They are often very stylish, have well-designed shapes, handles and spouts, and the large-mouth ones let you add ice cubes.

Depending on the material, you may pay anywhere from $10-20 for most reusable water bottles.

Refill directly from the tap.  If you don’t like the taste or smell of your tap water, consider a filtered re-usable bottle. Filtered bottles cost very little more than un-filtered ones, but of course the filter may take up room inside the bottle.

For daily use you’ll get sweet-tasting water and probably drink more as a result!

Filtered bottles for survival have a better quality filtration system.

In an emergency, you may be filling your bottle with “questionable” water – from old supplies, from a pipe that may have been compromised, even directly from a lake or stream. In that case, you will be happy to have a high-quality filter between the water and your mouth.

New review on the sitefive different survival water bottles, each under $50.

We selected these bottles for their price (As you can imagine, there are others costing far more.) and because each has a particular feature that will help you customize your purchase.

The features you probably want to consider:

  • Size of bottle (how many ounces)
  • Quality of filter (what does it filter out, what doesn’t it)
  • How long will the filter last (how many gallons)
  • Can you get a replacement filter
  • Can you clean the filter and reuse

Last point. In every case, with every reusable water bottle, hygiene is essential.

Not all bottles are dish-washer safe (That may be something you look for.) but they can all be washed by hand with hot, soapy water, rinsed well (you can even add vinegar to the rinse water), and left to air dry. Experts suggest you clean your bottles – particularly those used by children or by people wearing lipstick or lip gloss – after every use, certainly at least once a week.

For even more info, please check out our new review: Best Personal Survival Water Bottles

Virginia
Your Emergency Plan Guide Team

Welcome to new readers!  Don’t miss any of our posts. (We call ’em Advisories.) Sign up below to have Advisories delivered to you every week.

Power Outage — Another Chance to Practice

Share

The power went out tonight at 7:16 p.m.

It was still pretty light outside, but the house was instantly, shockingly dark except for the hall, where the emergency lights glowed.

Lantern for power outage

Lantern in the bathroom

Grab flashlight from cupboard. Track down phone number for electric company. Regular phone doesn’t work, so punch through six different choices on cell phone to get recorded message: “Widespread outage. Estimated time to service restoral — one hour.”

Turn on walkie-talkie, request check-in from emergency team members.

“Division One, do you read?”

“Division Three, do you read?”

“Division Five, do you read?”

Finally, some answers trickle in. Somewhere somebody from outside our network is using the same channels, so they annoyingly insert themselves into our conversations.

Getting darker quickly, now. We pull out two of our lanterns. They work great!

A friend comes by in his new golf cart, and he and I make a circle of the neighborhood. People are leaning out on their porches, gathering in little groups on the street. Much laughter. Doug and I check the front gates: they’re open, as they should be. We meet a couple of stray people who are scrounging up and down the street for flashlights or batteries from their neighbors.

Overall, the feeling of a block party!

Full dark. The new golf cart has no lights (!) so we creep along. I have my trusty flashlight, of course, and use it to alert people that we’re approaching. As we pass house after house, Doug and I discuss people who we know have oxygen or CPAP machines, and wonder how they are coping.

We totally miss the people straggling out from the community center. As it turns out, the automatic doors there shut down tight, and the emergency bars were difficult to figure out. Fortunately, a number of the exit doors have push bars.

Back home. Another call to the utility. “Restoral in 10 minutes,” they say. We’re dubious. I pass along the latest via the radio. Streets are now empty, dim lights visible in most of them. Over the fence out on the main street, we see the flashing lights of the utility trucks and hear the workers calling to one another.

“Street lights up on our street,” comes the report from Division Four. Nothing here. Suddenly, rather like a Christmas scene, lights start popping on. Yellow street lights, red and blue TV screens, white porch lights. It’s over! Only ten minutes after they said it would be!

Such a relatively benign “emergency.”

Yet some people found it more than just an inconvenience. One woman described how it brought back shocking memories of war for her. One friend had just had surgery, and she woke suddenly to a blackout. Very frightening.

So, another day passes and we have the chance to “test” our readiness. I’m betting and trusting that everyone will be more prepared next time! How would you have fared?

Virginia
Your Emergency Plan Guide Team

P.S. We’ve talked a lot about emergency items. Here are a couple of our most popular posts:


Keeping Up With Breaking News

Share

Does Your City or Local Police Department Have a Mass Alert System?

Last month we talked about the “Lone Wolf” terrorist and the random nature of such attacks. While there is little, if anything, that authorities can do to predict or prevent these attacks, some cities are instituting a Mass Alert Notification System . . . a message distribution system to get the word out immediately when something does happen.

Basic Level

Actually, most cities have a basic telephone notification system; the most popular one is called Reverse 911®. When an emergency happens or threatens, authorities can automatically send out a recorded phone message to all or some of the phone numbers found in the database within that geographic area. If the line is busy, the phone will redial several times in an attempt to leave its message. The important limitation to Reverse 911 is that it only goes to landlines.

If you do not have a landline, or are not home or at a work number when the call goes out,
you will miss the message.

Enhanced System

Opt-in for mass messaging service iAlert

How will they reach you?

Our city has enrolled in an enhanced mass messaging system, called “iAlert.” This is an opt-in program; you go online and sign up for the service and the message comes to you three ways, depending on which options you sign up for.

First, it comes by recorded telephone call to the primary or work telephone number you provide. (This can be a landline, a VOIP line, or a cell phone number.)

You will also receive an email to the email address you give, and finally, the message comes as an SMS text message to your smart  or mobile phone. The only cost is the SMS charge is for the standard data cost imposed by your cell phone carrier when you receive a text message.

IAlert messages can also be sent to hearing-impaired receiving devices.


Useful, Targeted Messages

On more than one occasion we have received notifications of missing persons, suspected active shooter situations and alerts to fires in progress. Our CERT team has also received activation alerts.

If your local authorities provide this service, you can likely sign up for it on the city’s website. If not, you may want to inquire at your local Police Department of their interest in providing the service in the future.

Joe Krueger
Your Emergency Plan Guide Team

Home Base – The Hub of Your Family Communications Plan

Share

In a true emergency, you may have no easy way to communicate.

Home Base Hub of Family ommunica

In a widespread or severe emergency we know that phone communications may be spotty, at best.

An earthquake may cut cables and topple cell towers. A bad storm or hurricane may not cut underground cables, but it can damage all above-ground services including electricity.

For sure, in an extended power outage, even if distant towers and/or satellites are still functioning properly, cell phones and computers will eventually run out of battery. (Yes, yes, if you have solar panels, you may be able to recharge your devices.)

Being cut off from family members is terrifying.

Naturally, you and they imagine the worst. You will be desperate to get in touch.

When local phone service is out, what’s your best course of action?

Reach out to your family’s “Home Base.”

Trying to make a local phone call, whether via landline or cell, may be impossible. However, an outbound long-distance call or text may get through!

This is why we recommend that you talk things over with your family and come up with an out-of-state person who is willing to serve as your “Home Base” – the one place that every family member knows about and tries to contact as soon as possible.

Qualifications for your “Home Base” contact.

Naturally, this needs to be a person you trust. In addition, is your Home Base contact . . .

  • Willing to answer the phone day or night?
  • Able to take down and forward complete messages from people who may be nervous or even injured?
  • Able to receive TEXT messages (cell phone) and EMAIL messages (computer) as well as phone messages?

Remember, family members may be trying to send messages themselves, or they may be asking others (Red Cross, medical personnel, school employees, colleagues, First Responders) to communicate on their behalf. Those other people may have any one of a variety of communications devices.

Your job: Know your family’s Home Base phone number.

In a true emergency, you won’t be able to check your phone contacts on your cell phone or computer. You may not have your address book.

Your children will be in this same situation.

The only thing you can count on is an emergency listing that you carry in your wallet (assuming it hasn’t been lost or ruined) or a number that you have memorized.

Protect your family!

Take the time, as a family, to discuss who your Home Base contact should be, and get their agreement. Discuss safe places you could go if you can’t go home.

Talk about the importance of confidentiality for this information.

Most important of all, make sure all family members memorize the Home Base phone number!

Virginia
Your Emergency Plan Guide Team

Texting While Driving Can Kill You. Texting Can Also Save Your Life.

Share
Texting can save your life

By now, you have heard that in an emergency, you may be able to get a text message through even when phones are down or overwhelmed.

Do you know how to send a text message?

This brief Advisory is for those parents and grand-parents who really haven’t taken the time to learn how to text, even though texting is going on all around them.

Start with a cell phone.

Just about any cell phone (with enough battery power) can send a text message to another cell phone. You don’t have to be on the same network or have the same phone company.

For this exercise, pretend your personal phone has disappeared. A kind stranger offers to let you use her phone to call your family.

Do you know the phone number of the cell phone you want to send the text to?

This isn’t your phone, so you have no numbers stored. Your emergency number has to be a number you know by heart or have written down!

First choice: the number of your emergency, out-of-town contact person, your “Home Base.” (More on that, below.)

Prepare the message.

  • Find the “messages” icon on the phone. It may look like the blue square or the green bubble on the image above. Tap it. (If you are really interested in the difference between the blue square and the green bubble, you can find out more here. I find it confusing!)
  • What comes up next will depend. What you’re looking for is a little square with a pencil in it – that’s the “write” icon. Tap that icon to bring up the message screen.
  • In the “To” area, type the phone number including area code. (You can toggle between ABC and 123 to get the keys you need.) No need for any punctuation.
  • In the “Message” area, type your message. Be sure you say WHO you are (It’s not your phone, remember?), WHERE you are, HOW you are, and how you can be reached. Limit your text to 160 characters. (To erase, hit the back arrow.)

Send the message.

Hit the “send” button. You’ve done it! Most phones will tell you that the message has been “delivered.”

Of course, there are all kinds of clever twists and turns to texting, but you don’t need any of them now. You just want to be able to send a simple message!

My recommendation? Find a friend (child? grandchild?) who texts often and get him to send a few back and forth with you, so you become comfortable with how it all works.

You may find out, like I did, that it’s fun and convenient! No texting while driving, though . . .

Virginia
Your Emergency Plan Guide Team

P.S. Remember that “Home Base” comment, above?

Family Communications Plan

If you didn’t immediately know what number to call, you need our new Emergency Plan Guide worksheet, called Family Communications Plan. It’s 2 simple pages that explain the Home Base concept, and give you a place to fill in the blanks. 

Urban Survival Tools to Get a Fire Going!

Share

OK, the big danger is over. But the rain is running down your neck. Your fingers are feeling frozen. It’s getting dark very fast. What you desperately need right now is a fire!

Matchbook
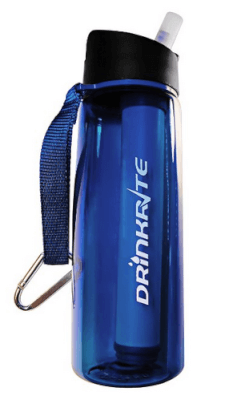
Do you have what you need?

Two necessities for starting a fire: an igniter and something to ignite.

I grew up in a kitchen that always had a big box of wooden matches above the stove. And my Dad always had a lighter in his pocket. Times have changed!

The only matches we have now is a jar full of souvenir paper match books from restaurants, and we all stopped smoking years ago. So I’ve had to make sure I have fire starters for emergencies.

Igniters I’ve assembled for my survival kit.

It’s so easy top tuck some of these small items into your go-bag, your survival pack, your evacuation pack. And I’d suggest you carry more than one, in case your pack gets wet or damaged. NOTE: If you shop at Amazon by clicking these links, be sure to notice whether the items are “add-on” or “eligible for Prime” and buy enough of them at once so you get free shipping. You’ll want multiples of nearly everything, so free shipping won’t be hard to get!

  • Waterproof matches are the simplest, the most obvious, and the cheapest of all to purchase. You can get them in wax coated boxes, or in neat little aluminum cases. An example: Coghlan’s 940BP Waterproof Matches – 4 Pack This is a four pack, one for each survival kit in the family!
  • Magnesium sticks won’t get damp, and won’t  accidentally light.  In fact, you need to practice using your stick to be confident you can get a fire started when you need it! The trick is to use that attached little saw blade to carve a pile of magnesium shavings (at least the size of a penny) and then stroke down the stick toward the shaving pile. (Don’t STRIKE the stick; that won’t work.) The Friendly Swede Magnesium Alloy Emergency Fire Starter Blocks (3 Pack), New and Improved Version gives you three blocks so you can practice without worrying that you’ll run out of magnesium.
  • Zippo lighter looks sharp (!) and will be familiar to former smokers. It feels good in my hand, too. Zippo Emergency Fire Starter, Black Matte also comes with pre-fashioned tinder sticks. Read on for more about tinder.
  • Magnifying glass would be a favorite  for me. I remember as a child burning holes with a magnifying glass in all kinds of things! Today I could use it to read instruction sheets written in miniature print . . . but of course, it’s not going to work in the rain for starting a fire!

Tinder for the survival kit.

You’ll be excited to see that spark from the igniter, but you’ll get mighty discouraged if it doesn’t “catch.” Here’s where tinder comes in. Tinder is specially prepared very flammable material that will get the fire truly started. You may have used crumpled newspaper or leaves or twigs in the past — but remember, we find ourselves in a WET URBAN SETTING for this blog post. So, what can we prepare in advance to be sure our fire will start?

  • Petroleum jelly and cotton balls (carried in an empty plastic medicine bottle). You may already have the ingredients for these clever items: cotton balls (NOT polyester) and Vaseline. Simply pull cotton balls apart a bit,  smear them with the petroleum jelly, scrunch back up. (Get everything ready in advance, and pull all the cotton first, because once you get the jelly on your fingers they’ll be sticky, sticky!) Here is one brand to give you an idea. Prepping Cotton Ball by Kendall ( COTTON BALL, PREPPING, MEDIUM, NS, 500/BG ) 500 Each / Bag
  • Alcohol wipes also work well as tinder, and you should already have some in your first aid kit!  If you don’t, buy a pack now and separate some out for first aid, and keep some for starting fires. Curad Alcohol Swabs Antiseptic Wipes, 200 Count
  • Waxed paper can be purchased at the grocery store if you don’t have any already in the kitchen. Cut a smallish piece from the roll, fold it over a couple of times, then fold back and forth until it makes an M shape, maybe about 2 inches across. Place the points of the M on top of your igniter material.  Tuck a few of these Ms into your pack and you’ll have tinder!
  • Dried and shredded bark, moss or fluff from cattails can also serve as tinder, but you’ll have to collect it next time you go for a walk in the park, bring it home and stuff it, making sure it’s totally dry, into those plastic medicine bottles that you can then put into your kit! In the city, in the rain, you may not be able to find any natural material to work as tinder.
  • Twine made of natural fibers may also work. Simply untwist it so get a good burning area.

And to keep the fire going: kindling and fuel.

Actually, gathering kindling (small pieces of wood and twigs) and larger pieces of fuel should be step number one, because if you START the tinder and don’t have adequate fuel right there,  the tinder will burn up and you’ll be back where you started. Some people carry dry kindling as part of their kit, but more than likely you’ll be scrounging in your immediate neighborhood for the right material to burn.  Some guidelines:

  • Pick a safe place for your fire. You can make a hearth of stones or concrete to be sure the fire doesn’t spread unexpectedly.
  • Dry sticks, splinters of wood and pine needles can serve as kindling. Have your kindling nearby so you don’t have to get up to fetch it.
  • Once the kindling is burning, add larger pieces of fuel. Wood is obviously the best fuel, but if you’re looking for wood in construction rubble, avoid treated or painted wood and wood look-alikes that are really vinyl.
  • Do not burn items made of rubber or plastic ( bottles, jugs, bags). Although they will burn, you will be creating noxious or dangerous fumes.

We’ve assumed here that your fire is for warmth and comfort.  Cooking over a fire is yet another subject. In the meanwhile, though, go back through this quick list and be sure you have emergency fire starters. As I said at the beginning, all these items are small and inexpensive, so there’s no reason not to have what you need. Your family will be counting on you!

Virginia
Your Emergency Plan Guide Team


How dangerous are Lone Wolf terrorists?

Share

totally unaware of her surroundings

Totally unaware of her surroundings . . .

Next week our city police force and first responders are holding a mock active shooter exercise in a local shopping mall. Inspired at least in part by the 2013 invasion of the Westgate Mall in Kenya, it’s also a response to the growing numbers of “home-grown” or self-radicalized would-be terrorists. In many ways these self-styled terrorists seem to pose a bigger threat than actual members of terrorist organizations.

Real Terrorists Plan Their Attacks

At least real terrorist cells fit a profile. They belong to a network, they prepare for a strike, and they pick targets that are likely to generate mass casualties and publicity. They are also more likely to be in communication with known terrorist cells, at least some of which could already be under some level of surveillance. These and other factors make it easier to identify and track them.

Lone Wolves Act on Impulse

The self-motivated, lone wolf actor is harder to identify, is more likely to be mentally unstable and less likely to pick rational targets. Perhaps the most worrisome aspect is the likelihood that this person is likely to act spontaneously and against a target of opportunity . . . virtually anyone that happens to be in their range. And, the mere fact that we live in a world where guns proliferate means that the tools of terrorism are readily available even to the least mentally competent. As scary as this may seem, there are some positives.

Self-Motivated Actors Often Fail to Follow Through on Threats

First, while these individuals may be numerous and hard to identify prior to an event, the attacks are likely to involve fewer people and less prominent targets. And, without direct connections to actual terrorist cells, they are less likely to be successful in mass attacks. Also, many will ultimately lack the courage to actually carry out the often gruesome and heinous acts these individuals conjure up in their fantasies.

Protect Yourself by Staying Aware of Your Surroundings

The best protection you have is your situational awareness . . . the same situational awareness that can keep you out of harm’s way. This means keeping your eyes on the way ahead, the road ahead and your surroundings – discipline yourself to avoid being glued to your smartphone while walking through alligator alley! Have your keys at the ready as you approach your car. If you notice someone strange for whatever reason, don’t ignore your instincts. Take evasive action. Turn in a safer direction. Whatever!

So many victims have reported that they were operating “on autopilot” and just kept going – right into danger!

A Single Lone Wolf Can be Taken Down by a Group

If you are in a life-threatening situation, instead of simply waiting for it to happen, consider a counter attack. A group of determined adults can very likely take down any single gunman. Yes, this goes against our training (“Keep out of trouble.”) but in the case of a Lone Wolf Terrorist, “Get him!” may be the only way to save more innocent people from being injured or killed.

Joe Krueger
Your Emergency Plan Guide Team


Are you within 10 miles of a nuclear power plant?

Share

The Nuclear Regulatory Commission (NRC) mandates that cities have an emergency evacuation plan for a 10-mile zone around a nuclear power plant – the ERZ or Emergency Planning Zone.  The rationale is that a radiation plume could impact people within this zone, so the plan is to remove people from the area as quickly as possible.

Outside the 10 mile zone, the NRC identifies a second zone that stretches out to 50 miles. Within this 50-mile zone, people won’t necessarily be directly affected, but food and water may become contaminated, so the plan needs to consider these dangers.

Multiple and overlapping EPZs

Example of multiple and overlapping EPZs

The graphic shows examples of multiple and even overlapping EPZs in North Carolina.

Recent news reports suggest that the EPZ rules from the NRC may be woefully inadequate. 

Here are questions you (and your neighborhood CERT group) should get the answers to. 

If you live within 10 miles of a nuclear plant, ask  . . .

“What’s my city’s plan for me?” 

Get a hold of your City’s Office of Emergency Services and pose questions like these:

  • What are the evacuation routes out of the zone?
  • Are they the same in summer and winter, when they may be impacted by snow, high water, etc.? Day and night? Weekday and weekend?
  • What year was the plan drawn up? What changes have occurred in population and in transportation options since the plan was drawn?

A 2012 study commissioned by PSEG (Public Services Energy Group) estimated that only half the population in the surveyed area (Pennsylvania, Delaware, New Jersey) could escape the 10-mile zone within 90 minutes – and the plan was based on population figures that have already been exceeded!

“What do I need to know for my family?”

Keep asking more questions. The NRC requires that cities provide residents every year with “radiological emergency planning materials.”  According to FEMA, you may get this information in your utility bills, via a pamphlet, or even in the phone book.  (Who reads the phone book anymore?!)

You should get answers to . . .

  • How will I know there’s an emergency?
  • What does radiation do, how does it act?
  • What should I bring with me if we have to evacuate?
  • What do I need in order to shelter in place?
  • I’m disabled. How do I get special assistance? (Typically, you’ll be asked to have a written request on file.)

If you live within 50 miles of a plant, ask . . .

“Does my city have any plans for me?”

 Maryland-based Disaster Accountability Project surveyed parts of 11 states within 50 miles of five operating nuclear plants, again in the northeast. 

Ben Smilowitz, Executive Director of the DAP group, reported that cities are not planning beyond the 10-mile limit.  Per Smilowitz, “Most people that live 20, 30, or 40 miles away from plants do not realize that their communities are only adhering to bare minimum standards for radiological emergency preparedness.”

Moreover, in this part of the country, millions of residents live within multiple overlapping emergency zones of up to seven reactors!

Find out more about nuclear reactor emergency response.

In Fukishima, the U.S. government extended the recommended EPZ to 50 miles. With this disaster still in mind, here are more resources for you and your CERT group:

Virginia
Your Emergency Plan Guide Team


Don’t miss a single Advisory. You never know when you’ll need this information! Sign up below to get Advisories every week.  Free.


Protecting Yourself From Home Invasion

Share

(This isn’t the kind of blog post we normally write. But because it’s so much in the news, it seemed important to touch on this emergency situation.)

The more details we learn about the recent home invasion in Washington, D.C., the worse the story gets: loss of property, torture, murder. And a fire set to conceal the evidence.

Home security

Secure enough?

Statistics about the frequency of home invasion are hard to come by. But authorities do seem to agree on some basic characteristics of home invasions, and basic steps to combat and even help avoid them. It just seems smart to review them all.

How does a home invasion differ from robbery or burglary?

Robbers and burglars usually act when they see an opportunity. Their crime typically takes place in public, so they are in a hurry and eager to get away as quickly as possible. They resort to force usually only to escape.

Home invaders are very different.

  • Most all home invasions are perpetrated violently by a team of two or more people.
  • Working together, they deliberately scope out the home and the habits of the family members, planning the crime for days or even weeks.
  • They are looking for people who have something of particular value to steal: money, jewelry, drugs.
  • They look for households where security is lax or non-existent.
  • They count on duplicity, force and intimidation to get into the home and overcome any resistance.

Once inside, they can relax and take all the time they want. In Washington D.C. the invaders made arrangements for money to be delivered, ordered pizza . . . and, of course, ultimately killed the inhabitants before setting fire to the house. Most home invasion robberies result in the death of family members since they have become witnesses to the crime.

What can you do to protect your home?

A home invasion once underway simply can’t turn out well.

So you have to put maximum effort into not letting it happen in the first place.

Recommended measures:

Heighten your awareness.

The better you know your neighbors, the more you and they will know about “what’s normal in our neighborhood.” Get used to noting travel patterns, visitors and their cars. Make note of strange cars driving slowly by or parking on the street. Such behavior could be someone “casing” your neighborhood. Share your concerns with law enforcement.

In an emergency, whether it’s an earthquake, a weather event or a home invasion, your neighbors are the best immediate source of help. Having an active neighborhood CERT group or a Neighborhood Watch program can help bring neighbors together and increase their knowledge and awareness.

Harden your perimeter.

Make sure you have lockable and locked doors and strong, locked windows. A simple door chain or glass door bar is useless in the face of a good kick. And a security system that is left turned off when you are at home is doing no good at all! Keep your system on so a door being opened alerts the house. Know how to use the panic button on the system.

Keep porches and alleyways well lit; check bulbs regularly. Plant bushes with thorns underneath window to discourage people from hiding there or approaching the house that way.
Without becoming totally paranoid, consider what you can do to make it harder for someone to break into the house.

Train your family.

Strong locks and a powerful security system provide no security if family members leave doors unlocked and readily open the door when they hear a knock.

A common ruse employed by home invasion teams is to send someone to the front door pretending to have a package to deliver. (As I was researching this article I read about situations where the “delivery person” was wearing a UPS, a pizza, and even a police uniform.) When the family member opens the door, other team members rush inside, overpowering all residents.

If it makes sense, install a wide-angle peephole in your door and train family members to use it. If you aren’t expecting a delivery, have the person leave the package outside the door and retrieve it later.

Flee.

Plan with your family about how to escape the house in an emergency – whether fire or home invasion. Practice screaming out a command like “Patio!” or “Garage!” Family members should IMMEDIATELY escape the building through that exit, and not come running to your voice to see what’s going on!

Close yourself in a safe room.

A special interior room can be built as a safe room or “panic room” to protect you from intruders or from natural disasters. It typically has extra strong doors and locks and is stocked with emergency supplies along with emergency communications. If you have firearms, or expect shooting, be sure the safe room has bullet absorbing protection you can get behind, and consider where YOUR bullets would hit if you fire through the door or walls. (The costs of such a room vary widely, depending on location and purpose, and the room is best added during construction. But any bathroom or closet may be suitable for conversion to a safe room.)

Fight.

Even in the face of probable injury, you must consider fighting the invaders rather than just giving in. Obviously, if you have weapons readily available, use them.

Once your family is totally restrained and controlled, you are out of options. Do everything you can to avoid this.

Are home invasions increasing?

Again, statistics are indefinite.  But it makes sense that as the traditional targets for fast money (convenience stores, gas stations) continue to limit the amount of cash on hand, and to add more surveillance cameras and security alarms, determined criminals will turn to easier targets – homes.

At the risk of being more paranoid than we’d like, it seems that taking a good look at deterring a home invasion just makes sense. I’d be interested to hear your comments on this Advisory.

Virginia
Your Emergency Plan Guide Team

Pack Your Survival Kit for Evacuation

Share

At our neighborhood CERT meeting yesterday, the question came up about the best emergency supplies kit.

Whatever kit you have is better than none.

If you are forced to leave home (or work) in a big hurry, you’ll only have time to grab “the kit,” and hopefully a bottle of water. Whatever is in the kit is what you’ll have to work with. You won’t have time to do any packing!

If you don’t have a kit, you’ll be worse than useless – you’ll be a burden on others.

Assume you have to manage your kit yourself.

Here in California nearly every trip I take is in my car, so I have several types of emergency stuff packed in the trunk. But what if roads are impassible, or the car is disabled, or we are asked to evacuate ON FOOT?

The only solution: ONE bag that I can carry myself.

Can you carry your kit?

At our meeting, several people stated flat out, “I can’t carry anything.” These were people who need a cane or a walker, who have back problems, or who are simply not very strong.

How many people in your family or your team at work would have trouble carrying a bag?

Which survival kit option would work best for you?

The best option . . .

for a survival kit is a backpack that will leave both your hands free.

When Joe and I decided to put together our kit  we looked for a backpack that was light, flexible and NOT TOO BIG. (Our build-it-yourself kit, shown in the image with its accompanying book, has sold out at Amazon.)

If you’re a hiker, you’ll be familiar with much larger and sturdier backpacks, with many more features. Maybe you even have one you can use for a survival kit. But we looked for a pack that the ordinary person could (1) afford and (2) be able to manage.

Because your backpack needs to be compact, you have to be deliberate in selecting what needs to be in it. It’s easy to lay out too much stuff!

Second best option . . .

in my opinion is a rolling cart. You can select something as sturdy as a rolling suitcase, but for emergency, infrequent use you likely will want something simpler, smaller and lighter. Here’s what looks like an excellent choice. This one’s called the  California Pak The Big Eazy 20 Inch, Navy Blue, One Size
and it comes in various sizes and colors.


Some things to consider about a rolling cart:

  • Does the cart/bag have a handle so it can be carried by hand if necessary?
  • Could you fit it on your lap in a bus?
  • Does it zip up or otherwise close completely?
  • Is the handle long enough for you?

Each person needs a kit, and each kit will be different.

What you think is important and are willing to carry is up to you. Your 10-year-old child, though, probably needs a few different items (including snack food!). And your 79-year-old grandmother needs other items altogether.

Action Item: Build a basic kit for each person, and then add those individual items to customize the kit to its owner.

Store the kit near the exit door, so you can grab it on the way out. You’ll only have minutes – but you’ll feel a lot more secure heading out if you have your survival kit in your hands.

It’s always back to basics, right?!

Virginia
Your Emergency Plan Guide Team

P.S. Your pet needs an evacuation kit, too. Here’s a link to more about your pet’s survival kit.