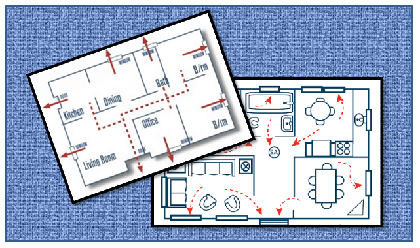
Tag: fire extinguisher

Fire! Fire! Quick, the extinguisher!
Share
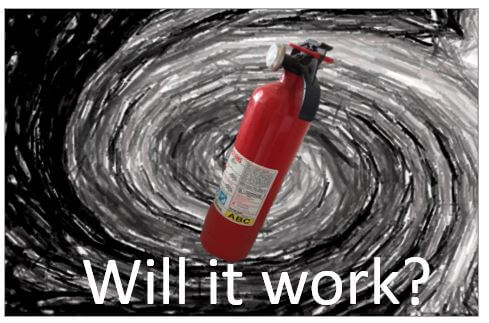
Fire extinguisher in smoke - Will it work?

Suddenly, a commotion down the hall – you hear screams, then shouts: “Fire! Fire!”

First reactions might be: “Get out now!” or maybe “Take the stairs!”  But someone (you!) should respond with:

  • “Where’s the fire extinguisher?”  and then,
  • “Will it work?”

If you can answer “Yes!” to “Will it work?” you may be able to keep a fire from becoming a disaster.

Here at Emergency Plan Guide, fires and fire prevention are a frequent theme.

For example:

  • In California, wildfires threaten all year long. We’ve addressed them often, including introducing a new way to provide local water on demand for firefighting helicopters.
  • Just last month we touched on the urban apartment house fires where smoke alarms didn’t work. This led to more info about alarms, their batteries, etc.
  • Last year we shared pictures of senior citizens testing their skills using the laser training extinguisher system from Lion. (That training was excellent, and fun. We asked our seniors came to that meeting carrying their home extinguishers. Then we found, and compared dates of manufacturer. The “winner” had an extinguisher dated . . . 1994!)

But let’s go back to the people hearing “Fire! Fire!” – the situation we described in the very first sentence.

Since you’re reading this, we can assume that if you heard this you would know where to find the nearest fire extinguisher. We would LIKE to be able to assume you know how to use an extinguisher. (Check out the laser training Advisory, mentioned above.) The question we can’t answer, and we suspect you may not be able to answer either, is . . . “Are you sure this extinguisher will work?”

I can’t find any “official” statistics about failure. (Odd, actually. I wonder why not? I’ve got a clue – coming up later.) But I heard a sobering interview with a retired police officer. Here’s pretty much what he said. “I’ve arrived at around a dozen car fires, grabbing the extinguisher in the squad car. But then, because my extinguisher gave out after a couple of seconds, I stood there helplessly watching as a fire that should have been easily extinguished burned that car completely up.”

Seems to me there must be a better way to know if the extinguisher will work. And this month I believe I’ve found one.

There’s a lot to this investigation. Here are the questions I asked, and some answers I’ve been able to come up with.

Why can’t we count on fire extinguishers? Main reasons seem to be:

  1. The pressure gauge may say “OK” but extinguisher may be “dead.”
  2. The chemical powder inside the extinguisher has moisture or compacted and won’t discharge even if there is pressure.
  3. The canister is rusted, or the rubber hose has decayed; they come apart in your hands. Extinguishers with plastic components seem to be particularly vulnerable.
  4. The user may never have practiced switching hands to pull the pin, aim the hose and squeeze, etc.

But I thought extinguishers were inspected?

Sure, OSHA has clear inspection and maintenance requirements for the workplace. (But do people do them at home?) Here’s what I learned about caring for an extinguisher.

  • Every month should start with a “visual test.” Is the extinguisher where it’s supposed to be? Visible and easy to grab? Pressure gauge in the green? Any obvious damage? Is pin in place?
    • What to watch for? (1) Homeowners store their extinguishers under the kitchen sink. WAAAAY under. They fail this first test. (2) Apartment house owners discover that the cabinets, where extinguishers are supposed to be, are empty.
  • Once a year, extinguishers in commercial use are supposed to be serviced by state licensed technicians. This means examining and repairing any potential problems with handles, hose, nozzle, etc.
    • What to watch for? My research found that sometimes technicians add repairs and items that may not have been necessary. But since business owners seldom really check their bills, they just end up paying them!
  • Every 5-6 years (sometimes every 12 years, depending on type of extinguisher) professional service companies test the container itself. They discharge the extinguisher, take it apart, then reload and re-pressurize it. This takes time and requires special knowledge, tools and supplies (new extinguishing agent).
    • Coming up: More on how this may not be as effective as you’d think!

So how long does a fire extinguisher typically last?

The “answer” here seems to depend on a number of things: the quality, type and size of extinguisher, its environment (stored inside? outside?), etc. The NFPA makes this general statement: “ . . .,rechargeable fire extinguishers must be recharged every 6 years, whereas disposable extinguishers must be replaced every 12 years.“

So the first thing to know is whether you have a disposable or a rechargeable extinguisher. (Most homeowners have disposable models because they are easier to find and less expensive to buy. More about price, below.) A disposable extinguisher has plastic components; the rechargeable extinguisher has a metal cap and valve.

Check the age of your disposable extinguisher!

Find the manufactured date (on the label or on the bottom – always tiny print!). If it’s 15 years old, dispose of it and get a new one!  (Remember our senior citizen clutching the extinguisher manufactured in 1994??) 

What about a rechargeable extinguisher?

When your rechargeable extinguishers are properly maintained, they’ll last a lot longer. Still, you’ll be paying for the maintenance services. And when the rechargeables reach the age of 12 years, they’ll have to “pass” even more stringent and costly tests if you want to keep using them safely.

Warning. In my research, I discovered references to “fire extinguisher service companies” that were not only adding fraudulently to their bills, but weren’t even the licensed services that companies thought they had a contract with! Be sure to check!

Second Warning. Even when your extinguishers are being recharged, you may not be getting what you are paying for. The problem? Some service providers may not be refilling your extinguishers with the proper chemical agents. A 2020 test of 100 extinguishers (from different manufacturers, different service companies, etc.) by Dyne Fire Protection Labs found that 9 out of 10 had been re-filled with something other than what the extinguisher manufacture called for! Obviously, the wrong “mix” may mean the extinguisher may not operate as designed. After a fire you’d sure hate to have the official report claim “User error” when it was all the fault of the extinguisher! (See video report of the Dyne study here: https://youtu.be/4YDFtGubNpY )

So what’s the Better Option I discovered? An extinguisher called the Rusoh® Eliminator®.

Even though it’s UL listed, and has been on the market since 2017, I have never seen this extinguisher! It really is different, starting with looks. Here are the innovations and why I had to write this Advisory.

  • You “charge” this extinguisher only when you need it! Pull down the simple yellow lever to puncture a CO2 cartridge (about the size of a short flashlight). The extinguisher is instantly pressurized. (The cartridges come in packs so you can always have a fresh one on hand.)  So, the Eliminator eliminates the “pressure leak” concern.
  • There’s no danger of the chemicals inside the container getting compacted, thanks to the Eliminator’s “Fluffing tool.”  (This is what captured my imagination!) Imagine an augur running up the center of the extinguisher. Every month, just give the “Fluffer” on the bottom of the extinguisher several turns. The chemicals inside will be stirred and mixed up, eliminating “compaction.”
  • The container can’t rust or dent or degrade because it’s made of super hard polymer. Eliminates damage and/or deterioration. Recyclable, too.
  • To use, lift off the wall holder, puncture the CO2, aim and squeeze. Big handle that’s easy to grab, solid body, works with left or right hand. Eliminates confusion and fumbling.

Most compelling feature for business? The Eliminator can eliminate service contracts!

Because it’s so simple, you can do the monthly and annual maintenance yourself after getting certified via an online course. Doing your own maintenance saves money being paid to outside vendors, and avoids the security and perhaps health risks of having strangers wandering through your facility.

So what does the Eliminator cost, compared to traditional extinguishers?

As you might expect, the initial purchase price is more. I looked at the cost of the 5 lb. extinguisher, most popular for commercial use. It costs around $150 (on the website), compared to a typical rechargeable extinguisher around $40-$60.

But that’s the purchase price, not the full cost. For business, costs includes those yearly inspections, maintenance, recharge, etc. How much are you paying for those services now? If you’re always on the lookout for cost savings, check out the Savings Calculator at the Fire Technology Innovations site.

If you’re serious about better fire extinguisher protection, I encourage you to take a closer look at the Rusoh Eliminator. You may want to do like I did, just pick up the phone and talk directly to the VP, John Tabacek. Here’s his contact info: John Tabacek, Fire Technology Innovations, (949) 246-4826 (PST), j.tabacek@teamfti.com, www.teamfti.com

Virginia
Your Emergency Plan Guide team

P.S. These questions were all mine, as a “regular” consumer with a serious interest. I am sure that a trained professional may have more of them. Either way, as a user or a professional, your comments and questions will help us all learn more. Please share them!

Fire News

Share
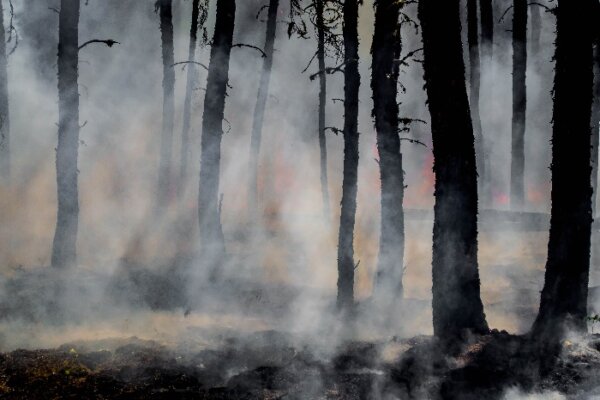
Picture of burned forest, smoke and flames in background
Pictures like this coming one after another . . .

News often drives these Advisories. You can’t have escaped the latest headlines about summer heat and summer fires. The following selected statistics from various fire news sources will give you an idea of what to expect this summer.

First, sobering statistics on the fire front — and they threaten to continue.

  • Fire season – what’s changed? Last season’s California fires were some of the biggest ever seen. Already this year, fires are burning faster and hotter and earlier. Summer fire season used to start in May. Now fire “season” is all year long.
  • High temperatures – how high? This year heat waves with triple-digit temperatures have hit most western states and even western Canada, setting records and breaking them the next day. (Are you familiar with “heat dome?” The NOAA defines it as “when the atmosphere traps hot ocean air like a lid or cap.”  Read more on the NOAA site and you’ll see that it’s all because the Pacific Ocean has heated up faster than the Atlantic. Expect more about heat domes in upcoming fire news.)
  • Drought – again? High temperatures added to dry vegetation make fires more extreme. Two-thirds of western states are in a drought. In California, 85% of the state is in a drought. The Governor has already called for 15% cut-back in water usage.
  • Deaths Dozens! People have died from these extreme temperatures – because they didn’t have A/C and because they didn’t know how to take care of themselves, or couldn’t. And of course there have been deaths due to the fires, too. The whole situation is sad and distressing.

By contrast, is there any good fire news?

Some. You may want to find out more about each of these!

As mentioned above, the fire season is now officially 12 months long. The Federal Budget has increased funding for permanent firefighter staffs. This means departments can do a better job of planning.

Meanwhile, new technologies are coming online to improve fire detection and firefighting. Drones are a good example. They can find fires (with the help of specialized cameras), assess conditions and direct fire fighters. New apps have been developed, for professionals and citizens, which show fire locations, evacuation zones, current evacuation alerts, and up-dated escape routes. Artificial Intelligence is being harnessed to capture and analyze information from cameras, current and archived weather data, satellite images and modeling tools to predict the likelihood of fire conditions wind patterns, utility service, and more.  

All these have potential, of course, but until there are some massive breakthroughs, it looks as though we are going to experience more and more extreme fire seasons.

What can we do today here in our neighborhood?

This question prompts me to write every week!  What can I do? What can my neighbors do, working together? How can we make use of good guidance and professional resources?

The news in this Advisory, and the emergency situations described below, are meant to help you step up to a higher level — of knowledge and of readiness. Like much of what you see here in Emergency Plan Guide, this Advisory assumes you already know most of the basics. So you can consider these items as extra credit!

How many fire extinguishers should you have in your home?

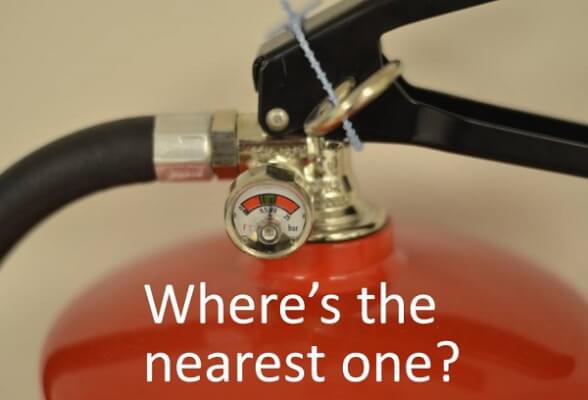
Where's the nearest fire extinguisher?

“More than you need.” CERT training suggests you attack a fire with a buddy. You both should have extinguishers, both pins should be pulled, both extinguishers tested BEFORE you attack the fire. When you’re ready, approach the fire, aiming at the closest lowest edge. Get it put out quickly! Your 2.5 lb. ABC extinguisher will only discharge for approximately 9 seconds! (5 lb., 14 sec.; 10 lb., 22 sec.) Find out more about extinguishers here. It tells about a special meeting we held, plus has a recommendation for a good deal on purchase.

Fire Alert! Wildfires can blow up out of control within as short as an hour, People need all the advance notice they can get in case they need to evacuate. Can you name three ways YOU will get warnings about fires?

Everyone should be familiar with and able to get multiple alerts: text and phone alerts from Federal and local jurisdictions, news from public airways, and messages from their place of  work. We’ve written before about emergency alerts. Be sure you are signed up if signing up is required! Promote signing up as a community or neighborhood activity. Be aware that PEOPLE WITHOUT INTERNET ACCESS MAY NOT GET ALERTS, particularly if power is out!

Possible gas leak from earthquake! Clouds of dust! A gas line valve needs to be turned off, but you know that a spark could set off an explosion or fire. What tools do you use?  

Non-striking adjustable wrench for use around electricity or gas

You use non-sparking tools — wrenches, hammers, etc. They are made of Aluminum-Bronze (Al-Br) or Copper-Beryllium (CuBe) alloys. (The gold-colored handle might as well be gold, for the price!) If you need non-sparking tools for the job, though, you’ll be thankful you have them.

Wind is pushing embers out miles in front of an advancing wildfire! You don’t expect to have to evacuate, but embers could certainly start a smaller fire. What is the latest fire news for removing vegetation fuel outside the home?

“Keep vegetation 1 foot away from the house, keep plants/bushes trimmed up 2 feet off the ground.” Get all the guidelines at FireWise. (And get rid of all Juniper bushes – to quote the firefighter giving one of the recent presentations I attended, “They are a roman candle ready to explode.”)

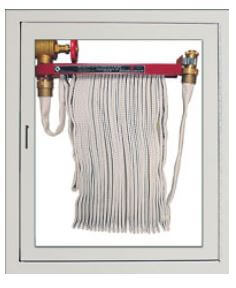
A small fire starts in an older public building. The fire department has been called. People are getting safely out. You notice a fire hose and standpipe right there. Are you allowed to use this hose to keep the fire from spreading?

fire hose with standpipe

According to my firefighter host – and supplemented by online research – small hose (1 – ½ in.) already connected to standpipe systems are designed for use by “trained building occupants.” If you feel you are “trained,” and you can safely stop an incipient fire from growing, take action. Open the case, turn on the valve, pull the hose all the way out, turn on nozzle and aim water at base of fire. You may have put the fire out before professionals even arrive. (P.S. They will be bringing their own, heavy-duty equipment.) Thanks to Guardian Fire Equipment for the photo. And here’s more info about these systems (no longer required but still found) with a quiz to finish up with.

Next steps

Every one of the questions above can be turned into a comment, an article, a show-and-tell, a flyer, a study session – perfect for sharing with others. You can invite a guest speaker from the fire department. Everything fire-related is appropriate for every single family and every single community. Please make a commitment to share!

Good luck with your fire prevention and preparation activities.

Virginia
Your Emergency Plan Guide team


Apartment Safety and Security

Share
Image by zephylwer0 from Pixabay 

Why, some of my best friends live in apartments (and condos)!

So much of what we read about preparedness and survival assumes a rural or at least a single-family-home setting, where there is room for a survival garden, water barrels, storage shelves in the basement, etc. There may even be nearby woods where you can practice building shelters, cooking over a campfire, etc.

But what about the 37% of us who live in rental properties, mostly in multi-family buildings? What about our safety and security? We have no room for many of the preparedness activities mentioned above. No place to practice outdoor survival skills. And we can’t just run outside if a fire threatens or we smell a gas leak.

And what role does the property owner play in taking care of safety and security items? Time to find out!

Let’s make sure renters are as prepared for emergencies as anyone else! Starting with . . .

Easily overlooked apartment safety and security recommendations.

Is your apartment secure?

Door locks. Whether you’re moving into a new unit, or have been there for years, take a look at the condition of your locks. Today, reasonable security for an apartment includes a deadbolt and a peephole. In fact, a peephole may even be required by your local building code! Find out before you make any assumptions, of course. And be sure to ask the landlord for help or at least permission to make any changes. You may be able to do these installations yourself, or you may have to pay to get them done. Read below for some ways to save money.

Oh, and while you’re talking with management, be sure to find out the property policy for management or maintenance to enter your apartment.

Balcony security. Don’t forget the locks on your balcony windows and doors, even if you are on the second level. Sliding glass doors are particularly vulnerable. Consider a security bar, or at the very least, a rod cut to the exact length of the sliding door’s track. Here’s an example of an adjustable bar that also locks to keep children from lifting it out.

Securityman Sliding Door Security Bar-Child Proof Sliding Door Lock Bar with Anti Lift Lock – Fits Most Doors & Windows-Adjustable Patio Door Security Bar (19″- 51″) (White)

Security system. If neighbors and/or the police records show danger of unwanted activity in your neighborhood, consider installing a security system. For a more detailed discussion of options, check this Advisory. For your apartment, there are many battery-operated systems that won’t damage the walls, and that you can then take with you when you leave.

Here’s a sample of a simple, battery-operated security system that could be mounted outside or in your apartment for additional safety and security. Click the image for price and full details. (The more options you want — lights, camera, audio, etc. — the more expensive the system, of course. This model is a good start for comparison shopping.)

Are you prepared for fire?

Does your apartment have a sprinkler system?  Starting in 2003, all apartment buildings were required to have sprinklers (but smaller and older buildings may have been grandfathered in). If you are moving to a new apartment, check closely. If it doesn’t have sprinklers, you may want to reconsider. (You may recall the story of how Trump Tower only has sprinklers on the lower floors. A fire there in 2018 killed a resident and injured six firefighters.)

Smoke alarms and carbon monoxide detectors? Do they work? Don’t take a chance. Test, require they be replaced or replace them yourself. Depending on the type of sensing equipment you choose, you can get alarms for around $15-$20. (Here’s a link to our alarms reviews.) According to The U.S. Fire Administration, more than one-third (38 percent) of home fire deaths result from fires in which no smoke alarms are present!

Do you have a home fire extinguisher? More than one? Are the extinguishers located where kids or someone in a wheelchair can reach them? Does everyone in the home know how to operate the extinguisher?

Can you get out of your apartment safely?

Getting out of a large complex is a lot different than fleeing a burning home! So, lots to think about.

Just as you want to know that your doors and windows can be locked, you want to test to be sure they all OPEN in case of emergency.

The standard “Family Evacuation Plan” calls for you to identify two ways to exit every room. Obviously, in a rental apartment, that may be tough, because the second exit is probably though a window. Can you actually get out your window? Can you get down to the ground safely? Does your family plan have a place for you to reassemble after having evacuated?

If your apartment is no higher than 4 stories, consider an escape ladder. Escape ladders are available in 2 to 6 story lengths, but the longer ones become quite a bit more expensive, and of course are more demanding in terms of required strength and agility.

Since in an emergency you could get trapped in an elevator, do you have more than one stairwell as an option for your family? Do all family members know where other stairwells are located? Are these stairwells well marked? If a family member is unable to get down stairs, do you have a plan for carrying that person down? Do you have the equipment that would make carrying possible?

Evacuation chairs and evacuation sleds may be the only way to get someone who is ill or unable to walk down stairs safely in an emergency. Find out about costs and capacity (different sizes for different sized people), note whether equipment takes two people or just one person to operate. Here is a place to start your research. And below see a 4 min. video that will give you a good idea of just how an emergency sled works.

I have not personally used this item, so I can’t recommend it. But the video is useful.

Do you have renter’s insurance?

Worth it. Check with neighbors to see what they have. The discussion alone will add to the safety and security of your apartment! Bring up the topic at a community meeting. Bring up the idea in the next paragraph at a community meeting, too!

Does your community have a community emergency response plan?

Knowing your neighbors is the best defense. They will be the best source of help in an emergency!

Put in the effort to create a community emergency response group and a plan. Engage management’s support and assistance – they have everything to gain by keeping tenants safer, too. Together with management, learn more about your buildings, security, utility service, maintenance, etc. Agree on emergency procedures – who will be responsible for what.

Added benefit of having a group for apartment safety and security

Working together, you will have more power to negotiate with the property owner. And you may be able to save money by buying locks or security lights in bulk. You may also be able to arrange with a handyman or contractor to install them for everyone in the group. Best of all, you could provide a job if that handyman or handywoman is one of your own neighbors!

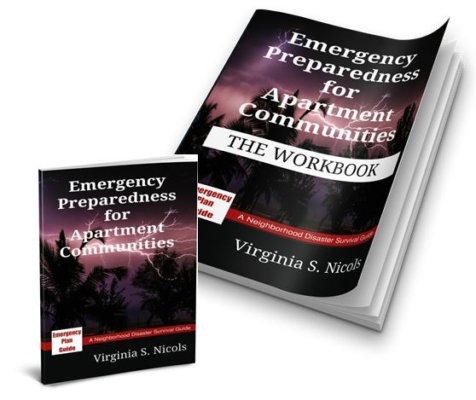
We’ve written a book to get you started on putting that neighborhood group and plan together.

Emergency preparedness for apartment communities
“The more we all know, the safer we all will be!”

Thanks for taking action on this.

Virginia
Your Emergency Plan Guide team


B.Y.O.E. = A special community meeting on fire extinguishers

Share

I was running late – to my own community meeting!

But we’d done some good planning, and by the time I got to the community room, a handful of volunteers were already digging into the oh-so-carefully-packed box of supplies. Name tags went out onto one table along with colored pens; handouts went onto another.  Two people were pinning photos from past events all across the back of the room. And refreshments had magically appeared on a table in the corner. (“Make people walk past the photo display to get to the cookies.”)

I saw immediately that our guest speakers had arrived before me, too!

But my back-up host had directed them to the electrical set-up, the microphone and projector were humming, and as neighbors started arriving, fire extinguishers in hand, everyone was standing about just casually chatting!

What a relief!  All I had to do was grab that microphone, take a deep breath, and gather my thoughts for the introductions! Here I am, a few minutes later, double-teaming with our fire captain.

“Bring your extinguisher, wear your Team vest . . .”

What was behind this special community meeting on fire extinguishers?

Pretty simple. We’ve had two fires recently in our neighborhood. In one, the whole house was engaged before the fire department arrived. (No person injured, but two pets died.)  In the other, smoke filled the kitchen but an observant neighbor noticed, grabbed a fire extinguisher, ran across the street and stopped the fire before any real damage was done.

The obvious lesson:

“If you can catch a fire right away, and you use the right equipment, you can put it out yourself.”

After the most recent fire, we took a poll of neighbors.

  1. “Do you have a fire extinguisher?”
  2. “Are you confident you could put out a fire in your house with your extinguisher?”
  3. “Have you ever even USED an extinguisher?”

Too many “no” answers! 

So we contacted our local fire department for help.

Not only were they willing to come do a special community meeting on home fire extinguishers, but they offered a magnificent surprise – a chance for us to actually practice putting out a fire.

But not a real fire.

We had the chance to train using a laser-driven fire extinguisher simulator!

First, we went over the basics of fire extinguishers.

In fact, we had invited everyone to BYOE — BRING YOUR OWN EXTINGUISHER – and it made a big difference! 

Many people had never even taken their extinguishers out of the box! Hardly any knew what sort of fire their extinguisher was good for. And I don’t think any had searched out the date of manufacture.

Imagine if you will a room full of people, many clutching red and white fire extinguishers in their laps, as our fire captain went over the basics using a power point presentation. There were MANY interruptions, much squinting to read the fine print, and MANY questions before it was over. (Remember, this meeting took place in a senior retirement community.)

  • Classifications tell you what kind of fire this extinguisher will put out – A, B, C, D and K.  In our group, nearly all were A, B, C.
  • What’s actually INSIDE the extinguisher? Again, for our audience, probably dry chemical that comes out as a powder to smother the fire.
  • How long is the extinguisher good for? “Check the date.” (This became an embarrassment and pretty humorous as people found the dates and called them out. The oldest extinguisher in the room dated to . . . 1987!)  The recommendation from our fire department – “Check ‘em often and replace after 5 years to be sure it will work when you need it.”
  • Where and how to store it? (Designated place, clearly visible. Turn it upside down and hit it with your hand to loosen the powder.)
  • Other comments – Only attempt to put out a fire you can control. Have an escape route. Call 911. and many more . . .

Then it was time for the SIMULATOR training!

Step back, you’re a little too close.

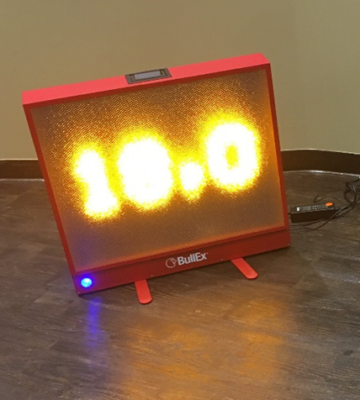
The head of our local CERT training stepped up to demonstrate the equipment. The digital “flame” on the screen was very bright, very realistic! The green dot from the laser was easily visible.

Before she was completely finished, people were already lining up to try it! (What a relief. As meeting planner you just never know what kind of reaction you’ll get!)

PASS – not so easy to remember when you have an extinguisher in your hands and the clock is ticking.

Our fire captain had gone through the steps to extinguish a fire.

And our CERT trainer had gone over them again, demonstrating two or three times just how the equipment works.

Still, when people came up to try, sometimes they forgot! They dropped the pin. The extinguisher was quite heavy and some couldn’t hold it and squeeze at the same time. A couple squeezed before they aimed!

Everyone was terribly engaged. Some were anxious. All were watching VERY closely.

Can she do it?
Too heavy? Hold it between your knees.

More than half the people in the audience tried the simulator. And everyone succeeded in putting out their fire. (A few did need a couple of tries.)

More important, as our CERT trainer observed, every one walked away with new-found confidence.

As the community meeting on fire extinguishers broke up, several people told me they wanted to learn more about our city’s CERT training and others wanted to join our local neighborhood response team. (We have no requirement for CERT training.)

As we gathered up all the stray handouts and took down the displays, we were very satisfied at the outcome.

Gotta love volunteers who stay to help tear down.

Could any meeting be more successful?!

Why yes, because that very evening I got several thank-you emails with many positive comments.

At 9 a.m. the following day our office manager wanted copies of anything that was left over “because people have already been coming in asking about it.” A bystander in the office volunteered, “I’m going to buy a new extinguisher for myself, and two for my daughter.”

Then the manager added, “I have never seen people come out of a meeting with so much excitement. They were talking and waving.  They were laughing. They were energized!

Fire extinguisher Simulator LED screen
The Bullex Digital Fire Simulator uses LEDs to create a “fire,” and the special fire extinguisher (same size and weight as regular one) “puts the fire out” using a laser beam.

I think you can agree, somewhere along the line this training will pay off. I hope you can add a similar meeting to YOUR group’s schedule!

Virginia
Your Emergency Plan Guide team

P.S. I’ll be adding this to my next collection of published Meeting Ideas! Let me know if you want to be on the pre-publication list!


Holiday Gift List for Mom

Share

Even if you’re one of the 33% of Americans who “wish they could skip the holiday season rather than spend money on gifts,” we think you’ll agree.. .

You really can’t skip over Mom!

But look past silly or pointless gifts. Rather, give her a gift that will make you feel better about her security and will show you really care. We’ve put together a Gift List for Mom to get you started. (If you don’t have a mom, just substitute any older person you care about!)

Click here for a Full Page Version – but read the whole Advisory first so you don’t miss any of the details!

Here’s what’s behind this gift list for Mom . . .

My shopping recommendations follow, along with some specific examples in a chart at the very bottom of the page.

Part One: Gifts to make life easier for Mom.

Most of these gifts are long-lasting material “things” that make fun stocking stuffers and great “mystery” gifts.

Part One gifts have been perennial favorites in our family. (You can actually find a gift for every age here!)

  • Bottle opener suitable for the kinds of cans and bottles that Mom opens
  • Flashlight/lantern/solar lamp with glow-in-the-dark handle
  • Emergency radio for news if the power is out
  • Motion-activated light in the driveway or on the porch
  • Portable cellphone chargers
  • A collection of batteries of various sizes

Part Two: Gifts to help Mom avert or avoid an emergency.

Part Two of the Gift List for Mom is another category of gift altogether. Each of these items requires some involvement on your part!

No use waiting for Christmas. Consider some of them for Thanksgiving . . .

  • Take a walk around the outside of Mom’s place. See some things that need to be taken care of before winter really hits? For example: trimming branches that may break in high winds. Making sure downspouts all connect and lead away from the house. Bringing in or covering up outdoor furniture.
  • Take on some fire prevention around your Mom’s’ home: rake up piles of dried leaves and clean out gutters where flying embers could find purchase. (Get the kids involved in this one, too.)
  • Make sure there’s a tool kit in Mom’s car that contains at the very least an emergency light, jumper cables and flat tire inflator. (Even if she isn’t sure about how to use these tools, a good Samaritan could make use of them on her behalf.)
  • Pack a simple Survival Kit for each car in the family, including Mom’s. Fill with warm clothing and/or blanket, snacks, a flashlight, a bottle of water. You never know when rain, snow or an accident will trap you for hours or even overnight on the road. For Mom, being trapped like that could be a real emergency. (You can find more info about what to look for on our Emergency Kit Reviews page.
  • Install a couple of new, lightweight fire extinguishers in Mom’s home. Put one in the kitchen. Make sure Mom holds and handles the extinguisher and understands how to use it. (PASS: Pull the pin, Aim the nozzle, Squeeze the handle, Spray from side to side at the base of the fire.) Again, see the chart below for a specific recommendation.

Part Three: Gifts that could save Mom’s life.

Before you head out for your next visit, pack up a few essential tools and supplies so you have what you need to complete these important household chores.

They may have been overlooked for too long.

  • Test Mom’s smoke and CO alarms! You may not enjoy climbing ladders, but your Mom may not be able to! Bring a few 9 volt batteries when you come to visit and take 15 minutes to test all the alarms in her house. (If the alarms are over 10 years old, replace them.) (We have more about CO alarms here.)
  • Does Mom live in earthquake country? Load up on a few brackets and straps at the hardware store and fasten shelves and bookcases to the wall. Tie down computers and TVs. Every day we get closer to one of the “big ones” and these simple preparations can save lives.
  • Has Mom added more electrical gadgets in the house, like fans, heaters or lamps? Maybe even an electric chair? Arrive with a couple of heavy-duty power strips and make sure none of her plugs is overloaded. (Get the kind with an overload switch. And choose the right length cord – 2, 4 or 6 ft.)

And here are some selected examples of gifts from the list for Mom!

All these items come from Amazon, where we are Affiliates. If you click on the images, you’ll go directly to Amazon where you can check full details including prices. Note that in a couple of places I’ve suggested variations on the basic product. Scroll down the Amazon page and you may find a comparison chart with those other variations listed.


Emergency lamps and lanterns -- These lightweight inflatables are solar powered! They do need to sit in the sun for several hours before they are charged - but if Mom has sun, she won't run out of light even during an extended power outage. Plus, these lamps are durable, waterproof, and the amount of light is adjustable. (If you need even more info about lanterns, remember we have a whole review page devoted to them here at http://emergencyplanguide.org/reviews/best-emergency-lanterns-for-power-outage/


Findable Flashlights -- The top one in the picture is a typical metal flashlight with a glow-in-the-dark handle. The second image shows a whole collection of smaller flashlights with entire rubberized, glow-in-the-dark cases. I've said it many times -- have a flashlight in every room! Having glow-in-the-dark models will make them a lot easier to find in an emergency.


Emergency radio will pick up news and weather even when the power is off. I like this radio particularly because it can operate with solar as well as with batteries. And it has a powerful battery storage bank.

Dawn to dusk security light is motion activated, powered by batteries. Once you have one on your porch, you'll wonder how you ever got along without it. Once Mom has one, she'll wonder why you never thought of it before now!


Batteries and Power Banks. Yes, you could add a whole collection of batteries as a great holiday gift. But I'd also add a simple power bank like this one, to charge Mom's phone. (We own a couple of similar ones. They hold a charge forever -- well, not really forever, but for weeks.)


Car Tool Kit. We all have tool kits in our cars, in various conditions. Be sure Mom has one that's complete. This one holds jumper cables and emergency items; if Mom lives in a place where she could get stuck, find a car kit with a tow strap. (That will add another $10 to the price . . .)


Fire extinguishers -- yes, more than one. Be sure to have one near the exit in the kitchen! And get a size and a squeeze mechanism that fits Mom's capabilities. (There are even spray can extinguishers but they empty out almost instantly. Still, better something than nothing.)

In my experience, moms often delay making decisions that someone else might label as “just for her.” You can help your Mom avoid any of that by making sure YOU take action for her welfare.

She will appreciate your thoughtfulness. She may even love you more!

Virginia
Your Emergency Plan Guide team

Travel safely by RV

Share


RV camping

Summer’s coming! Are you planning a vacation that includes travel by RV?

(If that would NEVER be in your plans, keep reading anyway. You may get some hints for other people you know and care about!)

In this article, I’m defining RV as including motor homes, 5th wheels, trailers or pop-ups. Our emphasis is on being prepared for emergencies, no matter what your rig!

Disclaimer: Joe and I aren’t RV vagabonds but we have driven across the country and back a couple of times in a 32 ft. Fleetwood, towing a car trailer. That doesn’t make us experts, but at least I’m writing with the benefit of some experience, plus a lot of story-telling friends and online research.

Getting started by being prepared as a driver

As you might expect, RVs get into accidents because they are big, have big blind spots, aren’t as maneuverable as a car, and are sometimes driven by inexperienced and elderly drivers.

Moreover, when an RV does get into trouble, it can cause a LOT of damage.

That being said, it turns out that fatality rates for RVs are less than half the rate of auto accidents. Still, with over 75,000 accidents a year, if you are planning an RV trip, be sure to get some real practice behind the wheel before you set out!

(Joe and I have taken hours and hours of driver training as members of a sports car club. Can’t express how valuable it has been over the years! A class may cost $100 but when you compare that to the cost of an accident . . .!)

Loading your RV

It just makes sense that you organize your RV so that the load is equally distributed or, if it’s a trailer, that heavier items are in front and not in back. Note: if you’ll have water at your destination, wait to get there before filling your tank completely. No use driving with that extra weight or with water sloshing around!

Check with other drivers with the same set-up (same type and size of towed vehicle, same kind of car or truck doing the towing) to see what they recommend. You can always hang out at an RV sales lot or visit a nearby campground to find friendly people to talk to!

Resource: As for what to pack, you’ll find some excellent and very comprehensive lists at http://www.rvforum.net.

The biggest risk for your RV — Fire!

Fire is usually caused by overheating in the engine compartment, wheel bearings and tires, battery compartment, propane system or refrigerator or by having something catch fire (curtain, paper towels, etc.) while you are cooking.

And as one RV blogger says, “Everything in an RV is an accelerant!” (We know from personal experience that older trailers and mobile homes burn to the ground in less than 10 minutes.)

Four recommendations for safety

1-Stop and check your entire rig on a regular basis.

Before you start, within 20 minutes of taking off, at every rest stop, when you get gas, etc. Walk all around, check the hitch, eyeball the tires and undercarriage, test to see that latches are secure, look for leaks, etc. You will likely be able to spot and smell leaks or friction before flames burst out! If you own a diesel pusher, you may want to investigate installing an engine fire suppression system.

2-Install smoke detectors.

If you’ve read our earlier Advisories about smoke alarms, you know there are a couple of types. One type (ionization) is activated when smoke gets into the detector and blocks the electrical current. The other type (photoelectric) activates when smoke blocks light receptors. Whichever type you have, it is likely to go off more frequently in the confined space of your RV, so be sure to have plenty of ventilation when you are cooking. (Use the exhaust fan!)

Two leading brands of smoke detector are Kidde and First Alert. We have used both. For your RV, you’ll want battery-operated models (not hardwired). Here are some examples. Click on the images to go to Amazon where you can look at a number of models.


3-Install a carbon monoxide detector.

Your RV will likely use propane for cooking and heating, and you’ll have a gas generator. Anytime there is an open flame, carbon monoxide is being released.

In November, 2017, 2 people were found dead of carbon monoxide poisoning in a mobile home in Hays, Kansas. They had left their generator running overnight . . .

Here’s an example of a well-regarded carbon monoxide alarm from First Alert.

You can also get combination alarms that warn of both smoke AND carbon monoxide, like this one, also from First Alert.

4-Install fire extinguishers.

Plural! If a fire starts, get people to safety immediately. Then, you can attempt to control the fire if possible. Have an extinguisher in the driver’s area, one in the bedroom and one in the kitchen area so you’ll be able to react immediately to a threat.

Because space is limited, and because we know that shelves are often crammed full, INSTALL your extinguishers so they are visible and will be where you reach for them in case of an accident!

We recommend two types.

First, consider aerosol extinguishers. They are easy to pack and work instantly and instinctively. I’d want several, and I’d prefer the comprehensive A,B and C models. Also, be sure the one you buy is allowed in your state.

Here’s an example. It comes in a 2-pack with brackets for mounting:

Second, get a larger extinguisher of the traditional type that you’re probably familiar with. Yes, it’s heavier, but also has more fire-extinguishing power. We own several similar to the one below, of different sizes – 2.5 lbs., 5 lbs., 7 lbs.


And the extinguisher below comes in a 4-pack – one or two for your RV, the other two for your home!

A few other safety tips for vacation travel by RV.

• Get in the habit of locking your RV or trailer every time you leave it – whether that’s on the street in front of your home, or in the national park. Close the curtains. Discourage the casual thief or mischief maker.
• Invest in a trailer hitch lock. Serious thieves have been known to hitch up and pull away homes that didn’t belong to them!
• While we’re on hitches, practice so you can unhitch your rig quickly to move your car away from it in case of a fire or other emergency.
• Be sure everyone in the family knows how to open the door (some door and screen latches are complicated!) and how to close the propane valves and unhook the electricity.
• As always, keep your gas tank half full so you have more options in case of something unexpected happening.

Final suggestion: Consider your vacation travel and camping as practice for sheltering in place.

In a disaster, you may want to use your personal RV as a bug-out vehicle, or as a temporary home if your house has been damaged. Assume you would have no hook-ups. You can pick a day or two on your trip to “camp dry” as a test for what might happen in a real emergency.

The dry run exercise will be challenging! You can test all your gear (lanterns, generator, whatever) and you will learn things you maybe never knew. (On our first dry run, we discovered that the gray water and the clean water spigots under the RV were reversed . . .!)

You can make it fun!

All this makes me want to plan another trip myself.

Virginia
Your Emergency Plan Guide Team


Property Managers Responsibility for Emergency Preparedness

Share

Neighbors getting answers

Neighbors getting important safety answers.

How does your Property Management Company Stack Up When it Comes to Emergency Preparedness?

Do you live in an apartment complex, a mobilehome park, a condo complex, a retirement community, a gated community, or any kind of community with a Home Owners’ Association?

Does your community have a property manager hired by the owner or by the Association?

Or maybe you yourself are a property owner, doing your own managing?

No matter the exact ownership circumstances, it is important to

Include a property manager in your emergency preparedness planning!

Two important outcomes are possible.

  1. You could uncover that you have been making unfounded assumptions about the role and capabilities of the manager to protect residents in an emergency.
  2. Your investigation and follow-up discussions may allow you to improve emergency response for all your neighbors1

Emergency Plan Guide is not a professional property management company, of course, but we have owned rental property, lived under property managers and served on various boards and homeowners’ associations making decisions about most of the topics that follow.

And of course we do not know where you live as you are reading this, so we can’t know the regulations that apply in your state and city.

Still, we understand basic management responsibilities and can pose general questions that EVERY one should be able to answer!

Disaster survival questions for tenants, owners and managers.

Personal experiences give us a place to get started with questions. If you have ever lived in a property with a property manager, consider these:

  1. When you moved in, did you get a list of emergency procedures for the building or for the community? For example, did you receive a map showing the buildings and/or homes (including their addresses), location of fire extinguishers or hydrants, list of local emergency contacts including who to call after-hours, information about evacuation routes, etc.?
  2. Is there any specific info on disaster planning for people with disabilities? Older people with mobility challenges? How about planning for pets?
  3. Has that emergency information been updated regularly?
  4. Do you know where to find the most recent copy of emergency procedures?
  5. Has the community ever practiced an emergency drill or evacuation?
  6. Do you know the location of all the exits from the property? If they are habitually kept locked, do you know who would open them in an emergency?
  7. If you are on the second floor, or higher, do you have an emergency ladder? Are you allowed to practice evacuating?

Multi-story buildings have particular emergency preparedness issues. If you haven’t lived in a multi-story building, you surely know someone who does. Be sure they are asking questions like these . . .

  1. Have you been told/shown where all the stairs are? Do stairs lead up to the roof as well as down to the street? Are doors in stairwells locked?
  2. Do you know where fire alarms and fire extinguishers are located in or outside the building? (We assume you have a fire extinguisher inside your own dwelling.)
  3. Do you know what happens when the fire alarm goes off? For example, what does the elevator do? What happens to interior doors, if anything?
  4. Do you know what happens when power goes out? Again, what happens to elevators, doors, gates?
  5. Are all dwelling units on all floors protected with a sprinkler system?

The 22017 Grenfell Tower fire in London – in which 71 people died — raised the question of sprinklers. And more recently a fire in the Trump Tower in New York – in which 1 person died and 6 firefighters were injured – revealed that its upper floors (exclusive residential apartments) also did not have sprinklers. Moreover, the apartment where the one victim died did not have a working smoke alarm.

Every property manager should be able to answer these questions:

  1. Who makes the decision that there is an emergency? If the manager isn’t available, who makes it?
  2. How are residents alerted or notified about a weather emergency? Can they be notified if power is out?
  3. After a disaster, does the management company maintain a website where updates could be obtained?
  4. What procedures are in place for ongoing communications if the emergency lasts for hours or days? (For ex., a widespread health emergency requiring closure of the pool and clubhouse.)
  5. How would the community fare in a longer-term emergency? What about rent payments, trash collection, security? What about management personnel?
  6. Does the management company store any kind of emergency supplies? How are they rotated, inspected, etc.? Who has a key? How would supplies be distributed?

How to use these emergency preparedness questions.

  • As someone concerned with emergency planning, you can use this list to be sure you haven’t made any assumptions about your community that turn out to be incorrect. In some cases you may be able to come up with alternatives to what look like problems.
  • As a member of a community preparedness group, you can use this list to suggest improvements to your neighbors and to your management company.
  • As a member of an HOA Board, you can use this list to help your group identify and hire the best possible management company for your property!

Again, every community is different, so there is no one-size-fits-all management standard. But property managers play an important role in emergency planning and, in particular, in responding to an emergency. Whether they are prepared or not, people will turn to them for answers.

You may be able to reassure residents and management alike by making sure common questions get answered well before a disaster happens.

Follow through with your own property manager, and share with others who live in communities with managers. This is essential info.

Virginia
Your Emergency Plan Guide team

Addendum: It seems that most property management contracts do NOT include requirements for protecting residents. (I conducted an informal survey online with a group of professionals and received a couple dozen responses.) Nevertheless, as more attention is paid to disaster prevention and emergency response planning, the concept of a “standard of care” needs to be considered. In this case, if most professional management companies in your area are incorporating emergency preparedness education and practices into their services – or at least adding in a budget line item for it — the few that ignore it will stand out as not being up to standard. This could have a legal impact. Certainly, it should have an impact on the company’s ability to win business.

5-point Safety Checkup for Daylight Savings Time Change

Share

Emergency waiting to happenJust waiting for you to make a mistake!

It’s “Spring Forward, Fall Back” time here again this weekend. Along with re-setting the clocks, this time of year now has expanded to include reminders for emergency preparedness.

Of course, you know about checking the batteries in your smoke alarm. But that’s just the start! So read on, for some simple actions that if overlooked could put you in BIG trouble.

To the extent that your safety and security depend in part on your neighbors’ preparedness, be sure you share this list with them, too!

1-Change the batteries in your smoke alarm.

You should know this statistic from the National Fire Protection Association by heart: Three of every five home fire deaths resulted from fires in homes with no smoke alarms or no working smoke alarms.  Nuff said?

And here’s a real life story to go with the statistic.

A couple of years ago on a Saturday, the local fire department, police department cadets, some EMTs, and the Red Cross, supported by our Neighborhood Emergency Response Team, installed 461 new smoke alarms in our neighborhood! (Funded by a grant, in case you’re wondering.)

The alarm packaging said, “10-year guarantee” so naturally we were all annoyed when people began reporting that their smoke alarms were “chirping.”

Here’s what we discovered about alarms chirping:

  • Nearly all people who heard the chirping incorrectly identified where it was coming from! In nearly every case, it was from an already installed OLD alarm, and not the new one.
  • The 10-year guarantee works for the mechanism. When it comes to the battery, the guarantee applies only to alarms that have sealed lithium batteries. If your smoke alarm has a replaceable battery, check it and replace it or it will surely start chirping, like ours did, in the middle of the night!
  • Every battery has an indicated life. Just remember, you may buy new batteries today but you don’t know how much of that “life” has already expired while the battery was on a shelf somewhere.

Upshot? Simply replace your alarm batteries twice a year when the time changes. A few dollars invested can save your life.

2-Change the batteries in your walkie-talkies.

Same concept: when the emergency hits, if you don’t have fresh batteries, you may have lost an important tool.

Walkie-talkies take AA or AAA batteries. Over the years we have tested different brands and over the years the “winner” in the test has been different every time!

Get the right size, get the longest life available, and TEST them regularly. Every month we catch a couple of dead Walkie-Talkies during our monthly drill. (Of course, if people forget to turn the Walkie-talkies off after the drill, the chances of the batteries going bad are about 100%.) (And corroded batteries can destroy the walkie-talkie, too.)

Don’t have Walkie-talkies for your group or family? Here’s our walkie-talkie reviews to get you started on adding some.

3-Check your fire extinguishers and replace if they have lost pressure.

Fire extinguishers can last many years, but – Do you really remember when you bought yours?

A good extinguisher has a pressure gauge to help you track its functionality. Check the gauge when the time changes, if not more frequently. Not sure if the extinguisher is any good? Get a new one.

Looking to re-charge your extinguisher? We’ve looked, and haven’t found a reasonably-priced service. Maybe you can find one, but chances don’t seem to be very good.

4-Refresh your first aid kits.

We’ve written before about the drawbacks of most purchased first aid kits.

Still, you’ll want to start with a basic kit, and add your own enhancements.

At the left is a starter kit, available at Amazon, that looks even better than ones we’ve recommended before. Click on the image to get full details, but note to start with that this kit has soft sides with pockets labeled so you can see everything at a glance.  (Most of the inexpensive kits that I see are simply a zippered container with contents thrown in.)

Any first aid kit needs customization, and that’s where a regular check-up is important. At the time change, pull together all your kits (from your cars, your Go-Bags, etc.) and look in particular for . . .

  • Small medicine bottles whose contents have dried up completely.
  • Tubes of medicine that have been accidentally crimped or punctured and are oozing gook.
  • Band aids that have torn packaging and thus have lost sterility and stick.
  • Pills that have expired.
  • Scissors or other tools that have mysteriously developed spots of rust.

Repeal and replace as appropriate!

5-Clean out coils and filters to prevent fire.

We’re talking refrigerator, heater, and clothes dryer. All these collect dust and lint in hard-to-see and harder-to-get-to places, and can overheat or even (in the case of the dryer) burst into flames.

Enlist help to move or open any pieces of equipment or access doors, and attack with the wand and the crevice tool of your vacuum cleaner.

When you’ve finished vacuuming, empty its dust container and replace the filter in the vacuum, too.

While we’re on vacuum cleaners, a couple more safety notes:

  • Don’t leave a vacuum cleaner running while you go to another room. It can overheat and start a fire! (Just go onto YouTube to see a number of dramatic examples. . .!)
  • Check the cord and plug of your vacuum to be sure they aren’t damaged or frayed. These cords get hot! (Even the cord of my quite new Navigator gets really warm, just from being in normal use.)

That’s it.

You may have discovered that your 60 minute time change job has turned into a multi-hour project!

However, once you’ve gone through the steps once, it’ll be easier next time. Also, you may be able to turn the whole thing into a family bonding exercise by delegating different jobs to different family members, and presenting it as a contest!

However you get through the 5-point list, you’ll have the satisfaction of knowing your home is good to go for another six months. And you won’t be caught by an emergency just waiting to happen — as represented by the eager dinosaur in the picture!

Virginia
Your Emergency Plan Guide Team

Safety Checklist for New Employees

Share

Safety Is Your Responsibility

Where's the nearest fire extinguisher?
Will a new employee be able to answer this question?

Are you a business owner? in charge of emergency response at your work? an employee of any sort?

If you’ve been there a while, you should be able to check off every item on the Safety Checklist below. There are only 12 items.

A new employee, however, will have to make an effort to figure out all the answers. And if an emergency hits before he or she has done so, your business may be in jeopardy!

12-point safety checklist

Download the full-sized safety checklist here.

Share it with new employees and, for that matter, with ALL employees.

More In-Depth Info on Employee Safety

Some Advisories with more details for workplace preparedness:

If you want a more thorough discussion of how to build a Simple Business Contingency Plan – get a copy of our book, Emergency Preparedness for Small Business.

Suggested Next Steps for the Company

You can put this checklist to work in just about any workplace – office, factory, hotel, retail operation – wherever your business is located. Of course, you may prefer to use it as a sample and make your own, more customized version.

Either way, here are 3 suggestions for how to proceed:

  1. Share this article and the safety checklist with management. See what items they can check off; are there any items no one has thought of, or knows the answer to? Be sure you understand which items might have some liability connected to them.
  2. Decide on a plan for sharing the checklist (or a customized version) with all current employees. Turn it into a team effort, or a competition — whatever works to engage people and get them more aware of safety and their surroundings!
  3. Add the safety checklist to your on-boarding process for new employees. Obviously, they will need a helpful partner to be able to get through the list. I think they’ll find it to be a comforting exercise and one that will impress upon them the company’s commitment to preparedness and to safety.

Disclaimer from EmergencyPlanGuide.org

This handy checklist is not meant to be a full assessment of employee or workplace preparedness. Rather, it is meant as a simple, easy tool to create more awareness among people who are working together.

If the checklist starts a conversation about what’s missing, consider it a bonus. And then, put together a plan to fill those gaps!

We are committed to a continuing conversation about being ready for emergencies. As always, the more the people around us know, the better off we ALL will be!

Virginia
Your Emergency Plan Guide Team

Fire Danger in High-rise Buildings

Share

High rise fire
Intro: At Emergency Plan Guide, we try to write about subjects we know something about from personal experience. (It helps to be “a mature adult!”)  But until we become paid reality-show stars, some things we have to write about as observers.

The news is often an inspiration. Last week I wrote about hurricanes — though I have never lived through one. This week, it’s a fire in a high-rise.

The closest I’ve been to that is living through a fire on a ferry boat — not exactly the same thing, but certainly some similarities.

The point of all this? My own experience may be limited, and the risks that I face may be limited. But we all will  face a variety of emergencies FOR THE FIRST TIME. I’m convinced that simply being open to ever more more knowledge gives us a better chance of surviving. That’s what keeps me learning and writing.

With that, here’s this week’s offering. 

_________________________________________

The high-rise apartment building fire in London was horrifying. And deadly. When I started this Advisory – 3 days after the fire – the number of people missing and presumed dead had risen to 58. As of today, 2 days later, it is now at 79 missing and presumed dead.

High-rise fires are alarming but infrequent.

High-rise fires are always particularly horrifying. We all picture flames shooting up the sides of buildings, far above the street, and we can imagine the terror of the people trapped inside.

Still, with the exception of terrorist acts, the threat posed by fires in high-rise buildings isn’t as great as that in low buildings.

According to the National Fire Protection Association, in all the structure fires in a year, around 2,600 people die – but only 40 of them are in high-rise building fires.

Moreover, the NFPA says the danger of fire in high-rises is going down.

Why? It’s a function of old buildings being replaced by newer ones.

Modern high-rise buildings have fire-suppression protections that work.

If you’ve read the details about the London fire, you will discover that the 24-story Grenfell Tower did NOT have such protections. According to news reports:

  • Only one stairwell was available for residents.
  • There was no sprinkler system.
  • Recent “upgrades” to the building included a plastic-filled cladding material that was not fire-resistant.

What do you know about the building you are about to enter???

Safety depends on the building codes in effect.

In the United States, national and state codes regulate new construction and, to a certain extent, upgrades or retrofits. Generally, these codes apply to different aspects of the building – some of which we, as consumers, may be aware of, and other that are hidden from sight but just as important.

Outside the U.S., codes and standards may be different. For example, in the case of the London fire, the new cladding would not have been allowed in the U.S. (A visitor to the building wouldn’t have known that. Even the residents of Grenfell Tower, who had requested fire-resistant upgrades, may not have realized that their new cladding did not meet that standard.)

So, whether living, working or traveling, here are some questions to get answered before you stay in a high-rise building.

It’s good practice to answer these every time you enter a high-rise building!

1-Is there a fire alarm or smoke alarm system?

Easy enough to find out. If you don’t see installed alarm buttons, just ask!

2-Is there a fire sprinkler system?

An alarm doesn’t fight a fire!

So, look up and see if you can identify sprinklers. These are the key safety feature – in fact, they have been determined to be 97% effective in suppressing fire. (The other 3% didn’t work because they water supply wasn’t hooked up right, or the system wasn’t properly maintained.)

Don’t see any sprinkler heads? Are they blocked by furniture or decorations? Ask property management if a system has been installed.

This is the very most important feature for high-rise fire safety! No sprinkler? Don’t stay!

(An older building can be retrofitted with a fire sprinkler system. Unfortunately, it costs many times more to put in after the fact that if it had been incorporated into the original building. So, building owners may resist adding systems if the law doesn’t require it.)

3-Where are the fire exits?

Look for signs. Identify more than one exit. Check diagrams of the building so you would know which way to go if you couldn’t see because of darkness or smoke.

4-Where are the stairwells?

Again, note the PLURAL word. Every high-rise building needs more than one set of stairs. Note where stairs are located so if you need to evacuate, and one set of stairs is blocked, you can go down the other. (Remember, in a fire, one stairwell may be reserved for use by fire fighters.)

5-Are there fire doors in the hallways?

Modern buildings include fire doors that close in the case of a fire, keeping it from spreading. Usually, these doors are held open electromagnetically, and if a fire alarm goes off the circuit is broken and the door closes by itself.

Bad sign: Fire doors are blocked so they cannot close.

Again, under normal circumstances you may never notice these doors because they are “hidden” by the décor. However, it is good to know that in an emergency you may come upon a door that you didn’t expect.

6-How would people with a disability be assisted in case of a fire?

While you may see special signs for emergency procedures for people in a wheelchair, etc., it is up to you to figure out how you will handle an emergency.

Other fire safety features to look for, in any building.

1-What is the maximum occupancy?

Overfilled rooms, theaters, restaurants, stadiums, etc. may be more dangerous if there is panic. Be aware of where exits are located, and in an emergency do not automatically head for the door where you came in. Is there a better exit option?

(In my experience it’s fun and valuable to train children on a regular basis to look for multiple exits. As you settle down in movie theater seats, ask, “How many exits do you see? Or, how many ways to do you see that we could get out of here?”)

2-Where are fire extinguishers?

In a commercial building in the U.S., there’s sure to be one not far away!

Usually, local fire codes require that fire extinguishers be installed based on square footage, and they also require that you be able to find one no more than 75 feet away. (“75 feet” is only an example. Specifics may change slightly in a different state and in a different type of building.)

In any case, when you enter a building or room, it’s a good idea to look around to see if you can locate the nearest hand-held extinguisher.

This assumes you know HOW TO USE an extinguisher, of course.

What to do if there is a fire in a high-rise?

Fire experts still say “shelter in place” is the best advice IF THE BUILDING HAS PROPER FIRE SUPPRESSION PROTECTION.

(Stuff towels under the door to block smoke from entering, stay alert for instructions.)

Sprinkler systems have been in use for over 100 years. They provide 24/7 protection, turning on automatically when sprinkler heads reach a certain heat level. Fires can be caught and put out without people even realizing it until later.

Once again, if you plan to visit or stay in a high-rise building without a sprinkler system, think twice. Think three times!  You may want to find another option.

Virginia
Your Emergency Plan Guide Team

Want more information about fires and how to avoid a disaster? Check out these Advisories:

Get out now! Your Home Evacuation Plan

Share

Sample family evacuation plansStop reading right now.

Look up. Look around.

What are TWO WAYS you could get out of the room?

  • Will that window open?
  • Can you really squeeze through?
  • Can you get down outside or do you need a ladder?

Did you have to pause and consider?

I hope not!  These are answers you should know before anything happens.

In fact, everyone in your family should know the answers to these questions BEFORE an emergency happens.

Are you leaving your children defenseless?

Unless you point these exits out, your children will never think of them. In an emergency, they will likely run to try to find YOU, even if evacuating would save them.

Here’s an exercise you can do on a Saturday that will answer questions and give you all a much better sense of security.

Design your Home Evacuation Plan together.

It’s a step by step process that everyone in the family takes part in. You’ll need a pad of paper and some colored pencils. And one BIG piece of paper to assemble everything on.

Step 1.  Sketch a plan of your home.

One sketch for each floor, or, if your young children are part of the exercise, let each child sketch a separate room. Approximate sizes are fine.

Be sure all doors and windows are marked on the plan.

Combine separate pieces into one master plan. (You can redraw or even cut and paste.)

Step 2. Mark at least two exits from each room on your plan.

Plan in hand, take a walk from room to room. Mark potential exits. You may want to use two colors, one for PRIMARY and the other for SECONDARY exits. You may be able to get out, but can all the children? What about grandmother?

If you need special equipment to escape (a ladder), note that on your plan and mark where it is stored.  (Obviously, if you don’t already have the equipment, start a shopping list on a separate piece of paper! More resources below . . .)

Step 3. Note the location of special safety shut-offs for your house.

Keep touring the house. Mark where utility shut-offs are located. Does everyone know when and how to shut off the water? The gas? Again, is a special tool required, like a wrench? Note where it is stored.

Where are the electrical shut-offs? There may be more than one panel. Talk about under what conditions you would shut off the electricity.

Step 4. Where are emergency supplies kept?

In particular, note on your plan the location of fire extinguishers, flashlights and lanterns, and first aid kits.  (You can use icons if your plan is getting crowded.)

Where are your evacuation/survival kits stored?

Step 5. Last step: mark on your plan the family’s emergency meeting place — OUTSIDE of the house.

On the sample plan below, the family has designated a particular tree as the meeting place. Be sure the meeting place is far enough away from the house to keep people safe in case there’s a fire. You may want to label a second meeting place if the first one isn’t reachable, even though the second place may be off the map.

evacuationplanwoodbuffalo(Thanks to the Regional Municipality of Wood Buffalo, Alberta, Canada for this drawing.)

A few more thoughts to help drive the point home:

  • Save and review your plan from time to time, particularly if you add new rooms, new equipment, etc.
  • Take a photo of the plan and share it with other family members (or maybe even with students at a show-and-tell session at school) to see if others will be inspired to follow suit.
  • If you will be shopping for emergency equipment, you may find more info in some of our special Advisories, listed below.

Can you get this done before the month is over?? Good luck!

Virginia
Your Emergency Plan Guide team

More Resources  from Emergency Plan Guide:

Escape ladders: Your healthy 12-year-old can get down any type of ladder, but what about others in the family?  We’ve looked at many of the escape ladders and think that the  Werner, 2-story version is a good place to start your shopping. It can carry more than one person at once. Here’s the link to Amazon: Werner ESC220 Fire Escape Ladder, Two Story (Be sure to look at the “product page” and scroll through the images to get a better idea of what the ladder is like.)

Fire extinguishers: We actually experienced a kitchen fire and used the extinguisher we’d just put in place!  Read the story and learn more about the different types of extinguishers. A good all-purpose extinguisher is this one, made by Kidde: Kidde 466227 ABC Pro Multi-Purpose Dry Chemical, Commerical and Industrial Fire Extinguisher, UL Rated 1-A, 10-B:C

First aid kits: Most kits you buy are woefully lacking. But you can start with a purchased one and add your own. We held a neighborhood meeting to discuss first aid kits — read about it here — and my search on Amazon for a good starter yielded this one by AAA: AAA 4180AAA 121-Piece Road Trip First Aid Kit


When Seconds Count — Emergency Preparedness Videos

Share

Do you know what to do in each of these situations?

Last Wednesday was the regular meeting for our local Neighborhood Emergency Response Team volunteers. Lately members have asked for “more training” on a variety of threats – threats we don’t normally spend much time on here in Southern California.

So we decided to devote this meeting to some dangers that most people in the room had heard of but probably never faced.

In fact, before the program, we took a poll of the people in the room. Not one person had ever encountered killer bees. No one had landed in a canal or river in their car, although two of them had temporarily lost control of a car in flooding water on city streets. And only three people had ever actually used a fire extinguisher to put out a fire.

Emergency Preparedness VideosKeeping CERT Training Interesting With a “Movie Night”

The meeting went well! We had searched carefully on YouTube for short (4-5 minute) videos. Before showing each one, we prompted people to watch for a particular scene or to note the answer to a pertinent question.

Here are three of the videos we used for the program, along with the questions for each.

“Where is the nearest fire extinguisher to the room we are in right now?” “ Where’s the next nearest one?” “ Do you know if they have been recently checked?”  (We were in a large meeting room that had an extinguisher on the back wall. Only one person had already noted its location! No one knew where any other extinguisher was located.)

This particular video is aimed at employees in a work setting but applies just as well to residents of a home.

“Where are killer bees in the U.S.?” “Are there any where we live?” (I was prepared for this question and had downloaded an interactive graph that shows how bees have spread in the U.S. since 1990. Here it is: http://en.wikipedia.org/wiki/File:Killerbees_ani.gif )

“Are we located in an area likely to flood?” (Consider the Red River’s recent flooding in Louisiana!) “What about electric car windows?” “How do you break a window?” (One of our volunteers had a spring-loaded window breaker on his key chain, just like the one demonstrated in the video. You can see one here and get it in time for your own upcoming meeting: resqme The Original Keychain Car Escape Tool, Made in USA (Black) (Use it as a door prize — always popular! Or get several and share the fun.)

CERT As Entertainment?

One of the LinkedIn groups that I follow has been debating the necessity of sticking to CERT training as laid out by FEMA. Obviously, a meeting such as the one described here is not covered in the official training materials.

However, in my experience, there’s a difference between training for dedicated CERT graduates and awareness training for ordinary citizens.

Of course, those of us who are CERT graduates attend the follow-up trainings put on by our city. (Next week it’s a Light Search and Rescue refresher.)

But as a Neighborhood Emergency Response leader I am committed to my entire community. So we do what we can to attract all people and engage them in emergency preparedness activities.

Our Movie Night was one of those efforts.

Would something like this work for YOUR group? Try it, and let me know!

Virginia
Your Emergency Plan Guide Team

P.S. If you haven’t yet heard, I pulled together over two dozen different meeting planning ideas for use by community leaders. You can get more info and order a copy at https://emergencyplanguide.org/CERT-meeting-ideas/


Fire In Your Home!

Share

How safe are you? Take this quiz.

Cigarettes cause fatal firesPick the correct answer:

  1. According to FEMA, what is the leading cause of residential fires in the U.S.?
  • Kitchen fires
  • Smoking
  • Wild fires
  1. What is the leading cause of civilian deaths caused by fire?
  • Kitchen fires
  • Smoking
  • Wild fires

True or False:

  1. Cooking is and has long been the leading cause of home structure fires and home fire injuries.
  2. Most cooking fires and cooking deaths are a result of the heat source being too close to combustibles.
  3. Households that use electric ranges have a higher risk of fires than those using gas ranges.
  4. Fires caused by smoking material (burning tobacco) are on the increase.
  5. The risk of dying in a home structure fire caused by smoking materials rises with age.

The peak day of the year for home cooking fires is: ____________________

The Answers

Here are some statistics to ponder.

In 2012, 36.8% of home fires causing injury started from cooking. (Many more kitchen fires actually take place, but are put out by occupants and not reported.)

That same year, smoking caused 15% of the fires resulting in fatalities, followed closely by carelessness (13%) and then fires set on purpose (12%).

Cooking

Most kitchen fires happen when the cook leaves whatever is cooking unattended. And most of those involve frying on electric ranges

The right portable fire extinguisher can be effectively used to suppress small fires in their beginning stages. However, the extinguisher must be properly rated and needs to be positioned where you can get it quickly and safely.

If you blast a skillet full of flaming cooking grease with the wrong extinguisher, you’ll create a fireball, greatly increasing the size of the fire and threatening you with serious burn injuries.

The day with the most cooking fires? Thanksgiving Day!

Smoking

Three-quarters of deaths due to smoking-material fires involve fires starting in bedrooms (40%) or in living rooms, family rooms, and dens (35%). The item most frequently ignited is trash, but trash doesn’t kill – people die when upholstered furniture catches.

Nearly half (46%) fatal home smoking-material fire victims were age 65 or older.

One out of four fatal victims of smoking-material fires is not the smoker whose cigarette started the fire.

The Action

  • Stop smoking. If you smoke, do it outside. Carefully put out your butts.
  • Be ready in the kitchen.
    1. Clear space around the stove. No mitts, no clipboards, no recipe holders.
    2. Have a lid and/or cookie sheet READY to cover a grease fire. It has to fit SNUGLY on top of the pan, blocking all air.
    3. Have a large box of baking soda handy to dump on and smother a small fire.
    4. Buy a kitchen fire extinguisher and position it between the stove and the door. Be sure you know how to use it. Remember that a powerful fire extinguisher could SPLASH AND SPREAD THE FLAMES if directed too closely at a burning grease fire.
  • If a fire starts in a pan . . .
    1. Try to put it out immediately! It can grow too big to handle within 30 seconds.
    2. Do not move a flaming pan. You could spill flaming grease all across the floor or counter, instantly creating multiple fires!
    3. Cover the stationary pan with a lid, cookie sheet or wet towel. Make sure all air is blocked.
    4. Turn off the burner.
    5. Leave the pan until everything has cooled.
  • If you can’t control the fire at the pan . . .
    1. Be sure other occupants are evacuated.
    2. Use your fire extinguisher. Pull the pin, aim, squeeze and sweep. Start several steps away and approach the fire as you see the effect of the spray.
    3. If not successful, call 911 and leave the home.

Fire is the most common emergency your family is likely to face, so share this information with them! Be sure your children know how to put out a cooking fire, and train older children in the use of a fire extinguisher.

If family members haven’t been trained about how to respond to a fire in the kitchen, they are likely to do the wrong thing!

You can find dramatic videos on YouTube that show what happens when grease ignites, what happens when people try to move the pan, or when water is thrown on the fire. And you can find good training for how to use a fire extinguisher there, too.  Take advantage of this great resource.

Want more details?

Two websites with statistical info:

https://www.iafc.org/files/1FIREPREV/flss_ResidentialRangeTopSafetyReport.pdf
http://www.usfa.fema.gov/data/

And this Emergency Plan Guide Advisory gives tips on shopping for fire extinguishers:

Fire extinguisher, anyone? 

Hope you take this Advisory to heart. In this case, there’s no need to become a statistic when you know what to do.

Virginia
Your Emergency Plan Guide Team

Share this quiz and its answers with your neighborhood emergency response group, too. Remember, the more prepared your neighbors are, the safer YOU will be!

Emergency Action Plan in Your Workplace – What Protection Does It Really Provide?

Share

Fire exit signThe US Department of Labor has a division called Occupational Safety and Health Administration, otherwise known as OSHA. I’m sure you’ve heard of it!
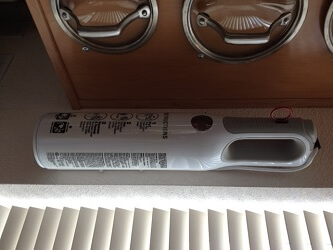
OSHA deals with a wide variety of employment issues, including protecting privacy, procedures for non-discrimination and retaliation, etc. OSHA also sets standards for safety, including requirements for Emergency Action Plans.  Does your workplace have a Plan?  Is it working for you?  Here’s an overview to start the conversation . . .

Who needs an Emergency Action Plan?

Just about every business. Take a look around your workplace. Do you see any fire extinguishers? If there were a fire, would you and co-workers need to evacuate the premises? These are the two key questions, so if you answer “Yes” to either one, you need to have an Emergency Action Plan!

What are the requirements for a Plan?

  • It must be in writing.
  • It must be kept in the workplace.
  • It must be available to employees for review. (An employer with 10 or fewer employees may simply announce the plan contents in a staff meeting or otherwise orally.)


What does the plan contain?

  • Information about how to report a fire or other emergency (Public address system? Call 911? Pull fire alarm?)
  • Evacuation procedures and identification of escape routes (Nearest exit? Maps or diagrams?)
  • Location of fire extinguishers and who is authorized to use them (Not everyone?)
  • Critical steps to be taken before the workplace is emptied (Shut down equipment? Close doors? Do nothing, just get out?)
  • Procedures for keeping track of all employees after an evacuation (Where are records?)
  • Rescue and medical duties for those employees who are to perform them
  • Who to contact for more information


How often does the plan have to be updated, or shared with employees?

Clearly, a number of plan items need to be regularly updated, such as the list of employees and the list of employees with special emergency skills or who require special training. There doesn’t seem to be a requirement to revise the plan on any regular basis, or to actually practice it. The plan must be shared with all employees covered by it, however, including new employees.

What if we should have a plan, but don’t?

OSHA provides an on-line eTool that you can use to create a basic plan. Just fill in the blanks and print it out. (Note that the material is NOT SAVED if you stop in the middle, so you need to complete all sections in one sitting.) You will discover that the questions, while simple, will force you to make some important distinctions about employee behavior in an emergency. You can find the eTool at:

https://www.osha.gov/SLTC/etools/evacuation/expertsystem/emergencyplan.html

What’s the bottom line?
An Emergency Action Plan is really only a FIRE EVACUATION PLAN
.

It is not an emergency preparedness plan or a disaster response plan. It has no provisions for assembling emergency supplies to protect employees or plans to protect the business itself in the event of a disaster. Still, it is a first step to survival awareness.

Action Item: Be sure your workplace has an Emergency Action Plan as a bare minimum

Stay tuned to Emergency Plan Guide Advisories, because we’ll be dealing in more detail on Business Continuity planning.

Virginia and Joe
Your Emergency Plan Guide Team


Fire Extinguisher Anyone?

Share

Consider these three types of fires:

  1. Structure fires
  2. Vehicle fires
  3. Outside fires

Quiz: What’s the most frequent type of fire? Which type is increasing the fastest? Which kills the most civilians?

Answer: From a report cited on the National Fire Protection Association, outside and wildfires are increasing five times faster than other fires! But the most people die in structure fires – some 2,640 in 2011. One structure fire is reported every 65 seconds.

You probably have fire extinguishers at work.  What about at home?

Unobtrusive but handy

Unobtrusive and handy

Fire in the kitchen!

Last year, at our daughter’s house, we had the occasion to use an extinguisher just like the white one shown here. (This one is in our kitchen; our daughter’s extinguisher was in her pantry.) For some unknown reason, food in the toaster oven caught fire and started smoking. In the excitement, she opened the door – and flames burst out and up, licking against the bottom of the cupboards.

Joe shoved her aside, grabbed the fire extinguisher, pulled the safety pin (had to try twice), and doused everything. What a cloud of white! But while the toaster oven ended up a pathetic shriveled piece of blackened metal, the counter, cupboards and the rest of us were fine with just a little dusting.

The right extinguisher?

Did we check in advance to be sure we were using the right extinguisher? No! But she had the designer model, and it turns out that the typical kitchen model is a BC extinguisher. That is, it is designed to put out fires that may be caused by

  • Burning liquids, oil or grease
  • Electrical equipment, wiring, appliances

On the other hand, the all-purpose model for the garage is an ABC extinguisher. It is designed to handle:

  • Ordinary combustibles like paper, wood and plastics
  • Burning liquids, oil or grease
  • Electrical equipment, wiring, appliances

In the green zone

In the green zone

Properly charged?

Check the pressure gauge on a regular basis! The arrow needs to be pointing to the green area. In our experience, some extinguishers hold their charge for years, and others lose it more rapidly. It’s like batteries . . .

Conveniently mounted?

It only takes a moment for a fire to catch hold. It’s that moment when you have the chance to act. Mount your extinguisher where it is visible and so you’ll know it is there when you need it. Tucking a loose extinguisher behind the door or in a cupboard will delay your response in an emergency.

The right size?

Small extinguishers may be appropriate for an automobile, but we recommend the larger 3 lb. size for household use. The cost for a good extinguisher starts at about $30 and can go up from there.

Tell us YOUR story about how you have used an extinguisher! The more stories we get and share about how extinguishers have saved property and lives, the more people get out there and get one! Just leave a comment in the reply box!