Author: Volunteer

Gated Community Keeps People Out

Share

Gated communityWhat about First Responders?

Gated communities are more popular than ever. People seem to agree that the gates are a symbol of security and exclusivity.

That’s all well and good until there’s an emergency and suddenly the gates become not a symbol but an actual barrier to entry for residents and First Responders.

Run a quick search online and you will find, like I did, some outrageous stories of people inside their gates, waiting and waiting for help while police or the fire department waits outside — powerless to get in.  In fact, you’ll find stories of people who died, waiting.

The problem of emergency access to your gated property may never have been discussed because no emergency has ever arisen. But if you live in a gated community,  have gated parking at your workplace, or know someone who does, part of your emergency preparation is to . . .

Get the answers to these 5 questions.

  1. Mechanism. How do First Responders open your gates? Is there some sort of lockbox requiring a physical key? An electronic card reader? A punch-in-the-code pad? A remote that requires batteries? A system that responds to light or sound (siren) frequencies?
  2. Updates. If you have a key-pad, who reports updates or changes in the code to the authorities? In two of the stories I read, the management company for the community had changed. The new company changed the code. Nobody reported the changes to the local dispatch.
  3. Keys. If you have a lock-box system with a unique key, who manages the keys to your community? Does each gated community in your area have a different key, requiring First Responders to have a huge key ring? What assurance do you have that the key has not been compromised or illegally duplicated?
  4. Knox Box. A common lock-box system is called the Knox Box. (Open the box to get to a switch that opens the gate or to a key to open a gate, a home, etc.) All boxes in a local area operate off the same key. If you have a Knox Box, how do First Responders keep track of their master key? Is it floating around somewhere in the cab of the fire engine?
  5. Power outage. And the most important question of all: What happens to your gates when the power goes out? Do your gates have a fail-safe override mechanism that allows a gate that isn’t working properly to be manually pushed open so that vehicles or people are neither locked in nor locked out?

Some years ago I lived in an apartment building in Northern California that had parking under the building. I drove in through a gate that raised up when I pressed my “clicker.” When the power went off, the gate remained down. It was way too heavy to lift by hand. If I had the key to the “pedestrian gate,” I could park outside the building and get in through a locked gate near the pool. Otherwise, I was stuck standing outside on the street.

Now I live in a gated community in Southern California. (Don’t worry, I’ve lived in other states too!) Several years ago we upgraded our unmanned gates to the Click2Enter system.  Residents get a battery-powered clicker; First Responders open the gates with a click of their mobile or portable radio transceiver (which has to be programmed with specific frequencies).  First Responders enter with no noise and no fuss. (That’s our gate in the photo. You can see the blue and white Click2Enter box attached at the left side of the center column.)

When the power goes out temporarily, our gates can continue to operate on back-up battery power. (We can count on several power outages a year.) In an extended outage, the gates will open and then remain open.  (This has caused our Emergency Response Group’s security committee to make special plans to keep strangers from entering. That’s another post for a later day.) .

Since we’ve had no problems, we had no idea of what to expect until we began to dig into the issue.  I suggest you dig into the details of your own gates before something happens in your community or at your workplace. The fact that there seem to be few if any building standards for gate operation means you may come up with a surprise!

Virginia
Your Emergency Plan Guide team


 Don’t miss a single Advisory. Get them automatically in your inbox by signing up below. If you have friends who need this information, forward the email to them so they can sign up too.

What drives you to join CERT?

Share

A Thank You Is Due!

I think I know why people become survivalists: paranoia, healthy skepticism, sturdy pioneering genes. But what makes people JOIN IN WITH NEIGHBORS to prepare for emergencies?

After all, willingness to prepare to help others is really quite different from preparing to protect yourself.

So a couple of weeks ago I started a campaign to find out. I sent out a broadcast message to all the people on my Emergency Plan Guide list, and posted an inquiry on one of my groups at LinkedIn:

“What drives you to join CERT?”

I want to thank all the people who responded! And for those who saw the message but didn’t respond, I thought it would be worthwhile to share

CERTSome of the answers I got.

Here are the themes that came through. Perhaps you’ll discover some that describe why YOU are interested and active.

1. Driven/shocked into action by news coverage

One person wrote that when he saw what happened after Hurricane Katrina hit, he could no longer stand by and watch another disaster go down. Joining CERT seemed the best way he could offer up his assistance. I’ve heard the same thoughts expressed by people who watched Hurricane Sandy come  . . .and stay and stay.

2. Living the volunteer lifestyle

I heard from California, New Jersey and Virginia about people taking CERT training and continuing their support for CERT as part of a lifelong commitment to volunteerism. Every one of these people volunteers in other areas of their lives, too. And as one reader put it, “Those who give back are almost always the Good people in town.”

3. Looking for camaraderie

The teamwork that characterizes many CERT activities is missing in a lot of lives these days. Ex-military, ex-boy scout, retired sales manager — once you’ve experienced the satisfaction of leading and being part of a team, it holds a powerful attraction. CERT fits the leadership/teamwork bill.

4. Fear of not knowing what to do

Outsiders tend to link CERT only with natural disasters like earthquakes and hurricanes. What we discover is that CERT training tends to make people aware of how to respond to a whole range of emergencies:  flooded streets, active shooter events, household fires, natural gas leaks, after-disaster psychological trauma, you name it. And if you have a particular concern, you can bring it up and get unofficial advice, for sure.

5. CERT as a requirement

I heard from one person that CERT was required for a particular Boy Scouts of America certification, and from another person that his employer told him to get certified. Works for me!  (Once you have the training, you aren’t going to forget it!)

6. Attracted by the gear

CERT trainees come out of the course with some basic stuff: a bag, helmet, flashlight, vest, goggles, dust mask. Most graduates immediately begin to add to their kit: better flashlight, a multi-tool, a helmet lamp. The ultimate, of course, is having a radio. While official CERT teams are assigned radios for events, even neighborhood groups (like ours) set up entire radio networks with FRS/GMRS radios (walkie-talkies). Some people love becoming experts with the technology!

7. Make the community a better/safer place

Only some people realize that the REAL first responders are your neighbors. These people want to spread more knowledge, more awareness and more “empowerment” as a way to improve the community. (I didn’t get a scientific response, but what I did get on this topic came from young people and older people, not from “people in the middle.” Does this mean anything?)

Did you find your reason in this list?

Or are you committed to preparing for another reason altogether? Let me know!

My goal is to use this valuable information to reach more people in my own community – and perhaps you can use it to reach out to your neighbors, too. The more we can share good ideas, the safer we all will be.

Virginia
Your Emergency Plan Guide Team


Home Base – The Hub of Your Family Communications Plan

Share

In a true emergency, you may have no easy way to communicate.

Home Base Hub of Family ommunica

In a widespread or severe emergency we know that phone communications may be spotty, at best.

An earthquake may cut cables and topple cell towers. A bad storm or hurricane may not cut underground cables, but it can damage all above-ground services including electricity.

For sure, in an extended power outage, even if distant towers and/or satellites are still functioning properly, cell phones and computers will eventually run out of battery. (Yes, yes, if you have solar panels, you may be able to recharge your devices.)

Being cut off from family members is terrifying.

Naturally, you and they imagine the worst. You will be desperate to get in touch.

When local phone service is out, what’s your best course of action?

Reach out to your family’s “Home Base.”

Trying to make a local phone call, whether via landline or cell, may be impossible. However, an outbound long-distance call or text may get through!

This is why we recommend that you talk things over with your family and come up with an out-of-state person who is willing to serve as your “Home Base” – the one place that every family member knows about and tries to contact as soon as possible.

Qualifications for your “Home Base” contact.

Naturally, this needs to be a person you trust. In addition, is your Home Base contact . . .

  • Willing to answer the phone day or night?
  • Able to take down and forward complete messages from people who may be nervous or even injured?
  • Able to receive TEXT messages (cell phone) and EMAIL messages (computer) as well as phone messages?

Remember, family members may be trying to send messages themselves, or they may be asking others (Red Cross, medical personnel, school employees, colleagues, First Responders) to communicate on their behalf. Those other people may have any one of a variety of communications devices.

Your job: Know your family’s Home Base phone number.

In a true emergency, you won’t be able to check your phone contacts on your cell phone or computer. You may not have your address book.

Your children will be in this same situation.

The only thing you can count on is an emergency listing that you carry in your wallet (assuming it hasn’t been lost or ruined) or a number that you have memorized.

Protect your family!

Take the time, as a family, to discuss who your Home Base contact should be, and get their agreement. Discuss safe places you could go if you can’t go home.

Talk about the importance of confidentiality for this information.

Most important of all, make sure all family members memorize the Home Base phone number!

Virginia
Your Emergency Plan Guide Team

Texting While Driving Can Kill You. Texting Can Also Save Your Life.

Share
Texting can save your life

By now, you have heard that in an emergency, you may be able to get a text message through even when phones are down or overwhelmed.

Do you know how to send a text message?

This brief Advisory is for those parents and grand-parents who really haven’t taken the time to learn how to text, even though texting is going on all around them.

Start with a cell phone.

Just about any cell phone (with enough battery power) can send a text message to another cell phone. You don’t have to be on the same network or have the same phone company.

For this exercise, pretend your personal phone has disappeared. A kind stranger offers to let you use her phone to call your family.

Do you know the phone number of the cell phone you want to send the text to?

This isn’t your phone, so you have no numbers stored. Your emergency number has to be a number you know by heart or have written down!

First choice: the number of your emergency, out-of-town contact person, your “Home Base.” (More on that, below.)

Prepare the message.

  • Find the “messages” icon on the phone. It may look like the blue square or the green bubble on the image above. Tap it. (If you are really interested in the difference between the blue square and the green bubble, you can find out more here. I find it confusing!)
  • What comes up next will depend. What you’re looking for is a little square with a pencil in it – that’s the “write” icon. Tap that icon to bring up the message screen.
  • In the “To” area, type the phone number including area code. (You can toggle between ABC and 123 to get the keys you need.) No need for any punctuation.
  • In the “Message” area, type your message. Be sure you say WHO you are (It’s not your phone, remember?), WHERE you are, HOW you are, and how you can be reached. Limit your text to 160 characters. (To erase, hit the back arrow.)

Send the message.

Hit the “send” button. You’ve done it! Most phones will tell you that the message has been “delivered.”

Of course, there are all kinds of clever twists and turns to texting, but you don’t need any of them now. You just want to be able to send a simple message!

My recommendation? Find a friend (child? grandchild?) who texts often and get him to send a few back and forth with you, so you become comfortable with how it all works.

You may find out, like I did, that it’s fun and convenient! No texting while driving, though . . .

Virginia
Your Emergency Plan Guide Team

P.S. Remember that “Home Base” comment, above?

Family Communications Plan

If you didn’t immediately know what number to call, you need our new Emergency Plan Guide worksheet, called Family Communications Plan. It’s 2 simple pages that explain the Home Base concept, and give you a place to fill in the blanks. 

Urban Survival Tools to Get a Fire Going!

Share

OK, the big danger is over. But the rain is running down your neck. Your fingers are feeling frozen. It’s getting dark very fast. What you desperately need right now is a fire!

MatchbookDo you have what you need?

Two necessities for starting a fire: an igniter and something to ignite.

I grew up in a kitchen that always had a big box of wooden matches above the stove. And my Dad always had a lighter in his pocket. Times have changed!

The only matches we have now is a jar full of souvenir paper match books from restaurants, and we all stopped smoking years ago. So I’ve had to make sure I have fire starters for emergencies.

Igniters I’ve assembled for my survival kit.

It’s so easy top tuck some of these small items into your go-bag, your survival pack, your evacuation pack. And I’d suggest you carry more than one, in case your pack gets wet or damaged. NOTE: If you shop at Amazon by clicking these links, be sure to notice whether the items are “add-on” or “eligible for Prime” and buy enough of them at once so you get free shipping. You’ll want multiples of nearly everything, so free shipping won’t be hard to get!

  • Waterproof matches are the simplest, the most obvious, and the cheapest of all to purchase. You can get them in wax coated boxes, or in neat little aluminum cases. An example: Coghlan’s 940BP Waterproof Matches – 4 Pack This is a four pack, one for each survival kit in the family!
  • Magnesium sticks won’t get damp, and won’t  accidentally light.  In fact, you need to practice using your stick to be confident you can get a fire started when you need it! The trick is to use that attached little saw blade to carve a pile of magnesium shavings (at least the size of a penny) and then stroke down the stick toward the shaving pile. (Don’t STRIKE the stick; that won’t work.) The Friendly Swede Magnesium Alloy Emergency Fire Starter Blocks (3 Pack), New and Improved Version gives you three blocks so you can practice without worrying that you’ll run out of magnesium.
  • Zippo lighter looks sharp (!) and will be familiar to former smokers. It feels good in my hand, too. Zippo Emergency Fire Starter, Black Matte also comes with pre-fashioned tinder sticks. Read on for more about tinder.
  • Magnifying glass would be a favorite  for me. I remember as a child burning holes with a magnifying glass in all kinds of things! Today I could use it to read instruction sheets written in miniature print . . . but of course, it’s not going to work in the rain for starting a fire!

Tinder for the survival kit.

You’ll be excited to see that spark from the igniter, but you’ll get mighty discouraged if it doesn’t “catch.” Here’s where tinder comes in. Tinder is specially prepared very flammable material that will get the fire truly started. You may have used crumpled newspaper or leaves or twigs in the past — but remember, we find ourselves in a WET URBAN SETTING for this blog post. So, what can we prepare in advance to be sure our fire will start?

  • Petroleum jelly and cotton balls (carried in an empty plastic medicine bottle). You may already have the ingredients for these clever items: cotton balls (NOT polyester) and Vaseline. Simply pull cotton balls apart a bit,  smear them with the petroleum jelly, scrunch back up. (Get everything ready in advance, and pull all the cotton first, because once you get the jelly on your fingers they’ll be sticky, sticky!) Here is one brand to give you an idea. Prepping Cotton Ball by Kendall ( COTTON BALL, PREPPING, MEDIUM, NS, 500/BG ) 500 Each / Bag
  • Alcohol wipes also work well as tinder, and you should already have some in your first aid kit!  If you don’t, buy a pack now and separate some out for first aid, and keep some for starting fires. Curad Alcohol Swabs Antiseptic Wipes, 200 Count
  • Waxed paper can be purchased at the grocery store if you don’t have any already in the kitchen. Cut a smallish piece from the roll, fold it over a couple of times, then fold back and forth until it makes an M shape, maybe about 2 inches across. Place the points of the M on top of your igniter material.  Tuck a few of these Ms into your pack and you’ll have tinder!
  • Dried and shredded bark, moss or fluff from cattails can also serve as tinder, but you’ll have to collect it next time you go for a walk in the park, bring it home and stuff it, making sure it’s totally dry, into those plastic medicine bottles that you can then put into your kit! In the city, in the rain, you may not be able to find any natural material to work as tinder.
  • Twine made of natural fibers may also work. Simply untwist it so get a good burning area.

And to keep the fire going: kindling and fuel.

Actually, gathering kindling (small pieces of wood and twigs) and larger pieces of fuel should be step number one, because if you START the tinder and don’t have adequate fuel right there,  the tinder will burn up and you’ll be back where you started. Some people carry dry kindling as part of their kit, but more than likely you’ll be scrounging in your immediate neighborhood for the right material to burn.  Some guidelines:

  • Pick a safe place for your fire. You can make a hearth of stones or concrete to be sure the fire doesn’t spread unexpectedly.
  • Dry sticks, splinters of wood and pine needles can serve as kindling. Have your kindling nearby so you don’t have to get up to fetch it.
  • Once the kindling is burning, add larger pieces of fuel. Wood is obviously the best fuel, but if you’re looking for wood in construction rubble, avoid treated or painted wood and wood look-alikes that are really vinyl.
  • Do not burn items made of rubber or plastic ( bottles, jugs, bags). Although they will burn, you will be creating noxious or dangerous fumes.

We’ve assumed here that your fire is for warmth and comfort.  Cooking over a fire is yet another subject. In the meanwhile, though, go back through this quick list and be sure you have emergency fire starters. As I said at the beginning, all these items are small and inexpensive, so there’s no reason not to have what you need. Your family will be counting on you!

Virginia
Your Emergency Plan Guide Team


How dangerous are Lone Wolf terrorists?

Share

totally unaware of her surroundings

Totally unaware of her surroundings . . .

Next week our city police force and first responders are holding a mock active shooter exercise in a local shopping mall. Inspired at least in part by the 2013 invasion of the Westgate Mall in Kenya, it’s also a response to the growing numbers of “home-grown” or self-radicalized would-be terrorists. In many ways these self-styled terrorists seem to pose a bigger threat than actual members of terrorist organizations.

Real Terrorists Plan Their Attacks

At least real terrorist cells fit a profile. They belong to a network, they prepare for a strike, and they pick targets that are likely to generate mass casualties and publicity. They are also more likely to be in communication with known terrorist cells, at least some of which could already be under some level of surveillance. These and other factors make it easier to identify and track them.

Lone Wolves Act on Impulse

The self-motivated, lone wolf actor is harder to identify, is more likely to be mentally unstable and less likely to pick rational targets. Perhaps the most worrisome aspect is the likelihood that this person is likely to act spontaneously and against a target of opportunity . . . virtually anyone that happens to be in their range. And, the mere fact that we live in a world where guns proliferate means that the tools of terrorism are readily available even to the least mentally competent. As scary as this may seem, there are some positives.

Self-Motivated Actors Often Fail to Follow Through on Threats

First, while these individuals may be numerous and hard to identify prior to an event, the attacks are likely to involve fewer people and less prominent targets. And, without direct connections to actual terrorist cells, they are less likely to be successful in mass attacks. Also, many will ultimately lack the courage to actually carry out the often gruesome and heinous acts these individuals conjure up in their fantasies.

Protect Yourself by Staying Aware of Your Surroundings

The best protection you have is your situational awareness . . . the same situational awareness that can keep you out of harm’s way. This means keeping your eyes on the way ahead, the road ahead and your surroundings – discipline yourself to avoid being glued to your smartphone while walking through alligator alley! Have your keys at the ready as you approach your car. If you notice someone strange for whatever reason, don’t ignore your instincts. Take evasive action. Turn in a safer direction. Whatever!

So many victims have reported that they were operating “on autopilot” and just kept going – right into danger!

A Single Lone Wolf Can be Taken Down by a Group

If you are in a life-threatening situation, instead of simply waiting for it to happen, consider a counter attack. A group of determined adults can very likely take down any single gunman. Yes, this goes against our training (“Keep out of trouble.”) but in the case of a Lone Wolf Terrorist, “Get him!” may be the only way to save more innocent people from being injured or killed.

Joe Krueger
Your Emergency Plan Guide Team


When Seconds Count — Emergency Preparedness Videos

Share

Do you know what to do in each of these situations?

Last Wednesday was the regular meeting for our local Neighborhood Emergency Response Team volunteers. Lately members have asked for “more training” on a variety of threats – threats we don’t normally spend much time on here in Southern California.

So we decided to devote this meeting to some dangers that most people in the room had heard of but probably never faced.

In fact, before the program, we took a poll of the people in the room. Not one person had ever encountered killer bees. No one had landed in a canal or river in their car, although two of them had temporarily lost control of a car in flooding water on city streets. And only three people had ever actually used a fire extinguisher to put out a fire.

Emergency Preparedness Videos
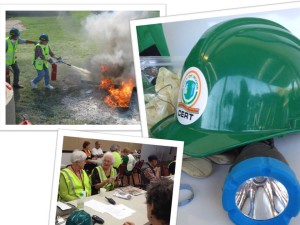
Keeping CERT Training Interesting With a “Movie Night”

The meeting went well! We had searched carefully on YouTube for short (4-5 minute) videos. Before showing each one, we prompted people to watch for a particular scene or to note the answer to a pertinent question.

Here are three of the videos we used for the program, along with the questions for each.

“Where is the nearest fire extinguisher to the room we are in right now?” “ Where’s the next nearest one?” “ Do you know if they have been recently checked?”  (We were in a large meeting room that had an extinguisher on the back wall. Only one person had already noted its location! No one knew where any other extinguisher was located.)

This particular video is aimed at employees in a work setting but applies just as well to residents of a home.

“Where are killer bees in the U.S.?” “Are there any where we live?” (I was prepared for this question and had downloaded an interactive graph that shows how bees have spread in the U.S. since 1990. Here it is: http://en.wikipedia.org/wiki/File:Killerbees_ani.gif )

“Are we located in an area likely to flood?” (Consider the Red River’s recent flooding in Louisiana!) “What about electric car windows?” “How do you break a window?” (One of our volunteers had a spring-loaded window breaker on his key chain, just like the one demonstrated in the video. You can see one here and get it in time for your own upcoming meeting: resqme The Original Keychain Car Escape Tool, Made in USA (Black) (Use it as a door prize — always popular! Or get several and share the fun.)

CERT As Entertainment?

One of the LinkedIn groups that I follow has been debating the necessity of sticking to CERT training as laid out by FEMA. Obviously, a meeting such as the one described here is not covered in the official training materials.

However, in my experience, there’s a difference between training for dedicated CERT graduates and awareness training for ordinary citizens.

Of course, those of us who are CERT graduates attend the follow-up trainings put on by our city. (Next week it’s a Light Search and Rescue refresher.)

But as a Neighborhood Emergency Response leader I am committed to my entire community. So we do what we can to attract all people and engage them in emergency preparedness activities.

Our Movie Night was one of those efforts.

Would something like this work for YOUR group? Try it, and let me know!

Virginia
Your Emergency Plan Guide Team

P.S. If you haven’t yet heard, I pulled together over two dozen different meeting planning ideas for use by community leaders. You can get more info and order a copy at https://emergencyplanguide.org/CERT-meeting-ideas/


Are you within 10 miles of a nuclear power plant?

Share

The Nuclear Regulatory Commission (NRC) mandates that cities have an emergency evacuation plan for a 10-mile zone around a nuclear power plant – the ERZ or Emergency Planning Zone.  The rationale is that a radiation plume could impact people within this zone, so the plan is to remove people from the area as quickly as possible.

Outside the 10 mile zone, the NRC identifies a second zone that stretches out to 50 miles. Within this 50-mile zone, people won’t necessarily be directly affected, but food and water may become contaminated, so the plan needs to consider these dangers.

Multiple and overlapping EPZs

Example of multiple and overlapping EPZs

The graphic shows examples of multiple and even overlapping EPZs in North Carolina.

Recent news reports suggest that the EPZ rules from the NRC may be woefully inadequate. 

Here are questions you (and your neighborhood CERT group) should get the answers to. 

If you live within 10 miles of a nuclear plant, ask  . . .

“What’s my city’s plan for me?” 

Get a hold of your City’s Office of Emergency Services and pose questions like these:

  • What are the evacuation routes out of the zone?
  • Are they the same in summer and winter, when they may be impacted by snow, high water, etc.? Day and night? Weekday and weekend?
  • What year was the plan drawn up? What changes have occurred in population and in transportation options since the plan was drawn?

A 2012 study commissioned by PSEG (Public Services Energy Group) estimated that only half the population in the surveyed area (Pennsylvania, Delaware, New Jersey) could escape the 10-mile zone within 90 minutes – and the plan was based on population figures that have already been exceeded!

“What do I need to know for my family?”

Keep asking more questions. The NRC requires that cities provide residents every year with “radiological emergency planning materials.”  According to FEMA, you may get this information in your utility bills, via a pamphlet, or even in the phone book.  (Who reads the phone book anymore?!)

You should get answers to . . .

  • How will I know there’s an emergency?
  • What does radiation do, how does it act?
  • What should I bring with me if we have to evacuate?
  • What do I need in order to shelter in place?
  • I’m disabled. How do I get special assistance? (Typically, you’ll be asked to have a written request on file.)

If you live within 50 miles of a plant, ask . . .

“Does my city have any plans for me?”

 Maryland-based Disaster Accountability Project surveyed parts of 11 states within 50 miles of five operating nuclear plants, again in the northeast. 

Ben Smilowitz, Executive Director of the DAP group, reported that cities are not planning beyond the 10-mile limit.  Per Smilowitz, “Most people that live 20, 30, or 40 miles away from plants do not realize that their communities are only adhering to bare minimum standards for radiological emergency preparedness.”

Moreover, in this part of the country, millions of residents live within multiple overlapping emergency zones of up to seven reactors!

Find out more about nuclear reactor emergency response.

In Fukishima, the U.S. government extended the recommended EPZ to 50 miles. With this disaster still in mind, here are more resources for you and your CERT group:

Virginia
Your Emergency Plan Guide Team


Don’t miss a single Advisory. You never know when you’ll need this information! Sign up below to get Advisories every week.  Free.


Protecting Yourself From Home Invasion

Share

(This isn’t the kind of blog post we normally write. But because it’s so much in the news, it seemed important to touch on this emergency situation.)

The more details we learn about the recent home invasion in Washington, D.C., the worse the story gets: loss of property, torture, murder. And a fire set to conceal the evidence.

Home security

Secure enough?

Statistics about the frequency of home invasion are hard to come by. But authorities do seem to agree on some basic characteristics of home invasions, and basic steps to combat and even help avoid them. It just seems smart to review them all.

How does a home invasion differ from robbery or burglary?

Robbers and burglars usually act when they see an opportunity. Their crime typically takes place in public, so they are in a hurry and eager to get away as quickly as possible. They resort to force usually only to escape.

Home invaders are very different.

  • Most all home invasions are perpetrated violently by a team of two or more people.
  • Working together, they deliberately scope out the home and the habits of the family members, planning the crime for days or even weeks.
  • They are looking for people who have something of particular value to steal: money, jewelry, drugs.
  • They look for households where security is lax or non-existent.
  • They count on duplicity, force and intimidation to get into the home and overcome any resistance.

Once inside, they can relax and take all the time they want. In Washington D.C. the invaders made arrangements for money to be delivered, ordered pizza . . . and, of course, ultimately killed the inhabitants before setting fire to the house. Most home invasion robberies result in the death of family members since they have become witnesses to the crime.

What can you do to protect your home?

A home invasion once underway simply can’t turn out well.

So you have to put maximum effort into not letting it happen in the first place.

Recommended measures:

Heighten your awareness.

The better you know your neighbors, the more you and they will know about “what’s normal in our neighborhood.” Get used to noting travel patterns, visitors and their cars. Make note of strange cars driving slowly by or parking on the street. Such behavior could be someone “casing” your neighborhood. Share your concerns with law enforcement.

In an emergency, whether it’s an earthquake, a weather event or a home invasion, your neighbors are the best immediate source of help. Having an active neighborhood CERT group or a Neighborhood Watch program can help bring neighbors together and increase their knowledge and awareness.

Harden your perimeter.

Make sure you have lockable and locked doors and strong, locked windows. A simple door chain or glass door bar is useless in the face of a good kick. And a security system that is left turned off when you are at home is doing no good at all! Keep your system on so a door being opened alerts the house. Know how to use the panic button on the system.

Keep porches and alleyways well lit; check bulbs regularly. Plant bushes with thorns underneath window to discourage people from hiding there or approaching the house that way.
Without becoming totally paranoid, consider what you can do to make it harder for someone to break into the house.

Train your family.

Strong locks and a powerful security system provide no security if family members leave doors unlocked and readily open the door when they hear a knock.

A common ruse employed by home invasion teams is to send someone to the front door pretending to have a package to deliver. (As I was researching this article I read about situations where the “delivery person” was wearing a UPS, a pizza, and even a police uniform.) When the family member opens the door, other team members rush inside, overpowering all residents.

If it makes sense, install a wide-angle peephole in your door and train family members to use it. If you aren’t expecting a delivery, have the person leave the package outside the door and retrieve it later.

Flee.

Plan with your family about how to escape the house in an emergency – whether fire or home invasion. Practice screaming out a command like “Patio!” or “Garage!” Family members should IMMEDIATELY escape the building through that exit, and not come running to your voice to see what’s going on!

Close yourself in a safe room.

A special interior room can be built as a safe room or “panic room” to protect you from intruders or from natural disasters. It typically has extra strong doors and locks and is stocked with emergency supplies along with emergency communications. If you have firearms, or expect shooting, be sure the safe room has bullet absorbing protection you can get behind, and consider where YOUR bullets would hit if you fire through the door or walls. (The costs of such a room vary widely, depending on location and purpose, and the room is best added during construction. But any bathroom or closet may be suitable for conversion to a safe room.)

Fight.

Even in the face of probable injury, you must consider fighting the invaders rather than just giving in. Obviously, if you have weapons readily available, use them.

Once your family is totally restrained and controlled, you are out of options. Do everything you can to avoid this.

Are home invasions increasing?

Again, statistics are indefinite.  But it makes sense that as the traditional targets for fast money (convenience stores, gas stations) continue to limit the amount of cash on hand, and to add more surveillance cameras and security alarms, determined criminals will turn to easier targets – homes.

At the risk of being more paranoid than we’d like, it seems that taking a good look at deterring a home invasion just makes sense. I’d be interested to hear your comments on this Advisory.

Virginia
Your Emergency Plan Guide Team

Pack Your Survival Kit for Evacuation

Share

At our neighborhood CERT meeting yesterday, the question came up about the best emergency supplies kit.

Whatever kit you have is better than none.

If you are forced to leave home (or work) in a big hurry, you’ll only have time to grab “the kit,” and hopefully a bottle of water. Whatever is in the kit is what you’ll have to work with. You won’t have time to do any packing!

If you don’t have a kit, you’ll be worse than useless – you’ll be a burden on others.

Assume you have to manage your kit yourself.

Here in California nearly every trip I take is in my car, so I have several types of emergency stuff packed in the trunk. But what if roads are impassible, or the car is disabled, or we are asked to evacuate ON FOOT?

The only solution: ONE bag that I can carry myself.

Can you carry your kit?

At our meeting, several people stated flat out, “I can’t carry anything.” These were people who need a cane or a walker, who have back problems, or who are simply not very strong.

How many people in your family or your team at work would have trouble carrying a bag?

Which survival kit option would work best for you?

The best option . . .

for a survival kit is a backpack that will leave both your hands free.

When Joe and I decided to put together our kit  we looked for a backpack that was light, flexible and NOT TOO BIG. (Our build-it-yourself kit, shown in the image with its accompanying book, has sold out at Amazon.)

If you’re a hiker, you’ll be familiar with much larger and sturdier backpacks, with many more features. Maybe you even have one you can use for a survival kit. But we looked for a pack that the ordinary person could (1) afford and (2) be able to manage.

Because your backpack needs to be compact, you have to be deliberate in selecting what needs to be in it. It’s easy to lay out too much stuff!

Second best option . . .

in my opinion is a rolling cart. You can select something as sturdy as a rolling suitcase, but for emergency, infrequent use you likely will want something simpler, smaller and lighter. Here’s what looks like an excellent choice. This one’s called the  California Pak The Big Eazy 20 Inch, Navy Blue, One Size
and it comes in various sizes and colors.


Some things to consider about a rolling cart:

  • Does the cart/bag have a handle so it can be carried by hand if necessary?
  • Could you fit it on your lap in a bus?
  • Does it zip up or otherwise close completely?
  • Is the handle long enough for you?

Each person needs a kit, and each kit will be different.

What you think is important and are willing to carry is up to you. Your 10-year-old child, though, probably needs a few different items (including snack food!). And your 79-year-old grandmother needs other items altogether.

Action Item: Build a basic kit for each person, and then add those individual items to customize the kit to its owner.

Store the kit near the exit door, so you can grab it on the way out. You’ll only have minutes – but you’ll feel a lot more secure heading out if you have your survival kit in your hands.

It’s always back to basics, right?!

Virginia
Your Emergency Plan Guide Team

P.S. Your pet needs an evacuation kit, too. Here’s a link to more about your pet’s survival kit.


Power out! Now what?

Share

When the lights suddenly go out, or there’s a bang and your appliance stops working, there are a couple of things you should do, and one thing NOT to do!  Here’s a quick review.

That is, for MOST people this should be a review. Please pass this along to people who may not know this info!

1. Is the outage widespread?

Take a look outside, or call a neighbor to see if the power is out everywhere or just in your home. If it’s a widespread outage, locate your emergency lamp or flashlight and sit tight. You can call your utility to report the outage, but remember, if your phone requires electricity, it may not work!

2. Is it your home only?

Think. What were you doing immediately before the lights went out? Were you

  • Watching TV
  • Running the dryer
  • Making popcorn in the microwave?

Too many electrical devices can overload your home’s electrical circuit, particularly in an older home. As a safety measure, the circuit will be broken to prevent a fire. Your job is to reset the circuit. First, though, turn off something from the list of “on” appliances so you don’t simply overload the circuit again.

3. Find the electrical panel.

Where’s your electrical panel? It could be in a closet, on a wall (probably near the utilities hookup) or even outside on a post. It looks something like this – a metal case with a series of switches and some identifying labels on the door.

Electrical panel

4. Find the “thrown switch.”

The panel has a dozen or so switches. Most of them will be facing the same way. When a switch is “thrown” or “tripped,” it pops out of position, breaking the circuit. You can usually pick out the thrown switch just by looking carefully. Or lightly “wiggle” switches to see if any are loose.

5. Turn the switch back on to reset the circuit.

Simply make sure the switch is all the way off, then switch it back on. (It may be stiff, and require a firm push.) Nine times out of ten you will have restored your electricity, and you’ll feel like a hero!  (If this DOESN’T solve the problem, you need to contact an electrician.)

Oh, and the one thing NOT to do?

Don’t light a match or a candle! Until you know what’s really going on, an open flame could create even more of a hazard.

Make sure you have one or more working flashlights handy. In fact, you may want to permanently store one near the electrical panel so you’ll always be able to find it right away.

(At a meeting of our emergency response team last week, everyone was astonished to think that there would be a single homeowner who didn’t know how to reset an electrical switch. I think they were probably over-confident about the skills of their neighbors. If you have family members or neighbors who might need this information, please pass it along.  Can’t hurt, and could certainly be helpful!)

Virginia Nicols
Your Emergency Plan Guide Team

In charge of planning emergency response team meetings? Don’t miss a single one of these Advisories!  Most can be used as the basis for a meeting training session.

Power Outage – Where are your emergency lights?

Share

Have you been watching the news footage coming from Puerto Rico? Satellite images show how dark the island has become because of power outages. It’s a reminder to us all to revisit emergency lighting.

Always-ready ambient lighting . . .

If the power goes out in our community center, battery-powered emergency lighting goes on automatically. Why not have the same level of preparedness at home?

One model — wall mounted emergency lights.

I have written before about wall-mounted automatic emergency lights. They plug into a socket and normally do duty as night lights (good for kids, visitors and wakeful spouses). When there’s a power outage, they light up and can be pulled out and used as flashlights, too. Cost: $12-20 each.

In my estimation, Emergency Automatic Power Failure Lights are a basic piece of emergency equipment.

A new find — emergency light bulb.

And this week, I found another automatic light I want to make you aware of. I think it would be particularly appropriate for families with children or families with older people for whom not being able to see would be dangerous.

3 in 1 lamp

Why I like this 3-in-1 bulb.

I pulled these images to try to show how the bulb works. It’s designed to screw into a regular socket, so you can just put it into a table lamp, like in the picture, and use it like an ordinary bulb.  It’s a soft color, and because it’s LED technology, it doesn’t use much power and doesn’t get hot.

You leave it in all the time so it is always charged.

The cool this is that IF THE POWER GOES OUT, THE LAMP GOES ON!  Because it has a built in battery, it will burn for about 5 hours. (Ultimately its battery will run out, of course.)

Let’s say the power goes out. You can find your way directly to the lamp, and then you can REMOVE THE BULB and use it as a flashlight! What about having one of these bulbs with you when you travel?? Pop it into a hotel lamp, and if something happens during the night you’ll be able to see  (Just don’t forget it when you check out.)

This bulb costs less than $5 when you buy two. Check out full details and a video HERE before you buy.

But for powerful emergency lighting . . .

The lights described above don’t give off enough light to actually repair something or find and rescue somebody in trouble. For that, you need more power. After considerable research our CERT team invested in several very large spotlights. They have bright halogen bulbs – 18 million candle power!

These are too bulky to casually carry around. Rather, you’d turn one on and set it up to illuminate an entire scene.

One of the reasons we chose this model is because it can be plugged into a car battery to be recharged! (We’ll have plenty of cars available in our neighborhood.) The car battery (DC) adaptor comes with the lamp. Below is the link directly to Amazon. On the day I wrote this, prices varied from as low as $57 to as high as $97 for the same lamp! So shop carefully.
Cyclops C18MIL Thor X Colossus 18 Million Candle Power Rechargable Halogen Spotlight

Now you probably wouldn’t need something as big and powerful as the Cyclops to get you through a simple power outage. But if the outage continued for many hours – or for 14 days as happened to some people caught in Hurricane Sandy and now, in Puerto Rico – emergency lighting is going to play an important role.

Here’s a quick review of standard emergency lighting. Do you need to put some of these on your shopping list?

1. Ordinary battery-operated flashlight. Cheap ($3-$15), easy to operate. As long as the batteries work, you’ll have at least SOME light! I recommend getting at least 250 lumens. Of course, the beam is narrow, and you have to use one hand to hold the flashlight. Here’s a really good one: LED Tactical Flashlight,Wophain Super Bright 800 Lumens CREE XML T6 LED Outdoor Handheld Flashlight Adjustable Focus Zoom Flashlight With 5 light Modes, Ultra Bright, Zoomable,Water Resistant
2. Headlamp. Again, battery operated, but you’ll be SO much more efficient with two hands free! Tape one to your helmet, or wear one over a cap. Costs start as low as $7 and go up from there. Here’s a best-seller: LE LED Headlamp, 18 White LED and 2 Red LED, 4 Brightness Level Choice, LED Headlamps, 3 AAA Batteries Included
3. Battery-operated lantern. We’ve drafted an entire new Advisory about lanterns. Prices usually range from $10 – $30. Here’s one with an AM/FM radio built in: Northpoint 12-LED Lantern with 4-LED Flashlight and AM/FM Radio, Green (I have a lantern in nearly every room, particularly in the bathroom.)

One final note . . .

Having enough battery-operated lights, and a supply of extra batteries, will prevent you from reaching for candles until you are absolutely sure it’s safe.

Hope I’m not preaching to the choir on this topic, but it’s always worth a reminder!

Virginia Nicols
Your Emergency Plan Guide Team


Questions to Ask About Gas Line Safety

Share

An Ongoing Threat

Gas main shut-off

Where and how?

The March 26, 2015 massive explosion and fire in  New York’s  East Village caused the collapse of three buildings and fire damage to a fourth — a reminder that natural gas continues to be a threat, particularly where the gas lines are aging – as they all are!

At one of your Emergency Response Team meetings, I’m sure you’ve discussed the threat posed by natural gas. If you haven’t, or if it’s time for a review, here are some questions to start the conversation.

1. Where are gas lines located in our neighborhood and building?

Large-diameter transmission lines may run near or even through your neighborhood, with smaller-diameter distribution lines connecting to individual residences or buildings. You should be able to get from your gas company a map showing the transmission lines. Getting maps showing smaller distribution lines may be more difficult. (In our case, we were able to get original construction drawings from the city. They show the exact location and size of our gas distribution lines.)

2. Where are shut-off valves located?

The gas utility, gas system operator and/or property owner may not want to reveal exactly where shut-off valves are located, mostly because they don’t want to invite mischief or sabotage.

However, from a SAFETY standpoint it is imperative for First Responders to know how to shut the system down in an emergency. A strong neighborhood CERT group can get this information.

Shut-off valves may be located at the individual home, at the building, at the street, and in other places along the system.

We recently had a visit from the crew of our nearest fire station. It was a shock for us to learn that they did NOT know exactly where our gas main shut-offs are located!

3. How do our shut-off valves work?

As a neighborhood group, you may be limited to what you can really do in your community. However, to the extent that you do know where lines and valves are located, you should find out what it takes to shut the gas off.

Review the different types of shut-off valves in your vicinity.

  • Automatic? Some valves, like seismic gas shut-off valves, operate automatically. However, such valves are not required and you probably don’t have any on your system.
  • Appliance? Within the home, individual appliances may have their own shut-off valves.
  • Entire home? In an emergency, shutting off the gas to the home likely means shutting it off at the meter. To do this, you’ll need a wrench and an understanding of the ON vs. the OFF position of the valve. (See earlier post.) Your turn-off may look like the one in the picture, or it may resemble a regular garden hose faucet handle.
  • Gas main? When it comes to shutting off gas at a larger line, the shut-off may be a larger version of the wrench turn off, or it may operate with a large wheel and gear.

Are any of the valves locked?

Naturally, if a gas valve is locked, no one except the operator may be able to access it. In a widespread emergency (earthquake) this could be an added problem.

In the Northridge Quake of 1994, managers of an affected mobile home park saw that gas escaping through the streets was being ignited by cars of residents evacuating the park. Unfortunately, management was unable to break the lock to turn off the gas at the main so it continued to fuel these fires.

4. What procedures are in place for shutting off the gas?

In an emergency,

  • Who is authorized to shut off the gas?
  • Which valves are they authorized to shut off? Remember, the gas utility probably “owns” the system up to the meter; you, as property owner, own everything on the house side of the meter.
  • What training do these authorized people receive?
  • How likely is it that authorized and trained people will be on hand in an emergency, when immediate action may be required? In a widespread disaster, Fire fighters may not reach you immediately; representatives of the gas company may also be delayed, perhaps indefinitely.

In the deadly 2010 explosion and fire in San Bruno, California, it took the gas company over 60 minutes to get the gas shut off!

5. What exactly are the dangers associated with natural gas?

The gas distribution system has thousands of miles of pipeline that operate safely nearly all the time. However, when there is a failure, it can result in a dramatic explosion and fire. Failures result from the following:

  • Pressure. The first concern of the system operator is to maintain the appropriate pressure in the system based on the size of the pipes and the number of connections to it. (The more connections, the more pressure needed to deliver the gas.) As communities grow, and more connections are added to the system, the Maximum Allowable Operating Pressure (MAOP) may need to be adjusted.
  • Pipeline failure Leaks and breaks occur when old pipes fail due to corrosion, improper welds or joins, improperly installed equipment, too much pressure – or as the result of natural events such as an earthquake.
  • Leaks Just because your system is old doesn’t necessarily mean it is in danger of failing. And just because a gas leak is detected doesn’t mean you are in imminent danger. However, when a leak is identified, you need to act quickly and decisively. What you need to be concerned about is a build-up of gas around a leak or as the result of gas “migrating” to an area where it gets trapped, such as in a basement, under a house, etc.

CERT Action item #1: Learn the signs of a gas leak and know how to respond. Start by reviewing this Emergency Plan Guide Advisory, and then research and distribute gas line safety bulletins that you can get from your own local gas utility.

CERT Action item #2: Find out how often and what kind of system testing (pressure, cracks, etc.) takes place in your area.

One of our most effective guest speakers was a representative from the Fire Department who talked about the various gas lines in our neighborhood. (We have the usual mains and feeder lines PLUS a high-octane aviation fuel line running beside our community.) See if you can set up a speaker from your own fire department or local utility.

Your invitation will cause that Fire Official to update his or her knowledge about your neighborhood, as well as remind your neighbors to be more alert. Every bit of knowledge helps!

Virginia Nicols
Your Emergency Plan Guide team

Looking for more information on gas lines? Check out these Emergency Plan Guide Advisories:

Want to get a reminder once in a while to help you stay tuned in and up to speed on the latest preparedness issues? Sign up for our Advisories, below.  They are free.

Fire In Your Home!

Share

How safe are you? Take this quiz.

Cigarettes cause fatal firesPick the correct answer:

  1. According to FEMA, what is the leading cause of residential fires in the U.S.?
  • Kitchen fires
  • Smoking
  • Wild fires
  1. What is the leading cause of civilian deaths caused by fire?
  • Kitchen fires
  • Smoking
  • Wild fires

True or False:

  1. Cooking is and has long been the leading cause of home structure fires and home fire injuries.
  2. Most cooking fires and cooking deaths are a result of the heat source being too close to combustibles.
  3. Households that use electric ranges have a higher risk of fires than those using gas ranges.
  4. Fires caused by smoking material (burning tobacco) are on the increase.
  5. The risk of dying in a home structure fire caused by smoking materials rises with age.

The peak day of the year for home cooking fires is: ____________________

The Answers

Here are some statistics to ponder.

In 2012, 36.8% of home fires causing injury started from cooking. (Many more kitchen fires actually take place, but are put out by occupants and not reported.)

That same year, smoking caused 15% of the fires resulting in fatalities, followed closely by carelessness (13%) and then fires set on purpose (12%).

Cooking

Most kitchen fires happen when the cook leaves whatever is cooking unattended. And most of those involve frying on electric ranges

The right portable fire extinguisher can be effectively used to suppress small fires in their beginning stages. However, the extinguisher must be properly rated and needs to be positioned where you can get it quickly and safely.

If you blast a skillet full of flaming cooking grease with the wrong extinguisher, you’ll create a fireball, greatly increasing the size of the fire and threatening you with serious burn injuries.

The day with the most cooking fires? Thanksgiving Day!

Smoking

Three-quarters of deaths due to smoking-material fires involve fires starting in bedrooms (40%) or in living rooms, family rooms, and dens (35%). The item most frequently ignited is trash, but trash doesn’t kill – people die when upholstered furniture catches.

Nearly half (46%) fatal home smoking-material fire victims were age 65 or older.

One out of four fatal victims of smoking-material fires is not the smoker whose cigarette started the fire.

The Action

  • Stop smoking. If you smoke, do it outside. Carefully put out your butts.
  • Be ready in the kitchen.
    1. Clear space around the stove. No mitts, no clipboards, no recipe holders.
    2. Have a lid and/or cookie sheet READY to cover a grease fire. It has to fit SNUGLY on top of the pan, blocking all air.
    3. Have a large box of baking soda handy to dump on and smother a small fire.
    4. Buy a kitchen fire extinguisher and position it between the stove and the door. Be sure you know how to use it. Remember that a powerful fire extinguisher could SPLASH AND SPREAD THE FLAMES if directed too closely at a burning grease fire.
  • If a fire starts in a pan . . .
    1. Try to put it out immediately! It can grow too big to handle within 30 seconds.
    2. Do not move a flaming pan. You could spill flaming grease all across the floor or counter, instantly creating multiple fires!
    3. Cover the stationary pan with a lid, cookie sheet or wet towel. Make sure all air is blocked.
    4. Turn off the burner.
    5. Leave the pan until everything has cooled.
  • If you can’t control the fire at the pan . . .
    1. Be sure other occupants are evacuated.
    2. Use your fire extinguisher. Pull the pin, aim, squeeze and sweep. Start several steps away and approach the fire as you see the effect of the spray.
    3. If not successful, call 911 and leave the home.

Fire is the most common emergency your family is likely to face, so share this information with them! Be sure your children know how to put out a cooking fire, and train older children in the use of a fire extinguisher.

If family members haven’t been trained about how to respond to a fire in the kitchen, they are likely to do the wrong thing!

You can find dramatic videos on YouTube that show what happens when grease ignites, what happens when people try to move the pan, or when water is thrown on the fire. And you can find good training for how to use a fire extinguisher there, too.  Take advantage of this great resource.

Want more details?

Two websites with statistical info:

https://www.iafc.org/files/1FIREPREV/flss_ResidentialRangeTopSafetyReport.pdf
http://www.usfa.fema.gov/data/

And this Emergency Plan Guide Advisory gives tips on shopping for fire extinguishers:

Fire extinguisher, anyone? 

Hope you take this Advisory to heart. In this case, there’s no need to become a statistic when you know what to do.

Virginia
Your Emergency Plan Guide Team

Share this quiz and its answers with your neighborhood emergency response group, too. Remember, the more prepared your neighbors are, the safer YOU will be!

My New First Aid Kit

Share

Last week’s article about “extra” items for a first aid kit inspired me to use the topic for our monthly neighborhood emergency planning group meeting.

The meeting turned out to be . . .

Another good meeting idea!

First Aid Kit with missing items

Here’s how it went.

Procedure

  1. First, I invited our neighbor Theresa, who is a Registered Nurse, as our featured guest. She brought along her own first aid bag as a “show and tell.”
  2. Second, so we’d have something to compare it to, I bought a brand new first aid kit (cost around $10) at the hardware store down the street (photo).
  3. Third, as a reference, I printed out the Red Cross’s list of “20 basic first aid items.” Everybody got a copy.

As Theresa pulled out an item from her bag, we checked it off the Red Cross list and then looked in the kit I’d bought to see if it was included.

Results of the Comparison

Number of items

The new kit had about 60% of the items suggested on the Red Cross list.

First Aid Kit items, Red Cross list

Quality

The bigger problem: nearly everything in the kit was in miniature! Packets were tiny (one squeeze, and the ointment would all be gone), gauze squares were tiny, gloves were tiny. We all laughed, in particular, at the roll of adhesive tape. Take a look at it in the photo, bottom right. Really, it’s about as big around as a quarter and weighs less!

Missing from both the list and the kit

Here are the items that Theresa had in her kit that were not in the kit AND were not on the Red Cross list:

  1. Antihistamine ointment
  2. Liquid skin
  3. Duct tape
  4. Flashlight
  5. Plastic bags
  6. Dust mask
  7. Eyewash
  8. Phone number of Poison Control center
  9. Whistle
  10. Sunscreen
  11. List of medicines currently being taken

And finally, one last item that our group felt needed to be in there:

12. Extra eyeglasses

Shocking finale

Attendees had been invited to bring their own kits to the meeting, too. One guy had his neatly packed into a fishing tackle box. One neighbor shared her pet first aid kit.

What shocked me, however, were the people who admitted they didn’t have a kit in their car. And there were a couple of people who said they didn’t even have a kit in the house!

The reason it’s shocking is because this is our neighborhood emergency group, supposedly tuned in to being prepared!

Lessons learned

Emergency preparedness starts and continues with the basics.

  • If you have a first aid kit, check on its contents and “top it off” with more supplies. Use the lists above for suggestions.
  • If you are missing a kit, build one from scratch or buy an inexpensive one, like I did, and add more supplies.
  • If extended family members don’t have kits, buy up a supply and hand them out for Father’s Day or Mother’s Day or Christmas! Or without any explanation other than, “You need to have this!”

I looked for a better kit. I found one at Amazon that looks pretty good as a starter. I like the way its clear pockets fold out to make things easy to find. It costs about twice as much as the one I bought at the hardware store ($19 instead of $9), but instead of “77 items” it advertises “121 items.” Again, you’ll want to add some extras, but this kit would be a good start, particularly for the car.

Here’s the direct link: AAA 121-Piece Road Trip First Aid Kit

Don’t let something as simple as not having a first aid kit turn an accident into a real emergency!

“Friendly but Forceful” Action item: Take care of your first aid kit/s right away!

Virginia Nicols
Your Emergency Plan Guide Team

P.S. What first aid items haven’t been mentioned in this article?  Please share your recommendations in the comments box so we can all benefit.