We’re seeing our neighbors again for the first time in a LONG time!
Three weeks ago I went to my first face-to-face, no-masks meeting since mid-March 2020. After 14 months of being shut-in at home, I felt almost giddy! That was the first such meeting. Since then, I’ve been part of two more. It’s been invigorating! In fact, a desire to “Get something new going!” seems to be catching!
In case you’re ready to get something going, too, here is an idea for spreading the preparedness word.
Write and share a personal story about disaster!
I was encouraged to write just such a story when I saw an invitation on LinkedIn. It came from Mark Keim, MD, one of the emergency preparedness professionals I follow. He had put out a Help Wanted blurb, asking for personal stories to include as part of a series on his website, DisasterDoc.org. The website is a comprehensive one, focused on preventing public health emergencies around the world.
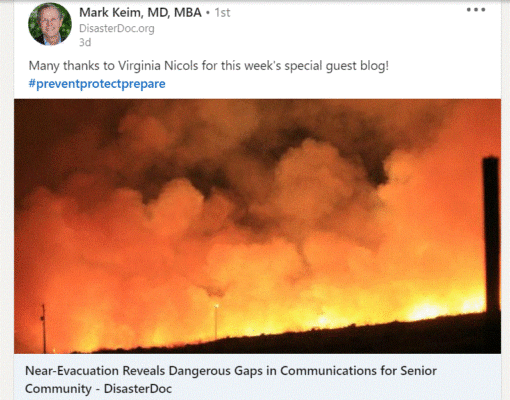
I submitted my story, and it was accepted! It is another look at what happened to us and our neighbors last year when we were threatened by a wildfire. You may want to give this version a quick read on the DisasterDoc blog, particularly if you are working with any fire departments or city emergency management agencies. For sure, evacuation will be on the danger list for many this summer!
The picture shows how my article was announced on LinkedIn. And here’s the link to the website blog page where the article appears: https://disasterdoc.org/blog/
While you’re there, be sure to read Mark’s post titled “How a children’s book saved my life!” That personal story is what caught my attention in the first place.
OK, with all that background, here’s my own HELP WANTED blurb, and your chance to get something new going!
Let’s hear YOUR story of an experience you’ve had working with neighbors in an emergency or preparing for one.
You wouldn’t be reading this if it didn’t matter to you what happens to other people in an emergency. Why do I know that? Because anyone interested in preparedness knows you can’t really prepare all by yourself!
After all, when the hurricane hits, and your home is threatened by storm surge, so is every home around you. When the power goes out, what your neighbors do – or likely don’t do – comes right back to haunt you!
Here’s an excerpt from Elizabeth’s story about neighborhood preparedness.
Elizabeth wrote to me just a couple of weeks ago about having helped plan and practice an evacuation of her Northern California mobilehome park neighborhood – in advance of this summer’s wildfire season.
Her intro sentence was . . .“Well, we had our modified, practice Evacuation Drill last weekend and if I do say so myself, it went off rather well.”
Her report went on to talk about who participated and who didn’t, how many people had Go-bags at the ready, what a difference the donut hole snacks made.
She further reported — and this is key — that “Volunteers on almost every street offered to help disabled folks, notify them, and help them get out of the park. That is still a big issue! Where does personal responsibility start? Where does it end? What responsibility do we have for our neighbors?”
Great, eh? What story can you share? Maybe . . .
You took a great Red Cross class or finished a refresher course? (The takeaway?)
You’ve met with just a few neighbors to find out where the gas line shut-offs are? (What prompted it?)
You’ve planned emergency drills with teachers at your kid’s school? (Were your efforts welcomed?)
You made it through the Texas power outage? (What helped?)
You’re an EMT and have a story to share about your team? (Heroes all!)
We’d love to know what you and your neighbors have done, or are doing, to be safer and smarter in the face of emergencies.
Nothing works like real stories to give the rest of us encouragement and ideas!
Just drop me an email with your idea! We’ll make sure you get your story written and published here as part of our “Get something going with neighbors” focus for the summer!
Virginia Your Emergency Plan Guide team
P.S. Many websites managed by “regular folks” are devoted to prepping, wilderness survival skills, etc. We do a lot of that too, but what we do that sets Emergency Plan Guide apart is getting the wider community involved. This Advisory is another effort to do that – and your story will help!
I’ve spent much of this past week working with our community on preparing for upcoming power outages. The short checklist from last week’s Advisory just wasn’t enough on cooking without power, so here’s additional info!
I’ve written before about using camp stoves in a disaster, but I’ve focused on the kinds I’ve used personally. Since I’m not a frequent back-packer, I don’t own an alcohol stove. And since I only occasionally cook outside (though I love being invited by a backyard chef!), I have limited experience with grills, too. But I have friends who do all these things, so their stories are incorporated here!.
Time to take another look at using camp stoves in a disaster!
Alcohol stoves for cooking in an emergency
An alcohol stove is perhaps the simplest way to heat water in an emergency! Here’s a basic alcohol stove that I really like. See how compact and handy it is?!! Makes you want to hold it in your hand, doesn’t it? Read below for more details about alcohol stoves, then click to head to Amazon for current prices. (This one seems to be on sale right now.)
Round metal fuel container weighing only a few ounces, often just 1 ounce. (Imagine a cut-off soft-drink can.) Different versions have double walls, a top with a chimney, holes punched in the sides to create a ring of flames like a gas stove. The more “designed” the heavier it’s likely to be. I chose this one because it’s just about the simplest version available.
Fuel to put into the container. Denatured alcohol (toxic to drink!), methanol (also toxic – sold as anti-freeze), ethanol. Fuels are readily found at sporting goods stores, Walmart, auto supply stores.
Way to light the fuel.
Stand to hold cup or pot above the flame. Again, my example has a companion stand that comes as part of the package.
Alcohol stoves are simple. Because they are so small and lightweight, you have to be careful not to tip them over, and you have to watch out for spilled fuel. You may need to shelter your stove from the wind. And you have to have the right size cup or pot to fit over the stove.
The key: even the simplest alcohol stoves can boil water in 5-6 minutes, enough to make hot drinks or soup for 1-2 people.
I really like the idea of something compact, light, and simple to operate in an emergency. You can actually build your own out of soda cans! (Great 3-minute video: https://youtu.be/wdGu_0eJr3k You’ll see an ad before the video starts, of course.) Or, you can buy a stove. Many are less than $20!
The stove shown above costs around $20. For about $10 more you can get the Vargo Triad, shown below. It’s made of titanium, with folding arms and legs that double as pot supports and anchors. This stove burns more than one kind of fuel. It also gets the best ratings on a variety of review sites.
Either of these two small stoves would make a great gift for a scout, a camper, or someone putting together a (better!) survival kit for the car!
Wood-burning stoves for cooking in an emergency
If you’ll be outdoors in at least a semi-wilderness setting, with fuel sources available, having a wood-burning camping stove makes lots of sense. No storing of fuels, no worrying about leaks.
Like the alcohol stoves, wood-burning camp stoves are very simple. Imagine a coffee can with some holes punched in it to let grasses or sticks and air in, and smoke out.
Like the alcohol stoves, these stoves also have ONE burner. You will be using ONE pot. Experts seem to be able to boil, fry and even bake – all on one burner. If you have a larger group, you may need more than one stove or take another look at the classic Coleman two- or three-burner box later on in this article.
I picked the wood-burning stove below because it got very high reviews from users. It’s meant to burn twigs, leaves, grass, etc., but can also burn alcohol. Easily add fuel, and air holes around the bottom keep the fire burning hot. I’d get some special camping ware to go with this stove to be sure everything fits and balances securely.
I pulled out our camp stoves. We have two of them, collected over the years. The pictures with dark backgrounds aren’t links – they are from my own camera!
This shows our trusty Coleman stove. It’s a three-burner which makes it really convenient. You can see how my own everyday small pot fits on the stove; with those three burners, we can use a large frying pan or even a griddle. Sometimes adjusting the flame takes some careful effort.
Here’s a link to the current Coleman 2-burner. (Maybe 3 burners are out of style?) It comes in other colors, too, but I wanted to show you a classic Coleman.
Our second stove is a one-burner model that we purchased across the street at an Asian market. It is smaller than the three-burner (Note the pot and the water bottle that appear in each photo for comparison.) and it weighs half as much, making it easier to pack and carry.
With either stove, we can accomplish the essentials: boil water for coffee, cook ramen noodles with dried vegetables (from the same Asian market), and have enough water left over for some washing up.
Here’s the current version of that same stove from Amazon (at today’s prices!) It comes with a carrying case.
If you already have a backyard BBQ, whether fueled with charcoal or gas, you are probably already prepared for some cooking in an emergency when the power is out! Most of the gas powered grills use propane or butane. Some are connected to your natural gas supply.
These grills can be just the size for a steak or two, or big enough to feed a crowd. They can be on a rolling frame that holds the fuel tank and a couple of side table, or built right into a larger backyard entertainment center.
Just a couple of weeks ago I picked out a charcoal burning BBQ that I thought would be a great gift for Mothers’ Day! Remember that one?
Having any of these stoves will give you more flexibility for summer entertainment, for camping, and, of course, in an emergency. All of them require some experimenting and practice before they will work exactly as you expected.
Hope you can find the right one to supplement YOUR emergency cooking needs!
Virginia Your Emergency Plan Guide team
P.S. Write and let us know what experiences you’ve had with camp stoves. Every bit of knowledge helps!
Have you noticed? I love checklists! Researching and discussing an issue can be exciting and fun. But LEARNING about threats is one thing, and TAKING ACTION to prepare for them is quite another. I found that building these 3 emergency preparedness checklists accomplished 2 things. First, they forced me to identify exactly what needs to be done, and second, I get the satisfaction of checking it off when I have done it!
3 Emergency Preparedness Checklists for Summer, 2021
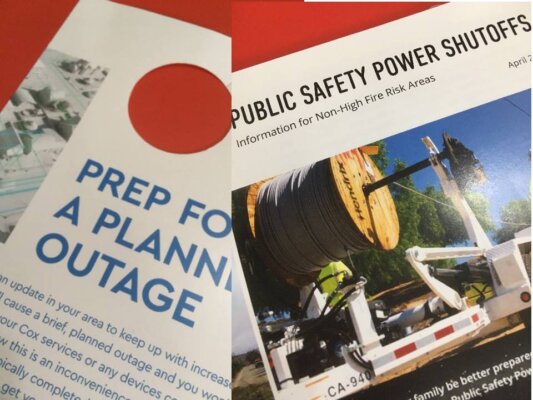
Both the notices you see in the photo above arrived at our place in the same week! One is from our phone company and the other from our power company. (I have hidden the names to protect the innocent . . . ha ha!) If we are getting notices like this, you may be too. At any rate, you need to plan for them in the future. After all, summer brings all kinds of potential emergencies – some planned, many unplanned.
Here are three potential threats with some steps you can take to lessen the impact if they become reality.
Checklist #1. Protect against hurricane.
Atlantic Hurricane Season starts June 1. If there’s any chance you will be in the path of a hurricane, consider taking steps NOW while you have the time and supplies are available.
Review your homeowner’s or renter’s insurance. Will wind damage be covered? What about rain? What about storm surge? You may be surprised at what is NOT covered.
Check your roof. Repair loose shingles. Seal around skylights, chimney and roof valleys.
Screw down soffits and seal.
Buy hurricane-rated shutters ahead of time.
Clean up outside by trimming trees, cleaning out gutters, strengthening fences, bringing loose furniture, toys and/or equipment inside.
Replace or reinforce the garage door. “weakest part of your house.”
Checklist #2. Prepare for water shortages.
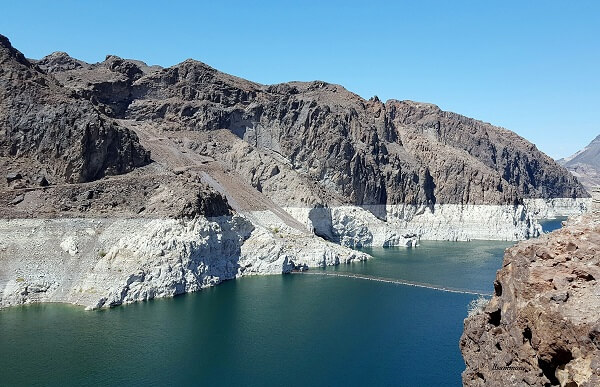
Water shortages threaten much of the west. Shortages have already been declared in Arizona, California, Colorado, Nevada, New Mexico, Utah, Wyoming, Oregon and Texas!
Why the shortages? Not enough rain. No snow pack. Household waste. You can’t impact the rain or the snow, but if you use the 100 gallons per person per day of the average American, there’s a lot you can do at home to save water every day!
Upgrade and fix appliances.
Do you have an old toilet? Those from before 1982 use 5 to 7 gallons per flush. Replace with an efficient model that uses only 1.6 gallons per flush.
A toilet that is “running” can waste as much as 300 gallons an hour! Buy the right “flush valve kit” kit for less than $20 and fix it! (Joe and I fixed one of ours last summer.)
What about showerheads? Same problem with older models. Replace with 1-2 gallon-per-minute low-flow models.
Train family members!
A 10 min. shower, even with an efficient shower head, uses at least 15 gallons. Buy a stylish shower timer.
Turn off the faucet when you’re brushing your teeth or washing your face.
Waiting for warm water? Don’t let the cold just run down the drain. Capture in a bucket or pan and water the plants.
Be smart about watering plants.
Water only as much as your plants need. Let the rain do its share!
Water at the right time of day.
Point your sprinklers so water doesn’t land on sidewalks or driveways.
Use timers for watering. (So easy to forget that the water is on!)
Collect rainwater if possible.
Checklist #3. Power demand is highest during hot weather – so prepare for outages this summer.
Our power company has already warned us to expect Public Safety Power Outages (deliberate outages executed to protect power equipment and to keep it from starting fires).
The utility recommends:
Watch for downed lines. Avoid them!
Expect traffic lights to be out. Assume every intersection is a 4-way stop.
Store up supplies of food that don’t need cooking.
Store extra water in case of long-term electrical outage. (Water systems need electricity to pump.) Mark supplies with the date, store them in cool dark location, and replace after 6 months.
Buy and store sturdy unopened bottles of water. (Not the cheap plastic kind!) Don’t store plastic directly on cement.
Wash and dry empty clear plastic juice bottles and their lids (also glass, porcelain, and stainless steel). Rinse with diluted bleach for extra security before you fill with water from the tap, seal and label. Do not re-use milk containers!
Fill clean BPA-free plastic containers (plastic with recycle code 2, 4 or 5) with water, store in freezer. (Leave room in container for water to expand.) Saves energy!
Be prepared to manage your refrigerated food.
Keep refrigerator and freezer closed as much as possible. Tape doors shut as reminder!
Invest in a cooler or insulated container where, when it’s filled with ice, you can store drinks, milk and butter without having to get into the refrigerator.
Plan to throw food out after refrigeration is lost. Know health guidelines.
I am confident you KNOW most of the things on these 3 emergency preparedness checklists. What’s important is that you actually DO what fits and get it done before the summer hits. Print the lists out, post them where you’ll see them, and . . .
We have often repeated that “Preparedness is more a way of life than a list of stuff.” So over the past few days, in the face of ever more ominous threats of power outages and drought here in California, Joe and I took another look at our emergency water supplies.
Liter bottles. Oh yes, we have bottles of water. A couple dozen liter bottles in the house, a half-dozen in each car, more in our storage shed. We go through them steadily, and replace as needed. (As we’ve mentioned before, we try to find square bottles. They pack so much better!)
Bigger bottles. We also have sturdy half-gallon plastic bottles of water as back-up. I like the ones with indentations for handles.
Empty containers. We have empty plastic jugs and bags to be filled at the last minute.
Frozen water. And of course we have square plastic containers full of water in all our freezer compartments. They help with energy use and serve as yet another backup supply in the case of a power outage. (“Previously frozen” water does not really smell very appetizing but it would certainly work for hygiene.)
Today, we take another look at our 55 gallon water barrel.
Every preparedness list also includes the famous 55 gallon barrel. We have talked about these barrels many times over the years, since that one item would make a really big difference in emergency water supplies for most families!
How much is 55 gallons?
Well, if you use the standard measure of “1 gallon of water per person per day,” then your two-person family could get along for almost a month using water from a full barrel! A family of four could manage for at least a couple of weeks. Honestly, it just makes sense to have one – if you can afford it and can find a place for it.
What’s involved in having a 55 gallon water barred?
Here’s what we did this past week . . .
We’ve had our barrel for several years. It was part of a discounted group purchase made available to our Neighborhood Emergency Response Group. The price included the necessary hand pumps. (All the barrels were dropped off on one afternoon to our neighborhood. Volunteers then delivered them one by one to the people who had already paid. As it turns out, a barrel will NOT fit in an ordinary car or its trunk, so several people with trucks and/or golf carts ended up doing all the delivering.)
Our goal this week was to refresh the water in our own barrel and make a better place for storing it. In particular, we wanted it to be relatively invisible while still accessible.
First, build the platform.
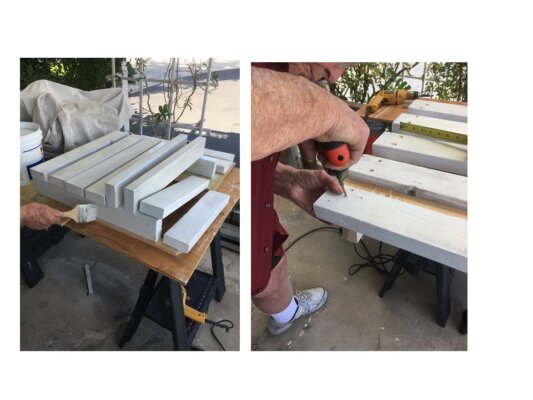
Joe did a lot of measuring and cutting and painting and screwing to build a sturdy platform in this narrow space. “Sturdy” is the important word. The full barrel weighs nearly 500 pounds!
We positioned the platform at the corner of our shed, where it would be accessible from two sides. Then Joe cleverly added hinged “doors” so that the barrel itself, when in place, really isn’t visible.
Then, prepare the barrel.
In the meanwhile, I pulled that barrel down, cleaned the inside with a strong bleach solution, and rinsed it out to be refilled.
(Sorry I don’t have any photos. Imagine me rolling the barrel over and back on its side, with the bleach sloshing about loudly on the inside.)
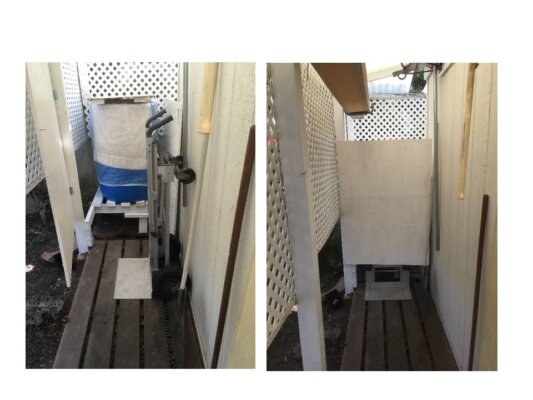
Then we put the barrel up onto its new platform. Note: one person cannot manage a barrel, even an empty one! It’s not that it’s so heavy, but that there are no handles. We tried moving it using the hand truck you see in the photos. No – better to just carry it. But it is fat and extremely awkward! Get a friend to help!
Finally, fill the barrel.
I filled the barrel using the garden hose (carefully cleaned beforehand). Took 15-20 minutes. Added the proper amount of bleach to keep any nasties from growing inside. (See below for more on purifying the water.) Closed up the bung holes, covered the top, laid on a second, raised top to reflect sunlight and allow air to circulate, then stepped back to admire our work!
Voila! With the “door” closed, all you can see is the base of our hand truck, which fits in there very nicely, too!
If you’re inspired by our barrel, here are a few more guidelines to consider.
Blue barrels can be pricey. (There are other colors, of course, but blue seems to be the standard.) On Amazon, where we’re Associates, you might find a price variation of as much as $40 for the same item! Be sure you shop and get what you want.
You need a way to get the water out of the barrel once it is filled, so don’t forget a pump. (There are electric pumps available, but in an emergency you aren’t likely to have electricity . . .!)
Be sure not to place your barrel right onto cement or concrete. Raise it up on a couple of boards, at least.
Water doesn’t spoil. It’s the creepy-crawlies and dirt that get into it that make it unpalatable or even dangerous. Be sure you can seal the barrel tightly using a bung wrench. (For some reason holes in a cask or in the top of a barrel are called “bung holes” and the stoppers are called “bungs.”)
Consider adding purifier for your long-term water supply. We used simple bleach. You may want to use liquid purifier, as shown below.
This looks like the best deal going right now.
We’ve shopped barrels for years. Right now, prices vary a lot. This package looked to be the best and most complete deal available on Amazon. Start your shopping here.
And a couple of additional resources for emergency water supplies:
https://emergencyplanguide.org/store-water-for-emergencies/ This Advisory goes into more detail about all kinds of water storage bottles, bags and bladders. Lots of pictures, ideas for storage, etc. It’s been recently updated, too (which is how we noticed some of the differences in pricing!)
https://amzn.to/3rvGWM0 This link takes you to our Mini-Book on water. It has close to 50 easy-to read pages on storing water now, before the emergency hits; how to find water AFTER the emergency hits and you’ve run out of your supplies; and dangers to watch out for. If you’re going to invest money in water, I’d recommend investing $5 in this little book first!
Walk the talk. Don’t overlook your water supplies. (Maybe you can get a discount deal on a bulk purchase, too!)
When we wrote our “Neighborhood Disaster Survival Series,” Part Three was aimed at building a more capable neighborhood. After all, our neighbors are our true First Responders. They are right there next door or down the street when calamity hits. They know our neighborhood. And we trust that, like good neighbors everywhere, they will be the first to help in an emergency. It follows then, that . . .
The more the neighbors know about threats to the neighborhood, the safer we all will be!
That’s why, after covering personal preparedness and training in Parts One and Two in the series, Part Three of each book provides a step-by-step plan to strengthening the neighborhood. One of those steps is doing a more thorough job of identifying THREATS to your particular neighborhood.
As you might expect, we include a long list to choose from. (59 different threats, to be exact. Even though our list was first compiled in 2018, I’m happy to say it included “Pandemic.” Who would have guessed . . .?!)
Now in the past I’ve done research and written an Advisory on the dangers posed by dams. If you know you have a dam nearby, I urge you to review that Advisory. And follow up with some of its recommendations. Why? Dam safety gets a “D” rating from by the American Society of Engineers. That’s why dams are high on the list of infrastructure improvements for legislation being considered right now. But along with dams,
My attention has recently been drawn to another, water-related threat.
While maybe not so dramatic, it’s equally scary. Take another look at the pig in the image above. Note that puddle he’s lying in. It could well end up in a so-called “hog waste lagoon.” (I find this expression offensive, actually. Trying to make something distasteful and dangerous sound benign . . .) Open air ponds and lagoons, typically built with earthen walls and sometimes lined with clay or plastic fabric liners, store water and all sorts of liquid products. Their level rises with rain, goes down thru evaporation.
If ponds and lagoons leak or overtop, dangerous and toxic waste can flow into neighborhoods and contaminate local water supplies.
Here’s the current news story that prompted today’s Advisory. It’s taking place today in Piney Point, Florida. There, an industrial waste pond, pretty much abandoned since its original builder went bankrupt 20 years ago, has started leaking.
Governor DeSantis has declared an emergency. People have been evacuated for fear that a full-fledged collapse could lead to a wall of “mildly radioactive” liquid pouring through their community. Special teams have begun siphoning millions of gallons of water off the top of the pond, and diving into it to inspect the pond liner. Thermal imaging is being used to ascertain the rate of flow of the leak. Authorities are issuing daily reports.
This year I discovered threats I had known nothing about!
Just a year ago our town put finishing touches on a new Emergency Plan. Now, we only have a couple of visible dams anywhere nearby, and no animal farms. So when I got a copy of the plan I was amazed to find that we are surrounded by eight dams and reservoirs!
The plan makes it clear that if any of the larger dams were to fail, releasing their maximum capacity of water, millions of dollars of infrastructure and hundreds of thousands of people would be impacted. As you might expect, more vulnerable households would be disproportionately affected.
What about your town and your neighborhood? What threats have you overlooked?
Do you actually know what kinds of reservoirs or other water storage might be tucked into the hills or lying overlooked in agricultural fields or industrial areas? Does your water utility have ponds? What kind?
Time to add a water storage threat assessment to your neighborhood plan!
Here are some ways to do that assessment.
Find out if your city/town has an Emergency Plan that includes a Local Hazard Mitigation Plan. (That’s the chapter where I found out about those eight dams in our town.) It will probably list flood zones, dams, etc.
Then, contact your local water utility to find out about their water treatment system. They may have “waste stabilization ponds” – typically open basins that hold run-off and domestic wastewater. Each basin uses specific techniques to treat water, like sunlight, temperature, plants, oxygen and bacterial action. Your water utility may also manage reservoirs for drinking or recycled water. If you can, schedule a tour for your neighborhood group!
Certainly, if you find local dams that would be high-hazard dams, see if they are following FEMA requirements for an “Emergency Action Plan.” (Only about 80% have one on file.) You can get more info about what should be in that EAP here.
Finally, if you feel you really need a better understanding of dams, reservoirs and other artificially-maintained bodies of water, it turns out that just this month FEMA has added three new courses on Erosion and Seepage.
It seems strange to be writing this Advisory on floods and liquid seepage just as we head into the driest months of the year. But most everything we’ve talked about today may have been built 60 or 80 years ago – or longer ago than that. And things wear out.
Be sure you and your neighbors are thinking creatively about some of the hazards currently all around you, not just the storms or hurricanes that might be on their way.
Virginia Your Emergency Plan Guide team
P.S. Let me know what your investigation reveals. And if you don’t have your copy of the Neighborhood Disaster Survival Guide for YOUR neighborhood, here’s where you can pick the one that fits best.
As I sat down to consider this Advisory about a gift for Mother’s Day 2021, it was clear that any suggestion I was going to make had to meet three criteria:
(1) Something a Mother, in particular, would appreciate this particular year. (2) Something I personally would want. (That’s always a requirement.) and (3) Something that readily fits into the Emergency Preparedness category — and thus is a justifiable purchase if you need to justify it!
So here is my number one (and most expensive) recommendation for Mother’s Day 2021: a Charcoal Grill!
Why do we need this particular gift in this particular year?
Every mother I know is pretty much tired of cooking after a year of having the whole family at home for every single meal. In fact, every person who cooks, whether mom, dad or single person, is pretty much exhausted just trying to think about preparing even one more meal!
So while you can’t stop feeding your family, here’s what I believe will be the PERFECT change of pace, change of scene and change of menu – a meal prepared on an outdoor charcoal grill! Whether meat or veggies, charcoal imparts a whole new flavor! And wielding those tongs and spatula – why, you’re a whole new competent person deserving admiration and respect! (You might even find a volunteer who would like to try!!)
And as for the emergency preparedness aspect – when the power goes out, whether from storm, wind or wildfire, you can stay right in business, putting delicious meals on the table to keep spirits up until things get back to normal. (If you would like to see the top 10 reasons your power may go out, here’s a convenient chart.)
All this as long as you have plenty of charcoal, of course. And a fire starter. And food in the freezer or frig that you can use before it goes bad. Read more about food spoilage here!
What’s my personal bias regarding charcoal grills?
Over the years we’ve had several grills – tiny hibachi-style grills, built-in propane grills, and a George Foreman grill that was meant for use on the kitchen counter. They all worked and the food turned out fine.
But the hibachi, admittedly cheap, actually seemed to burn up after we’d used it for a while. The propane grill was just way too big – not at all useful unless we were having a huge backyard party! And the George Foreman grill, while a handy size, spat grease all over the counter. I am ready for something better!
Mother’s Day 2021 deserves a classic solution.
Here’s a classic style grill from a classy company, Weber. Everything you need with a few extra features that make it even more of a pleasure to use. Take a look:
Thermometer in the lid. (I seldom use a thermometer but when I want to try a new meat recipe, I do like to check to see what the experts say.) Built-in is awfully convenient!
Adjustable openings so you can keep heat at the temp you want: dampers for more less oxygen, and a hinged grill for adding more charcoal.
A closed ash catcher. Theoretically, that makes clean up easier!
Porcelain finish. (Note: The grill comes in other colors but they are more expensive than black.)
And key for me – video instructions for setting the whole thing up!
As you can imagine, Weber offers several other versions of charcoal grills. When you click on the link, you’ll get to Amazon where you can find some Weber grills that are smaller (18 in.) or larger (25 in.). There are taller grills that sit on bigger wheels, and even come with attached side tables. And there are a couple that have no wheels at all and are small enough to be carried.
But if you’re thinking about flexibility, portability and stability in an emergency, this classic version seems just right.
A few more thoughts from a Mom
If you are buying this as a present for Mother’s Day, you may want to add a few more handy items to complete the deal: some long-handled utensils, oven mitts (also long), and a fire-starter for the charcoal. Wrap each item separately and it will create a whole pile of presents! So much more fun for Mom to open!
(By the way, you don’t have to use expensive gift wrapping paper. Consider using colorful pages of newspaper advertising showing food specials for the week!)
So there you have it. It’s not often that I can limit myself to just one purchase, but this one fits the bill like no other. I hope it sounds as attractive to you as it does to me!
Virginia Your Emergency Plan Guide team
One of my favorite emergency response stories is the one from my friend Elizabeth, who with her friends held a Power Outage Potluck last year when PG&E shut down power in much of northern California. Can’t you imagine the charcoal grills that were put to use that evening!?
Why, some of my best friends live in apartments (and condos)!
So much of what we read about preparedness and survival assumes a rural or at least a single-family-home setting, where there is room for a survival garden, water barrels, storage shelves in the basement, etc. There may even be nearby woods where you can practice building shelters, cooking over a campfire, etc.
But what about the 37% of us who live in rental properties, mostly in multi-family buildings? What about our safety and security? We have no room for many of the preparedness activities mentioned above. No place to practice outdoor survival skills. And we can’t just run outside if a fire threatens or we smell a gas leak.
And what role does the property owner play in taking care of safety and security items? Time to find out!
Let’s make sure renters are as prepared for emergencies as anyone else! Starting with . . .
Easily overlooked apartment safety and security recommendations.
Is your apartment secure?
Door locks. Whether you’re moving into a new unit, or have been there for years, take a look at the condition of your locks. Today, reasonable security for an apartment includes a deadbolt and a peephole. In fact, a peephole may even be required by your local building code! Find out before you make any assumptions, of course. And be sure to ask the landlord for help or at least permission to make any changes. You may be able to do these installations yourself, or you may have to pay to get them done. Read below for some ways to save money.
Oh, and while you’re talking with management, be sure to find out the property policy for management or maintenance to enter your apartment.
Balcony security. Don’t forget the locks on your balcony windows and doors, even if you are on the second level. Sliding glass doors are particularly vulnerable. Consider a security bar, or at the very least, a rod cut to the exact length of the sliding door’s track. Here’s an example of an adjustable bar that also locks to keep children from lifting it out.
Security system. If neighbors and/or the police records show danger of unwanted activity in your neighborhood, consider installing a security system. For a more detailed discussion of options, check this Advisory. For your apartment, there are many battery-operated systems that won’t damage the walls, and that you can then take with you when you leave.
Here’s a sample of a simple, battery-operated security system that could be mounted outside or in your apartment for additional safety and security. Click the image for price and full details. (The more options you want — lights, camera, audio, etc. — the more expensive the system, of course. This model is a good start for comparison shopping.)
Are you prepared for fire?
Does your apartment have a sprinkler system? Starting in 2003, all apartment buildings were required to have sprinklers (but smaller and older buildings may have been grandfathered in). If you are moving to a new apartment, check closely. If it doesn’t have sprinklers, you may want to reconsider. (You may recall the story of how Trump Tower only has sprinklers on the lower floors. A fire there in 2018 killed a resident and injured six firefighters.)
Smoke alarms and carbon monoxide detectors? Do they work? Don’t take a chance. Test, require they be replaced or replace them yourself. Depending on the type of sensing equipment you choose, you can get alarms for around $15-$20. (Here’s a link to our alarms reviews.) According to The U.S. Fire Administration, more than one-third (38 percent) of home fire deaths result from fires in which no smoke alarms are present!
Do you have a home fire extinguisher? More than one? Are the extinguishers located where kids or someone in a wheelchair can reach them? Does everyone in the home know how to operate the extinguisher?
Can you get out of your apartment safely?
Getting out of a large complex is a lot different than fleeing a burning home! So, lots to think about.
Just as you want to know that your doors and windows can be locked, you want to test to be sure they all OPEN in case of emergency.
The standard “Family Evacuation Plan” calls for you to identify two ways to exit every room. Obviously, in a rental apartment, that may be tough, because the second exit is probably though a window. Can you actually get out your window? Can you get down to the ground safely? Does your family plan have a place for you to reassemble after having evacuated?
If your apartment is no higher than 4 stories, consider an escape ladder. Escape ladders are available in 2 to 6 story lengths, but the longer ones become quite a bit more expensive, and of course are more demanding in terms of required strength and agility.
Since in an emergency you could get trapped in an elevator, do you have more than one stairwell as an option for your family? Do all family members know where other stairwells are located? Are these stairwells well marked? If a family member is unable to get down stairs, do you have a plan for carrying that person down? Do you have the equipment that would make carrying possible?
Evacuation chairs and evacuation sleds may be the only way to get someone who is ill or unable to walk down stairs safely in an emergency. Find out about costs and capacity (different sizes for different sized people), note whether equipment takes two people or just one person to operate. Here is a place to start your research. And below see a 4 min. video that will give you a good idea of just how an emergency sled works.
Do you have renter’s insurance?
Worth it. Check with neighbors to see what they have. The discussion alone will add to the safety and security of your apartment! Bring up the topic at a community meeting. Bring up the idea in the next paragraph at a community meeting, too!
Does your community have a community emergency response plan?
Knowing your neighbors is the best defense. They will be the best source of help in an emergency!
Put in the effort to create a community emergency response group and a plan. Engage management’s support and assistance – they have everything to gain by keeping tenants safer, too. Together with management, learn more about your buildings, security, utility service, maintenance, etc. Agree on emergency procedures – who will be responsible for what.
Added benefit of having a group for apartment safety and security
Working together, you will have more power to negotiate with the property owner. And you may be able to save money by buying locks or security lights in bulk. You may also be able to arrange with a handyman or contractor to install them for everyone in the group. Best of all, you could provide a job if that handyman or handywoman is one of your own neighbors!
I wrote my first Advisory about self-defense products about 5 years ago. Since then, I’ve added a couple more and then, last year, I turned an update on self-defense products into a whole booklet in the Emergency Preparedness Q&A Mini-Series!
The Advisories and that booklet have generated a number of comments. The topic continues to be one of our most popular. Still, no matter how attractive as a subject for reading, buying and actually using self-defense products isn’t for everyone!
At the same time, personal safety continues to be a concern, today more than ever.
So we keep up with the news and reviews about all aspects of self-protection, including Second Amendment controversies. I’m not ready to jump into recommending firearms yet, but I certainly can suggest some non-lethal alternatives that may serve ALL our readers.
Stun Guns vs. Tasers – They are NOT the same.
The confusion about these two items continues in the public, at least. Even on Amazon, there is no distinction!
Here are three differences you need to know:
1 – Different technology
While both these devices operate using a charge of electricity, the stun gun generates a shock when the probes on the gun itself are pressed against someone. Stun guns are available starting at around $20. On the other hand, the taser shoots a projectile that creates the shock when the projectile hits someone. Tasers start at around $300 and quickly go up in price from there.
2 – Different uses
Obviously, given the technology, the stun gun is an up-close weapon useful when you are being physically attacked. The taser can be put to use from a distance – typically from 10 – 25 ft, away.
3 – Different regulations
Stun guns seem to be legal in most states. Tasers may not be legal without a weapon carry permit and the training that goes with it. It all depends on the state – or even the county – you live in.
No guarantees! Check with official agencies in your OWN town to be sure you know the rules. And if you’re looking for more about the advantages of stun guns vs. tasers, check out this Advisory. The Advisory shows several sample products, too.
Warning about these NON-LETHAL devices.
The taser really isn’t non-lethal. It has been reported as causing the deaths of hundreds – now over 1,000 – of people in law-enforcement related incidents. Only some of these deaths seem to have been accidental.
My recommendation – Unless you are willing to come up with the cost for a taser, get the appropriate training and licenses and run the risk of a tragic accident that could get you mired in the legal system – I’d stay away from a taser.
Stun gun vs. Pepper Spray
The disadvantage I see to a stun gun is that your attacker has to actually be within arm’s reach for you to use the device. Of course, its colorful “Zap” may have some deterrent effect, but that’s it.
When it comes to stopping an attacker before he gets too close, I’d prefer pepper spray.
A hand-held canister of pepper spray can shoot a spray or cloud at least 8-10 feet, and probably more.
The important questions to ask about pepper spray:
Size of canister – Does the spray canister fit easily and comfortably in your hand so you can grab and use it? Sizes range from lipstick-tube-size to much larger cans. The 2-oz. size offers enough liquid that you can test a couple of times without emptying the canister.
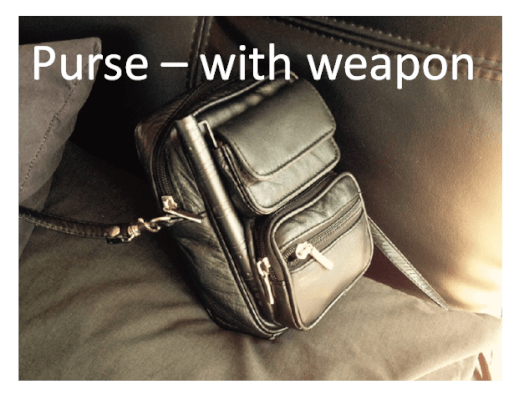
Safety features – If you hang your canister on your key chain or onto the outside of your purse, or carry it IN your purse, what keeps it from accidentally going off? Flip top? Twist top? Can the safety features be operated WITH ONE HAND?
Life of product – Pepper spray won’t last forever, although it should last at least a couple of years. Check the expiration date on the packaging, and test to see that the spray is working every 6 months or so. You don’t want to need it and discover that nothing happens when you press the button!
Product quality – There are a number of manufacturers of pepper spray, and while I am usually happy to get “the best deal” on anything I buy, in this case the cheapest is not likely to give me what I am looking for.
My research has led me to one particular manufacturer of pepper spray – Fox Labs.
Reviews from law enforcement users as well as “regular” people are compelling. This product seems to work when other products, similarly priced and highly promoted, do not.
Here’s what the 2 oz. canister looks like. It should provide 18 or so ½ second bursts, so you can practice a couple of times. Its range is advertised as 17-20 feet.
Click on the image to get the latest pricing at Amazon. (It was just over $20 when I last looked.)
There is also a 4 oz. canister that may shoot even farther and has double the number of bursts, but that size is not legal to be shipped in California, so may not be legal where you live, either. Again, check local regulations!
Note that this product must be shipped via ground, so it may not arrive immediately.
Important Update! Thanks to a prompt from one of our readers (See his comment below!), I’m compelled to add another couple of items to this Advisory! They are both variations on the pepper spray theme.
There are now pepper sprays in GEL format and in FOAM format! They have the same basic capsaicin ingredient and serve the same purpose of self-defense. But neither is as likely as spray to blow back onto you in a confined space! Moreover, pepper gel goes a good 6 feet farther than either spray or foam, so you can use it from a safer distance. The gel doesn’t spread out as much though, so you may have to be better at aiming.
Click on the link below to get to a sample of gel made by SABRE. I own the SABRE spray and find it fits my hand well, and it looks as though the gel is packaged pretty much the same way.
Finally, if you purchase any pepper product, check your canister carefully. Note its expiration date. Then . . .
Practice with self-defense products!
Practice getting it out of your purse, unlocking the cover and shooting. You must be able to do it in the dark and when you are nervous! Get your moves down, and then refresh your skills from time to time.
If you ever need this, you’ll need it.
Virginia Your Emergency Plan Guide Team
P.S. Joggers and bike riders say this spray works great on threatening dogs, too.
P.P.S. I mentioned that we’ve written other articles about protecting yourself from danger. If you are serious about buying for the first time, please get a copy of our 2020 mini-book, Personal Safety. Its 50 pages of common questions and answers will give you an update on self-defense and self-defense products plus a discussion of the necessary state of mind required to use force or weapons.
Nearly 20 years ago, Joe and I worked on a marketing campaign for one of the largest telephone companies in the country. Called “Silence can be deadly,” the campaign was aimed at selling more dependable phone service.
In the middle of the campaign the Loma Prieta quake hit in San Francisco. No phone service! Only static on the car radio! Traffic lights missing in action! Worse, because it took the World Series right off the air, the whole country was suddenly struck by the shock of no communications! (This dramatic interruption helped make the campaign a huge financial success.)
That was then. This is now, when we are all carrying cellphones. Still, communications can be interrupted by disasters. Be ready!
For example, just last month, you’d have seen this news coming out of Texas.
“.. . all major cell carriers are experiencing interruptions.” And this meant . . .
“Can you hear me?” Hundreds of thousands of cell phones were silenced when power was cut to cell tower sites. Even if your cellphone is fully charged, when cell towers don’t function, either because they have lost power or are turned off, that means no calls, no texts and no access to the internet news.
No emergency alerts. When California shut off power deliberately in the summer of 2019, it wasn’t anticipated that without TV, radio or cell service, governmental emergency alert notices do not come through. Without power, the only way you’ll get notified of impending disaster is via physical alarms like sirens, airhorns, car-powered loudspeakers, etc. (Does your preparedness team need any of these devices?)
No 911 service. These days, 96% of people carry cellphones, so that’s where 80% of 911 calls come from. If your cell phone isn’t working, you can’t get through to 911!
It feels as though this list is just a start for the inconvenience and the danger that awaits in a widespread and/or lengthy power outage that includes telephone companies.
What is the answer when you have no phone service?
So far, there seems to be no one perfect answer. If your power goes out because of a disaster or a policy decision, here are a few suggestions:
Adjust your attitude. Just expect to have no instant communication with the outside world – with your family, your work, or your health care providers. It’s not impossible – our grandparents lived this way! As for attitude, one of our Emergency Plan Guide readers reports that she invited neighbors for dinner every night of a recent power outage! Together, by the light of solar garden lamps, they put together meals (cooking with charcoal grills) and enjoyed each other’s company.
“Read you loud and clear.” If you have family or neighbors within a local neighborhood, you may be able to use inexpensive battery-operated walkie-talkies to touch bases, ask for assistance – or invite people to dinner. Longer-rage satellite radios could reach to just about anywhere! (We just added info about satellite radios to our review page.)
Get on the air with HAM radios. Amateur radio operators – HAM radio operators – have higher-powered equipment that will likely be able to get news from other HAM operators and receive emergency communications from official agencies, too. They may be able to send messages from your neighborhood, as well. A good HAM set-up should have battery-back-up — check with your local HAM team members!.
What about getting to the internet via my cellphone?
It’s possible that you can reach the internet through your cellphone or VOIP phone even if your local phone service isn’t functioning. Once there, you could reach emergency contacts using internet phone systems (Ex.: Vonage, GotoConnect) or apps (Ex.: Google Voice, WhatsApp).
This scenario makes a lot of assumptions. First and foremost, you’ll need ready-to-employ back-up power for your own home or office wi-fi set-up (modem, router). It also assumes your internet provider (operating over fiber or in the cloud) is able to continue operations.
Action item: check with your own internet provider to see just what will happen to your service in a power outage! Find out if they have recommendations to keep communications open.
What about my hard-wired landline?
Honestly, I don’t have a solid recommendation here. Many phone companies seem to be discontinuing wired phone service – I know we can’t use our cheap hard–wired phone any longer. Still, some people’s wired phones do seem to have continued to work even during the outages. If you have a hard-wired phone, you may want to hang on to it. (Check first to see if it is actually working!)
Don’t confuse “wired phone” with “portable phone.” Your portable phone’s base may be connected by hardwire, but – surprise! – that system itself needs electricity to operate.
Once again, do you have suggestions? Stories about power outages that might be useful to other Emergency Plan Guide readers? Please share! This is a complicated issue, with many possible variations. And they keep changing. We’d like to hear from you with your latest discoveries!
Virginia Your Emergency Plan Guide Team
P.S. And while I’m writing from here in California, where we have experienced planned and deliberate Public Safety Power Shut-offs, please remember that historically, the leading cause of power outages in the U.S. is hurricanes! So if you’re not in wildfire country, don’t shrug this info off as something you won’t need to know!
Our neighborhood emergency response group is in the midst of updating after a year of very little activity. COVID has added new perspective, so managing risk for volunteers is part of our update. Fair warning: this is only the first episode on risk!
Our volunteers’ risks may be different from yours.
Every group is different. Risks depend on WHO is being covered and WHAT actions they are taking.
Take a look at our volunteer group. It is made up entirely of senior citizen volunteers. Their ages range from 55 to 85. Some of them have had CERT training and some have not. (CERT training has been the basis for all our organizing and training.) However, we share one mission: be of service to our senior community by helping each other prepare for and manage our way through a disaster.
Over the years, we have met frequently with local First Responders. They have encouraged us to above all focus on everyday safety and security with a secondary emphasis on shelter-in-place.
Some historic examples of our volunteer activities.
With these two priorities, we’ve held many educational meetings, often with 50-100 people in attendance. As we look back, we can see where and how some of our activities might be considered to have risks! For example:
How to stabilize furniture and shelves to keep things from falling in an earthquake (Local handyman gave demo and volunteered to help secure shelves, TVs, etc. in neighbors’ homes.)
How to build up emergency supplies (Local hardware store brought examples of lights, fire extinguishers, first aid kits, etc. People bought whatever equipment they decided they needed.)
How to protect home from wind-blown sparks (FD did tour of entire area and we wrote up their findings regarding weeds, flammable decorations, etc. There was no follow-up to confirm whether people followed the recommendations of the fire department.)
How to avoid ATM scams (Police department crime prevention specialist gave Zoom presentation.)
How to turn off gas line to your home if there’s a leak (Our group owns a real gas meter attached to a base, so people can practice turning the valve using a wrench. Unfortunately, every time we have a practice, somebody runs home, smells “gas,” and shuts off their meter! One year the “gas smell” resulted in a visit by our emergency response team plus a visit by the fire department. No one could find the leak until we determined it was the smell of marijuana floating over from a nearby backyard . . .!)
A new risk emerged in 2020.
Last fall we faced a new situation – a near miss with a rapidly moving wildfire! Since then we’ve expanded our education to include evacuation. In coordination with the fire department, police department and city emergency operations, we came up with a series of recommendations. (You can read details about how the evacuation threw everyone for a loop here and what we did afterwards here.)
As a result of the evacuation scare, it has become clear that, at least in our senior community, an informal volunteer group cannot be responsible for an evacuation. People have to make their own decisions! And now the question regarding managing risk for volunteers:
If our neighbors don’t take precautions, or don’t make smart decisions, can they (or their relatives) somehow blame our volunteers?
That’s the question that started this whole Advisory. As I began to do the appropriate research on managing risks for volunteers, I realized there were three main issues to examine. I’ve spent the last month or so asking questions of Emergency Plan Guide subscribers, LinkedIn connections, and insurance companies.
As you continue to read, please realize we are not offering legal advice. We trust you will follow up with research on your own volunteer needs and your own country or state laws.
Part 1: How does the Good Samaritan Law work?
Generally, a “Good Samaritan” is someone who volunteers to aid an injured person in an emergency. The term comes, of course, from a parable in the Bible. The Samaritan helped the victim of a robbery, even after others had passed the victim by.
In the United States there is no one law. Each state is different. Moreover, state laws sometimes change. Action item: Go to your browser and type in “Good Samaritan Law [your state}”. What follows here is our best understanding as of the date of this Advisory, and some examples to show differences.
What separates a Good Samaritan from a First Responder?
In an emergency setting, a Good Samaritan someone who has no duty to give aid and is not trained to do so but volunteers to help.
A member of the fire department, for example, is not volunteering to help in an emergency. CERT members who have been “activated” and are serving under the direction of CERT leadership may or may not be volunteers. The point? You have to know your own circumstances.
What kind of care can I give and be considered a Good Samaritan?
The Good Samaritan Law protects you if you provide assistance “as an ordinary prudent person would under the same or similar circumstances.” (There is a similar “Prudent Man Rule” that operates in the world of finance.) It is assumed you won’t try something that would be considered “wanton or reckless.”
Do I have to ask the person if they want help?
Generally, if the victim is unconscious, it is assumed that they give their consent for your help. If they are conscious, it’s a good idea to first ask permission to help. (You see a person choking. He can’t talk. Before you start the Heimlich maneuver, it’s a good idea to ask: “Are you choking? Do you need help?” and get a positive nod!)
A recent law in California added Good Samaritan protection to people who call 911 to protect people who have overdosed. This broadened the scope of the law from providing purely “medical assistance” to “non-medical” – and saved lives because the 911 callers were often underage or engaging in dangerous or illegal activity themselves and thus were afraid to call.
What if their injuries are such that I can’t really help?
In most states, you are not obligated to give help. You can at least call 911. It may be considered negligence if you simply do nothing. You’ll have to check with your local laws to see if you have a “duty to help.”
What if I make it worse by helping?
If you are acting in good faith you will likely be protected. But, here are the limitations that you don’t want to ignore if you are depending on Good Samaritan protection.
Make sure you know these limitations to the Good Samaritan Law!
First, you must provide the care at the scene of the emergency, and to protect the victim from what might be considered “imminent peril.” An example. There’s been an automobile accident, but there is no fire or danger of a second collision. The victim is stable. Moving her at that time might be ill-considered.
Second, your assistance won’t be considered having been given in good faith if you think it will result in payment. Even getting a reward days or weeks after the fact may exclude you from Good Samaritan protection.
What about volunteer activity that takes place when there is no emergency?
Now we get to a completely different situation! So, let’s take a look at a Federal law passed in 1997:
Its goal was to encourage volunteerism at a time when social services were needed. Non-profits formed, but volunteers were afraid to help because they thought they might be sued. The VPA was passed to help manage risks for these volunteers.
The non-profits are expected to provide the appropriate training so that the organization’s mission or purpose will be properly served. Training usually includes clearly laid out policies and procedures. In addition, volunteers agree to follow them!
Just like the Good Samaritan Act, the VPA has limitations. Volunteers are covered if –
They are performing within their assigned job description.
They have whatever license or certification is required.
Their action in question is considered “ordinary negligence” and not “willful or criminal” or reckless.
They aren’t using a vehicle that requires a State-issued license and/or insurance.
The volunteer won’t get the benefit of the VPA if the volunteer commits a hate crime, denies someone’s civil rights, or is volunteering while drunk!
Note that the VPA protects the volunteer of a non-profit, but doesn’t protect the organization.
Part 3: What about Insurance Protection?
As you can imagine, insurance for managing risk for volunteers is detailed, confusing and can be expensive. Speak with a local expert (maybe several!) before making any decisions.
Here is a BRIEF list of different types of insurance that I have discovered. This discussion assumes your “organization” is a non-profit. If your emergency response group is affiliated with or sponsored by a city or a fire department, you are probably already covered by one or another. Find out which.
Liability coverage carried by the organization typically covers bills for accidents or damage caused by the organization. Volunteers can be added as “additional insured” to give them protection for a claim that arises while they are performing their assigned volunteer duties.
Professional liability insurance (also called Errors and Omissions or Malpractice insurance) protects the organization if it is charged with giving bad advice, making a mistake or failing to do something that was expected.
Directors and Officers insurance covers Board members from allegations of fraud or mismanagement, mostly involving the organization’s money. (This could include not having enough insurance!)
Volunteer Accident Insurance provides limited coverage for a volunteer who gets injured while on the job.
Every volunteer group runs some risk. Certainly, as you reach out to recruit more members, you may be asked about how you are managing risk for volunteers. You will want a good answer!
Today’s Call to Action
To repeat the same sentence we used at the beginning, every group is different. You can use this Advisory to start a discussion about where your volunteers’ actions could lead to problems. Make a list. Then, reach out for help from an expert who understands your community. You should probably talk to more than one expert (i.e.: insurance agent). Then you can decide what coverages your group needs – if any – and how best to pay for them.
We’re in the midst of reviewing our own situation. I’ll report on the decisions we come to!
Virginia Your Emergency Plan Guide Team
P.S. In the meanwhile, if you have good insurance stories or good insurance recommendations, please share them. The world of emergency preparedness is “a different animal” and we can all use pertinent information!
By now you will have heard how the FBI is using cellphone data to track down people who were at the January 6 storming of the Capitol. Early last year, you may have seen the orange-dots-on-black maps that tracked a group celebrating spring break in Fort Lauderdale as they headed home — potentially carrying COVID. What about you? Have you been in any situations lately where you think someone might have been tracking your phone?
Whether you like or don’t like the idea of being tracked by your cellphone, it is happening!
Not because you are a suspect in a crime. Not because you could be carrying a virus. No, you are being tracked because you are a valuable marketing asset! In fact, years of your location data has probably already been recorded, sold and re-sold multiple times, without you getting a single penny for it!
By now you may also be wondering, “Virginia, what does phone location data have to do with emergency preparedness?” As you’ll see, there are a couple of interesting angles to this story.
Assumptions behind this Advisory
First, we assume you have a smartphone. If you’re like most people, you count on your phone as your main communications tool for emergencies. How your phone is set up could play an important role in its usefulness.
Second, we think everyone interested in preparedness should be knowledgeable about security. We assume this includes phone security.
Before we go any further, here’s a disclaimer. Cellphone technology changes monthly, maybe weekly! Please confirm what you read here today with experts (your phone manufacturer, the app developer, your IT consultant, etc.) before you take any actions!
The vocabulary of phone tracking
And before we jump into what I’ve learned this week, I have to start with some vocabulary. (I had to look up these words myself.)
A GPS chip in the phone is what allows it to be tracked. The chip reveals location data: where your phone was and how long it stayed there. (GPS refers to the Global Positioning System, operated and maintained by the U.S. Air Force for “Space-Based Positioning, Navigation, and Timing.”) Satellites, cell towers and Wi-Fi can all be used to pinpoint the location of your phone.
Metadata is the basic info about a phone message. It consists of who you are (your device, not your name), who you’re talking to (device), and when you’re talking.
Content is what you are actually saying or sending by message. Your content can be encrypted for privacy.
Encryption is a process whereby a message is converted into code, making it impossible to read unless you have the key to the code.
Of course, we rely on all this information on ordinary days and during emergencies.
GPS capability helps us chat with friends, make business arrangements and find our way there. It lets us check on what the weather’s going to be like, and figure out where to get gas.
In an emergency our phone uses the same technology. We can check to be sure family is OK, locate the fire or traffic jam, find our way to a shelter. If we’re trapped under a fallen wall, our phone could help direct First Responders to our rescue.
Some of these functions are built into the phone. We can add many other functions using apps – map apps, news apps, social apps, earthquake alerts, gaming, chat, roadside assistance, etc. etc. You will be interested to know that the average person has 40 apps installed on their phone — of the over 2 million available! That average person only uses about 20 of them, however. (As you might imagine, younger adults use more than older adults.) You can get more interesting details of phone app usage here.
So, phones and apps represent a lot of convenience.
The real value though, and the reason people are tracking your phone, is the information that apps capture about your location.
When you use your phone and apps, you are agreeing to be tracked in real time. Companies tell you they are tracking your phone in order to “Give you a better user experience” or “Improve service.” At the same time, many of the apps, and particularly the free ones, collect far more than the essential info they need.
They combine your location data with other users’ data and sell it to organizations that build and then in turn sell detailed user profiles for marketing purposes. Hundreds of companies buy the compiled user profile data. Examples are banks, insurance companies, credit companies, airlines, and retail giants like Nike and Amazon. Oh, and political parties!
Can the government buy this data, too? Typically, law enforcement has to prove why they need the data. But there’s been recent reporting of Customs and Border Protection (CBP) and Immigration and Customs Enforcement (ICE) spending thousands of dollars on location data – without being authorized to do so. The ACLU is suing for infringement of privacy.
However the lawsuits work out, you can pretty much assume that some of your personal location information has been collected and passed along to private and perhaps even governmental agencies. And this won’t stop.
What can you do to keep the world from tracking your phone?
Here are simple things we all can do that will make it harder for our location to be traced.
Turn off the radios (think Spotify) on your phone, whether they are cellular or wi-fi.
Even if your phone is off, though, its location can be found because Wi-Fi and Bluetooth still receive data. The easiest way to stop this is to turn on the “Airplane Mode” feature.
Go to “Settings,” “Privacy” and “Location settings” on your phone, and adjust. Apple also has a setting to “limit ad tracking.” (A lot of the apps you like probably need location settings, so be careful in shutting things off entirely.)
Shut the phone down completely and take out the battery. Of course, then you can’t use the phone at all!
If you read any crime novels like I do, at this point you will be asking, “What about using a burner phone? (For the non-crime reader, these are pre-paid cellphones used just a couple of times and then trashed.) If you want to use a burner to avoid being identified, be sure to buy with cash (away from where you usually shop), keep your calls short, and remove the SIM card before you toss the phone. These phones can still be located but even if the phone is located there’s theoretically no link to you as an individual.
What about protecting the messages you do send?
Location is metadata, and can be tracked in a number of ways and by a whole raft of commercial enterprises. What’s in your messages is “content.” Content is a lot harder for people to get to – and pretty easy for you to make more secure.
For security, insist on encrypted messages. I didn’t really realize it, but many of our most popular messaging services automatically encrypt what you send – as long as the person on the other end of the message has the same service (and thus the key to the encryption).
For several years my family and I have been using WhatsApp to send messages and photos. In 2016 WhatsApp announced end-to-end encryption. (WhatsApp had been purchased by Facebook a couple of years earlier.) In 2018, Apple’s iMessage and FaceTime also announced end-to-end encryption.
Sounds good, eh? But it’s important to remember that if these companies store or back up your messages, the messages may be available at a later time. And since these are for-profit companies, we cannot know exactly how they intend to approach privacy in the future.
My research for this Advisory suggests that if you are concerned about having a good, free and private encryption message service, you should look into the Signal Messaging app. It’s a non-profit company that has always been dedicated to end-to-end encrypted calling and texting.
Caution: In recent months the demand for “privacy” online has led to dramatic growth for Signal, and experts are watching to see how the company will respond to this surge in new users.
So you’ve set up your phone for a better level of privacy. Now what?
What else can you do to your phone to yourself from being tracked, surveilled or hacked? Here’s a last list of suggestions. I hope most of these recommendations are familiar to you!
Set up a password on your phone, the longest one possible. Don’t be like the 70% of people who use the same password for multiple accounts!
Consider using a fingerprint or faceID instead of a passcode. Harder for a thief to get into your phone. On the other hand, easier for police to force you to open it.
Don’t charge your phone in public places like airports or shopping centers. You don’t know if that outlet itself has been compromised and thus might be transmitting your private data while all you think is that you’re charging the phone.
Use the same caution when picking public “hotspots” – like a Starbucks – for connecting to the internet.
Remember that companies can be subpoenaed to give up your data. You may not even know it has happened.
Finally, keep track of your cellphone! Over 70 million are lost or stolen each year!
Go onto YouTube and you can see video after video of people’s phones being stolen right out of their hands as they are standing talking on the street. Most of these “grab and run” thieves zip by on a bike or scooter and before you realize it, your phone hand is empty! We wrote about “scooter” thefts last year, when there was a rash of them in San Francisco.
And if you’re still remembering the image at the top of this page, it is meant to represent another situation where phones get stolen. You are going up the escalator, the thief is going down, and BINGO, your phone has disappeared.
I found a couple of inexpensive items that might be useful for forgetful or careless types.
First is a lanyard to keep you from walking away from your phone. This one comes in different colors, even in two-packs so you can change colors to fit your outfit (or share with another family member).
Or maybe you’d prefer a wrist strap to you can keep the phone handy even when your hands are otherwise full. And a wrist strap would keep that escalator thief from grabbing and getting away!
If you’re worried about your phone slipping out of your pocket, or being slipped out by a pick-pocket, consider this. It uses a magnet to “pin” your phone securely in place inside your pocket or purse.
Your security depends on the person you are sending to having good security, too. I love this oh-so-timely quote: “Think of it as herd immunity. The more people practice good security, the safer everyone else is.”
Virginia Your Emergency Plan Guide team
P.S. What other suggestions do you have? Let us know. Dealing with our phones is not going to get any easier.
Because you are reading this, I can bet you’ve already done a pretty good job of the first step in preparing for an emergency – that is, preparing for your personal safety and security. I trust you can answer confidently questions about your extra food supplies, your family’s Go-Bags, stored water, and emergency communications plans. Focusing on personal safety is step one for everyone. But where do you stand on the second step — working with your neighbors?
(Have you seen recent news reports about families spontaneously getting together to save each other during this recent Texas winter storm? Proof of what we repeat here at Emergency Plan Guide: “In an emergency, the real first responders are your neighbors, because they are already on the scene!”)
So for us, once you’ve taken care of your personal planning, it just makes sense to look at how your neighbors are doing. And to ask yourself, “To what extent will you be able to count on them in an emergency?”
You can’t assume that your neighbors have the attitude, the skills and enough supplies and equipment for you all to get through any disaster that hits. You have to find out!
Step Two in preparedness planning is a process to give you confidence as you start working with your neighbors.
After 20 years in our current neighborhood, we’ve had to repeat the process several times because neighbors come and go. Team members get older and drop out.
In fact, now that the pandemic looks to be loosening up, it’s a good time for us to start getting to know our neighbors once again!
Here are the steps we’ll be following to improve neighborhood cohesiveness and resilience. See if you can make use of them too.
Define the neighborhood.
Whether this is a new group or an existing one, invite neighbors to get together and start by building a map of your neighborhood. Your map may show just one street, several streets, one building or just one floor of a building. The idea is to keep the “neighborhood” small enough so that you can get to know the other neighbors. (Some experts recommend a maximum of 20 families per neighborhood.)
You will probably want to hand draw the first iteration of your map, so everyone at a group meeting can see and agree. It’s really fun to get a giant piece of butcher paper or a big white board, with colored pens, and turn people loose!
If you have access to a drone, consider using it to get a better overhead view of your neighborhood’s layout!
Add more details to your map. Details might include streams, driveways, landscaping, common areas, parking, playgrounds, stairways, entrances and exits.
For the next layer of detail, note the location of safety equipment: fire extinguishers, fire hydrants, utility shut-offs, emergency exits. You may want to use standard icons for fire fighting equipment or emergency exits, etc.,
Once your map is drawn, you can take a photo and scan it so the image can be shared digitally with everyone in the group.
Review your list of threats.
This is a great topic for a subsequent group meeting. Invite people to come up with every threat they can think of, and make a list of them. Again, easel paper works well, particularly the kind you can stick to the wall.
Capture as many threats as you can.
Here are suggestions to get the conversation started!
What threats do we face because of our location? Probably everybody knows about threats from the weather; either you live in a flood plain or you don’t. If you’re in an area safe from earthquakes but on the wildfire-urban interface, you have different priorities than a property bordered by mainline train tracks or in the flight path of a local airport. Your map will point to some of these vulnerabilities.
What about the property itself? How old are the buildings? How well maintained is the infrastructure? (Lighting, gas lines, etc.) Are there tunnels or bridges on the property that could collapse? What will happen to gates and elevators if the power goes out?
Do our neighbors need special consideration? For example, do we have children or pets to plan for? Any aged or physically impaired residents? What about neighbors who only speak languages other than English?
Once you’ve listed all the threats you can think of, go back and prioritize them. Pick the top 5 or 6 threats that are most likely to materialize. Talk about the impact of that threat on each aspect of the neighborhood.
Again, this is only the beginning, so rough estimates are all that you need.
Identify your neighborhood assets.
Once you know what you’re watching out for, you’ll find it easier to know what you need to improve your response.
How close are you to fire and police stations? What kinds of businesses (if any) are close by? What is the status of the water supply to the neighborhood or to the building? Where do able-bodied residents live? Are they likely to be home? Do you have a number of retirees? Do they have specialized skills? How many are likely to be available in an emergency?
How many people have first aid or medical experience? How about people skilled in trades? What tools are available? How about working vehicles (trucks, vans, etc.)? Motorhomes (with AC electrical supply generators)? Boats? Snow blowers? Golf carts? Here’s one of the lists we use to identify assets.
(Singing) “Getting to know you, getting to know all about you . . .”
In your first meetings, you can only estimate the answers to some of these questions. While many city programs suggest identifying assets at the very first meeting, we have found that at the beginning, people are reluctant to share details of their personal lives.
Later, though, working with your neighbors becomes easier and easier as they start to know one another, have heard from each other about training and commitment, etc.
And people recognize right away that by working together they can avoid the costs of duplicate effort.
For example, in the aftermath of a hurricane, there’s really no need for every house on your block to have a chainsaw, When the power is out, one or two families with BBQ grills can host the others for an outdoor dinner! Not every household needs to have a trained ham radio operator; a couple of enthusiastic hams can provide important emergency communications for the whole neighborhood.
Having an understanding among neighbors improves the situation for everyone!
Of course, you’ll want to discuss the need for protecting the privacy of this personal information. The best way is to keep the group small enough and personal enough that every member will respect the other members. Don’t post obviously private info where people outside the group can see it.
The Step Two Process can lead to more, including Building a Written Plan that will endure.
The three actions we’ve talked about here — mapping your neighborhood, reviewing likely threats, and getting a handle on assets you already have in place – will be a great introduction to emergency preparedness for a newly forming group. They can serve just as well as a refresher for an already existing group.
The process will reveal areas where you want more information, and thus provide suggestions for upcoming meetings or for recruitment.
The process may also provide an opportunity to sign neighbors up to take the CERT training!
In our estimation, the Third Step in Preparedness Planning is to actually build a written plan for your neighborhood, using CERT as a foundation.
Building a written plan is another whole topic. If you’re eager to get started right away, please take a look at our Neighborhood Disaster Survival Guides. Each book is divided into the three parts we’ve mentioned in this Advisory: (1) personal preparedness, (2) working with your neighbors, and (3) building your neighborhood plan.
We’ve put years of experience into these books (having lived in all three types of communities!) and we think they’ll help you work effectively with old and new neighbors at all levels of preparedness. Just what you need as we return to active life after months of COVID inaction!
Whenever we experience a big disaster, whether it’s a man-made massacre, a devastating hurricane, or a raging epidemic — we all jump immediately into survival mode. Chances are greater that we might be attacked or simply caught up in an event that suddenly turns dangerous. We need to be ready to defend ourselves in these circumstances.And for people who are prepared, survival includes self-defense.
Keeping out of trouble is the very best form of self-defense.
For most of us this means simply staying at home, avoiding planned demonstrations, not being drawn to accident scenes. Staying at home, even after a wide spread disaster, is easy enough if you’ve taken basic steps to store food, water, medicines, etc.
If you must go out to replenish supplies, keep a low profile. And have a plan to get away from trouble if you feel you are heading into it! Know where you are going, and have an alternate route in case you need it. Avoid wearing flashy clothes and carrying purses or packs that could catch the eye. Go with the crowd, but stay on the fringes so you can get away quickly if necessary.
UPDATE 2021: We’ve expanded the whole topic of self-defense this last year by devoting one of our Mini-Series books to the topic. Read this Advisory, then come back to this block to find out more about the Mini-Series and Personal Safety.
But if you must protect yourself . . .
1 – What about stocking up on guns and ammunition?
I must admit to seeing a big increase lately in emails coming across my desk that advertise weapons, including all sorts of guns. Some messages promise information about how to get guns legally and illegally. Others promote accessories that will make guns easier to draw, quieter to shoot and harder to notice when you are carrying them on your body.
Now if you have been reading our Advisories for a while, you know that Joe and I both have histories with firearms. Joe was in the military. I hunted with my Dad starting at about age 12. So we are comfortable with guns.
But our Emergency Plan Guide mission is to create more resilient citizen responders and resilient communities. That includes senior citizens, young people, employee groups, etc. We try to stick with plans that are suitable for most everyone. In our estimation, a gun-owner needs a special mind-set and special training in order to be a valuable member of the community.
So, in this Advisory we are looking at other options for personal safety and self-defense.
2 – Martial arts skills are a potent defense for some.
If you are a trained martial arts master there is no doubt you might have a much better chance of surviving a violent attack by someone even with a weapon. In fact, nearly everyone can become more skilled, without having to become a master. (I’ve seen classes advertised for kids, for young women – “Don’t get raped” — and for senior citizens.)
But – and here’s the big caution. I am NOT in the best shape of my life, nor have I trained or practiced these moves. So I’m NOT confident that I would remember exactly which move to apply when. What about you?
In other words, unless you are willing to sign up for a professional class and become proficient if not professional, a casual approach to martial arts is probably as useless and dangerous as a casual approach to guns.
3 – When you have to fight, your ultimate goal is still to get away.
There may be a time when your “antennae” just didn’t work and you can’t avoid a person who is threatening you. (Like the guy in the image above.)
Or, and I hate to say this, YOU may have provoked a situation by threatening, annoying or insulting someone (Road rage? Street protest?) to the point they attack you. At that moment, you need to be able to let go of your own emotions and recognize the danger you’ve put yourself in!
Either way, if you decide that you must fight for your life, then commit to it. Any half-hearted attempt will be inadequate and could put you in even more danger.
Some self-protection suggestions that make sense for me.
First, yell sharply and loudly right in the face of the attacker! “BACK OFF!” makes it clear you are not going to be a willing victim. Your aggressive resistance may even be enough to make the attacker look for an easier victim. Note you are yelling at the attacker, not yelling for “Help!” from some unknown source.
Then, use what you have or can find as an improvised weapon. If you have keys in your hand, use a key to scratch or cut. Hurl a cup of hot coffee. Toss dirt or sand. Spray an attacker with perfume or hairspray. Use what you can to distract the attacker so you can get away.
Consider “weaponized” personal items for self-defense. Any device is useless unless you understand how to use it, and you have it in your hand ready to use. This takes us right back to “mental attitude.” Here are some ordinary items that become weapons if you use them that way. Click the blue links under the images to go to Amazon to get current prices and full details. (We are Amazon Associates. If you buy using our link we may get a small commission. Your price is the same.)
Examples of weaponized personal items
I try to carry a flashlight all the time, for light and as a weapon.
Lately, we have the choice of “tactical” flashlights that serve both purposes. My favorite “tactical” flashlights have a ridged grip that won’t slip and a sharp front edge that would cut seriously when used as a slashing weapon. A wrist strap means you won’t drop it so easily. (The image shows just one flashlight. You can order a pack of two from this company, too. Just click the box on the sales page.)
Here’s a picture of one of my pens attached to my small, cross-body purse. (Not when I climb on an airplane, though.)
This purse looks pretty ordinary. And the pen is almost invisible. But it’s easy to grab, solid, has a pointed end and a thumb rest on the other end for a secure grip. It could break a window, too. There are other pens that are more pen than weapon, and pens with other tools built in. (see example below).
And two dedicated self-defense items you should know about
Carrying guns or knives requires a level of training outside the scope of this Emergency Plan Guide Advisory. But there are other options to consider. The items below are NOT expensive — and they work. Check them out.
You hold a stun gun in your hand. When you press it against the body of an attacker, its “electrical punch” can completely disable and disorient him for seconds or minutes, giving you the chance to get away. Before you purchase, be sure a stun gun is legal in your state or county. (For a lot more on stun guns – and tasers, which we do NOT recommend — see our earlier Advisory.)
I like the model shown below because it has a safety disable pin. If you lose control of the gun, the pin pulls out and it won’t shoot. It comes with a wrist strap, too – and in pink and black.
As I just said, for your stun gun to work, you have to press it against your attacker’s body. That means the attacker is VERY CLOSE to you!
That’s why I prefer to carry a canister of pepper spray. It can shoot a spray at least 8-10 feet. Anyone over 18 can buy and carry pepper spray. These days you can also get pepper spray as a gel or as a foam. They have the same basic capsaicin ingredient and serve the same purpose. The gel isn’t as likely to blow back onto you in a confined space, but you may have to do a better job of aiming. Most important feature of the gel: it goes at least 6 feet farther.
Finally, if you purchase any pepper product, check your canister carefully. Note its expiration date.
Here’s a pepper spray one I recommend. It has a pocket clip and actually shoots 10 ft. (We tested it.) with up to 35 bursts. (This brand also comes in pink, with a key-chain attachment. Pick the one that works best for you!)
Be sure to read all the instructions and safety precautions!
There are now pepper sprays in GEL format and in FOAM format! They have the same basic capsaicin ingredient and serve the same purpose of self-defense. But neither is as likely as spray to blow back onto you in a confined space! Moreover, pepper gel goes a good 6 feet farther than either spray or foam, so you can use it from a safer distance. The gel doesn’t spread out as much though, so you may have to be better at aiming.
Click on the link below to get to a sample of gel made by SABRE. I own the SABRE spray and find it fits my hand well, and it looks as though the gel is packaged pretty much the same way
Finally, if you purchase any pepper product, check your canister carefully and note its expiration date.
Should you make a change in what you normally carry on your person? (Don’t store pepper spray in the car where temperatures could get so high it might explode!) Should some of your family members have one or more of these self-defense items?
Remember if you are faced with any of these emergencies – while you are shopping, jogging or simply resting on a park bench — you will only be able to protect yourself if you act without hesitation . . .
Assess the situation.
Decide what to do.
Do it!
Here’s to your safety,
Virginia Your Emergency Plan Guide Team
P.S. If you’ve read all the way through to here, then you will want to know whether bear spray is legal. The answer? It depends — on the state and even on the country! Generally, bear spray is meant for defense against — you guessed it — a bear attack. Carrying it may be legal. Using it against a person is illegal.
Our best-selling book last year was Emergency Preparedness Meeting Ideas – that is, up until COVID hit and in-person meetings were cancelled! Happily, our Q&A Mini-Series was finished just in time to take up the slack. The mini-series booklets can provide the perfect launch for a series of virtual meetings on the topic of emergency preparedness. Whatever your topic, though, you want to make virtual meetings more fun — and as effective as possible!
We’ve scheduled different types of virtual meetings since our in-person meetings were cancelled.
Telephone Conference Calls
Earlier this week, for example, we held a simple telephone conference call to discuss an upcoming COVID vaccine clinic being held in our neighborhood. We chose a simple telephone call-in format so neighbors without internet access would be able to participate. About 40 people joined the call. (Hint: Even a simple conference call needs managing! Be sure that you know how to mute and unmute attendees, and explain what you are doing when you do it! First-timers on a conference call may never have heard the word “unmute.”)
Virtual Video Conference Platforms
Joe and I have also participated in many webinars, several Zoom meetings and a Microsoft Teams meeting. Meetings were as long as 2 hours; participation ranged from 15 to as many as 60+ people. Some sessions could have been more effective and a whole lot more fun. Here is some of what we experienced . . .
Some people’s faces are in total shadow so you can’t see if they are awake or asleep.
Probably half the attendees pay close attention; others bob around, eating and drinking.
A few people simply disappear for a while and leave you seeing just their name, or worse, their empty chair!
We want to improve on results for the meetings we are hosting!
Whether you are the host or a participant, you can help get your message across by including some of the following suggestions. We’ve included emergency preparedness examples to help in your planning.
As you will see, these suggestions assume a relatively small group – maybe 12-15 people. A group this size keeps everyone visible in gallery view. Plus, you can see people’s expressions, their hand motions and, if they want to hold something up to show, everyone can see it. This size group is also exactly what we had in mind for the Prepare & Share concept, where the goal of the meeting is to help build relationships, not just deliver information!
Show and tell, don’t just talk!
Demonstrate a piece of equipment or a tool. If the topic of conversation is emergency lighting, for example, you can hold up your foldable lantern, flip up the handles and pull to turn it on, show how the switch activates different white/red/strobe lighting options.
Show variations on a theme. Have several members of the audience bring their favorite pocket knife or maybe their favorite first aid kit — and be ready to explain which feature/s they particularly appreciate.
Illustrate using a miniature or a picture – either of which can be held up to the screen so everyone can visualize the item. For example, what about a model mobile home or tent, a chain saw or a firefighting helicopter with its snorkel? Too big to hold up to the camera!
Give weight to your words.
Make words or ideas tangible. Are you quoting a good book? Hold up the book where the words can be found. Point to the picture of the author!
Illustrate a concept. Show how the wrong sized wrench can’t accomplish the job! Or remember the little kid’s toy, with holes for the various shaped blocks? Use either to illustrate the importance of the right fit.
Ask for feedback along the way.
Ask for a quick vote: thumbs up, or thumbs down? Interrogate a couple of your participants as to why they voted that way.
Take a survey. Go around the “room” and check to get everyone’s opinion regarding an option, their biggest concern, etc. Use this information to schedule the next meeting topic, invite a guest speaker, etc.
Make virtual meetings more fun!
Pick a theme and decorate! Have participants create their own (homemade) video background based on the theme of the discussion. Let everyone vote on the winner.
Dress up for fun! Have everyone wear a hat illustrating the theme or the topic of the day. (Fire helmet. Police cap. Ear muffs for bad weather. Headlamp. Hard hat.)
Bring something to illustrate the topic! For example, people could bring and share “the one thing they would HAVE to have in their Go-Bag!” You’ll be surprised . . .!
Celebrate a holiday or a birthday – or an “un-birthday.” Share a photo of a past birthday, or a wedding. Or a holiday. There’s a holiday of some sort every day! Today, for example, it’s National Chili Day! See https://www.calendarr.com/united-states/observances-2021/
Grab a screen capture of your group so you’ll have something to share on a completion certificate, or in a church newsletter, etc.
Be confident in your personal “look.”
Wear real clothes, not your PJs. You may have to get up and “reveal” yourself. No use being embarrassed.
Set up lighting so your face is clearly visible. Your remarks will be more effective. And people want to see that you are paying attention! (See lighting hints here.)
Avoid annoying and disconcerting glare from eye-glasses by further adjusting lighting. (Here’s an excellent and energetic YouTube video to give you help with avoiding eyeglass glare!)
Know how to mute and unmute yourself.Practice.
Stay “in the frame.” Make sure you, your hands and your props stay “in the frame” that everyone else sees. Rule of thumb: your head should take up 1/3 of the screen. You may have to practice holding your props at the proper distance from the camera, pointing to a specific feature using a pencil, etc. (You can go to Zoom before your meeting and test your audio and video.)
Whether you’re hosting a meeting of neighbors, family or business colleagues, I hope you’ll find some suggestions here that will work to make virtual meetings more engaging. If I were responsible for facilitating a meeting, I’d try to fit in an “activity” like one of those above every 6-10 minutes.
And don’t be shy. You can use items from this list to make virtual meetings more fun and more effective even when you’re not the person in charge!
Virginia Your Emergency Plan Guide team
Send a copy of this Advisory to every one of your team (along with the list of Best Practices) so they each will have some good ideas with which to start their next virtual meeting!
So today is the start of the new Lunar year. The Year of the Ox. According to a variety of sources, today and the next 15 days are “a good time to take a look at your situation, plan to work steadfastly over the next year – and eat dumplings.” (Among other traditions!)
With that as preface, I’d like to introduce this year with a sober and important step in emergency preparedness – the “Just In Case” letter.
If you have a family, the “Just In Case” letter is particularly for you.
Families who’ve lost a loved one have to cope with grief. We’ve heard from many this year how hard that is, and you may have experienced the death of a loved one yourself.
And family members left behind often have an additional burden, that of sorting through many miscellaneous papers in order to get the family member’s affairs in order.
A “Just In Case” letter can give you the satisfaction of “getting your act together,” and it will make it much easier for your family when the time comes.
Just so you know, Earlier in my career I spent 15 years as a Certified Financial Planner, speaking and providing counsel to individuals about their retirement planning. And I wrote about financial affairs for many years, too, including a book on Retirement Planning that was re-printed in Chinese. (Its tax information is totally out of date by now, of course!) I pulled copies off my shelf so you could see them, below.
As for the Just In Case letter, I first wrote it years ago, too. I updated it when my aunt died at age 92 and again when my Mother died at age 99. I’ve shared updated versions with neighbors via our local community newsletter. Now seems a good time to update it again.
A “Just In Case” letter addresses three major concerns.
The first concern is where to find important papers.
Making a list or even drawing a diagram to show where these things are located in your house is helpful. Here’s a list of family documents that should be readily “findable” just in case:
Birth certificates, marriage (and divorce) certificates, death certificates
Other IDs including Driver’s License, immigration, military, passport
Social Security numbers for everyone, plus other names people may have used
Your will or trust, and the name of the executor (who should have the original)
House papers: deed or title, cost basis, list of improvements, details of mortgages; rental contract
Car papers: ownership or lease, DMV registration, warranties or service contracts
Insurance documentation on people, houses and cars
Medical and dental insurance information, including account numbers
Bank Account numbers, including Money Market Funds and IRAs
List of Investments: when purchased and for how much, including account numbers
Company benefits information: your most recent statement is a good starter. If you haven’t retired yet, don’t forget benefits you may be entitled to from a company you or your spouse USED to work for (including the military).
Credit Cards: A list of all your cards and account numbers, with phone number to call if you lose one!
Location of a safe deposit box and key, and a list of its contents
Past years’ tax returns and receipts
Debts you may owe (as distinguished from credit card debt), such as student debt, car loan, private debts
A list of important online accounts, with logins and passwords
The second concern your family may have is who to turn to, and their names and addresses:
Your insurance agent(s)
Your attorney (you may have more than one)
Your financial planner or broker
Your tax preparer
The executor of your will
Other special people, such as property managers, your banker, car repair person, business partners, etc.
Finally, include in a written document any personal wishes you may have.
We have all seen images of “the reading of the will.” Yes, the will is one thing, and we’re not addressing that here. What I’m talking about are things that aren’t included in your will.
If you have personal items you want to leave to different family members, it’s always best to list them in a personal letter instead of in your will. That way, if you want to make changes, you don’t have to go through the trouble of getting new witnesses, etc.
This list is not exhaustive.
I hope I haven’t missed anything essential, but there will certainly be things that YOUR list should include that aren’t here. Still, if you’ve been with us for a while at Emergency Plan Guide, nearly all of it should sound familiar, since much duplicates the same items you’d want to have with you if you had to evacuate.
You don’t have to do everything on the list all at once! (Slow and steady, like the Ox, remember?) But if you don’t have something like it, you are leaving your family in a position that could cost them added money and emotional distress.
Disclaimer. This list does not constitute financial or estate planning. If you are looking for more detail, I’d recommend you check with Nolo and with AARP first to get comfortable with the lingo and language of professional planning, and go from there.
But every one of us can do ourselves an emergency preparedness favor and enjoy the personal satisfaction that will result from writing and/or updating our own “Just In Case” letter. Now’s a good time to start!
Virginia Your Emergency Plan Guide team
P.S. If you read the Protect your Pet booklet, you saw in there some comments regarding making plans for your pet in the case of your death. Surely it’s just as important to make plans for your family!
This is the first Advisory about some of these issues. I’m working now on a second Advisory dealing with End of Life choices. Remember our mantra: The more we all know, the better off we all will be.