5 Ways to Create Your Own Home-Grown Disaster

Share
Danger, Not a Step.

Look familiar? See #4 below.

Not knowing is one thing. Just not thinking is another.

Here are five really dumb things that people do that lead to emergencies and even disaster.

Don’t do any of them, please.

 Dumb Act #1: Mix household cleaners.

The classic mistake is to mix household ammonia (like window cleaner spray) with liquid bleach — “because two cleaners ought to work better than just one.”

The result: a gas that can cause nausea, eye irritation, sore throat, headache, cough, and difficulty breathing.

In fact, the chloramine gas that’s released could even send you to the hospital for an emergency tracheostomy — surgery to create a hole through the neck into the trachea (windpipe) to allow you to breathe.

OK, so you know about not mixing.

Did you know that you can create the same noxious gas by simply using two cleaning agents one after another on the same surface?

Every cleaning agent should be suspect:

  • liquid cleaners for the toilet bowl
  • gel for unclogging drains
  • powdered cleansers for counter tops and grout
  • spray foams for the shower.

Check the label for ingredients (look for sodium hypochlorite) and warnings.

If you smell or feel ANY strange or strong fumes, get out of there immediately and allow the space to air out thoroughly before allowing anyone into the area. Rinse everything completely with water and let it dry out some more before you attempt to finish your cleaning job.

Dumb Act #2: Work alone.

Most of us are happy to work alone for some time during the day!

But most of us are not engaged in high risk activities like using dangerous tools, working around machinery, electrical wires, scaffolding, trenches, high pressure materials, hazardous substances, at height or in closed spaces like grain elevators or tanks, etc.

For the 15% of people who do find themselves in these situations it’s important to have some sort of check-in procedure.

This isn’t just for construction or agricultural or other special industries. Office workers like receptionists or parking attendants who work alone may face potential violence from the public. They need a check-in procedure, too.

If your workplace doesn’t have a policy about working alone, get one.

Dumb Act #3: Underestimate a portable generator.

We’ve talked a lot lately about how a portable generator can be a great emergency preparedness tool if the power goes out. We’ve even made some recommendations about which kind to consider, how much to expect to pay, etc. (See footnotes for links.)

We have certainly talked about the risk of carbon monoxide poisoning from setting up a generator indoors. That extends to having it in the garage or even locating it too close to an open window.

There are other dangers associated with generators that you would know if you thought about it – but sometimes, people just don’t think.

Consider these possibilities:

  • Fire. Like any motor, your generator can get overheated. Don’t spill gas on or around it!
  • Electrocution.  A generator produces – electricity! If your power cords are too light, frayed or kinked, or not properly grounded, you could get the shock of your life. Electricity can kill.
  • Electrocuting someone else. The fifth leading cause of occupational deaths is what is termed “back-feeding.” This occurs when a power company worker touches a wire that should be inert but isn’t because it is carrying power from an unanticipated source – like YOUR generator.

This is why you don’t plug your generator into a wall outlet in your house. The power goes into the house and right through the house into the power grid where the unsuspecting worker is busy trying to fix the outage!

Yes, there is a way to power your house with your generator, but it requires a special “power transfer switch” installed in advance by a qualified electrician.  (A solar array with battery backup requires the very same type of switch.)

Dumb Act #4: Disrespect a ladder.

We are all pretty familiar with ladders, and have probably used at least a couple of different types — step ladder, extension ladder, etc.  (There are many types. Wikipedia lists 21 different ones!)

But for all its familiarity, a ladder can be very dangerous.

If its feet aren’t solidly placed, the ladder can tip over backwards or slide down frontwards. You come down right with it, flat on your back or your face or tangled between the rungs.

Second, a ladder can break. Like any other piece of equipment, ladders simply wear out.  Got an old one in your truck or garage? Before you use it the next time, check out the rungs, the rails, the spreader bars and locks and the feet to be sure they all function as designed.

Finally, can you read? I’ll bet your ladder has a sign somewhere that reads, “Not a step.” (I took the photo above of my own well-used step ladder.)

In simple English, that means “Do not stand on this.” Get up too high on a ladder and you will overbalance the whole thing. Stand on a paint can shelf instead of a step, and the shelf will break.

Every year, more than 90,000 people end up being treated in the emergency room from ladder-related injuries!

Dumb Act #5: Disconnect smoke alarms.

This is simple. Once again, the statistics tell you everything you need to know.

Half of U.S. fire deaths occur in houses where a smoke detector is installed but has been disabled because it beeps.

Of course, nuisance chirping from a smoke alarm is awful. And yes, it always seems to happen in the middle of the night.

Just take the time to fix it. Either put in a new battery or replace the whole thing, preferably with a photoelectric alarm (instead of the cheaper ionization model). If you’re not sure how to do it, go online to YouTube and search for “How to change the battery in a smoke alarm” or “How to install a smoke alarm.” Some videos are boring and some are better; any of them will guide you in making the fix!

As you read this, I hope you are saying to yourself, “Heck, I knew that!”

The key thing is, not everyone does know it! When you have the chance, share this information with children, co-workers, members of your club or church — anyone, in fact, who might have missed it. These are NOT emergencies you want people to learn about from experience.

Virginia
Your Emergency Plan Guide Team


Looking for more info on some of these topics? Here are other Advisories we’ve written over the past year or so.

The Best Generator for Emergencies

Portable Generator for Power Outage — Safety Update

Carbon Monoxide Alarms and Detectors

What you didn’t know about Smoke Alarms


Don’t miss the NEXT safety Advisory. Sign up below to get them all.


Here’s a Gift for You or a Friend

Share

On a daily basis we’re caught up in the excitement of whatever storm or heat wave is going on, or in the latest political maneuverings. Or maybe news from the sports world.

Here in California, though, there’s a background noise like the far-off rumble of a train. It is  . . .

The steady threat of an earthquake.

It’s tough to get people to think about and prepare for something they may never have experienced, no matter how dramatic you try to make it. Our neighborhood emergency planning group comes back to the subject of “the big one,” and earthquakes in general, again and again!

Here’s one of our best neighborhood emergency response group flyers.

How to protect yourself during an earthquake and afterwards

Share this flyer!

How to use the flyer.

  • Make copies and go over it at a neighborhood meeting. You will be surprised at the number of questions that will come up and the number of comments people will make about the supplies they have stored. Discuss the status of gas lines in your neighborhood and how to tell if there is a leak. Take a look around the room you are in and ask people what furniture they would get under if the earthquake happened right this minute! If your meeting takes place at night, find out how many people in the audience even have a flashlight with them! (Action item: Come prepared with a flashlight to give away as a door prize.)
  • Make a few changes to the text and and use the flyer at work.
  • Send to family members and out-of-town friends, too.

Emphasize the warning about NOT STARTING YOUR CAR if you suspect a gas leak. Cars backed up in traffic jams have started devastating fires in earlier quakes.

So you can make any changes, and fill in the box at the bottom of the flyer,

Click here to download the Microsoft Word document.

Let us know how your meeting goes. What questions came up that you weren’t expecting?

Virginia
Your Emergency Plan Guide Team


If you need more background for likely questions, here are some earlier Advisories that may be useful:

Severe Weather Means Danger for Your Pet

Share

Headlines here today read:

“California still in the grip of a record-setting heat wave.”

I checked the weather map for my friend Russell in Vermont.  Headlines there read:

“East Coast Braces For Life Threatening Cold Temperatures”

In these conditions, pets are in danger!  Grab these checklists and make sure YOUR pets are prepared and protected.Heatstroke kills pets

Cold kills pets


I think it goes without saying that your pet needs to have proper ID tags (even a microchip) at ALL times.  And you may have other great suggestions for pet safety and security during extreme weather. Add them in the comments if you will.

In the meanwhile, I’ll get this right out. It may save a pet today or tomorrow.

Virginia
Your Emergency Plan Guide Team

If you haven’t seen it yet, get our complete Pet Emergency Supplies Kit here.


Smartest Emergency Purchase I’ve Made Lately

Share

When it comes right down to it, having a simple phone plugged into a traditional landline simply makes sense. And when it costs so little . . .!

Corded phone for emergencyFive reasons to go out today and buy a corded phone.


1 – It works when other phones are knocked out or overwhelmed in an emergency.

How many times have we talked about what happens to regular phone communications in a widespread emergency? Power can disable cordless phones; cell phone towers can fall; systems can be overwhelmed. Ultimately, any device powered by a battery will stop working.

Landlines are the most reliable of all the options.

2 – Emergency Services will pinpoint where the call is coming from.

When you call 911 from a landline, emergency services know just where you are. When you call from a cell phone, they have to go through extra steps (using GPS) to find you. And if you’re on the tenth floor, and the only ID the emergency services get is the address of the building . . . When seconds count, a landline wins hands down.

3 – Your kids (visiting grandmother, babysitter) can operate a simple corded phone.

My granddaughters play with their parents’ cell phones all the time. That doesn’t mean they know how to actually turn a phone on, get past the password, find the phone app, and use the phone to make a call.

EVERY kid above the age of about 2 can be taught how to dial 911 from a simple phone.

Not every adult carries a phone, either. Consider elderly relatives. They, too, would easily be able to make an emergency call using a phone like the one in the photo.

4 – Yes, someone could tap the line – but not a random hacker.

Privacy is a concern whenever you’re using wireless communications. A landline is secure unless someone has actually installed wiretap equipment onto your line.

5 – You won’t misplace or lose it.

Your emergency phone is tethered to the wall. It will always be in that place so you will always be able to get to it immediately.

What will it cost?

A neighbor told me he’d bought a simple phone recently for “around $10.”

Frankly, I found that hard to believe. Still, when Joe went shopping for a phone yesterday, he came home from Walmart with the one in the photo. And it had cost him $5.95!

Naturally, you can get fancier ones, with a bigger price tag. (Check out our friends at Amazon. Use the search words: “corded phone.”) But we were looking for the simplest model possible.

Joe opened the box, pulled out the phone, and . . .

We plugged it into a wall jack — instant dial tone.

No registering, no passwords, no set-up, no waiting for a battery to charge, no software upgrades.

(What a relief after we had spent hours over the past week getting our over-the-air antenna to work with our TV and our Amazon Fire Stick. That’s another story, of course . . .)

Now, since the phone doesn’t store names or numbers, you’ll have to dig out an address book to go along with it. Or simply type up and print out a one-page sheet of emergency numbers as part of your family communications plan. (If you have children, you are likely to have this page already prepared for babysitters.)

Fasten this page to the phone itself, or tape it to the wall next to the phone, so it doesn’t get misplaced.

That’s it! It has taken me longer to write this Advisory than it did to get the phone set up.

Action Item: Do yourself a favor and get your own corded phone today.

You will definitely feel smarter and you and your family will definitely be safer!

Virginia
Your Emergency Plan Guide Team


Being prepared is more a state of mind than anything!  Keep your mind focused every week or so by subscribing to our Advisories. (Form below.) Free. Easy. Sensible.

Have friends who should be thinking about preparedness? Forward this email to them and suggest they subscribe, too!


Pedestrian Killed In Accident

Share

When you’re driving, how well do you see pedestrians or bikers?  How about at night?

Man in darkness
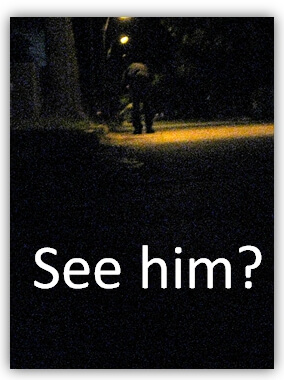
It’s raining in California – at last! Yesterday our day was wet and gray and darkness came early. We stuck close to home and didn’t even take the car out.

Probably a good idea. According to Marc Green, legal expert in “Human Factors” (vision, perception, memory, etc.), “ [the] pedestrian fatality rate is three times higher at night.”

Darkness, smoke, fog, rain = all mean lower visibility and even greater danger for pedestrians.

Somewhere someone is experiencing these conditions right now.

In an emergency, conditions will be worse.

Imagine yourself on foot, either as a victim or as a responder. Street lights are out. The roadway has buckled and cracked so vehicle headlights are jerking and flashing in all directions. Blustery rain is coming down and water is pooling everywhere.

Drivers don’t know what to expect — so their reaction times are slower than ever.

What can you do to protect yourself? Wear high-visibility clothing.

We see safety vests every day, worn by people working in construction, landscaping, traffic control and clean-up. These workers’ vests are required by OSHA (Occupational Safety and Health Agency) and, in fact, they must “reflect from all sides for 1,000 feet” in the dark.

Smart joggers and cyclists have taken to wearing reflective clothing as a safety precaution when they are out in the dark. Typically they have wrist or ankle bands or reflective tape on a backpack or fender. High-fashion garb has stripes, sometimes even small LED lights built in.

(As a driver, I appreciate their efforts, and find myself yelling at those who DON’T make it easy for me to see them.)

The BEST gear is both fluorescent and reflective, or retroreflective.

Fluorescent materials actually emit light by converting invisible ultra-violet rays to visible light. They work best in low natural light, particularly dawn or dusk. Reflective materials bounce a beam of light off their surface – thus they only work as long as a light is shining on them. Retroreflective materials combine both fluorescent and reflective properties.

Get high visibility gear into your emergency kit.

Some popular high-visibility “vests” really look just like a pair of wide suspenders and belt. Convenient to carry and easy to slip on and fit. Here’s a popular one from Amazon: Rioa Best Reflective Safety Vest – Stay Safe Jogging, Cycling, Working, Motorcycle Riding, or Running – Elastic and Easily Adjustable Means the Best Running Gear Around


In my estimation these belts, even with wrist or ankle bands, may not provide enough coverage.  In fact, if you are moving in an emergency situation – crawling, running, bending, digging – the viewer may see movement but not be able to tell what it is he or she is actually seeing.

I prefer a full vest, like the one pictured below: High Visibility Gear Set of Reflective Safety Vest with Pocket + 2 Wristbands+Bag | Perfect for Running Walking Cycling Jogging Motorcycle | Fluorescent Yellow | Size L/XL This vest will make it clear that you’re a person. It has a pocket for your phone or keys, and comes with a small storage pouch.  The hourglass design leaves your sides less visible, so arm/wrist bands help fill in that gap.

Adding a high visibility vest to your emergency kit is easy, and you will find that you pull your vest out more often than you might have thought. For example, I’ve used mine just to walk from a distant parking lot to an event, and I’ve lent it to a friend who found herself drafted to direct traffic during a race. Of course, for CERT trainings I wear my CERT vest, but it is bulky and no where near so comfortable (!).

Virginia
Your Emergency Plan Guide Team

P.S. Be sure to consider what you might be wearing UNDER the vest to be sure you get the right size.


East Coast Handles Blizzard.

Share

Were authorities crying “Wolf?”

Snow Plow, emergency preparednessTragically, there were deaths as a result of the weekend’s blizzard – mostly from car wrecks, some from heart attack. And the flooding in New Jersey apparently took some people by surprise.

The clean-up is just starting. According to the Wall Street Journal, it costs $1.8 million per inch for snow removal alone!

But by and large, it sounds as though millions of people (60 million under blizzard, winter storm or freezing rain warnings Saturday!) did a pretty good job of getting through. Here’s what it looked like from my desk, here in California.

What worked well?

  • The weather reports were accurate and timely. And they were updated. Maybe reporters learned something a year ago when they forecast the Mighty Blizzard of 2015. That one fizzled!We have all now learned that there are different weather models. The European model looks at the big, long-range picture. The National Weather Service uses its own, short-range models. Not one model is perfect, but taking input from each, and being willing to make a change as things develop, seems to have added credibility to this forecast.
  • Authorities took prompt action. In at least 11 states, Governors declared states of emergency. This helped position resources (over 2,200 members of the National Guard) before the snow actually hit. Schools closed in New York as of Thursday. City government offices closed as of Friday noon. Travel bans were declared – and enforced – up and down the whole Eastern Corridor.
  • Political leaders repeatedly got on T.V. to emphasize city actions and the need for citizen responsibility. Whatever the party, political leaders’ words and actions draw attention. NY Mayor De Blasio was warning people of the storm as early as Wednesday morning. By Saturday, Chris Christie had cut short his campaigning in New Hampshire to return to New Jersey because of the blizzard. People noticed.
  • Citizens got the message and were smart. On Thursday evening I got a call from my friend Teri in Maryland. She was laughing– weakly–as she reported how hard it had been to get home and that “There was absolutely no meat left in the grocery store!” People either had what they needed or got it by Thursday. Then they prepared to hunker down.

Did preparedness pay off?

Cities and politicians are pretty much required to promote preparedness. You and I promote preparedness because we believe in it as a lifestyle.

Nowhere, however, have we found a formula that shows just how much our investment is worth.

But the Boston Consulting Group’s 2015 study for Unicef and the World Food Programme (WFP) added more understanding to why to prepare.

Their study of 49 activities aimed at cutting costs and reducing response times during emergencies showed that an investment of $5.6 million is expected to deliver $12 million in savings.

To be clear, the study analyzed actions in the countries of Chad, Pakistan and Madagascar. I’m not sure what the ROI would be for actions taken in the U.S. – but it surely wouldn’t be worse!

If you want to read the whole report, here’s the link: https://www.bcgperspectives.com/content/articles/development-business-social-sector-big-payback-emergency-preparedness/

What next for Storm Jonas?

It will be interesting to watch for the follow-up reports on the East Coast Blizzard/Storm Jonas – on its costs and hopefully on the value of everything that went into getting ready for it.

I’ll let you know what I find out. In the meanwhile, if you are in the blizzard area, let us know what you experienced and how well you fared. For example, are you among the thousands without power right now? (Which means you are reading this on some portable battery-driven device!?)

Looking forward to hearing from you!

Virginia
Your Emergency Plan Guide Team

P.S. As you know, we’re waiting here in California for the next storm to roll in from El Nino . We’ve had only one. Do you think OUR weather forecasters have cried wolf?


Hang On To That Swiss Army Knife

Share

A Gift for a Lifetime

I got my first Swiss Army knife when I was about 8 years old, a gift from a friend of my mother’s. (A boyfriend? We’ll never know!) I don’t think I’ve been without one in my pocket since.

When I say without “one” I should really be saying “without several” since there are so many different models, each with some special feature, that you want to own one of each! (Well, maybe not every one. Read on . . .)

Real Swiss Army knives, brand name Victorinox, last nearly forever if you don’t lose them.

If a part breaks or goes missing, you can fix it!

Replace scissors spring on Swiss Army Knife

Replace scissors spring on Swiss Army knife

Here’s what got me started on this Advisory. I had to . . .

Replace the broken scissors spring

in one of my favorite small knives.

I use these scissors a LOT, for cutting everything from paper to fingernails to packaging tape.

(Once I even used the scissors to give myself a quick haircut when a posh restaurant thought my hair was too long to let me in.)

Where to find the spring

In years past I have found the scissors spring at hardware or sporting goods stores, but for the last three years I’ve had no luck. (Maybe people prefer to sell a whole new knife rather than a $2 set of springs!) I( knew I could get them from Victorinox, but that involved more shipping that I wanted to fool with.)

This time, I went to Amazon to get what I needed. Here’s the link to the purchase, for a grand total of $2.95. Victorinox Scissor Spring, Small

How to replace the spring

Replacing the spring takes four things: a new spring (image 1 shows the package), some sort of round file or punch (image 2) , a pair of needle-nose pliers (3) and a little dexterity.

And here are the steps to replacement.

  • Open the knife so that the scissors extend at a 90% angle.
  • See the round hole near the base of the scissors? One side of the hole has sharp edges; on the other side, the edges have been rounded.
  • Use the pliers or a punch to push/pull the old spring out so it comes out the rounded side of the hole. I found that the tip of a small round file worked perfectly for me.
  • Use the pliers to press the new spring into place from the rounded side of the hole.
  • Be patient and persistent. You may need to flex the spring slightly to get it into the hole.

Knife like new, back in my pocket for another day!

What about other models of the Swiss Army knife?

Victorinox (and competitor, now partner Wenger) has produced many different models since the company started in the late 1800s. All have a main blade plus various auxiliary tools – as many as 30 in various combinations! Most also have the familiar red handle with white cross logo.

Most practical multi-tool

While it’s great to have different tools all in one, the largest Swiss Army Knife that I find practical is the Swiss Champ. It costs $73.49, and its holster adds another $8.34.  (Yes, I own both.)
Victorinox Swiss Army Swiss Champ Pocket Knife (Red)

If you want more tools, of course, you can get more. In 2006 Guinness World Records recognized a knife (made by Wenger) that had 87 tools and 141 different functions and that cost upwards of $1,000!

Best for everyday use

And for everyday use, I carry the “Midnight MiniChamp” version with built-in ball point pen and flashlight . . .

Victorinox Swiss Army Midnite Minichamp, Sapphire

(This picture shows the knife in blue, but of course, it comes in red, too.)

If you’re shopping for yourself or for a gift, take the time to review all the different models to get the exact knife you need. Again, a small convenient pocket knife is one thing, and a versatile multi-tool for your survival kit and/or emergency kit for the car serves a completely different purpose.

Either way you can rest assured that this will be something to treasure.

And one final note, just for fun. It turns out that the name “Victorinox” is a combination of the original owner’s mother’s name – Victoria – and the French word for stainless steel, “inoxydable“, shortened to Inox. (Stainless steel was invented by an Englishman in 1913.) Oh, and the clever family that named the company still owns it, four generations later.

Joe Krueger
Your Emergency Plan Guide Team

P.S. I’ll bet you have a favorite Swiss Army knife. Which one and why? Your comments may help others decide which one(s) to get!


Power Outage At Work

Share

Some statistics for small business.

No Business PlanYou’ve seen the stats here before. Check out numbers from a June 2015 Nationwide Insurance survey:

  • 75% of small business owners say they don’t have a disaster plan. (This is UP from the 72% we’ve quoted before!)
  • 38% don’t even think a disaster plan is important.
  • Unfortunately, a business without a plan has a poor chance of recovery after a disaster. FEMA reports that 43% of them will never reopen, and another 25% will close their doors after one year. That means that after a disaster, nearly three-quarters of businesses without a plan will be gone.

Who knows what the numbers will tell us after the recent one-two-three punch from Hurricanes Harvey, Irma and Maria!

No matter what the exact numbers are, operating without a plan leaves your customers in the cold, your employees without a job, and your investment down the tubes.

If you don’t already have a plan, what might spur you to action? Consider this . . .

Let’s take a look at just one risk that you are surely familiar with.

One company we follow is Agility Recovery. As its name suggests the company offers recovery solutions – four main ones (office space, power, communications, computer systems).

In its 25 years of business, Agility has responded to one type of emergency more than twice as often as any other —

Loss of power!

Further, according to Agility Recovery,

  • Nearly 70% of businesses will lose power sometime in the next 12 months.

So, where does your company stand on being ready to withstand a power outage?

“Well, I think we have a back-up generator on premises!”

That’s a start. Again, thanks to some resources offered by Agility Recovery, Popular Mechanics and The Home Depot, here are

Ten questions for your next conversation about power outages at work.

  1. Do employees have emergency kits with flashlights? Are the batteries fresh? Are the flashlights hand-crank?
  2. Do you have emergency radios so you can get the news and weather? Again, fresh batteries, hand-crank or solar?
  3. Are electronics protected by a power strip surge protector?
  4. Do employees know what should be turned off in a power outage, and what should be left on?
  5. Are desktop electronics connected to a functioning UPS device so they can be powered down in a controlled fashion?
  6. Do you have a back-up generator for essential equipment?
  7. Do you know what equipment is considered “essential” and are you confident the generator can both START and RUN that equipment? (It takes 3 to 5 times more power to start up a motor than to run it.)
  8. Have you trained on where to place the generator when it is needed?
  9. Do you have the appropriate electrical cords and plugs for your needs? How long do cables need to be?
  10. Do you have fuel for the generator? How long will it last, and what are the plans for getting more?

Get the rest of the questions and answers.

These ten questions are really just a start. Any business other than a home office needs more information in order to do a good job of managing a power outage. You can get a more detailed checklist, plus see some of the case histories offered by Agility Recovery, at their resource library: https://www.agilityrecovery.com/resource-library/

Power outages are on the horizon, it’s just a matter of when.

Good luck!

Virginia
Your Emergency Plan Guide Team

Countdown to Survival

Share

Top Ten Items For Your Emergency Plan

Help them SurviveIf you think you are already prepared, use this list as a quick check. If you suspect you’re missing a few things, use the list to fill in the gaps.

Food the Means to Prepare It and Eat It . . .

Water, Food and Medicines – Enough for the entire household including pets, to last for a minimum of 3 days . . . up to one or two weeks if possible. Best to stock up on the canned soups, staples and packaged foods you normally eat, and then rotate to keep supplies fresh. (We have enough sardines and packages of instant latte coffee to survive for a month!) Don’t overlook a 14-day supply of important medications (think customized first aid kit) for you, your children and your pet.

Prescriptions, Medical Devices, etc. – In a serious event, electricity, running water and plumbing facilities may not be available for hours or days. Without power, ATMs, computer systems and electronic cash registers will be inoperative, making the renewal of prescriptions challenging if not impossible. Likewise, life-sustaining devices such as oxygen machines that require power may have to be run on “inverters” (alternative power devices that convert the direct current of a car battery to alternating current). Inverters or small solar panels can also power small appliances, laptop computers, etc. and serve as a recharging source for smart phones, iPods and other electronics. In all these, wattage requirements will determine if the system works for you. Test everything in advance! Note: Power generators are both expensive and unwieldy and are not practical in most residential settings.

Camping Stove, Hand-Held Can Opener & Eating Utensils – Disposable plates & eating utensils may prove satisfactory but keep in mind that if the emergency continues, leaving you without power, water or garbage disposal or pickup, you will need to think outside of the box to survive. We recommend a propane-powered camping stove even if you have an outside barbecue.

Communications Are Your Link to Friends, Family and the Reality of the World Around You.

Emergency Radios that Receive NOAA and Local Government Broadcasts – With TV and internet out, the only sure way you will know what’s happening is via emergency radio transmissions. Have at least one full service radio for the home (two or more for larger, multi-story homes or community residences) and one smaller hand-held model for each family vehicle.

Walkie-Talkies – These hand-held multi-channel, battery-powered communicators will work regardless of a power outage. They are the best way for your CERT Teams to communicate with volunteers and for you to keep in touch with your neighbors following an emergency. We have extra units strategically placed throughout our house and a pair in each car.

Emergency Contact Numbers – When local telephone circuits are down or overloaded, you may be able to use out of state relatives or contacts as a way to relay messages to family members, employees or associates. But this works only if all parties are in on the scheme before a disaster strikes.

You Will Need Light and Heat When There is No Power.

Flashlights and Battery-Powered Lighting – With the widespread availability of LED (light emitting diode) devices, we use far fewer batteries than we used to with incandescent bulbs. Flashlights are cheap; have more than one. Keeping a small 250+ Lumen flashlight in a handy location in each room in the house ensures you can safely navigate in the dark. But you will also want a couple larger, more powerful (500+ Lumens) flashlights and possibly even a headlamp or two that leaves both hands free. And you’ll appreciate some LED table lamps or lanterns for general lighting needs.

Energizer Batteries

Winner in past tests

More on Batteries From Our Experience – We need batteries for everything from radios to flashlights to smart phones and other devices, typically AAA, AA, C & D sizes. Most batteries manufactured under the Duracell and Energizer brands are guaranteed to have a 10-year shelf life. In our experience, this is misleading. Ten years may be possible under ideal conditions . . . whatever those are.

With few exceptions, we have found the batteries to lose some of their power midway through this period, and many start to corrode. The basic “copper top” Duracell batteries seem to deteriorate more rapidly than the standard Energizers – 3 to 1 in our experience – but the new (and more expensive) “red-top” Duracell batteries seem to perform better. We only have a few months experience with them.

The bottom line: Whatever brand batteries you use, don’t leave radios or electronic devices sitting for long periods of non-use with batteries installed. Take the batteries out and look at them carefully before reinstalling. If you have devices with corroded terminals, they can sometimes be rejuvenated by using a cotton swab to apply a water & baking soda paste (which will absorb the corrosion) and removing the resulting dry crust with a wooden toothpick or a single prong of a broken plastic fork. This works about half the time, seemingly depending on how bad the buildup or corrosion was.

Clothing You Can Count On to Keep You Warm – Even in moderate climates nights get cold. Your emergency kit needs to contain at the very least a warm coat and sturdy shoes. It’s easy to add a space blanket and rain slicker. (A large plastic garbage bag is better than nothing.) Blankets in the car will be welcome when you’re stuck trying to get home.

Take Care of Personal Needs. 

Hygiene and Sanitation Items – From brushing your teeth to disposing of trash, garbage and body waste, a world without electricity or running water presents several significant challenges. The bigger the household (including pets), the greater the problem. In addition to trash bags, toilet tissue, cleaning and disinfectant supplies, you’ll want heavy-duty “compactor bags” to insert in toilets for collecting solid human waste. If you’re part of a community that includes elderly or frail residents, you may be faced with managing deceased humans. As distasteful as all this may be, pre-event planning will yield big dividends in comfort.

Who Will Be Turning To You?

Most Important Preparation of All is Your Neighborhood &/or Workplace – Take a moment and think about what a major calamity will mean to your immediate environment. If you are the only one who is prepared, your circumstances will be little better than your neighbors or co-workers. In the Tsunami that caused widespread devastation in Japan, it was neighbors helping each other that saved lives and made community survival possible.

While hard-core, serial “survivalists” devote considerable (often inordinate) resources to building “bug out bags” and even acquiring arsenals of weapons to protect themselves, the reality for most of us is not likely to be something out of Mad Max. Major roadways and potential escape routes will probably be congested, unnavigable or even impassable. Where would you go and how would you carry what you need to survive? For most of us, “survival in place” is the most realistic option. What can you do to help your co-workers and neighbors focus their energies on emergency preparation . . . for their sake and yours as well?

Virginia 
Your Emergency Plan Guide Team

Virginia Nicols, CERT graduate living in Southern California, has helped lead her local neighborhood emergency team for over a decade. Her website, http://EmergencyPlanGuide.org, reflects much of what that award-winning volunteer group has struggled with and accomplished over the years. This month, El Niño tops the preparedness agenda.


Get a weekly reminder about emergency preparedness for family or workplace. Subscribe below to our Advisories. They are free.


Pet Emergency Kit — Don’t Put It Off

Share

lost and injured dogAs a pet owner, are you offended at this question:

Do you consider your pet a part of the family?

What about this question:

“Are you one of the 28% of pet owners who plan to buy their pet a gift at Christmas?”

I thought so!

With a gift for your pet in mind (!), don’t overlook the same thoughtful step you have taken for your family members – a survival kit.

There’s only one way to protect your pet.

In an emergency, you will surely want your pet near, safe and comfortable. The only way to manage that is to have a complete kit, ready to put into play at a moment’s notice if you must evacuate.

Even if you are sheltering in place at home, your pet’s routine will be interrupted. So having what you need on hand for your pet will allow you to focus on safety and security for the whole family.

Seven basics for your pet’s emergency kit.

Just like a personal survival kit for your 8-year-old daughter or your 81-year-old mother, your pet’s kit needs to be customized.  Still, there are basics that you can start assembling now if you haven’t already.

In fact, any or all of these items make great Christmas presents!

1.The container or kit itself.

Crates and hard-sided carriers work well if you have plenty of space, but a soft-sided carrier that folds flat may be the most practical for an emergency kit. Get the right size for your pet and the right weight for you, since you will have to carry the container with pet and with the other supplies that are part of it.

Look for sturdy handles and a shoulder strap or backpack straps. You may even want a container with wheels or that’s attached to a rolling cart. Here’s one from Amazon:
Snoozer Roll Around 4-in-1 Pet Carrier, Red & Black, Medium

(I saw it at more than one price, so be sure to shop. As always, if you buy through our link, we may receive a commission from Amazon. The price you pay is the same, no matter what.)

2.Food and water supplies.

Water is the most important, and the heaviest item to manage. As you plan for your family’s needs of 1 gallon a day/person, add extra for your pet. You may be able to store a couple of quarts in the carrier itself, along with a collapsible water dish.

As for food, canned wet food is convenient and doesn’t attract any bugs. BUT, be sure you have a can opener and be sure your pet likes the brand! You don’t want an animal with digestive problems on your hands. You could use the same collapsible dish mentioned above for food, or add a second dish.

3.First aid kit.

Every pet should have a first aid kit, again, customized for that pet (medicines, clippers, veterinary instructions) and for your part of the country (ticks, burrs, heat). Get the smallest kit that works, then add personal items. If you don’t already have what you need packed up in a bag, here are a couple of simple pre-built kits to start with.  Reviews of the second kit were particularly positive.

Essential Pet First Aid Kit

Pet First Aid Kit, Large – 50 Pieces

4.Safety items.

In an emergency, your pet needs a collar or harness and SHORT leash so you can protect it. Your dog may need a muzzle. Store these items in the carrier, too.

If you have to walk your pet, it would make sense to have a hands-free leash, since you are likely to be carrying a flashlight, a tool, or a child or holding hand somebody’s hand. You can get a simple hands-free leash for as little as $5. Here’s a more sophisticated and useful one you could use every day:

Outward Hound Kyjen 23003 Hands Free Hipster Dog Leash Storage Accessory 5ft Leash Included, Blue

5.Sanitary items.

IF YOU HAVE TRAINED YOUR PET IN ADVANCE to wear diapers, or to use pee pads, having a supply in your container makes sense. Obviously you’ll also want some of your usual poop bags.

6.Comfort items.

A familiar blanket and/or towel is probably one of the most valuable items to have in your container. You can wrap your pet for carrying, your pet can use it to lie on, or you can throw it over the container for privacy.

Having a source of light might make you both feel more comfortable; consider a couple of light sticks or LED Glow Stick like this one that has several “light modes” (steady, blink) as well as a whistle:

Life Gear Multimode 4N1 Glow Stick, Flashlight, Safety Flasher, Emergency Whistle, RED

A favorite toy also makes sense – but don’t get a fetch toy, or a tugging toy, or a toy that squeaks!  Here’s one that you might try out – according to the manufacturer it has a “protein taste and vanilla smell” and is likely to keep your pet engaged for a long time.

Petmate Dogzilla Rubber Dumbbell Shaped Dog Toy, Small

7.Pet ID

As you probably know, not every shelter allows pets, so you may be separated. Attach a waterproof envelope to the container that clearly identifies its occupant – with photo, name of owner, emergency contact information, history of shots, etc.  Keep copies of all this information for yourself, too.

Disclaimer: Joe and I don’t currently have a pet, though we’ve each owned several. We interviewed many enthusiastic pet owners for items in this blog post and have shopped in local pet stores for ideas and current brands.

We have also discovered in our community that more than half of our senior neighbors have pets. And nationally, while families with children are the most likely to have pets, more younger couples are getting pets, too, as they postpone having children. Who do you know with a pet? Be sure they have this information.

In an emergency, out of control lost animals will create heartbreak and danger for all.

Protect your pets now by putting together emergency kits for each of them.

Virginia
Your Emergency Plan Guide Team


Last-Minute El Niño Checklist

Share

28 Sensible Things To Do To In and Around Your House.

We’re expecting more balmy 80-degree days in Southern California.

A couple of years ago we braced for an El Nino event, and it didn’t happen. Since then, however, the forecast is back.  According to the NOAA’s Climate Prediction Center, a weak El Nino is likely to continue through the Northern Hemisphere summer 2019 (65% chance) and possibly fall (50-55%).  they have officially declared an Advisory.

El Nino Rainstorm

An El Nino will have a big impact – at the very least resulting in gutters rushing with water, small urban streams and canals overrunning their banks, and even larger scale flooding.

We normally make no “winter” preparations in Southern California.

But after the rains this past winter, we’re going to be on the lookout. Here’s a checklist for Southern California residents, assembled from a number of sources.

Before the rains and winds come, check out your home.

Outside and around the house:

  1. Clean out drains; keep ditches and other water ways clear of leaves and debris.
  2. Check your landscaping for areas where water may pool. Can you re-grade, or at least add mulch or other absorbent material?
  3. Turn off your automatic sprinklers if rain is threatened.
  4. Be sure your vegetables are planted above ground in raised planters.
  5. If you have fences, lights, fountains, etc., store or tie them down. Fasten outdoor furniture so it can’t blow away.
  6. Move potted plants to a secure spot.
  7. Check with your neighbors if you think water may drain from their property onto yours. They are responsible for making sure water from their property flows into the gutter or other drain.

The house itself:

  1. Check for leaks or weak spots in your roof. Make sure no debris is caught in flashing.
  2. Clean out gutters BEFORE it rains and be prepared to clean them again after the first downfall.
  3. Seal holes in the walls/roof made by cables or wires.
  4. Check around window glass and on trim; fill in any gaps with sealant or paint.
  5. Check porch and porch roof slope; make sure water flows away from the walls.
  6. If your property is low-lying or likely to be impacted by run-off, know where to find sandbags, how to fill them, and how to position them.
  7. Store plastic sheeting and heavy clips for emergency covering.

Put together emergency provisions to get you through short or extended power outages.

  1. Store water, non-perishable food and batteries to power flashlight or other lanterns. NO CANDLES; they cause fires.
  2. Have warm clothing and blankets for when the temperature falls and you have no heat.
  3. Be sure to have a back-up battery or other back-up for electrical medical equipment.
  4. Emergency items will disappear off store shelves before or immediately after the storm, and afterwards you may not even be able to travel due to downed trees, power lines, etc. Do your shopping early.

Communications may be interrupted.

  1. Your phones may not work if cables are cut, towers topple as the result of landslides, etc. An “old-fashioned” hard-wired phone is a good back-up.
  2. Prepare a list of emergency numbers. (Your computer or cell phone may be out of battery.)
  3. Know where to tune for emergency broadcasts and official information.
  4. Know the non-emergency number for your local police and/or fire. Use it, not 911, unless it is a matter of life and death.

Prepare your car, too.

  1. Do you need new tires? Bald tires are even more dangerous on wet roads.
  2. Check whether your tires are properly inflated; lessen the risk of hydroplaning.
  3. Do you need new wipers? Don’t wait until you’re caught in a downpour to realize you can’t see clearly.
  4. Need a new battery? Don’t get stranded because the car won’t start.
  5. Put together a survival kit for the car: water, food, flashlight, blanket, emergency radio.

Consider flood insurance.

As with all insurance coverages, the devil is in the details. However, here are some general observations that may help you to decide if you need flood coverage.

  • Flood insurance is not generally covered by regular homeowner policies.
  • A separate flood policy covers damage from flood waters to property and/or contents. (Check on the definition of “water.”)
  • Prices depend on the assessment of risk based on where you live. Premiums may range from $150 to over $1,500/year.
  • “Twenty percent of people who file claims come from non-high-risk areas,” says Mary Simms, spokeswoman for the Federal Emergency Management Agency’s Region IX, which includes California.
  • Federal policies have limits that would easily be overtaken in California, where property values are high. Separate “extra value” policies would be necessary to cover the full value of an expensive home.
  • A policy doesn’t cover living expenses if you have to leave your home while it is being renovated.
  • FEMA makes flood insurance available through a number of partners. The entire federal government flood insurance program is being revisited. Check out its website at floodsmart.gov.
  • It takes 30 days for any flood policy to become effective.

This is specialty insurance. Do your homework, starting with your regular agent. Then find and speak to someone who specializes in flood insurance, and finally get a third opinion.

One last thing to protect against the rain.

Oh, and don’t forget. Have a good umbrella handy! How could you go wrong with an umbrella with the name “RainStoppers?”?!

RainStoppers Auto Open Windbuster Sport Umbrella, Black, 48-Inch

There are bigger “Rainstoppers” too – 54, 50, 62, up to 68 inches! Just click the link or the image above to get to the right place to start your search!

Virginia
Your Emergency Plan Guide Team

Don’t miss a single one of our Advisories. Sign up below to get them every week.

Should you include a Geiger Counter in your Survival Kit?

Share

Three reasons for yes.

If you’ve been watching the news lately you no doubt know that our counterterrorism officials’ greatest fear is that terrorists will get their hands on enough nuclear materials to construct “dirty bombs” – bombs that could turn large areas of cities or communities into radioactive cesspools.

1. The dirty bomb threat

Admittedly, the odds are long on any one community becoming a target for this kind of attack. If you happen to live or work in or near a target area, however, having a reliable Geiger counter could be a real asset

2. Nuclear waste storage

While we don’t own one currently, we are considering purchasing a Geiger counter. For us, the decision is prompted by the fact that we are relatively close to a decommissioned nuclear power plant. It was closed a couple of years ago because of numerous equipment failures as well as design and construction flaws.

At first, its closure made us breathe a sigh of relief. Now however, our concern has risen again because levels of security and emergency planning for the decommissioned plant have been allowed to be reduced. And, finally, nuclear waste materials are being stored on the closed site – which is right on the Pacific Ocean and thus an obvious candidate for becoming the victim of storms and tsunamis.

(Why nuclear material is being allowed to be stored in this location is a question to be raised in another post. If you recognize this story as relating to San Onofre, in southern California, and it interests you, read more at: http://www.ocregister.com/articles/nuclear-658213-edison-waste.html)

3. Landfill threatened by fire

You may not have a nuclear power plant nearby, but consider this horror story that came out just last week.

According to St. Louis County (MO) officials, an underground fire at a landfill – a fire that has been burning for 5 years – is now within 1,000 feet of a nuclear waste dump.

Clouds of smoke have already polluted the region. Now it looks as though the fire will reach the decades-old dump filled with nuclear waste from government projects (like the Manhattan Project!) and weapons manufacturing — creating a radioactive smoke plume.

This entire situation became headline news in October when the school district sent out a letter to parents advising them that the school had “an evacuation plan for students” for when the fire reaches the landfill. Apparently, no plans for stopping the fire.

(Again, get more on this story at:  http://thefreethoughtproject.com/st-louis-preparing-nuclear-disaster-landfill-fire-nears-radioactive-waste-site/)

Could you use a Geiger Counter?

If you find yourself in any of these situations, or in similar ones, understanding your exposure to radioactive material may be prudent. If you travel to Japan, or if you are concerned about radiation levels in the food you eat, a Geiger counter could provide you with peace of mind.

In any case, here are two pieces of equipment to consider:

SOEKS 01M Plus Generation 2 Geiger Counter Radiation Detector Dosimeter (NEW Model replaces SOEKS 01M)

GCA-07W Professional Geiger Counter Nuclear Radiation Detection Monitor with Digital Meter and External Wand Probe – NRC Certification Ready- 0.001 mR/hr Resolution — 1000 mR/hr Range

There are less expensive options, including . . .

Smart Geiger Counter Nuclear Radiation Dosimeter “X-Ray” and “Gamma” Detector Smartphone Android iOS with App

The cost for the Smart Lab app (less than $35 when we wrote this) is a no-brainer for people who live and/or work in areas of moderate risk, or for people who just want a backup unit to carry on the road.

We are considering purchasing one of these for testing in our CERT program and, if they work as well as advertised we’ll probably purchase a half dozen for our Special Teams. As for the more expensive instruments, we recommend that you review all of the listed makes and make your decision based on your perceived level of risk and your own personal comfort zone.

UPDATE as of 10/25/2015: When we inquired regarding battery life, we received this email from John at Images Scientific Instruments, Inc., the distributor of the GCA-07W model shown above:

The 9V battery is not rechargeable. You can expect 10-12 hours of Geiger Counter usage per battery. Your battery lifetime time may vary. To extend battery life keep the LCD backlight off. 

The Geiger counter has an external wall transformer power supply for extended monitoring.

Final Note:  If you plan to volunteer as an Investigator with MUFON (Mutual UFO Network) to check out UFO sightings and test for radiation at reported landing sites, you will be required to provide your own Geiger counter. In this case, you will probably want the most sensitive unit  that fits your budget. (!)

Joe Krueger
Your Emergency Plan Guide Team

An earlier Advisory describes other safety concerns and radiation-related items for your survival kit.  Read it here.


First-time Driver Needs More Than Seat-time

Share

Our 16-year-old granddaughter got her first car just a week ago and is nervously practicing her driving. While Joe helps her master reverse gear (one of his favorites), I am putting together an emergency kit for her. Considering her skill and experience level, it needs to be different from the usual “commuter car kit.”

Key features of Emergency Car Kit: simple and unobtrusive.

Emergency kit for new driver

Assembling the kit for my granddaughter

Our driver’s parents have always had quite new cars, so I doubt she has ever experienced a breakdown or flat tire in the light of day, much less at night! And what if she’s driving when the anticipated earthquake hits, or El Niño (also anticipated) leaves her stranded?

So, first comes the lecture about getting the car to a safe place. Then there’s the phone call to parents and/or AAA or other emergency contact.

Now for the wait for help to arrive.

Here’s where the emergency kit comes in.

So far, I have assembled these 8 simple items, with one not yet decided on.

As always, where it makes sense I am including links to typical products — and usually products that I have bought myself — at Amazon.  Yes, I may get a small commission if you buy through the link. Of course, your price isn’t affected — and if you want to shop more, just use the link to get you to the right departments.

1. Orange Safety Triangles.  If you shop for these, you’ll discover than many come packed individually. Honestly, I don’t think one triangle serves ANY purpose for an inexperienced driver, who will tend to set the triangle too close to the rear of the disabled car. So, while Orion seems to be the leader in this category, I recommend this pack from Deflecto. It has three triangles in a carrying case: Deflecto Early Warning Road Safety Triangle Kit, Reflective, 3-Pack (73-0711-00)

(I would recommend flares for an adult, but they are not simple to light and require THOUGHTFUL decision-making before deciding where to put them. I will be writing about that in another post.)

2. Flashlights. Every car should have more than one flashlight, with extra batteries stored separately. I will have to test my granddaughter to see if she can put batteries in correctly!  (She normally uses her phone as a temporary flashlight . . .)

From a safety/visibility standpoint, inexpensive LED lights seem OK, although a better-quality light (at least 400 lumens) is preferable. This is one of our favorites: Duracell Durabeam Ultra High Intensity Tactical- 500 Lumen Flashlight 2-Pack with 6 C Batteries

3. First Aid Kit.  We have written extensively about first aid kits (See links to other posts, below.) ALL inexpensive pre-built kits are lacking – get the best one you can, then go through it and add more bandages, first-aid cream, moist wipes, etc.

4. Gloves.  She may not wear work gloves very often, and perhaps never has! But in a real emergency, protecting your hands is easy and essential. I prefer leather gloves to the rough fabric ones, and I like these because they adjust to the size of the wrist: Custom Leathercraft 2055M Split Cowhide Work Gloves, Medium

5. Emergency Radio. In the case of an earthquake, storm or other widespread emergency, your driver will need to find out what’s going on  — and cellphones may not work. Our favorite battery-operated emergency radio is the Ambient Weather radio: Ambient Weather WR-090 Emergency Pocket AM/FM/WB Weather Alert Radio with Digital Tuner and Flashlight

And since our granddaughter is pretty enterprising, I might consider the Weather’s larger cousin that operates via batteries, solar or crank: Ambient Weather WR-111B Emergency Solar Hand Crank AM/FM/NOAA Digital Radio, Flashlight, Cell Phone Charger with NOAA Certified Weather Alert & Cables

6. Blanket. My granddaughter seems to have several nice throws associated with various sports teams. If you don’t have any, or think your driver would like a new one, they are relatively inexpensive and easily packable. Here’s a link to where you can pick a fleece of exactly the right color!Super Soft Cozy Fleece Throw Blanket – 50×60 Fleece Blanket (Assorted Colors)

7. Water. Again, my granddaughter has plenty of plastic water bottles, and she can pick out the best one for her kit. However, I would recommend, as an emergency item, a bottle with a filter since we don’t know how long this water will remain untouched and unrefreshed. See the link below to our recent review of water bottle with filters.

8. Food. Teenagers seem to subsist on all kinds of snacks, so check with your driver to find the best combination of energy bars, dried fruit and candy for emergency food supplies. No use putting stuff in the kit that they won’t like or won’t touch.

9. Personal Safety. My granddaughter is tall, athletic and capable. I will discuss with her and her parents whether it makes sense to include any pepper spray in her kit (and it requires written permission). Waiting in the dark could be scary and dangerous; it may give her an added sense of security: SABRE RED Pepper Spray – Police Strength – Compact, Pink Case with Quick Release Key Ring (Max Protection – 25 shots, up to 5X’s more)

What to put everything in? Something unobtrusive.

All my teenaged friends seem to carry a variety of backpacks for school, sports, or just for hanging about. So, for the car emergency kit I selected a simple, inexpensive backpack that will attract no notice on the floor in the backseat or rear compartment.

Next step: Present the kit, take everything out, talk about how and when to use it, and have her repack it.

It will be a fun family activity, one I’m looking forward to!

Virginia
Your Emergency Plan Guide Team

Here are other posts with more info about emergency kits:


Security, Safety at Home with Exterior Lighting

Share

Suddenly, it’s October, and . . .

Getting darker much earlier.

Have you noticed?

Solar lights

Controls for motion-activated light

Our streetlights give the minimum legal light as part of our city’s attempt to lessen urban light pollution. That’s fine – but when I come home at night, I want to see the porch steps!  And, I don’t want to imagine someone standing outside looking in.  So we have installed several different night lights.

Hard-wired lights

One big light on the porch stays on all night long (hardwired energy-saver bulb). It’s bright enough that anyone coming up on the porch can see to navigate the steps safely.

In the carport, at the back door, we have a hard-wired motion-activated light. It goes on when we pull in or when anyone walks by.

I like this light!  The bulbs are big and bright (although not energy efficient) and we can adjust and have adjusted everything – direction of the sensor, aim of the lights, etc. In fact, the light is so powerful that we had to restrict its “sensitivity” because it was picking up people walking their dogs on the other side of the street. (It reaches out to 70 feet.)

Battery-operated motion-activated lights

It’s not easy to drill holes and run hard wire everywhere where we want it, so we’ve also tried a variety of small, battery-operated motion-activated lights for other areas around the outside of the house. (Most of these lights have been about the size of a TV remote.)

Some of these worked well, and they were pretty inexpensive ($10-$15). Most, unfortunately, seem to need constant attention, which is a nuisance since we have to get out a ladder to adjust them or replace the batteries. I don’t feel I can recommend any of these.

Solar-powered motion-activated light

So here’s the third option – a rechargeable battery-operated light that gets its power from the sun!

There are three pieces to this light.

First, there’s the solar panel.  It’s a thin-film panel and generates electricity best in bright sunlight, but also even when light is dim or it’s cloudy. Just be sure to mount the panel, which is about 7 ½ in. wide by 6 ½ in. tall, where it won’t be shaded. (Eaves and leaves are tricky this way, and change with the seasons! Check carefully before you decide where to put the panel.) The panel is weather resistant.

Second, the panel comes with 15 ft. of connecting wire.

Third, the light itself. It is made up of the light panel at the top, with 80 LED bulbs, the battery compartment in the middle, and the sensor at the bottom. (There’s another version with 60 LEDs.) The LEDs are powered by the rechargeable battery that has been charged by the solar panel.  (The battery will have to be replaced at some point, hard to say exactly when.  Depends on how often the unit is used.)

The sensor isn’t as powerful as the one on our hard-wired light (adjusts to 30 feet) but works fine for where we want the light.

The light actually has several adjustable components: the bracket that attaches to the wall, the sensor, and on the bottom of the sensor, three control buttons.  (Shown in my photo.)

The first button sets how dark it has to be before the light will go on. The second control sets how long the light will stay on each time it is set off.  The third control adjusts the range of motion detection.  (You may want to start by setting the lighting to a dusk condition at first, so you can set the rest of the controls while you can still see!  Then, readjust to full dark.)

The light was easy for Joe to put up. (I helped by pointing out potential shade!)  We followed the instructions to fully charge the battery before using it for the first time. And so far, it’s worked just as expected.

I consider light a safety feature (for us and for guests). Having some lights that stay on and others that go on also makes the house look “busier” than it might otherwise, which can act as a deterrent to unwanted visitors.

If you could use extra lighting, here are direct links to Amazon for the two lights I’m recommending.  Note that they come in different colors, different wattage, and sometimes have bulbs included and sometimes not. But if you click on a link you’ll get to the right place.

Hard-wired motion activated: Heath-Zenith 180 Degree Motion Activated Security Light with 2-120 Watt Bulbs

Solar-powered motion activated: Sunforce 82080 80-LED Solar Motion Light

And if you have tried some of the small motion-activated lights, and found them satisfactory, please let us know by leaving a comment!

Virginia
Your Emergency Plan Guide Team


Get out now! Your Home Evacuation Plan

Share

Sample family evacuation plansStop reading right now.

Look up. Look around.

What are TWO WAYS you could get out of the room?

  • Will that window open?
  • Can you really squeeze through?
  • Can you get down outside or do you need a ladder?

Did you have to pause and consider?

I hope not!  These are answers you should know before anything happens.

In fact, everyone in your family should know the answers to these questions BEFORE an emergency happens.

Are you leaving your children defenseless?

Unless you point these exits out, your children will never think of them. In an emergency, they will likely run to try to find YOU, even if evacuating would save them.

Here’s an exercise you can do on a Saturday that will answer questions and give you all a much better sense of security.

Design your Home Evacuation Plan together.

It’s a step by step process that everyone in the family takes part in. You’ll need a pad of paper and some colored pencils. And one BIG piece of paper to assemble everything on.

Step 1.  Sketch a plan of your home.

One sketch for each floor, or, if your young children are part of the exercise, let each child sketch a separate room. Approximate sizes are fine.

Be sure all doors and windows are marked on the plan.

Combine separate pieces into one master plan. (You can redraw or even cut and paste.)

Step 2. Mark at least two exits from each room on your plan.

Plan in hand, take a walk from room to room. Mark potential exits. You may want to use two colors, one for PRIMARY and the other for SECONDARY exits. You may be able to get out, but can all the children? What about grandmother?

If you need special equipment to escape (a ladder), note that on your plan and mark where it is stored.  (Obviously, if you don’t already have the equipment, start a shopping list on a separate piece of paper! More resources below . . .)

Step 3. Note the location of special safety shut-offs for your house.

Keep touring the house. Mark where utility shut-offs are located. Does everyone know when and how to shut off the water? The gas? Again, is a special tool required, like a wrench? Note where it is stored.

Where are the electrical shut-offs? There may be more than one panel. Talk about under what conditions you would shut off the electricity.

Step 4. Where are emergency supplies kept?

In particular, note on your plan the location of fire extinguishers, flashlights and lanterns, and first aid kits.  (You can use icons if your plan is getting crowded.)

Where are your evacuation/survival kits stored?

Step 5. Last step: mark on your plan the family’s emergency meeting place — OUTSIDE of the house.

On the sample plan below, the family has designated a particular tree as the meeting place. Be sure the meeting place is far enough away from the house to keep people safe in case there’s a fire. You may want to label a second meeting place if the first one isn’t reachable, even though the second place may be off the map.

evacuationplanwoodbuffalo(Thanks to the Regional Municipality of Wood Buffalo, Alberta, Canada for this drawing.)

A few more thoughts to help drive the point home:

  • Save and review your plan from time to time, particularly if you add new rooms, new equipment, etc.
  • Take a photo of the plan and share it with other family members (or maybe even with students at a show-and-tell session at school) to see if others will be inspired to follow suit.
  • If you will be shopping for emergency equipment, you may find more info in some of our special Advisories, listed below.

Can you get this done before the month is over?? Good luck!

Virginia
Your Emergency Plan Guide team

More Resources  from Emergency Plan Guide:

Escape ladders: Your healthy 12-year-old can get down any type of ladder, but what about others in the family?  We’ve looked at many of the escape ladders and think that the  Werner, 2-story version is a good place to start your shopping. It can carry more than one person at once. Here’s the link to Amazon: Werner ESC220 Fire Escape Ladder, Two Story (Be sure to look at the “product page” and scroll through the images to get a better idea of what the ladder is like.)

Fire extinguishers: We actually experienced a kitchen fire and used the extinguisher we’d just put in place!  Read the story and learn more about the different types of extinguishers. A good all-purpose extinguisher is this one, made by Kidde: Kidde 466227 ABC Pro Multi-Purpose Dry Chemical, Commerical and Industrial Fire Extinguisher, UL Rated 1-A, 10-B:C

First aid kits: Most kits you buy are woefully lacking. But you can start with a purchased one and add your own. We held a neighborhood meeting to discuss first aid kits — read about it here — and my search on Amazon for a good starter yielded this one by AAA: AAA 4180AAA 121-Piece Road Trip First Aid Kit


Special Terrorism Report, Part Two, now available.

Share

Part Two of Joe’s Terrorism Series is now out. It focuses on workplace violence.

“How can we possibly anticipate an attack by a terrorist or by a co-worker who suddenly snaps?”

Workplace violence warning signs
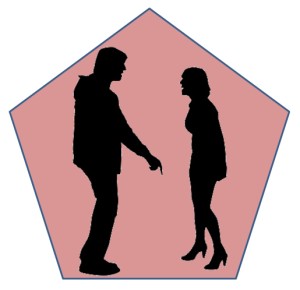
The truth is, there are warning signs for nearly all these acts of violence. When we look back, we almost always find a trail of anti-social or illogical behavior.

In the past, only law enforcement and some human resources professionals received training in identifying  these warning signs.

Today, with incidents happening more frequently, it’s time for all of us to know more.

Here’s the link to the article:

  Part Two of the Special Report  

And here are links to earlier Advisories from Emergency Plan Guide, in case you missed them.

Plus an article on workplace security: Security at the Front Door


Be aware. Take action.

Your Emergency Plan Guide Team
Joe and Virginia


More Live Shooter or Terrorist Attacks?

Share

When statistics show an increase in just about anything, we always have to question whether the numbers are higher because they truly are, or because reporting has gotten better.

In the case of live shooter or terrorist attacks, it seems that both are at play. That is, there are more incidents. And the reporting, almost instantaneous, is now “enhanced” by graphic video taken by security cameras or by people at the scene and shown over and over again on television and other media.

Here at Emergency Plan Guide, we can’t ignore this trend. In fact, the U.S. Department of Justice’s 2013 study clearly shows it.

Active Shooter EventsAccording to this FBI study, in 2000-2013 there was one live shooter event every three weeks.

How many incidents need to be added to this chart for 2014 and so far in 2015??

Special Report: Live Shooter and Terrorist Attacks

Emergency Plan Guide Co-Author Joe Krueger has written a special report on this topic. Part One, published today, is entitled:

“What are the chances of you being involved?”

Part Two will be appearing in a week or so. It will focus on Workplace Violence. With over 2 million incidents a year, this is something that many more of us run the chance of being involved in.

But that’s next week. While we wait for Part Two, please take the time to read Part One of the Special Report.

It starts with some observations about the recent heroic actions taken by the Americans on the train headed to Paris.

They were certainly inspiring, but before you think that they could easily be replicated, read Joe’s perspective on the event. (You may not realize that he was trained in counter-terrorism, and although it hasn’t been his career, that’s not information or sensitivity that you lose.)

What can you do to protect yourself?

As always, Emergency Plan Guide is looking for sensible, do-able actions we can all take to improve our chances of surviving a disaster, whether natural or man-made.

We do not advocate arming more citizens; the thought of having untrained, aggressive or worse, terrified, gun-toters anywhere near us is repugnant.

But we do believe that taking time to mentally prepare before anything happens will give you a much better chance of making the right snap decision if it becomes necessary.

To that end, the report recommends two inexpensive books that we think make sense for our readers.

Head over to Joe’s report and read it. Here’s the link again: Special Report: Live Shooter and Terrorist Attacks

Thanks.

Virginia
Your Emergency Plan Guide Team


Storing water in plastic bottles

Share
Survival water bottle

One of our favorites – find out why.

Is it safe?

“What’s that thumping noise in the back of the car? Oh, it’s that half-empty bottle of water, been in there since last week.”

I know you’re trying to be thrifty, but a half-empty plastic bottle of water is probably NOT something you want to drink from!

Not because it’s a plastic bottle, but because somebody’s lips were on it at some point and lips carry germs (probably bacteria of some sort, depending on what’s on your mouth or on your hands). Germs particularly love the threaded spout of that plastic bottle.

Give those germs a week or so to grow, in a nice warm environment, and . . . not so good!

Is there a difference in plastics?

The above paragraphs assumed a disposable plastic water bottle – the new thin kind, made of PET plastic. By being so thin, these bottles save energy (a lot less heavy to transport) and are recyclable. And they are not supposed to contain BPA, the chemical that created the concern some years ago and has been banned from baby bottles.

However, studies on water stored in PET bottles for a relatively long period of time (several weeks) at high temperatures show that chemicals from the plastic do leach into the water. Remember that the interior of your car, parked in the sun, can reach temperatures as high as 170 degrees!

In other words, pour that left-over water on a house plant, and then toss the bottle in the recycle bin.

A reusable sports bottle is a much better option.

Sports bottles designed for re-use are a much better option. They may be made of different materials — sometimes of steel or steel with a glass liner or of BPA-free plastic.  They are often very stylish, have well-designed shapes, handles and spouts, and the large-mouth ones let you add ice cubes.

Depending on the material, you may pay anywhere from $10-20 for most reusable water bottles.

Refill directly from the tap.  If you don’t like the taste or smell of your tap water, consider a filtered re-usable bottle. Filtered bottles cost very little more than un-filtered ones, but of course the filter may take up room inside the bottle.

For daily use you’ll get sweet-tasting water and probably drink more as a result!

Filtered bottles for survival have a better quality filtration system.

In an emergency, you may be filling your bottle with “questionable” water – from old supplies, from a pipe that may have been compromised, even directly from a lake or stream. In that case, you will be happy to have a high-quality filter between the water and your mouth.

New review on the sitefive different survival water bottles, each under $50.

We selected these bottles for their price (As you can imagine, there are others costing far more.) and because each has a particular feature that will help you customize your purchase.

The features you probably want to consider:

  • Size of bottle (how many ounces)
  • Quality of filter (what does it filter out, what doesn’t it)
  • How long will the filter last (how many gallons)
  • Can you get a replacement filter
  • Can you clean the filter and reuse

Last point. In every case, with every reusable water bottle, hygiene is essential.

Not all bottles are dish-washer safe (That may be something you look for.) but they can all be washed by hand with hot, soapy water, rinsed well (you can even add vinegar to the rinse water), and left to air dry. Experts suggest you clean your bottles – particularly those used by children or by people wearing lipstick or lip gloss – after every use, certainly at least once a week.

For even more info, please check out our new review: Best Personal Survival Water Bottles

Virginia
Your Emergency Plan Guide Team

Welcome to new readers!  Don’t miss any of our posts. (We call ’em Advisories.) Sign up below to have Advisories delivered to you every week.

Power Outage — Another Chance to Practice

Share

The power went out tonight at 7:16 p.m.

It was still pretty light outside, but the house was instantly, shockingly dark except for the hall, where the emergency lights glowed.

Lantern for power outage

Lantern in the bathroom

Grab flashlight from cupboard. Track down phone number for electric company. Regular phone doesn’t work, so punch through six different choices on cell phone to get recorded message: “Widespread outage. Estimated time to service restoral — one hour.”

Turn on walkie-talkie, request check-in from emergency team members.

“Division One, do you read?”

“Division Three, do you read?”

“Division Five, do you read?”

Finally, some answers trickle in. Somewhere somebody from outside our network is using the same channels, so they annoyingly insert themselves into our conversations.

Getting darker quickly, now. We pull out two of our lanterns. They work great!

A friend comes by in his new golf cart, and he and I make a circle of the neighborhood. People are leaning out on their porches, gathering in little groups on the street. Much laughter. Doug and I check the front gates: they’re open, as they should be. We meet a couple of stray people who are scrounging up and down the street for flashlights or batteries from their neighbors.

Overall, the feeling of a block party!

Full dark. The new golf cart has no lights (!) so we creep along. I have my trusty flashlight, of course, and use it to alert people that we’re approaching. As we pass house after house, Doug and I discuss people who we know have oxygen or CPAP machines, and wonder how they are coping.

We totally miss the people straggling out from the community center. As it turns out, the automatic doors there shut down tight, and the emergency bars were difficult to figure out. Fortunately, a number of the exit doors have push bars.

Back home. Another call to the utility. “Restoral in 10 minutes,” they say. We’re dubious. I pass along the latest via the radio. Streets are now empty, dim lights visible in most of them. Over the fence out on the main street, we see the flashing lights of the utility trucks and hear the workers calling to one another.

“Street lights up on our street,” comes the report from Division Four. Nothing here. Suddenly, rather like a Christmas scene, lights start popping on. Yellow street lights, red and blue TV screens, white porch lights. It’s over! Only ten minutes after they said it would be!

Such a relatively benign “emergency.”

Yet some people found it more than just an inconvenience. One woman described how it brought back shocking memories of war for her. One friend had just had surgery, and she woke suddenly to a blackout. Very frightening.

So, another day passes and we have the chance to “test” our readiness. I’m betting and trusting that everyone will be more prepared next time! How would you have fared?

Virginia
Your Emergency Plan Guide Team

P.S. We’ve talked a lot about emergency items. Here are a couple of our most popular posts:


Keeping Up With Breaking News

Share

Does Your City or Local Police Department Have a Mass Alert System?

Last month we talked about the “Lone Wolf” terrorist and the random nature of such attacks. While there is little, if anything, that authorities can do to predict or prevent these attacks, some cities are instituting a Mass Alert Notification System . . . a message distribution system to get the word out immediately when something does happen.

Basic Level

Actually, most cities have a basic telephone notification system; the most popular one is called Reverse 911®. When an emergency happens or threatens, authorities can automatically send out a recorded phone message to all or some of the phone numbers found in the database within that geographic area. If the line is busy, the phone will redial several times in an attempt to leave its message. The important limitation to Reverse 911 is that it only goes to landlines.

If you do not have a landline, or are not home or at a work number when the call goes out,
you will miss the message.

Enhanced System

Opt-in for mass messaging service iAlert

How will they reach you?

Our city has enrolled in an enhanced mass messaging system, called “iAlert.” This is an opt-in program; you go online and sign up for the service and the message comes to you three ways, depending on which options you sign up for.

First, it comes by recorded telephone call to the primary or work telephone number you provide. (This can be a landline, a VOIP line, or a cell phone number.)

You will also receive an email to the email address you give, and finally, the message comes as an SMS text message to your smart  or mobile phone. The only cost is the SMS charge is for the standard data cost imposed by your cell phone carrier when you receive a text message.

IAlert messages can also be sent to hearing-impaired receiving devices.


Useful, Targeted Messages

On more than one occasion we have received notifications of missing persons, suspected active shooter situations and alerts to fires in progress. Our CERT team has also received activation alerts.

If your local authorities provide this service, you can likely sign up for it on the city’s website. If not, you may want to inquire at your local Police Department of their interest in providing the service in the future.

Joe Krueger
Your Emergency Plan Guide Team

Gated Community Keeps People Out

Share

Gated communityWhat about First Responders?

Gated communities are more popular than ever. People seem to agree that the gates are a symbol of security and exclusivity.

That’s all well and good until there’s an emergency and suddenly the gates become not a symbol but an actual barrier to entry for residents and First Responders.

Run a quick search online and you will find, like I did, some outrageous stories of people inside their gates, waiting and waiting for help while police or the fire department waits outside — powerless to get in.  In fact, you’ll find stories of people who died, waiting.

The problem of emergency access to your gated property may never have been discussed because no emergency has ever arisen. But if you live in a gated community,  have gated parking at your workplace, or know someone who does, part of your emergency preparation is to . . .

Get the answers to these 5 questions.

  1. Mechanism. How do First Responders open your gates? Is there some sort of lockbox requiring a physical key? An electronic card reader? A punch-in-the-code pad? A remote that requires batteries? A system that responds to light or sound (siren) frequencies?
  2. Updates. If you have a key-pad, who reports updates or changes in the code to the authorities? In two of the stories I read, the management company for the community had changed. The new company changed the code. Nobody reported the changes to the local dispatch.
  3. Keys. If you have a lock-box system with a unique key, who manages the keys to your community? Does each gated community in your area have a different key, requiring First Responders to have a huge key ring? What assurance do you have that the key has not been compromised or illegally duplicated?
  4. Knox Box. A common lock-box system is called the Knox Box. (Open the box to get to a switch that opens the gate or to a key to open a gate, a home, etc.) All boxes in a local area operate off the same key. If you have a Knox Box, how do First Responders keep track of their master key? Is it floating around somewhere in the cab of the fire engine?
  5. Power outage. And the most important question of all: What happens to your gates when the power goes out? Do your gates have a fail-safe override mechanism that allows a gate that isn’t working properly to be manually pushed open so that vehicles or people are neither locked in nor locked out?

Some years ago I lived in an apartment building in Northern California that had parking under the building. I drove in through a gate that raised up when I pressed my “clicker.” When the power went off, the gate remained down. It was way too heavy to lift by hand. If I had the key to the “pedestrian gate,” I could park outside the building and get in through a locked gate near the pool. Otherwise, I was stuck standing outside on the street.

Now I live in a gated community in Southern California. (Don’t worry, I’ve lived in other states too!) Several years ago we upgraded our unmanned gates to the Click2Enter system.  Residents get a battery-powered clicker; First Responders open the gates with a click of their mobile or portable radio transceiver (which has to be programmed with specific frequencies).  First Responders enter with no noise and no fuss. (That’s our gate in the photo. You can see the blue and white Click2Enter box attached at the left side of the center column.)

When the power goes out temporarily, our gates can continue to operate on back-up battery power. (We can count on several power outages a year.) In an extended outage, the gates will open and then remain open.  (This has caused our Emergency Response Group’s security committee to make special plans to keep strangers from entering. That’s another post for a later day.) .

Since we’ve had no problems, we had no idea of what to expect until we began to dig into the issue.  I suggest you dig into the details of your own gates before something happens in your community or at your workplace. The fact that there seem to be few if any building standards for gate operation means you may come up with a surprise!

Virginia
Your Emergency Plan Guide team


 Don’t miss a single Advisory. Get them automatically in your inbox by signing up below. If you have friends who need this information, forward the email to them so they can sign up too.

What drives you to join CERT?

Share

A Thank You Is Due!

I think I know why people become survivalists: paranoia, healthy skepticism, sturdy pioneering genes. But what makes people JOIN IN WITH NEIGHBORS to prepare for emergencies?

After all, willingness to prepare to help others is really quite different from preparing to protect yourself.

So a couple of weeks ago I started a campaign to find out. I sent out a broadcast message to all the people on my Emergency Plan Guide list, and posted an inquiry on one of my groups at LinkedIn:

“What drives you to join CERT?”

I want to thank all the people who responded! And for those who saw the message but didn’t respond, I thought it would be worthwhile to share

CERT
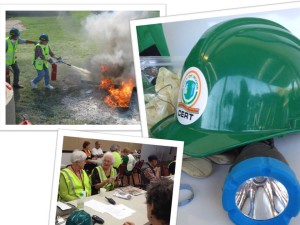
Some of the answers I got.

Here are the themes that came through. Perhaps you’ll discover some that describe why YOU are interested and active.

1. Driven/shocked into action by news coverage

One person wrote that when he saw what happened after Hurricane Katrina hit, he could no longer stand by and watch another disaster go down. Joining CERT seemed the best way he could offer up his assistance. I’ve heard the same thoughts expressed by people who watched Hurricane Sandy come  . . .and stay and stay.

2. Living the volunteer lifestyle

I heard from California, New Jersey and Virginia about people taking CERT training and continuing their support for CERT as part of a lifelong commitment to volunteerism. Every one of these people volunteers in other areas of their lives, too. And as one reader put it, “Those who give back are almost always the Good people in town.”

3. Looking for camaraderie

The teamwork that characterizes many CERT activities is missing in a lot of lives these days. Ex-military, ex-boy scout, retired sales manager — once you’ve experienced the satisfaction of leading and being part of a team, it holds a powerful attraction. CERT fits the leadership/teamwork bill.

4. Fear of not knowing what to do

Outsiders tend to link CERT only with natural disasters like earthquakes and hurricanes. What we discover is that CERT training tends to make people aware of how to respond to a whole range of emergencies:  flooded streets, active shooter events, household fires, natural gas leaks, after-disaster psychological trauma, you name it. And if you have a particular concern, you can bring it up and get unofficial advice, for sure.

5. CERT as a requirement

I heard from one person that CERT was required for a particular Boy Scouts of America certification, and from another person that his employer told him to get certified. Works for me!  (Once you have the training, you aren’t going to forget it!)

6. Attracted by the gear

CERT trainees come out of the course with some basic stuff: a bag, helmet, flashlight, vest, goggles, dust mask. Most graduates immediately begin to add to their kit: better flashlight, a multi-tool, a helmet lamp. The ultimate, of course, is having a radio. While official CERT teams are assigned radios for events, even neighborhood groups (like ours) set up entire radio networks with FRS/GMRS radios (walkie-talkies). Some people love becoming experts with the technology!

7. Make the community a better/safer place

Only some people realize that the REAL first responders are your neighbors. These people want to spread more knowledge, more awareness and more “empowerment” as a way to improve the community. (I didn’t get a scientific response, but what I did get on this topic came from young people and older people, not from “people in the middle.” Does this mean anything?)

Did you find your reason in this list?

Or are you committed to preparing for another reason altogether? Let me know!

My goal is to use this valuable information to reach more people in my own community – and perhaps you can use it to reach out to your neighbors, too. The more we can share good ideas, the safer we all will be.

Virginia
Your Emergency Plan Guide Team


Home Base – The Hub of Your Family Communications Plan

Share

In a true emergency, you may have no easy way to communicate.

Home Base Hub of Family ommunica

In a widespread or severe emergency we know that phone communications may be spotty, at best.

An earthquake may cut cables and topple cell towers. A bad storm or hurricane may not cut underground cables, but it can damage all above-ground services including electricity.

For sure, in an extended power outage, even if distant towers and/or satellites are still functioning properly, cell phones and computers will eventually run out of battery. (Yes, yes, if you have solar panels, you may be able to recharge your devices.)

Being cut off from family members is terrifying.

Naturally, you and they imagine the worst. You will be desperate to get in touch.

When local phone service is out, what’s your best course of action?

Reach out to your family’s “Home Base.”

Trying to make a local phone call, whether via landline or cell, may be impossible. However, an outbound long-distance call or text may get through!

This is why we recommend that you talk things over with your family and come up with an out-of-state person who is willing to serve as your “Home Base” – the one place that every family member knows about and tries to contact as soon as possible.

Qualifications for your “Home Base” contact.

Naturally, this needs to be a person you trust. In addition, is your Home Base contact . . .

  • Willing to answer the phone day or night?
  • Able to take down and forward complete messages from people who may be nervous or even injured?
  • Able to receive TEXT messages (cell phone) and EMAIL messages (computer) as well as phone messages?

Remember, family members may be trying to send messages themselves, or they may be asking others (Red Cross, medical personnel, school employees, colleagues, First Responders) to communicate on their behalf. Those other people may have any one of a variety of communications devices.

Your job: Know your family’s Home Base phone number.

In a true emergency, you won’t be able to check your phone contacts on your cell phone or computer. You may not have your address book.

Your children will be in this same situation.

The only thing you can count on is an emergency listing that you carry in your wallet (assuming it hasn’t been lost or ruined) or a number that you have memorized.

Protect your family!

Take the time, as a family, to discuss who your Home Base contact should be, and get their agreement. Discuss safe places you could go if you can’t go home.

Talk about the importance of confidentiality for this information.

Most important of all, make sure all family members memorize the Home Base phone number!

Virginia
Your Emergency Plan Guide Team

Texting While Driving Can Kill You. Texting Can Also Save Your Life.

Share
Texting can save your life

By now, you have heard that in an emergency, you may be able to get a text message through even when phones are down or overwhelmed.

Do you know how to send a text message?

This brief Advisory is for those parents and grand-parents who really haven’t taken the time to learn how to text, even though texting is going on all around them.

Start with a cell phone.

Just about any cell phone (with enough battery power) can send a text message to another cell phone. You don’t have to be on the same network or have the same phone company.

For this exercise, pretend your personal phone has disappeared. A kind stranger offers to let you use her phone to call your family.

Do you know the phone number of the cell phone you want to send the text to?

This isn’t your phone, so you have no numbers stored. Your emergency number has to be a number you know by heart or have written down!

First choice: the number of your emergency, out-of-town contact person, your “Home Base.” (More on that, below.)

Prepare the message.

  • Find the “messages” icon on the phone. It may look like the blue square or the green bubble on the image above. Tap it. (If you are really interested in the difference between the blue square and the green bubble, you can find out more here. I find it confusing!)
  • What comes up next will depend. What you’re looking for is a little square with a pencil in it – that’s the “write” icon. Tap that icon to bring up the message screen.
  • In the “To” area, type the phone number including area code. (You can toggle between ABC and 123 to get the keys you need.) No need for any punctuation.
  • In the “Message” area, type your message. Be sure you say WHO you are (It’s not your phone, remember?), WHERE you are, HOW you are, and how you can be reached. Limit your text to 160 characters. (To erase, hit the back arrow.)

Send the message.

Hit the “send” button. You’ve done it! Most phones will tell you that the message has been “delivered.”

Of course, there are all kinds of clever twists and turns to texting, but you don’t need any of them now. You just want to be able to send a simple message!

My recommendation? Find a friend (child? grandchild?) who texts often and get him to send a few back and forth with you, so you become comfortable with how it all works.

You may find out, like I did, that it’s fun and convenient! No texting while driving, though . . .

Virginia
Your Emergency Plan Guide Team

P.S. Remember that “Home Base” comment, above?

Family Communications Plan

If you didn’t immediately know what number to call, you need our new Emergency Plan Guide worksheet, called Family Communications Plan. It’s 2 simple pages that explain the Home Base concept, and give you a place to fill in the blanks. 

Urban Survival Tools to Get a Fire Going!

Share

OK, the big danger is over. But the rain is running down your neck. Your fingers are feeling frozen. It’s getting dark very fast. What you desperately need right now is a fire!

MatchbookDo you have what you need?

Two necessities for starting a fire: an igniter and something to ignite.

I grew up in a kitchen that always had a big box of wooden matches above the stove. And my Dad always had a lighter in his pocket. Times have changed!

The only matches we have now is a jar full of souvenir paper match books from restaurants, and we all stopped smoking years ago. So I’ve had to make sure I have fire starters for emergencies.

Igniters I’ve assembled for my survival kit.

It’s so easy top tuck some of these small items into your go-bag, your survival pack, your evacuation pack. And I’d suggest you carry more than one, in case your pack gets wet or damaged. NOTE: If you shop at Amazon by clicking these links, be sure to notice whether the items are “add-on” or “eligible for Prime” and buy enough of them at once so you get free shipping. You’ll want multiples of nearly everything, so free shipping won’t be hard to get!

  • Waterproof matches are the simplest, the most obvious, and the cheapest of all to purchase. You can get them in wax coated boxes, or in neat little aluminum cases. An example: Coghlan’s 940BP Waterproof Matches – 4 Pack This is a four pack, one for each survival kit in the family!
  • Magnesium sticks won’t get damp, and won’t  accidentally light.  In fact, you need to practice using your stick to be confident you can get a fire started when you need it! The trick is to use that attached little saw blade to carve a pile of magnesium shavings (at least the size of a penny) and then stroke down the stick toward the shaving pile. (Don’t STRIKE the stick; that won’t work.) The Friendly Swede Magnesium Alloy Emergency Fire Starter Blocks (3 Pack), New and Improved Version gives you three blocks so you can practice without worrying that you’ll run out of magnesium.
  • Zippo lighter looks sharp (!) and will be familiar to former smokers. It feels good in my hand, too. Zippo Emergency Fire Starter, Black Matte also comes with pre-fashioned tinder sticks. Read on for more about tinder.
  • Magnifying glass would be a favorite  for me. I remember as a child burning holes with a magnifying glass in all kinds of things! Today I could use it to read instruction sheets written in miniature print . . . but of course, it’s not going to work in the rain for starting a fire!

Tinder for the survival kit.

You’ll be excited to see that spark from the igniter, but you’ll get mighty discouraged if it doesn’t “catch.” Here’s where tinder comes in. Tinder is specially prepared very flammable material that will get the fire truly started. You may have used crumpled newspaper or leaves or twigs in the past — but remember, we find ourselves in a WET URBAN SETTING for this blog post. So, what can we prepare in advance to be sure our fire will start?

  • Petroleum jelly and cotton balls (carried in an empty plastic medicine bottle). You may already have the ingredients for these clever items: cotton balls (NOT polyester) and Vaseline. Simply pull cotton balls apart a bit,  smear them with the petroleum jelly, scrunch back up. (Get everything ready in advance, and pull all the cotton first, because once you get the jelly on your fingers they’ll be sticky, sticky!) Here is one brand to give you an idea. Prepping Cotton Ball by Kendall ( COTTON BALL, PREPPING, MEDIUM, NS, 500/BG ) 500 Each / Bag
  • Alcohol wipes also work well as tinder, and you should already have some in your first aid kit!  If you don’t, buy a pack now and separate some out for first aid, and keep some for starting fires. Curad Alcohol Swabs Antiseptic Wipes, 200 Count
  • Waxed paper can be purchased at the grocery store if you don’t have any already in the kitchen. Cut a smallish piece from the roll, fold it over a couple of times, then fold back and forth until it makes an M shape, maybe about 2 inches across. Place the points of the M on top of your igniter material.  Tuck a few of these Ms into your pack and you’ll have tinder!
  • Dried and shredded bark, moss or fluff from cattails can also serve as tinder, but you’ll have to collect it next time you go for a walk in the park, bring it home and stuff it, making sure it’s totally dry, into those plastic medicine bottles that you can then put into your kit! In the city, in the rain, you may not be able to find any natural material to work as tinder.
  • Twine made of natural fibers may also work. Simply untwist it so get a good burning area.

And to keep the fire going: kindling and fuel.

Actually, gathering kindling (small pieces of wood and twigs) and larger pieces of fuel should be step number one, because if you START the tinder and don’t have adequate fuel right there,  the tinder will burn up and you’ll be back where you started. Some people carry dry kindling as part of their kit, but more than likely you’ll be scrounging in your immediate neighborhood for the right material to burn.  Some guidelines:

  • Pick a safe place for your fire. You can make a hearth of stones or concrete to be sure the fire doesn’t spread unexpectedly.
  • Dry sticks, splinters of wood and pine needles can serve as kindling. Have your kindling nearby so you don’t have to get up to fetch it.
  • Once the kindling is burning, add larger pieces of fuel. Wood is obviously the best fuel, but if you’re looking for wood in construction rubble, avoid treated or painted wood and wood look-alikes that are really vinyl.
  • Do not burn items made of rubber or plastic ( bottles, jugs, bags). Although they will burn, you will be creating noxious or dangerous fumes.

We’ve assumed here that your fire is for warmth and comfort.  Cooking over a fire is yet another subject. In the meanwhile, though, go back through this quick list and be sure you have emergency fire starters. As I said at the beginning, all these items are small and inexpensive, so there’s no reason not to have what you need. Your family will be counting on you!

Virginia
Your Emergency Plan Guide Team