Tag: first aid kit

Emergency Kit for School

Share
Emergency kit for school
Any emergency supplies in that backpack?

Is your child missing an emergency kit for school?

The first time I did research for this Advisory, I was shocked to read comments like this:

“Wow, an emergency kit for school. What a good idea! I just thought the school would be taking care of this!”

These were comments from people reading articles online!  What about all the other parents who don’t have time to spend online?!

First things first. What emergency supplies does your school store?

A year or so ago I attended a training put on by the Earthquake Country Alliance, and sat next to a woman who works with schools. She told me about a school that called to ask her to inventory their emergency supplies shed. “How long has it been since you checked it?” she asked.  The answer was, “Uhhhh…”

When she opened the shed she discovered what she called “a hazmat situation.” The shed had leaked and everything inside was completely spoiled and contaminated!

That story should encourage you, when you go to your Back to School night, to ask not only what supplies are kept at school but also how often they are refreshed.

Next, what emergency supplies does the school want children to bring? Are they adequate?

In some schools in our area, each child is required to bring an “emergency kit for school” at the start of the school year. Reading the instructions closely, I discovered that the kit is to consist of a quart-sized resealable plastic bag with the child’s and teacher’s name on the outside, some snacks, and a personal note from the parent to the child.

This “kit” would sustain the kids I know for about 15 minutes.

Here’s another list from a school district in the mid west: ”A little food, some water, a space blanket or large plastic trash bag, a non-toxic light stick and a letter or photograph from home.”

As a parent, you need to find out about “required kits” at your school. The questions to ask:

  • What goes in the kits?
  • How are they stored?
  • What about kids whose parents send nothing at all?

Third, what sort of PERSONAL emergency supplies make sense for YOUR child?

Here at Emergency Plan Guide we talk about survival kits frequently, so none of this should be new or different. In this section we’re not talking about the “required kit” that the school wants to collect and hold. Here, we’re talking about emergency supplies specifically for your child. A few things to consider:

  1. Your child may need access to emergency supplies at any time! An emergency could happen on the way to school, or on the way home, not just while the child is in class. So, the best place to have supplies is in the kid’s bookbag or backpack.
  2. Of course, this kit is meant for emergencies only. It’s not to be shared or talked about at recess. This means the kit has to be separated from the rest of the stuff in the bag.
  3. Every kid’s personal emergency kit will be different. Your first-grader just won’t need or want the same stuff that your 6th-grader wants! And, of course, that kit’s contents will have to change regularly.

Some suggestions from parents for customizing an emergency kit for school.

The kit needs its own pocket.

Pick a backpack or book bag or rolling cart with a zippered pocket for the emergency kit.  A bottom pocket would work, as well as an outside pocket of the right size.  You’ll have to shop for the right backpack based on your your kid’s size, sex and whatever is in fashion at the school! 

An older child may like a “tactical” bag with mesh and lots of pockets – as long as it has one pocket for the survival kit.

Find a sensible container for the personal emergency kit.

Depending on the size of your kid’s backpack, you will very likely be able to find an individual zippered toiletries bag or one in a set of organizers that will fit perfectly in the pocket or on the bottom of the bag. You might want to use a clear bag (meant for travelers) and a couple of sets of compressible “packing cubes.” If you’re packing a jacket or other emergency wear, being able to compress it would be a great space saver. ( Here’s the link to an Advisory with some handy packing tips and organizers.)

You may even be able to pack supplies in a tin box that will fit in a particular pocket.

In any case, the idea is to avoid your child having to paw past the kit to get to books and papers, etc.

What goes into the personal emergency kit for school?

If the student carries the bag every day, it can’t be too heavy. (That’s why a rolling cart is a good idea!) Still, the kit should include items from this list:

  • Food – energy bars, non-perishable snacks. Hard candies. Get some protein bars and not just carbs!
  • Water – if your child carries a water bottle every day anyway, that may suffice. Otherwise, consider packets of water.
  • Warmth – Poncho, space blanket, extra jacket. Maybe hand warmers.
  • Light – Pen with light; light stick.
  • Emergency whistle – good quality. Cheap plastic whistles are hard to blow and may not give the sound quality your child needs.
  • First aid items – Most children won’t be able to use a full first aid kit, but they certainly know and love band aids and maybe anti-bacterial cream.
  • Face mask for emergency use.
  • Wet wipes individually packaged.
  • ID card with emergency contacts and family photo – protected from getting wet.
  • Emergency phone if allowed and if the kid knows how to use it.
  • Small toy, book or comfort item.

Warning: The emergency kit for school is NOT the place for medicines or drugs. Most schools have strict rules about how student prescriptions are to be handled. Be sure you find out about those rules.

Suggestions for parents whose kids walk home alone . . .

Phone Wristwatch.

The minute school lets out I have two young neighbor children who immediately call their parents using a phone wristwatch. Children aren’t allowed to have phones at school, but the watches are allowed. I’ve interviewed the parents, who REALLY like being able to check in via voice and talk with the kids as they head to their after-school care locations. Questions to have in mind:

  1. Is the wristwatch phone limited to a particular carrier?
  2. Can you connect the wristwatch phone via app to YOUR phone? (iOS or Android)
  3. Does it monitor the child’s location via GPS? Can you set limits and get an alert when the child goes out of area?
  4. How many phone numbers can be programmed into the wristwatch phone?
  5. What sort of access to the internet (games!) is available through the phone?

The phone below is a good example. I was attracted because this phone limits calls to 10 known friends or family, and blocks all others. It also can block calls during class time. Naturally, I was looking for different colors, too! Click on the image or the link to check out all the details at Amazon.

Cosmo JrTrack 1 Kids Smartwatch | Pink | Voice & Video Call | GPS Tracker | SOS Alerts | Water Resistant | Blocks Unknown Numbers | SIM Card Included | Class Mode | Perfect for Back to School

Welcome-home doorbell Camera

By now we’ll all seen the home security cameras that can alert you when your kid steps through the front door. Again, parents whose kids arrive home to an empty house are really comforted by this technology. Of course, you’d want to get the kind that allows for two-way conversation.

We’ve written many times about front door security. New models are coming online all the time. The Ring model shown below does what I was looking for for parents wanting to know their child is home safely after school.

Ring Video Doorbell – newest generation, 2020 release – 1080p HD video, improved motion detection, easy installation – Satin Nickel

Special needs kid?

If you have a special needs kid, please take a look at my recent Advisory that describes a particularly powerful tracker for kids who need close supervision.

Let me know of other suggestions you have for items for kids, or what your school requires. I’d like to include that research next time!

Virginia
Your Emergency Plan Guide Team

Welcome to new readers! If you’d like more on the topic of kids and school, you may want to check out this Advisory with Preparedness Questions for Back to School.

Spring Cleaning for Preppers

Share
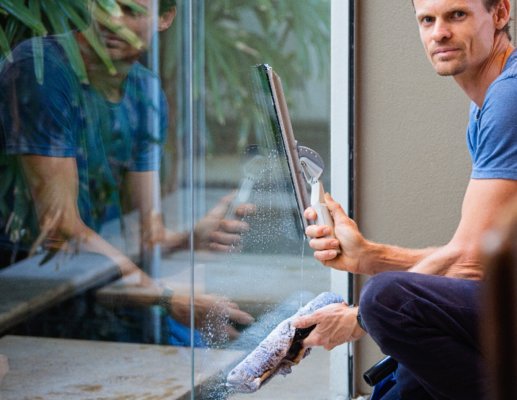
Spring cleaning means washing windows

If you are a dedicated spring cleaner, you’ve already taken care of the windows. You may have done some spring cleaning in closets or in the garage, too. And when the time changed a few weeks ago, you undoubtedly checked the batteries in the smoke alarms. (You did, didn’t you?)

With summer coming up quickly, it will be easy to get caught up in end-of-school parties, vacation plans, etc. In the midst of that, your spring cleaning may get interrupted, along with some of your good preparedness habits.

Here are a few quick reminders for your family and your neighborhood team. Click on the images to get more details on these items from Amazon.

Walkie-talkie spring cleaning.

Yesterday we picked up my daughter at the airport. While Joe circled, I hopped out with a walkie-talkie so we could keep in touch. This is one of the most convenient uses for these hand-held radios!  No dialing, no busy signals, no dropping of the signal. Just push to talk: “OK, I see her! “OK, we’re at gate 3, right at the crosswalk.”

But the walkie-talkies have to have good batteries! Actually, we have added walkie-talkie battery replacement to our twice-a-year Daylight Savings Time checklist.

Last week we also added 10 more walkie-talkies to our supply for our neighborhood group Block Captains. The Uniden model continues to be our favorite, and prices haven’t gone up much at all. Here’s the model we buy – less than $25 for a set of 2:

Uniden GMR1635-2 Up to 16-Mile Range, FRS Two-Way Radio Walkie Talkies, 22 Channels with Channel Scan, Battery Strength Meter, Roger Beep, Call Tone, Keypad Lock, Black Color

If you are building your emergency team, or are planning family outings that will involve keeping track of each other in crowds (like a theme park) or in the woods, consider Walkie-talkies for your own family use. For short-distance communications they really can’t be beat.

Spruce up safety clothing.

Some clothing items seem to find their way into dark corners and onto the floor of the trunk of the car. I’m referring to sweatshirts, gloves, hats, etc.

With summer coming, it’s time to clean out and be ready for warmer weather. But don’t forget the safety gear that you KEEP in the car.

For example, we have found that having colored shirts and/or reflective vests are smart additions to our usual car survival kits.

  • Heading for Disneyland? If everyone in the family — Mom, Dad, Grandpa, Kid 1, Kid 2, Kid 3, etc.! — is wearing the same bright-colored T-shirt you will be a lot easier to spot!
  • Being on the street in the dark next to a disabled car is terribly dangerous! A reflective vest becomes an important safety item on the street and a reassurance in a campground at night.

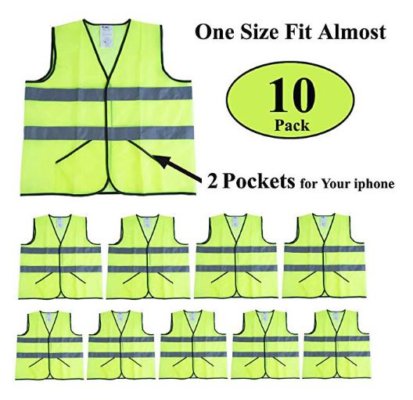
Last week when we put in our order for more walkie-talkies for our team we also bought 10 more reflective vests for our neighborhood group Block Captains. They are amazingly modest in price!  (It’s not like we are wearing these every day, so they don’t need to be top of the line.) I chose these because they have pockets, and the package came with an extra vest in child-size!

Click on the link below the imageto get full details.

CIMC Yellow Reflective Safety Vest with Pockets, 10 Pack, Bright Construction Vest with Reflective Strips,Made from Breathable and Neon Yellow Mesh Fabric,High Visibility Vest for Working Outdoor

Battery replacement.

How many flashlights and emergency radios do you actually have, when you add up all the ones in the cars and in the house?

Guess what, they probably all use batteries! And have you noticed the rule that says batteries will whimper and die just when you really need them?

So, the competent Prepper adds a flashlight check and battery replacement exercise to the spring cleaning list.

Over the years we have tested and tested different batteries. The best ones one year seem to lose place to another manufacturer the next year. So we simple buy batteries on a regular basis.

Again, you probably need different sizes. Here’s a convenient pack with the AA and AAA sizes most common for our flashlights and walkie-talkies. Click on the image for exact pricing.

You may want to separate batteries and put a set of extra ones – of the right size – in a plastic baggy that you store alongside the item they belong with. When the power is out you can’t be searching through your battery box . . .!

Here’s an image of one of our flashlights. Note the green batteries in the holder which will be replaced with the gold ones stored in the bag.

Replace batteries with right-sized batteries stored in plastic bag
Always replace all batteries when you replace one.

Car survival kit spring cleaning.

We’ve spent time before on everything to consider for the survival kits you carry in your car.

For spring cleaning, it may be enough to simply refresh.

  • Go through your first aid kits and replace old bandages, anything that has cracked or gotten wet. Recycle old medicines and put in new ones. Add anything you’ll need for summer, including sunscreen and dark glasses.
  • Replace all your snack food with new packages. Canned stuff may last a while longer, but why not eat it up now and put new things in its place?
  • Remove kids’ items that they have outgrown, and replace with more appropriate things – we’re talking games, toys, etc.
  • Consider adding a new battery-charger for your devices. As we’ve written before, the “power packs” store enough to charge your phone more than once. (Scroll to the P.S. in that Advisory for an example of a popular power pack.) And solar-powered chargers are now ubiquitous. Both make good gifts, too.

Communications update.

Do all family members have updated phone numbers? Do all response team members have updated phone numbers for their neighbors? Now’s a good time to refresh this info.

And test family members’ memory. Can they recite the phone number of your out-of-town contact?  (Make it a contest as you are driving to that vacation spot. . .)

Insurance review.

We see so many ads on TV about saving money by switching auto insurance. Maybe you have switched, and actually saved money!

When it comes to other insurances, it’s important to shop and compare, too. Given the past couple of years’ dramatic storms, fires and floods, you may discover that the coverage you thought you had has changed, or is going up in cost. Or maybe you thought you were covered and you haven’t been covered at all! Or you are now required to have coverage that you didn’t have to have when you bought your house years ago!

Check out these Advisories for important questions to have ready when you talk with your insurance agent.

OK, this Spring Cleaning review could actually take some time. You probably can’t do it all in one week.

But every item you check off the list means you are in better shape to avoid an inconvenience, not to mention an emergency.

Good luck!

Virginia
Your Emergency Plan Guide team


Automatic Survival Habits

Share
Automatic survival habit - looking for exits at the theater

How would you rate your everyday survival habits?

It’s such fun to get caught up in whether your next knife should be full tang or folding, or maybe assisted folding. Whether you need a sleeping bag that has synthetic insulation or goose down. Whether to buy last year’s model hand-held radio (to save a lot) or splurge on the very latest version.

These are fun decisions and here at Emergency Plan Guide we engage with them just like you do.

But these decisions are one-time. What we want to talk about today are:

Simple survival habits as second nature.

As you know, we are part of a neighborhood emergency preparedness group. A lot of what we do is aimed at getting other neighbors to take even their FIRST step toward preparedness!

Actually, we work on at least a dozen survival habits, trying to turn them into second nature to improve the readiness and resilience of the whole community.

Below is a recent list of survival habits we’re trying to instill in everyone around us. As you look through the list, ask yourself.

  • How well do you measure up?
  • What steps would you add for your neighborhood group?
  • How will you share the list with them?

20 Easy and Smart Automatic Survival Habits

1 – Heading to the grocery store? Buy just one or two extra cans of food for your emergency supplies. You don’t have to stockpile everything all at once!

2 – Adding to your emergency food supplies? Be sure to get things you like and eat regularly. That way, you can eat from the front of the shelf and replace at the back.

3 – Building a better emergency kit for your car? You may be able to get a used backpack or tote bag at Goodwill – cheap, serviceable, and unnoticeable.

4 – Keep your car half full of gas all the time. (I keep mine 3/4 full!) Nothing worse than being caught in a traffic jam, watching that gas gauge go down and down!

5 – Keep your car locked when it’s parked, even at home. An unlocked car is an invitation a passerby might not be able to resist.

6 – Whenever you go into a building – theater, store, school – get in the habit of noting the location of other exits. In an emergency you may want to avoid the way you came in. This survival habit may save your life in an active shooter situation.

7 – Update the emergency info on your refrigerator at least twice a year, when the time changes. Have there been changes in your medications? The phone numbers of your emergency contacts?

8 – Don’t have the Vial of Life info on your refrigerator? Here’s what we did with our group.

9 – Need help? Can’t call loudly enough to be heard outside your home? Consider adding a simple whistle to your key ring or someplace else where you can reach it in an emergency.

10 – Flying? Keep your shoes on for the first 3 minutes after take-off. That’s the most dangerous time, and if you have to evacuate you don’t want to do it bare-footed!

11 – Teach your grandchildren their first name and last name. Absolutely necessary if they get separated from their parents.

12 – When you’re planning for emergencies, start your planning with the most likely emergencies, not the most severe. For most people, the most likely emergency is a power outage. Not too hard to plan for! All you need right away is emergency lighting and a way to keep warm.

13 – Heat wave and no A/C? Don’t try to tough it out! Put up shades to block the sun coming in the windows. Take a cold bath. Drape yourself with wet washcloths and towels.

14 – Power out during cold weather? Pick a small room, hang or tape blankets over the windows and door, get into bed with blankets.

15 – Best emergency lighting? Inflatable solar lanterns and/or battery-powered lanterns. It should go without saying that you have a flashlight in every room, with extra batteries handy.

16 – After a couple of days of eating out of cans, you’ll really appreciate having condiments to spruce up the taste! When you are out, collect packets of BBQ sauce, honey, jelly, soy sauce, ketchup, syrup, etc. for your emergency food stash.

17 – Canned meat may not taste so good, but it will give you the same protein as fresh meat – and will last for years. Add canned chicken, tuna in oil, and spam to your supplies.

18 – Don’t forget to refresh your first aid kit. Throw out dried up bottles or anything that’s gotten wet. You may want to add liquid skin as a new way to treat scrapes and cuts.

19 – Be sure to store an old pair of shoes, comfortable for walking, in your car. Heels or flip-flops won’t work if you have to hike for help!

20 – If you haven’t done it yet, freeze some plastic containers filled with water. (Leave space at the top for the water to expand.) Use the containers to keep your freezer fully packed. Saves energy when you have electricity, provides emergency water when you don’t!

Do all these ideas sound familiar?

Have you taken any of these steps and/or practiced them more than once? Have they become automatic survival habits?

I hope the answer is yes!

Virginia
Your Emergency Plan Guide team

P.S. Here’s something that you may find it interesting in light of the things we’ve talked about lately.

It turns out that Amazon (where we are Associates) has a service called PRIME PANTRY where you can buy everyday first aid, household, cereals, packaged items, etc. – what they call “everyday essentials” – and have them delivered for free. You don’t have to buy huge quantities, either.

Click on the ad to find out more. This may be a convenient way for your group to stock up on some of the things you want for your survival kits.


Specialty First Aid Kit

Share

Are you ready for these unusual threats?

First Aid for Everyday Emergencies

Before we get to our specialty first aid kit discussion, here are a couple of safety rules to live by:


Do not allow a large knife to fall handle first into the garbage disposal while the disposal is running.

What you will discover, if all the stars are aligned, is that that knife will fly out of the disposal and scythe its way through the kitchen, slicing anybody in its path.

In our case, the person in the way was Joe. Specifically, the back of his right hand. (Do not ask for more details.)

And here’s another rule based on personal experience plus a LinkedIn post I read earlier this week:


Assume that, as you set up for an important business presentation, the hinge of a piece of equipment will strike back, gouging a nice chunk out of a finger.

Not exactly everyday accidents, but not unheard of, either! Certainly, breaking the first rule, and then reading about the second rule, made us rethink our own first aid kits — and consider at least one specialty first aid kit as our next project.

Have you considered the state of your own first aid kits?

Where are they?

If you are at home when the wayward knife strikes, your first aid kit is probably in the bathroom. So before you head there to get it, you grab a clean dish towel or a handful of paper towels, and tell the injured person to “apply pressure” to keep more blood off the floor.

If you are in the conference room of a client when the equipment attacks, you may have NO first aid kit handy!

 You certainly don’t have a dish towel and probably don’t have paper towels, either!  (Maybe there will be some napkins over on the table with the coffee.) You grip your bleeding hand with the other hand, getting both of them covered with blood.

Now, if you’ve been through a CERT course, you may have a first aid kit in your car, which is about 2 blocks away in a parking structure. In this case, 2 blocks away is too far away!

How about adding a specialty first aid kit?

Since experts seem to agree that the kitchen and the bathroom are the two most dangerous rooms in the house, why not have kits in each room?

A kitchen kit

In the kitchen, cuts and burns are probably your most likely emergencies.  Your kitchen kit has to have the necessary to respond for all sizes of each.

In our case, a simple band aid wasn’t adequate for the cut on Joe’s hand. And the cut seemed too deep for that handy liquid skin.  We needed to stop the bleeding and close the cut. So, we used folded gauze and several strips of tape, cut to fit. (Which means we had to have scissors, too.)

So, our new kitchen kit will include all those, plus band aids and burn spray.

Traveling kit for business meetings

Our event planning list always has a tool box (for larger events) and a first aid kit. But that’s when we expected a team to be in action.

Now even our smaller meetings – at least, those with presentations! – will contain a specialty first aid kit for pinches, gouges and scrapes! It needs to be small enough to fit into a tote or briefcase.

I picture a ziploc bag with essentials: gauze, tape, band aids, antiseptic cream.  And from the LinkedIn post that I mentioned, this great idea: a RED washcloth to absorb and/or wipe up blood and make it less noticeable!

Your “master” first aid kit — that one in the bathroom — can have dozens of items, depending on your location, your skill level, etc. The list below has suggestions for one of the simpler specialty first aid kits described here.

What do you need for YOUR kits?

Of course, by now you may have thought of a specialty first aid kit that YOU need – like for the kids’ sporting events, or for the woodshop, etc. Each kit might need other items, but you can start with the list below, and have them assembled and IN PLACE with little delay. Click on the image to go to Amazon where you’ll find other styles and sizes.

1-A selection of band aids. These are fabric, which I think holds better than paper.

2-Liquid skin is great stuff. (Some people use crazy glue, but I prefer the “official” item!) Use when a bandaid will get in the way, get dirty, or can’t cover the scrape. This is a pack of two.

3-Gauze pads for cleaning, absorbing. They come in sterile and in non-sterile packs.

4--Antibacterial cream. You probably already have a tube or two of your favorite cream. This one is ours.

5-Spray for burns. Comes in a pressurized can, like this, or in a pump version. If you’re building a specialized first aid kit that will be traveling a lot, you might prefer the pump version.

6-First aid tape comes in different widths, made of different materials, can be self-adhesive, etc. This one is basic, breathable and works pretty well for any use.

7-You may already have scissors at home, too. For your traveling kit you’d want a small, slim pair like these.

I don’t always show prices, but in this case I was trying to show that with a relatively modest outlay you can have WHAT YOU NEED – in the kitchen and in your briefcase — to stop the bleeding, relieve pain, and take the first steps to get the situation back to normal.

If you already have a good supply of everything you need, just divide things up and you’ll be set! Otherwise, grab a couple of the missing items and complete each specialty first aid kit on your list. It will be worth it!

Virginia
Your Emergency Plan Guide Team

Update from March 7. Following my own advice from last month, I went out last week and added a can of first aid disinfectant spray to my new kitchen first aid kit. I have already used it twice when I grabbed a hot pot handle with bare fingers. You can also get mini-sized sprayers, perfect for your purse or key ring. Click on one of these recommendations from Amazon and shop there to see what might fit your kitchen needs.


5-point Safety Checkup for Daylight Savings Time Change

Share

Emergency waiting to happenJust waiting for you to make a mistake!
It’s “Spring Forward, Fall Back” time here again this weekend. Along with re-setting the clocks, this time of year now has expanded to include reminders for emergency preparedness.

Of course, you know about checking the batteries in your smoke alarm. But that’s just the start! So read on, for some simple actions that if overlooked could put you in BIG trouble.

To the extent that your safety and security depend in part on your neighbors’ preparedness, be sure you share this list with them, too!

1-Change the batteries in your smoke alarm.

You should know this statistic from the National Fire Protection Association by heart: Three of every five home fire deaths resulted from fires in homes with no smoke alarms or no working smoke alarms.  Nuff said?

And here’s a real life story to go with the statistic.

A couple of years ago on a Saturday, the local fire department, police department cadets, some EMTs, and the Red Cross, supported by our Neighborhood Emergency Response Team, installed 461 new smoke alarms in our neighborhood! (Funded by a grant, in case you’re wondering.)

The alarm packaging said, “10-year guarantee” so naturally we were all annoyed when people began reporting that their smoke alarms were “chirping.”

Here’s what we discovered about alarms chirping:

  • Nearly all people who heard the chirping incorrectly identified where it was coming from! In nearly every case, it was from an already installed OLD alarm, and not the new one.
  • The 10-year guarantee works for the mechanism. When it comes to the battery, the guarantee applies only to alarms that have sealed lithium batteries. If your smoke alarm has a replaceable battery, check it and replace it or it will surely start chirping, like ours did, in the middle of the night!
  • Every battery has an indicated life. Just remember, you may buy new batteries today but you don’t know how much of that “life” has already expired while the battery was on a shelf somewhere.

Upshot? Simply replace your alarm batteries twice a year when the time changes. A few dollars invested can save your life.

2-Change the batteries in your walkie-talkies.

Same concept: when the emergency hits, if you don’t have fresh batteries, you may have lost an important tool.

Walkie-talkies take AA or AAA batteries. Over the years we have tested different brands and over the years the “winner” in the test has been different every time!

Get the right size, get the longest life available, and TEST them regularly. Every month we catch a couple of dead Walkie-Talkies during our monthly drill. (Of course, if people forget to turn the Walkie-talkies off after the drill, the chances of the batteries going bad are about 100%.) (And corroded batteries can destroy the walkie-talkie, too.)

Don’t have Walkie-talkies for your group or family? Here’s our walkie-talkie reviews to get you started on adding some.

3-Check your fire extinguishers and replace if they have lost pressure.

Fire extinguishers can last many years, but – Do you really remember when you bought yours?

A good extinguisher has a pressure gauge to help you track its functionality. Check the gauge when the time changes, if not more frequently. Not sure if the extinguisher is any good? Get a new one.

Looking to re-charge your extinguisher? We’ve looked, and haven’t found a reasonably-priced service. Maybe you can find one, but chances don’t seem to be very good.

4-Refresh your first aid kits.

We’ve written before about the drawbacks of most purchased first aid kits.

Still, you’ll want to start with a basic kit, and add your own enhancements.

At the left is a starter kit, available at Amazon, that looks even better than ones we’ve recommended before. Click on the image to get full details, but note to start with that this kit has soft sides with pockets labeled so you can see everything at a glance.  (Most of the inexpensive kits that I see are simply a zippered container with contents thrown in.)

Any first aid kit needs customization, and that’s where a regular check-up is important. At the time change, pull together all your kits (from your cars, your Go-Bags, etc.) and look in particular for . . .

  • Small medicine bottles whose contents have dried up completely.
  • Tubes of medicine that have been accidentally crimped or punctured and are oozing gook.
  • Band aids that have torn packaging and thus have lost sterility and stick.
  • Pills that have expired.
  • Scissors or other tools that have mysteriously developed spots of rust.

Repeal and replace as appropriate!

5-Clean out coils and filters to prevent fire.

We’re talking refrigerator, heater, and clothes dryer. All these collect dust and lint in hard-to-see and harder-to-get-to places, and can overheat or even (in the case of the dryer) burst into flames.

Enlist help to move or open any pieces of equipment or access doors, and attack with the wand and the crevice tool of your vacuum cleaner.

When you’ve finished vacuuming, empty its dust container and replace the filter in the vacuum, too.

While we’re on vacuum cleaners, a couple more safety notes:

  • Don’t leave a vacuum cleaner running while you go to another room. It can overheat and start a fire! (Just go onto YouTube to see a number of dramatic examples. . .!)
  • Check the cord and plug of your vacuum to be sure they aren’t damaged or frayed. These cords get hot! (Even the cord of my quite new Navigator gets really warm, just from being in normal use.)

That’s it.

You may have discovered that your 60 minute time change job has turned into a multi-hour project!

However, once you’ve gone through the steps once, it’ll be easier next time. Also, you may be able to turn the whole thing into a family bonding exercise by delegating different jobs to different family members, and presenting it as a contest!

However you get through the 5-point list, you’ll have the satisfaction of knowing your home is good to go for another six months. And you won’t be caught by an emergency just waiting to happen — as represented by the eager dinosaur in the picture!

Virginia
Your Emergency Plan Guide Team

Safety Checklist for New Employees

Share

Safety Is Your Responsibility

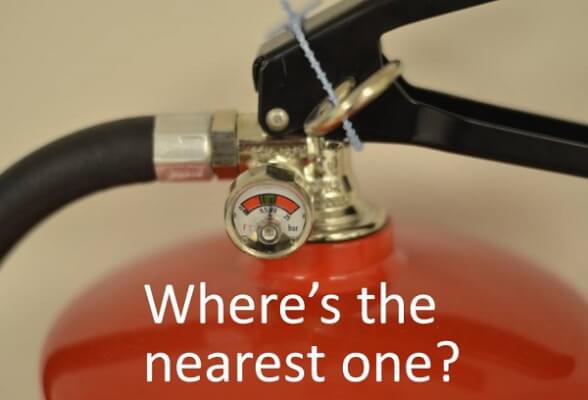
Where's the nearest fire extinguisher?
Will a new employee be able to answer this question?

Are you a business owner? in charge of emergency response at your work? an employee of any sort?

If you’ve been there a while, you should be able to check off every item on the Safety Checklist below. There are only 12 items.

A new employee, however, will have to make an effort to figure out all the answers. And if an emergency hits before he or she has done so, your business may be in jeopardy!

12-point safety checklist

Download the full-sized safety checklist here.

Share it with new employees and, for that matter, with ALL employees.

More In-Depth Info on Employee Safety

Some Advisories with more details for workplace preparedness:

If you want a more thorough discussion of how to build a Simple Business Contingency Plan – get a copy of our book, Emergency Preparedness for Small Business.

Suggested Next Steps for the Company

You can put this checklist to work in just about any workplace – office, factory, hotel, retail operation – wherever your business is located. Of course, you may prefer to use it as a sample and make your own, more customized version.

Either way, here are 3 suggestions for how to proceed:

  1. Share this article and the safety checklist with management. See what items they can check off; are there any items no one has thought of, or knows the answer to? Be sure you understand which items might have some liability connected to them.
  2. Decide on a plan for sharing the checklist (or a customized version) with all current employees. Turn it into a team effort, or a competition — whatever works to engage people and get them more aware of safety and their surroundings!
  3. Add the safety checklist to your on-boarding process for new employees. Obviously, they will need a helpful partner to be able to get through the list. I think they’ll find it to be a comforting exercise and one that will impress upon them the company’s commitment to preparedness and to safety.

Disclaimer from EmergencyPlanGuide.org

This handy checklist is not meant to be a full assessment of employee or workplace preparedness. Rather, it is meant as a simple, easy tool to create more awareness among people who are working together.

If the checklist starts a conversation about what’s missing, consider it a bonus. And then, put together a plan to fill those gaps!

We are committed to a continuing conversation about being ready for emergencies. As always, the more the people around us know, the better off we ALL will be!

Virginia
Your Emergency Plan Guide Team

First-time Driver Needs More Than Seat-time

Share

Our 16-year-old granddaughter got her first car just a week ago and is nervously practicing her driving. While Joe helps her master reverse gear (one of his favorites), I am putting together an emergency kit for her. Considering her skill and experience level, it needs to be different from the usual “commuter car kit.”

Key features of Emergency Car Kit: simple and unobtrusive.

Emergency kit for new driver

Assembling the kit for my granddaughter

Our driver’s parents have always had quite new cars, so I doubt she has ever experienced a breakdown or flat tire in the light of day, much less at night! And what if she’s driving when the anticipated earthquake hits, or El Niño (also anticipated) leaves her stranded?

So, first comes the lecture about getting the car to a safe place. Then there’s the phone call to parents and/or AAA or other emergency contact.

Now for the wait for help to arrive.

Here’s where the emergency kit comes in.

So far, I have assembled these 8 simple items, with one not yet decided on.

As always, where it makes sense I am including links to typical products — and usually products that I have bought myself — at Amazon.  Yes, I may get a small commission if you buy through the link. Of course, your price isn’t affected — and if you want to shop more, just use the link to get you to the right departments.

1. Orange Safety Triangles.  If you shop for these, you’ll discover than many come packed individually. Honestly, I don’t think one triangle serves ANY purpose for an inexperienced driver, who will tend to set the triangle too close to the rear of the disabled car. So, while Orion seems to be the leader in this category, I recommend this pack from Deflecto. It has three triangles in a carrying case: Deflecto Early Warning Road Safety Triangle Kit, Reflective, 3-Pack (73-0711-00)

(I would recommend flares for an adult, but they are not simple to light and require THOUGHTFUL decision-making before deciding where to put them. I will be writing about that in another post.)

2. Flashlights. Every car should have more than one flashlight, with extra batteries stored separately. I will have to test my granddaughter to see if she can put batteries in correctly!  (She normally uses her phone as a temporary flashlight . . .)

From a safety/visibility standpoint, inexpensive LED lights seem OK, although a better-quality light (at least 400 lumens) is preferable. This is one of our favorites: Duracell Durabeam Ultra High Intensity Tactical- 500 Lumen Flashlight 2-Pack with 6 C Batteries

3. First Aid Kit.  We have written extensively about first aid kits (See links to other posts, below.) ALL inexpensive pre-built kits are lacking – get the best one you can, then go through it and add more bandages, first-aid cream, moist wipes, etc.

4. Gloves.  She may not wear work gloves very often, and perhaps never has! But in a real emergency, protecting your hands is easy and essential. I prefer leather gloves to the rough fabric ones, and I like these because they adjust to the size of the wrist: Custom Leathercraft 2055M Split Cowhide Work Gloves, Medium

5. Emergency Radio. In the case of an earthquake, storm or other widespread emergency, your driver will need to find out what’s going on  — and cellphones may not work. Our favorite battery-operated emergency radio is the Ambient Weather radio: Ambient Weather WR-090 Emergency Pocket AM/FM/WB Weather Alert Radio with Digital Tuner and Flashlight

And since our granddaughter is pretty enterprising, I might consider the Weather’s larger cousin that operates via batteries, solar or crank: Ambient Weather WR-111B Emergency Solar Hand Crank AM/FM/NOAA Digital Radio, Flashlight, Cell Phone Charger with NOAA Certified Weather Alert & Cables

6. Blanket. My granddaughter seems to have several nice throws associated with various sports teams. If you don’t have any, or think your driver would like a new one, they are relatively inexpensive and easily packable. Here’s a link to where you can pick a fleece of exactly the right color!Super Soft Cozy Fleece Throw Blanket – 50×60 Fleece Blanket (Assorted Colors)

7. Water. Again, my granddaughter has plenty of plastic water bottles, and she can pick out the best one for her kit. However, I would recommend, as an emergency item, a bottle with a filter since we don’t know how long this water will remain untouched and unrefreshed. See the link below to our recent review of water bottle with filters.

8. Food. Teenagers seem to subsist on all kinds of snacks, so check with your driver to find the best combination of energy bars, dried fruit and candy for emergency food supplies. No use putting stuff in the kit that they won’t like or won’t touch.

9. Personal Safety. My granddaughter is tall, athletic and capable. I will discuss with her and her parents whether it makes sense to include any pepper spray in her kit (and it requires written permission). Waiting in the dark could be scary and dangerous; it may give her an added sense of security: SABRE RED Pepper Spray – Police Strength – Compact, Pink Case with Quick Release Key Ring (Max Protection – 25 shots, up to 5X’s more)

What to put everything in? Something unobtrusive.

All my teenaged friends seem to carry a variety of backpacks for school, sports, or just for hanging about. So, for the car emergency kit I selected a simple, inexpensive backpack that will attract no notice on the floor in the backseat or rear compartment.

Next step: Present the kit, take everything out, talk about how and when to use it, and have her repack it.

It will be a fun family activity, one I’m looking forward to!

Virginia
Your Emergency Plan Guide Team

Here are other posts with more info about emergency kits:


My New First Aid Kit

Share

Last week’s article about “extra” items for a first aid kit inspired me to use the topic for our monthly neighborhood emergency planning group meeting.

The meeting turned out to be . . .

Another good meeting idea!

First Aid Kit with missing items

Here’s how it went.

Procedure

  1. First, I invited our neighbor Theresa, who is a Registered Nurse, as our featured guest. She brought along her own first aid bag as a “show and tell.”
  2. Second, so we’d have something to compare it to, I bought a brand new first aid kit (cost around $10) at the hardware store down the street (photo).
  3. Third, as a reference, I printed out the Red Cross’s list of “20 basic first aid items.” Everybody got a copy.

As Theresa pulled out an item from her bag, we checked it off the Red Cross list and then looked in the kit I’d bought to see if it was included.

Results of the Comparison

Number of items

The new kit had about 60% of the items suggested on the Red Cross list.

First Aid Kit items, Red Cross list

Quality

The bigger problem: nearly everything in the kit was in miniature! Packets were tiny (one squeeze, and the ointment would all be gone), gauze squares were tiny, gloves were tiny. We all laughed, in particular, at the roll of adhesive tape. Take a look at it in the photo, bottom right. Really, it’s about as big around as a quarter and weighs less!

Missing from both the list and the kit

Here are the items that Theresa had in her kit that were not in the kit AND were not on the Red Cross list:

  1. Antihistamine ointment
  2. Liquid skin
  3. Duct tape
  4. Flashlight
  5. Plastic bags
  6. Dust mask
  7. Eyewash
  8. Phone number of Poison Control center
  9. Whistle
  10. Sunscreen
  11. List of medicines currently being taken

And finally, one last item that our group felt needed to be in there:

12. Extra eyeglasses

Shocking finale

Attendees had been invited to bring their own kits to the meeting, too. One guy had his neatly packed into a fishing tackle box. One neighbor shared her pet first aid kit.

What shocked me, however, were the people who admitted they didn’t have a kit in their car. And there were a couple of people who said they didn’t even have a kit in the house!

The reason it’s shocking is because this is our neighborhood emergency group, supposedly tuned in to being prepared!

Lessons learned

Emergency preparedness starts and continues with the basics.

  • If you have a first aid kit, check on its contents and “top it off” with more supplies. Use the lists above for suggestions.
  • If you are missing a kit, build one from scratch or buy an inexpensive one, like I did, and add more supplies.
  • If extended family members don’t have kits, buy up a supply and hand them out for Father’s Day or Mother’s Day or Christmas! Or without any explanation other than, “You need to have this!”

I looked for a better kit. I found one at Amazon that looks pretty good as a starter. I like the way its clear pockets fold out to make things easy to find. It costs about twice as much as the one I bought at the hardware store ($19 instead of $9), but instead of “77 items” it advertises “121 items.” Again, you’ll want to add some extras, but this kit would be a good start, particularly for the car.

Here’s the direct link: AAA 121-Piece Road Trip First Aid Kit

Don’t let something as simple as not having a first aid kit turn an accident into a real emergency!

“Friendly but Forceful” Action item: Take care of your first aid kit/s right away!

Virginia Nicols
Your Emergency Plan Guide Team

P.S. What first aid items haven’t been mentioned in this article?  Please share your recommendations in the comments box so we can all benefit.


Ouch! What I found in my Survival Kit!

Share

As a part of National Preparedness Month, we’re going to be staffing a table at a neighborhood preparedness faire. So I pulled out of my car the emergency kit I had first put together after my Community Emergency Response Team (CERT) training.

Outdated CERT gear

Don’t use these!

Look at the photo and you’ll see some of the yucky things I found!

* Corroded batteries in my flashlight! (Upper right arrow) The kit actually has two flashlights in it. One was the high-tech model (from Sharper Image, no less) that holds AA batteries. Look closely and you’ll see the totally blown-out end of one of them! We find that batteries need to be replaced every 6 months if they are in a light or radio.

* Dried up and useless first aid items! On the left in the photo you can see the shriveled up antiseptic wipes and the stained band aid packages. Although they had been stored in a plastic bag, not one of them was usable.

* Melted and leaking pens! CERT training reminds you to have a way to write on a door when you’ve searched the room, write on a piece of tape to label someone, or write right on their skin. We assembled a variety of writing implements for these purposes, including crayons and permanent markers. Again, stored in a plastic bag, they melted and leaked. I could hardly get that one crayon out to be able to photograph it!

What’s the state of your Survival Kit? How about your CERT bag? (These are two different things, of course. Survival Kit is to help you; CERT bag is to help others.) Consider setting up a schedule to update and refresh your kits.

Use the twice-a-year time Daylight Savings Time change as an update reminder.

In addition to replacing old items, here are a couple of other suggestions for keeping your kit ready for use:

1. Best battery solution. Store batteries in a bag taped to the flashlight or radio. Whereas they seem to deteriorate quickly when stored INSIDE the device, they keep much longer when stored separately.

2. Rubber gloves. Your CERT kit will have disposable nitrile gloves — the thin rubber kind that your doctor wears – for use in an accident. These gloves are very fragile; replace every six months.

3. Environment. Think about where the kit is kept. I keep my kits in the trunk of my car – where temperatures reach over 100 degrees. Obviously, crayons aren’t going to be happy in this environment.

4. Backpack. If your kit lies in direct sunlight (in your car, for example), the duffle bag or backpack material will deteriorate over time. The first to go on my CERT kit were the carrying straps.

5. Clothing. I have a long-sleeved shirt, a sweatshirt, and hat in my kits. While they don’t deteriorate, a wash and fluff keeps them more usable.

Reviewing and updating your kit takes only a few minutes – less time than it has taken me to write this article! You’ve made the investment – be sure to keep it tuned up.

What have YOU found in unattended survival kits that we should be warned about?  Let us know in the comment box below!

Virginia Nicols
Your Emergency Plan Guide Team