Category: Action Items

Apartment Survival

Share

Home ownership, the standard

Most descriptions of preparing for disaster seem to focus on a single family home and how its residents should prepare. These descriptions include making changes to the building itself, like installing braces or safety glass or reinforcing the chimney or roof. Some families go so far as to fortify their homes or to build totally separate disaster shelters.

Naturally, the family stores large quantities of water and food and perhaps invests in emergency equipment like solar panels or generators. The family also is reminded to include emergency preparations for pets.

Highrise apartment buildingBut what about renters?

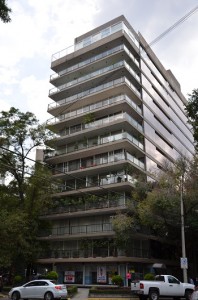
But if you are one of the 35% of all households that live in rented homes and particularly in apartments, options may be different – and limited. You probably have far less square footage to start with. You are not likely to have outside area where emergency items could be securely stored or easily accessed. And you certainly would not be allowed to make any structural changes to make the building any sturdier or safer.

What can apartment dwellers do differently?

1. Be efficient!

Your requirements are every bit as important as those of a family living in a single family home, but you will definitely have to be cleverer in order to store even the basics. The smart apartment dweller will become an expert in high-nutritional-value, low-bulk food and in multi-purpose tools and equipment. Instead of investing in a generator, the apartment dweller may need to invest in storage containers that can be hidden under the bed, stacked 8 feet high in a closet, or converted to use as an end-table.

2. Be creative!

Whereas someone with plenty of space outside can store emergency water in a 55 gallon barrel, you may have to make do with a variety of individual bottles, supplemented with a supply of expandable bottles, to be filled at the last minute. Given your limited ability to store water, you may be putting your filtration equipment to use immediately as you are forced to supplement your original water supply.

3. Make friends!

In an apartment setting, neighbors can make all the difference. A group of people can cooperate in assembling and storing food, tools, and other essentials. (For example, two families could share one stove.) One neighbor may have handyman skills and tools; another might have medical training; a third might be a competent cook. Sharing the burdens and responsibilities may serve the entire community better than each person trying to fend for him or herself.

For a whole lot of ideas about organizing your neighbors, check out Emergency Preparedness for Apartment Communities. It discusses getting your own preparedness act together and then helping neighbors get prepared, too.

Are you in a flood zone?

Share

Like maps?

If you are a map fan, check out FEMA’s Map Service Center to see whether you’re in a flood zone. The map is designed for ordinary citizens, but also for real estate and insurance specialists, who can create printouts coordinated with the Digital Flood Insurance Rate Map.

Starting in May, 2013, the map service is being expanded and upgraded. But in the meanwhile, you can do what I did to check out your own home and community. It’s easy!

Check FEMA’s map service.

Here’s the link. www.msc.fema.gov.

Do a “Product Search” by filling in your address. A second screen will come up identifying your general area (county). Click on “View” and be patient as the data loads. Ultimately, you’ll be rewarded with a very small map of your area!

FEMA map shows flood zones

Red arrows point to flood zone markings

You can adjust the scale at the top of the screen. (I changed the 4% to 15 % and that gave me a much better size map, and I could read most of the street names.) You can also click on the “pan” button on the left (looks like a little hand) and move the map around. (Again, be patient since it’s a lot of data and the map re-adjusts slowly.)

Once you’ve found the right area and the right level of detail, search for overlays. In our example, the gray dotted area (left arrow in the illustration) indicates a 500-year-flood zone, and the bright blue color (right arrow in the illustration) indicates a 100-year-flood zone, which means there’s a 1 percent chance of a 1-foot or higher flood in that area in any given year.

How would you be affected?

In the illustration, our home is not in the flood zone. But the blue area happens to be a key highway/railroad overpass/underpass. This interchange is about one mile from our neighborhood, so a flood there would definitely impact our emergency response, particularly if an evacuation were called for.

Check out this resource for your neighborhood, and also for your business or place of work. It’s interesting and good information to have.

Virginia
Your Emergency Plan Guide Team

We’ve added more information about flood insurance. Check it out here.


Business Owner – Do you employ drivers?

Share

Alley

Where will your driver be when the disaster hits?

Delivering services to homebound seniors

At a meeting last week at the local American Red Cross, we were discussing a new program aimed at preparing the senior community for disaster.

Most of the people in the room represented companies that deliver services to homebound seniors. There were folks from Meals-on-Wheels, SeniorServ, and a whole group of home health care providers.

Home health care staff members drive from home to home to assist their elderly clients. In the case of an earthquake disaster, these drivers will likely be on the road in their car or in the home of a client when the earthquake hits. The drivers will NOT be at their own home, and they will NOT be at their employer’s office.

Homes with few if any resources

These senior clients are people who, by definition, are not self-sufficient. They may be disabled or frail. This means that the driver, caught in the home with the client, will be faced with taking care of the client as well as him or herself.

If the driver is on the road when the earthquake hits, what is her responsibility? To continue on to the client’s home when possible? Return to the office? Or head for home to join the family?

Responsibility of the employer

This situation raises several issues for the employer that need to be addressed through training or investment in appropriate emergency supplies and equipment. Based on the group at the American Red Cross meeting, there was no one correct answer. But everyone agreed that these questions DID deserve consideration, and a positive answer.

1. Do your drivers all have an emergency supplies kit in their vehicle?

2. Does the kit contain enough to share with a client?

3. Are your drivers clear about their responsibility to their clients in the case of an emergency?

4. Do you know how you will communicate with your drivers in an emergency?

5. Do you have a plan for communicating with your clients’ families in an emergency?

Are you an employer with drivers?

What emergency preparations have you made to cover your staff and your customers?  What liability do you feel you carry as the employer?  Please share!


Nine Hazard Signs — A Quiz

Share

What does that sign mean?

Think you’re pretty aware?  I’ll bet you’ve seen many, many danger signs, whether in “real life,” on the pages of a magazine or on a movie or computer screen.

But do you REALLY know what the signs are warning about?

Use the quiz below to refresh your memory. Share the quiz with your family at dinner, with your colleagues at work. Use it to start a discussion of what dangers might be present in your local neighborhood or in your region – dangers you really don’t think about.

Match the description to the sign!

We’re starting with the easiest ones first!  (Answers are below the images.)

Danger Signs

Danger Signs

Danger Signs


And the answers:

  1. Trip Hazard
  2. Alligators in the neighborhood!
  3. Don’t drink the water

OK, now it’s on to the REAL signs . . .

  1. Laser Beam
  2. Radiation or electromagnetic waves
  3. Biohazard, contaminated or infectious materials
  4. Blasting – watch for more signage or a guard
  5. Health hazard
  6. Do not microwave your head (Thanks to Dan Wolfe!)

Of course, the image at the very top of this Advisory indicates POISON.

What other signs do you see regularly that warn of danger in your environment?

Action item:  Test your family and neighbors using this article!  It will be a great conversation starter!

Virginia
Your Emergency Plan Guide Team

P.S. Later we’ll take a look at the container placards you see on trucks. You know, the diamond shaped ones!


Severe Weather Alerts

Share

Without being paranoid about it, you need to be aware when danger is heading your way. Some things, of course, can’t be anticipated. But tornados, storms, floods, ice – these you can be ready for! Here’s how to find out what’s coming:

Local weather channel on T.V.

Watching the local weather news is the easy option, of course. But most of us don’t have the “luxury” of having a T.V. available whenever we want.

weather map

Regional weather map on Weather.com

Severe Weather Alerts on your tablet or computer

Head to www.weather.com , find your regional map and read about what’s coming. You can bookmark this page so you can find it readily. Typing in your zip code will give you even more local detail.

iAlert

This is a message service managed by your local law enforcement or emergency management service that alerts you by text message, automated phone call or email whenever there is an emergency.  (weather related, traffic emergency or crime related) You can find out if your city has the service and sign up for alerts here: http://ialert.com

Mobile Phone Hurricane App

The American Red Cross offers an app that will help you monitor conditions in your own area or where family members live, find help, and let others know you’re safe with one click of a button. It can warn you with a siren sound, and even turns your phone into a flashlight with strobe if you’re trapped. From your mobile phone, call “**REDCROSS” (**73327677) and you’ll be sent a link for downloading to your phone.

Other severe weather apps

A few minutes online and you will discover many other apps. Some of them might be sponsored by an organization right in your town, like the local news channel. Others may be offered by insurance companies or other organizations.

As you surf, you’ll see that some apps work only on specific phones. Some are free, others may cost a couple of dollars.

Action Item: If you carry a smart phone, invest a few minutes in checking out “severe weather apps” either online or right on your phone through the iTunes Store. Try a couple of the apps that make sense for your locality and your circumstances. (Get your kids to help if you haven’t downloaded an app yet.)

This is one emergency preparation action that is easy and fun!


Testing Your Emergency Equipment

Share

Practice ahead of time!

Virginia asked me to write this Advisory. It was prompted because of a blog post she read recently. Seems someone was trapped on his way home during Superstorm Sandy. By phone his wife reported the power was out and temperatures were dropping rapidly. He was proud and relieved to remind his wife that they had a back-up generator. The problem? His wife didn’t know how to turn it on!

Figure it out ahead of time.

Uhhh – confused?

This led us to take a look around our place at some of the emergency equipment we have to see what we really haven’t tested. Here’s my report.

Generator – Yes, we have a generator, a compact one, highly rated. It is still in the box and Virginia has never really seen it! (Two months ago our CERT organization set out to test its large new generator, and the starter did not function. So back it went to the store where we had bought it.)

Camp stove – Virginia and I have camped for years, both in tents (a LONG time ago) and in our RV, so we are familiar with propane stoves. The glitch – where are the gas canisters? And is there any trick to attaching them? If there is, we could waste a valuable resource trying to figure it out.

Water barrel – Last year we purchased a 55 gallon water barrel. (We wrote about our water barrel earlier.) It came with a pump to be inserted when the water is needed. OK, we haven’t needed the water yet. So, where is the pump, and how difficult is it to attach to the barrel? We haven’t tested it yet.

Solar panel back-ups for computers and phones – This one we’re good with. But if you have purchased panels yourself, be sure you have the right connectors that go between the panels and your device. Surely you have noticed that every mobile phone has a different plug on the end. Test NOW to be sure you have what it takes to take advantage of your solar back-ups.

Emergency radios – When we wrote the review of the best emergency radios, we tested all of our radios, so we know how to crank them, where the batteries go (if there are batteries), what connectors they require, etc. I recommend that you use your emergency radio daily. (It gets music or news, not just emergency alerts!) That way you’ll know it it’s ready to go.

How to Send a Text –– You may need grandchildren to help you out, here. But learn!

Turn on the Power — Again, something as simple as knowing where the fuse box is, and how to reset the switches, could make a difference. Everyone in your family needs to know this.

I think this list could go on. But the message is, “Test and practice.” Our plan is to set up a schedule to test one thing every week. You could set up the same action item — and include your children in the exercise. You won’t all be home when the emergency hits!

The more trained family members, the safer you’ll all be.


Joe Krueger
Emergency Response Team


Get an Emergency Kit!

Share

Tell the truth.  Do you agree that an Emergency Kit is a good idea?

Do you need one for the car/s as well as for the house?  Do you need one at work as well as at home?  Do you need to protect all the members of your houslehold in an emergency and not just a few?

All reasonable people must answer YES!

So putting together an emergency kit makes sense …

But it’s just not simple!

Emergency supplies

Kits packed and ready to go!

First, you have to pull together a list of what is needed. That list starts with basics: water and food. From there, it varies quite a bit depending on where you live, the make-up of your family, your commute patterns, etc.

Second, you have to shop for and/or assemble all the items on the list. This may take several days or even weeks, depending on how much stuff is required and how much money you will have to devote to this action. Many people build a plan and then lay out a purchase schedule to fit their budget.

Third, you need to get the right size container for each kit. The family kit is likely to be the largest; car kits, smaller. A child’s kit, smaller yet.  A workplace kit could be much larger, depending on how many people it is meant to serve. Of course, your kits need to be manageable; a backpack or rolling cart seems to be the favorite container.

Can you do all this? Of course! But will you?

If you haven’t done it up ‘til now, what would make a difference for you?

Consider this game-changer: Invest in a ready-made kit!

Then, improve it or personalize it as you go.

Yes, there’s an upfront cost, and it may be more than you would like. And yes, you could probably save money by assembling the kit on your own. But frankly, if you value your time at, say, $20/hr. you will save money by simply taking action now to buy a ready-made kit!

So consider getting a kit without further delay.

Five popular kits compared.

We have taken our time to look closely at five of the best-selling family kits on the market. We compare them as regards to contents, quality and price.

  • We start with the “basic” list of necessities, and note extras that some kits include.
  • Quality is sometimes not the best because these providers are competing on price. But some kits are better than others, and we’ll point that out.
  • Price ranges from $50 to $250 for a kit. Mostly the price depends on how many people the kit is meant for.

In our estimation, it doesn’t matter whether any given kit is perfect. What’s important is to have one for basic necessities, and then improve upon it when you can.

No more excuses.

If you haven’t put together your kit by now, you’re not going to…so be realistic! “I had it on my list of things to do…!” or “I was just trying to save money!” will be weak excuses when your family looks to you for help.

Check out our review of the Best Emergency Kits right now, pick the one that’s best for you, and get it. You will have taken a big step toward sensible preparedness.

Virginia
Your Emergency Plan Guide Team

When you buy your kit, let us and all our readers know what you got and how you found it, OK?? We appreciate your feedback!


Family Communications Plan — An Overview

Share

Timing is everything. Where will you be when the disaster hits?

You can almost assume that when an emergency hits, your family will not be together. Depending on the circumstances, you may not be able to get back together for some time. And whether you get together at home is yet another question.

  • Students and teachers may be held in school, perhaps in a locked-down situation.
  • Employees may be required to stand by to help protect co-workers as well as the business itself.
  • City employees and First Responders are likely to be called into action and kept away from home for hours or days at a time.
  • Any family member could be away from the home on travel, shopping, or vacation.

Immediately following the disaster, your concern will be to find out where everyone is, their condition, and the condition of your home. This is natural and normal . . . and without a plan, this difficult period may be far longer and more painful than necessary.

A Plan Speeds Communication

Your plan could contain a number of important steps.

  1. Sign up to receive emergency communications from your local police department via email or phone. This could give you an important head start.
  2. Set up an Out-of-Town Contact , someone who:
    • Lives out of the immediate area. If local phones are out, getting through to someone via a long-distance connection may be easier.
    • Owns a smart phone that can receive a text or SMS message. (SMS = Short Message Service). Of course, any phone is better than no phone.
    • Is able to keep track of calls that come in and share info with others. Not all family members are able to do this.
  3. Create Emergency Contact Cards for every member of the family.

Everyone needs a wallet card that can be carried for identification and that will have the Out-of-Town Contact’s number.

Below is a sample Emergency Contact Card.  Include a similar card in backpacks, briefcases and purses.

Emergency Copntact Card

Sample Front of Card

 Special for Families with Children

Being separated from parents during an emergency will be an emergency itself for many children. If you have small children, your family plan needs to be more extensive than simply an Out-of-Town Contact name and number.

We recommend that you:

  1. Review the list of “approved people” that is on file at your child’s school. Should it be expanded?
  2. Confirm with neighbors or relatives that they are on the “approved list” and be sure they agree to be there.
  3. Go over the list with your children so they know what to expect in an emergency.

Update your information

Like all contact information, your emergency contact information needs to be regularly updated. Reaching an old, disconnected number may be more upsetting than not having one at all!

NOTEThis Advisory is only an overview. You can find more on what happens to phones in an emergency, which ones are best to have, where to look for missing family members in a wide-spread U.S. disaster, and a suggested agenda for a family meeting about emergency communications on our website.  Click here to jump to the three-page Family Communications Plan.


Emergency Supplies List

Share

If you’re looking for a checklist, you’ll find many, many of them online. FEMA offers up a 26-item list; the American Red Cross has a 36-item list, and different commercial companies (selling tools, pre-made kits, insurance, dried food)  have their own lists, some of which extend to hundreds of items.

Different lists serve different purposes

Comprehensive checklist

Page One of list

Over the years we have created or used different lists for different purposes. For example,

* At an introductory neighborhood meeting, you may wish to distribute a simple, one-page list with items that apply to everyone and that won’t appear too intimidating.

* In a community where people have had some training, a more comprehensive list would be a good idea. (We wrote earlier about the “door-hanger list” that we created for our community.) Naturally, adding items appropriate for the geography would make sense: rain gear, for example, or cold-weather gear.

* In a senior community, a list might focus on items that apply to older people: 14-day supply of medicines (and how to get your doctor to give you extras), extra eyeglasses, batteries for hearing aids, etc.

* A community with pets needs a completely different set of reminders. (You can get a copy of our Emergency Pet Supplies Kit here.)

* A quick reminder card, useful for teaching, might have only a half-dozen items or a specific, focused list of supplies (for example, what you need in your first aid kit).

Our Emergency Supplies List

The Emergency Plan Guide has prepared its own comprehensive list. We have found that breaking it into three sections makes it easier for people to focus on. The three sections are:

 17 basic items for a 3-day emergency

 11 more categories for managing an extended, 14-day emergency

 10 essentials to take if you must evacuate

What’s important is to get your list, and then take the time to see what’s missing from it based on your family’s needs. Add those items to the list, and start assembling!

Like many families, you may need to prepare not only for the three situations listed above, but you may also want to put together specialty kits to carry in your cars, for students away from home, or for the office.

Get started now!

There is no time to assemble emergency supplies after the earthquake, after the storm has hit, after the fire has forced you out of your home.  Action item:  Download the Emergency Supplies Checklist and get started.

Virginia
Your Emergency Plan Guide Team

P.S.  I am not called the “Queen of Lists” for nothing!  Stick around Emergency Plan Guide and you will discover a number of them. Lists help me think, and keep me on track.  I hope you’ll find them useful, too!


Simple Business Continuity Plan – Validation

Share

Your Business Continuity Plan is drafted.  Now what?

Once you have created a Plan Draft, you may want to turn to outside experts for review and confirmation. These experts could be your local fire department, county emergency management or disaster response team. The list could also include a Business Continuation consultant that specializes in your industry.

The right expert could add detail to your plan as well as validate what you’ve put together. For example, the right expert could:

1. Review your list of threats and suggested actions and add to it, if appropriate.

2. Suggest costs for implementing these recommendations.

3. Make sure your plan is meeting any legal requirements for your industry and your size business in your state.

Get the full plan approved by management.

This should be a formality, since we assume management has been included all along the way.

Turn the plan into a useful tool for your co-workers.

Simple Ac tion Steps

Only SIMPLE steps can be followed.

A Plan is one thing.  If it’s well done, it’s a big binder full of stuff.  But your co-workers have no interest in reading or storing a binder!  What they need is simple instructions of what to do in an emergency.  Draft ACTION STEPS for workers as a series of one-page instructions.

A one-page set of instructions, written in large text and in simple language, is all they will be able to follow in the excitement of a real situation!

You or someone in your organization is likely the best candidate to draft those instructions. You know your people, their language capabilities, their familiarity with various processes, what emergency equipment you have and where it is located, etc.

Practice following the ACTION STEPS.

Schedule a series of “emergencies” over the course of the year. Be sure each person has an alternate to perform his or her job, since in a real emergency some people will be gone.

In the case of a real emergency, people are often shocked to inaction, or frightened into dangerous reaction. People who have practiced will be able to take action immediately and will be better able to make good decisions.

Improve the plan with new information.

The Pan will no doubt have to be updated on a regular basis. But keep the ACTION STEPS to one page, and keep practicing! It’s your people who will save themselves, save each other and save the business.

Disclaimer: This is a very simplified outline of how to build a Disaster Preparedness or Business Continuity Plan. Depending on your business, you will want to expand it as necessary. Still, if you see that the plan you now have is missing some components, or if you have no plan at all, this is a good place to start.

If you would like a copy of our full 6-page Report: How to Build a Simple Business Continuity Plan, you can sign up here to get your free copy.


Simple Business Continuity Plan – Development

Share

Developing your Business Continuity Plan In-House

If you are the person who has been placed in charge of developing a Business Continuation or Disaster Recovery Plan from in-house, take a deep breath — and then relax.  You won’t be responsible for finding all the things that need to go into your Plan — your co-workers will be providing most of it!

Step One:  Identify a core group of co-workers.

Your first task will be to identify a core group of co-workers – people who are interested in planning, know something about responding to disasters, etc. The members of your core group could come from anywhere within the organization, and may not be from the ranks of management. For example, your team might have someone with medical training, someone with military experience, or someone who is a retired First Responder.  You can work with HR to identify some of these people, or maybe send out a brief email questionnaire, or simply talk it up in the coffee room.  The key is to get people who are interested in the topic, not people who are “assigned” it!

Step Two: Provide your core group with training.

Training may be available locally, in person, as classes offered by the Red Cross or CERT training offered by your City. Training is also available online. Check out the American Red Cross’s Ready Rating program for business, and Citizen Corps Online CERT training. These programs also offer suggestions for procedures and sample forms you may find useful. Dig deeper and review from FEMA (Federal Emergency Management Agency) the National Incident Management System and Incident Command System, so your core group will be comfortable communicating with other professional organizations.

People who are genuinely interested will value this training, particularly if the company provides them some time to get it, and recognizes their progress.

Step Three: Now, involve the rest of your co-workers.

With your core group in place, now you can involve others. After all, if you want your co-workers to understand the risks faced by the business, they need to be involved in identifying them.

And if you want to find the best ways to prevent emergencies from turning into disasters, again, just ask your co-workers! They will know more than any outsider about the equipment and materials they use, the state of the building, the potential for fires or floods, and the challenges associated with an evacuation.

The missing piece in most Plans.

We have seen a lot of plans and nearly all of them are missing one key component that dooms them to failure! It is a consideration for the peace of mind of employees regarding their own families. Until that is assured, you cannot count on employees paying attention to their responsibilities at the business! Be sure to include a family communications plan and invest in whatever it takes to make it functional.

Step Four:  Develop the content of the plan.

1. Lay out a schedule for “building the plan,” starting with a series of brainstorming sessions. (Remember the definition of brainstorming: coming up with as many ideas as possible, without any attempt to judge them!)

2. Hold these brainstorming sessions and their logical follow-up sessions. Here are some of the topics you would want to cover. Each could be covered at a different meeting. Some input might even be assessed via email or questionnaires.

a. Identify threats to the business

 b. Rate threats based on likelihood of risks

 c. Rate threats based on impact on the business (hours, days, weeks or longer to recover?)

 d. What can we do to avoid these threats altogether?

 e. What can we do to mitigate/lessen the impact of these threats?

f. What response procedures work best for our business?

 g. Special procedure: How will we manage communications with families of employees?

 3. Document the threats, the avoidance or mitigation measures, and the response procedures that have been suggested.

4. Set out a list of recommendations that result from the brainstorming session.

5. Draft the first version of the Plan.

Step Five: Now, ask for input from outside experts.

Having put together the guts of your Plan, you can be confident that it is meaningful for your co-workers and for your business.  Still, it is important that the Plan pass whatever “official standards” it may be held to.

The next installment of this series will discuss who should be invited to take a look at your Plan before you consider it finished.

Here’s the link to Installment 3 – Validation

If you’re in a hurry to get all this information in one convenient package, check out our free, 6-page Report: Simple Business Continuation Plan. 


Simple Business Continuity Plan – Preparation

Share

Who’s in charge?

The person put in charge of coming up with a business Disaster Recovery or Continuity Plan is often not an expert in the field. In fact, most often in a small business the job is simply “assigned” to someone in the company – someone in IT, or human relations, or facilities management. But “Business Continuation” means a whole lot more than simply saving data, or meeting OSHA requirements. It means keeping the whole organization functioning so you will all be employed six months or a year from now!

Unfortunately, statistics on going out of business as the result of a disaster are not reliable – but it appears that even in the best of cases, your business’ chance of survival after a disaster without a plan are only about 60%. (“Business Continuity Statistics: Where Myth Meets Facts” documents often-quoted reports.)

Typical first step: Hire an expert — but with what result?

Thick Business Continuity Plan

Comprehensive Business Continuity Plan — How useful?

The logical first step for the newly-assigned person is to hire a consultant, who IS a specialist. That individual or group submits its proposal, wins the contract, and then gets down to the research necessary to draft “The Plan.” Some weeks or even months later, “The Plan” is submitted.  It may be approved and accepted.

In our experience, this method handicaps the consultant, who faces a dual challenge.  He or she doesn’t know all the subleties of your business operations.  And he or she may be forced to bid on putting a plan together that covers a number of bases without having access to all the factors that will impact the veracity of the plan.  As a result, the needs analysis task is underestimated and the final plan misses some of the subtle but important factors that make the plan meaningful and credible.

If you go the route of seeking bids from consultants, you can help avoid this pitfall by doing some of the homework in advance.  That way when (and if) you bring an expert planner into the organization they start with enough facts to bid realistically on pulling the plan together and are more likely to produce a real working plan that will save both lives and property.

Nevertheless, the result of these challenges is that most outside-developed plans we have seen (and we have seen many of them) are:

Very thick and intimidating (to justify the fee?)

Complex (to cover all the bases or the rear of the consultant)

Filled with jargon and therefore unreadable by the very people the plan is meant to protect!

Result: Plan goes onto the shelf.

Isn’t there a better process? Of course, and particularly for small businesses. Our recommendation is as follows.

Alternative method: Create the plan in-house.

Creating the Plan in-house requires more time and more dedication from the person in charge than simply hiring an outside expert to put it together for you.  And it requires that employees at all levels be involved.

Over the years, we have found some good ways to encourage participation from within the organization — ideas which we’ll be sharing in the next Advisory, and also in a more complete form on our website.

If you’re in a hurry to learn more about the In-House Planning Method, here are links to the next two installments in this series:


And if you know you need to get started right now, find out more about our free 6-page report: How to Build A Simple Business Continuation Plan.


Emergency Preparedness Vocabulary for Business

Share

More words to know!

The more you read about Disaster Recovery and Emergency Preparedness, the more abbreviations and acronyms you come across. Many of them are already in use in business – like KISS , or Keep It Simple Stupid. But as in every industry, some words creep in that are not explained, and that you are simply expected to know. If you don’t know them, you feel stupid or confused or both.

Here are some of the common words I’ve come across in dealing with preparedness in the workplace. (It’s a companion piece to our earlier list of emergency preparedness vocabulary.)

This is by no means a complete list, but it’s a good start for talking with or or writing to industry professionals!

Risk Analysis Chart

Simple tool for assessing risks facing the business

Business Acronyms and Definitions

BAU – Business As Usual. If this is the state you want to return to AFTER the emergency, then it’s considered something positive. However, BAU is often used when projecting what the future will be like if we go on with BAU instead of making suggested changes.

BIA – Business Impact Analysis. One step in the process of building an Emergency Preparedness Plan. It describes and measures what would happen to the different business functions in the event of an accident, disaster or emergency. The analysis covers both financial impacts as well as non-financial impacts, such as loss of customer or supplier confidence, etc.

BP — Best Practices. Methods or techniques that have shown the best results over time and around the country (or world) and that have become the standard for the industry.

CBCP – Certified Business Continuity Professional. This is the most well-known certification in the industry. It is offered by DRI International (Originally the Disaster Recovery Institute). The certification requires more than two years of experience, with proven expertise in five different subject areas, and requires continuing education.

DR/BC — Disaster Recovery/Business Continuation. These two expressions are often used together, but DR seems more closely tied to the protection and restoration of data and information technology systems, whereas BC refers to the whole business.

KISS — Keep It Simple Stupid. A classic reminder for educators, salespeople and for those who design Emergency Plans!

RA – Risk Analysis. Risk analysis is one of the first steps to building an Emergency Plan. Risks are identified and rated by likelihood and by likely impact, often using a matrix showing frequency/importance.

RM – Risk Management. This is closely tied to Risk Analysis, and typically covers actions the organization can take to prevent or lessen the risks identified in the analysis.

SME – Subject Matter Expert.  You? Your local Fire Chief? Head of a department? Facilities manager? Whoever knows the most about the topic/risk/equipment/impact under discussion!

SOW – Statement of Work. If your organization decides to hire a consultant to help in developing your Emergency Plan, you’ll likely ask for, or actually provide yourself as part of the consulting contract, a statement of work that outlines exactly what is to be done by the contractor.

Action Item: This is a list that can easily be shared with co-workers or with your boss. It will give everyone a sense of confidence in dealing with Emergency Preparedness, particularly if it is a new subject.

Virginia
Your Emergency Plan Guide Team


Gas Line Leak!

Share

High pressure lines are closely monitored by a number of agencies.  Your local utility or city will be the most familiar with the state of high pressure lines in your area, and with the monitoring guidelines and records.

Gas fire in street.

Gas fire erupting through LA street after Northridge earthquake. (photo by M. Rymer)

No matter how carefully lines are monitored, however, leaks and breaks can happen.  Most often, they happen when construction equipment accidentally punctures a line.  They can result from a natural event like a storm, earthquake, tornado, or ice storm.  Sometimes an over-loaded, aged infrastructure is to blame.

Leaks could happen at any time.

How do your local gas lines stack up?

An online search using the National Pipeline Mapping system is a good place to start. Dig deep on that site to find the names of the various operators of the different lines in your area. Contact them to get more details about the age and condition of their lines, their monitoring and safety policies and plans, etc.

If you think you have an emergency…

If you see or hear any of these near a pipeline right-of-way, it could signal a leak:

  • A hissing, roaring sound
  • Dirt or dust blowing
  • Water bubbling or spraying
  • Dead or brown vegetation
  • Flames coming from the ground
  • “Rotten egg” smell

(Typically the “rotten egg” smell is added only to smaller distribution lines. It won’t appear in major transmission lines.)

What’s the right response to a potential gas leak?

Get out! But do it intelligently.

  • Turn off any machinery or motors.
  • Don’t turn on or use any electrical equipment that could create a spark. This includes turning lights on or off, making a cell phone call, closing a garage door, or using a battery-operated radio!
  • Do not allow any open flames, including matches, cigarette lighters, welding equipment, etc.
  • Evacuate the immediate area. If exiting a building, leave the doors open.
  • Keep bystanders away.
  • Do not try to find the source of the leak.
  • Do not operate any valves or other shut-offs.
  • Do not attempt any repairs.
  • Do not attempt to put out any fires.
  • From a safe distance, call 911.

Emergency Preparedness Training

Action Items: Train your Emergency Response Team to recognize this hazard and to respond accordingly. Invite an expert as guest speaker to one of your neighborhood meetings. Prepare a flyer (taken from this Advisory?) and include it in your “Welcome Wagon” handouts for new neighbors.

We consider gas line leaks and the potential for fire resulting from them as the number one threat to our neighborhood! Where do they fit in your list of top threats?


Gas Pipelines in Your Area

Share

One of the possible risks you face, whether at home or at work, is from a pipeline leak. A good emergency preparedness plan reminds you to find out where pipelines are located, what they carry, and how to respond if there is an emergency.

Step One: Look for nearby pipelines.

Warning sign for petroleum pipeline

Have you seen this sign?

Find local pipelines by watching for pipeline signs as you go about your daily business! They are typically posted at major intersections, railroad and water crossings, and at property boundaries. The sign shown here is only a sample; a real sign would give more information about the kind of material being carried by the pipeline – for example, “petroleum,” “high pressure gas,” “natural gas,” “oil,” “jet fuel” — and include the operator’s emergency phone number.

Action Item: Get all members of your team, or workplace colleagues, to watch for signs as they come and go from home and work. They can bring in photos and locations. Build your own map of where they are located, and of your vulnerabilities.

Step Two: Find a detailed gas pipeline map.

The National Pipeline Mapping System provides an online service where you can search for pipelines by state and county. The maps are layered, showing transmission lines, liquid natural gas plants and breakout tanks. Smaller lines (distribution and gathering systems) are not included in NPMS. You can print the maps, but you are not able to download the underlying data.

You don’t need a password to get into the site, but it does take a while to get through all the different layers. You will be able to see a map by county and then, by entering a specific address, you’ll see major carrier lines, the pipeline operators for the area, what is carried and whether it is “hazardous,” whether the line is in service or abandoned. You can also use a tool to measure how far you are from the pipeline.

Access the National Pipeline Mapping System here.

Action Item: As part of your Risk Assessment process, research your local geographic area using the National Pipeline Mapping System.

Step Three: Know how to respond to a pipeline leak or break.

Watch for the continuation of this article in an upcoming Advisory here at Emergency Plan Guide. Sign up below to be sure you get ALL the Advisories about Gas Line Leaks.

Virginia
Your Emergency Plan Guide Team