Category: Resources

Summer Water Shortage

Share

What I really meant: Summer Water Shortage Storage

Here in California, we’ve had drought conditions for 4 years. Throughout the state, people have cut back about 25% on water usage – sometimes voluntarily, mostly as a result of cost pressure.

But using less water for the landscape doesn’t mean we should drop storing water for an emergency!

So again, I want to promote . . .

The best water storage solution: the 4-item 55-gallon water barrel kit.

The kit has four components. You need all four!

You can buy them separately or all together, at Amazon, Walmart or at Costco or wherever you find the best price. In doing my research today I found that by shopping carefully I could get the same four items for a low of about $100 to a high of about $150.

The image shows a kit with the four items that need to be on your shopping list — the barrel, the bung wrench, the pump and the water preserver. You can click on the kit image — or any of the images below — and go directly to Amazon. But before you go there, learn more about each of the components so you know what you’re looking for.

1 – The 55 gallon water barrel

What you want is a standard blue polyethylene plastic food grade water storage barrel with a sealed top. (I’d want a new one. Even if it’s brand new, give it a good rinse with a diluted chlorine-bleach solution – one part bleach to 10 parts water. Of course, use non-scented bleach that contains no soap.)

What to watch out for:

When it’s full, your barrel will weigh 440 pounds so you won’t be able to move it by hand!  Pick the spot where you want to store it, lay down some boards or pieces of wood to keep it up off the ground or the floor, and set it in place. (Make sure your floor can hold this weight.)

2 – A “Bung wrench” to open the plugs in the top of the barrel

The stopper in a barrel is called a “bung” and you’ll need a special wrench to remove it. You can get a metal or plastic wrench like the red one in the photo to the right. Often, the wrench will be designed for a second function, like being able to turn off gas at your meter. Bung wrenches seem to go missing on a regular basis. You may want to fasten it to your barrel (tape?).

3 – A Pump to get the water out of the barrel

 These water barrels are designed with openings only at the top, so to get the water out you need to insert a pipe down through one of the bung holes and then pump the water up and out. Since this is for emergency use, you need a pump that operates by hand! Be sure your pump is BPA free since your drinking water will be flowing through it.

What to watch out for:

An inexpensive siphon hose can work but may take a lot of effort to get started. Other hand siphon pumps have a hand-operated sliding action and larger tubes, and are more efficient. The image shows the “vertical manual action” of the pump shown in the kit.

Once you get a siphon pump flowing, it will continue to flow until you stop it, so be sure you know how to start AND stop the flow. (Hint – you unscrew the cap at the top to break the vacuum.)

Here’s a great video from Robert Canning that shows just how to install and use a hand siphon pump.

There are also hand pumps with a lever that pump a certain amount with each press of the lever – best if you want to remove just a small amount of water.

4 – Water preserver liquid

We have written before about using 1/8 cup of plain bleach in your barrel full of water to keep the water clean for long-term (i.e. year-long) storage. You can also use a water preserver concentrate that will keep water clean for up to 5 years. Follow the directions on the bottle to get the right amount into your barrel.

And now, the question we overlooked . . .

How to get the water INTO the barrel? Three options.

If you’re like me, I want the barrel tucked out of the way, so it turns out not to be close to a faucet. So how do I fill the barrel?

Naturally, you’ll think about using the garden hose. But wait. That hose has probably been sitting around for who knows how long, getting dirt on it, spraying pesticides or soap, and gradually disintegrating. I wouldn’t want to use it to fill MY barrel!

So what are other options?

One way is to use new bottles of water or simply carry water from the kitchen in a clean container and pour it into the barrel. Works fine, takes many trips!

The other option is to purchase the right length of food grade, white plastic drinking water hose at an RV supply store and run it from the tap.

And finally, store the barrel properly.

Some hints:

  • Label the barrel with the contents and the date you fill it, so you’ll know when it’s time to empty, refresh and refill.
  • Store in a cool dark place, out of sunlight; keep it clean.
  • Camouflage the barrel to prevent someone from stealing your water. Cover it with a tarp or canvas, turn it into a workbench, whatever.

This water can keep you alive in a crisis, so consider this big purchase as a gift to the family for the summer!

Virginia
Your Emergency Plan Guide team

P.S. You will likely want to have smaller containers of water, too, so you can store them more easily, move them, pour out just a glass of water, etc. Here are a two more articles from Emergency Plan Guide you may find useful as you consider how to store the water YOU need:

Are Your Employee Communications a Disaster Waiting to Happen?

Share

Many companies are being forced to set up or beef up their emergency employee communications plans. Those that don’t may be courting liability.

Being sued for no disaster plan

Being sued . . .

Read on.

In today’s news, we learn from a simple press release that “The Boston Globe is making customized comprehensive safety guidelines available to all employees via a mobile app.” (That’s my emphasis.)

What does this have to do with YOUR company?

Start with these questions:

  • What has your company done about emergency response and emergency communications? Does it have a plan?
  • Is your company keeping up with what others are doing?
  • Is it meeting its legal responsibilities?


Managing emergency communications is an ongoing challenge.


1 – You face threats today that may never have been threats in the past.

Again, recent news stories tell of oil train explosions, once-in-a-lifetime flooding, live shooter events and cyberattacks that can cripple entire enterprises.

Is your workplace communications system set up to respond to “new” disasters as well as the usual ones? When did you last do a “risk analysis?”

2 – New technology means the world may hear about your emergency before your front office does.

What’s your procedure for making sure employees get instructions and the public – including suppliers and customers – gets factual information that will staunch rumors?

As Paul Barton, a business communications specialist says, “Rumours are created for a specific reason: they fill in the information void. If an organization does not tell staff what is going on, they will make up their own story.”

And today, that “story” will be out via YouTube and Twitter before the smoke has a chance to clear!

In the past, companies usually assigned one person to be the spokesperson in an emergency. Today, every employee can instantly reach a huge audience. You can’t stop that, but you can train employees in how to communicate.

3 – Employee turnover means your “communications plan” must be continually updated and employees must be regularly trained or they won’t be able to use it.

Not only does your workforce change, but the company premises themselves change. You may change your phone system, switch to a different internet provider or IT set-up, add a new website or a new office, invest in mobile devices for the whole staff, etc.

All these give the business and employees new communications options that must be considered in the emergency communications plan.

4 – Don’t overlook the families.

You may expect your employees to be ready to step up to protect the business and pitch in to get it back on its feet in an emergency.

Guess what. You may be wrong.

Over and over again in disasters, employees – even First Responders! – have abandoned their posts because they were desperate to find out if their families were safe.

If you can reassure employees about their families, your business continuity plan has a much better chance of working.

What this means is your emergency communications plan has to put family communications right up at the top. It must ask and help answer questions like:

  • How will the company communicate with employee family members regarding the status of the business and the employee?
  • What plan does the family have to get in touch with each other in an emergency?
  • Does the family have an out-of-state family contact person?
  • Has the family designated a place to go if they get separated and/or they can’t get back to their home?


5 – What responsibility does the company really have?

The “Prudent Man Rule” (now probably referred to as the “Prudent Person’s Rule”) has been around in the financial world for nearly 200 years. It says that someone responsible for another’s interests should exercise the same care, skill and judgment that other “prudent men” in that position would exercise.

When articles like the one about The Boston Globe appear in the daily news, you must ask yourself,

“If others are setting up new ways of communicating with employees during emergencies, could we be found deficient or even negligent if we haven’t updated our own plans?”

Here at Emergency Plan Guide we’re not offering legal advice. But we do know that businesses and particularly owners get sued. We believe they can improve their chances of coming through the legal system safely by demonstrating that their decisions with regards to emergency response planning are consistent with good practice.

Two more resources.

Action Item:  If your company’s emergency response plan needs updating, take a look at these for inspiration.

This article reviews the different groups that may sue you after a disaster, and suggests three steps you can take immediately to protect yourself from legal fallout.

If you haven’t thought about physical security, this article will list some “prudent steps” that other companies are taking in this regard.

Once again, this isn’t legal advice, but I hope it falls into the category of “good business” advice.

Virginia
Your Emergency Plan Guide Team


Don’t miss any of our free Advisories. They’re a quick read and come right into your email box. Sign up below.


Off to College? What’s in your survival kit?

Share

Pretty exciting, isn’t it? New freedom, new friends, new food (!).

And, new dangers.

Survival kit for collegeWe can’t deal here with all the social issues on campus. But there are some things you can do to make your life away at school a bit safer and more secure. Take the time to check these out.

1-Be Ready For An Active Shooter on Campus

The news has been full of shooter incidents lately, so perhaps you’ve spent time talking about what YOU would do in that situation. But maybe you haven’t.

People most at risk are – OBLIVIOUS!

  • Walking around with their eyes glued to their cell phones.
  • Chatting or goofing off with friends and not paying attention to their surroundings.
  • Half asleep, waiting for somebody else to tell them what to do.

Time to change those habits!

Here’s a video put out by the University of Alberta that is pretty effective at reminding you what to do in case you hear what sounds like gunfire. The best stuff comes after the 2 minute intro.

Action item: Take 8 minutes right now and watch this video.

https://youtu.be/gHNApS-MC18

And then consider these actions for when you get to campus:

2-Secure Your Dorm Room or Apartment

Let’s assume that any room you are sleeping in has normal locks, and that you use them. However, if you want to be more secure – and particularly if you have been notified of danger on campus – you want to be sure you are extra safe inside.

Depending on the construction of the door, here are three things to consider.

= = > Barricade the door.

Somebody dangerous threatening you? The classic chair under the door handle really DOES work, as long as the angles are right. In an office setting, though, you may not find the stiff chair you’re looking for. So, in an emergency, don’t hesitate to pull a HEAVY piece of furniture (table, copy machine) in front of the door. Add a second heavy piece behind it.

= = > Disable the mechanism.

Keep door from openingThe working of a typical commercial door hinge may be defeated by use of a belt. Tighten it down to prevent the door from opening, as shown by Bill Stanton, safety expert.

= = > Get a door wedge.

In your bedroom or dorm room, a simple investment in a rubber door stop may be all you’ll need. (This one looks as though it will work on any surface.) Click on the image for details.

Keep intruders from coming in through a balcony with the help of a sliding glass door bar – you can place it in the track of the door, or, if you’ve bought one for that purpose, lock it across the center of the door. Obviously, a determined intruder can break a glass door if he or she has the tool to break it with.

3-Be Prepared For Evacuation or An Extended Lockdown

It’s far more likely that your college stay could be impacted by something less dramatic than an active shooter. But it might be equally serious – like a storm, flood, electrical outage, or even some sort of disease outbreak.

Be ready to respond to a call to shelter in place or to evacuate by having your own survival kit. Figure you need to take care of yourself for at least 72 hours – and remember, you will have no access to electricity, water or food. Or a toilet.

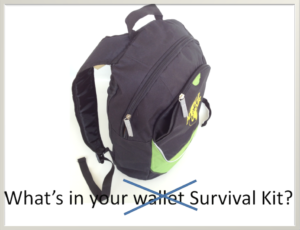
Stuff your kit (use a backpack) and have it handy so you can grab it at a moment’s notice.

What should be in your kit?

Basic Emergency Supply Checklist

  1. Water – 1 gallon per day. (Tough to fit in a small backpack, admittedly!)
  2. First Aid Kit with fresh supplies.
  3. Food – Canned or dried foods that you like and that don’t require cooking.
  4. Clothing – A set of warm, comfortable clothing. Extra sunglasses, glasses or contact lenses.
  5. Medicine – At least a two weeks supply of any prescription medicines.
  6. Sanitation – Garbage bags, including small, compactor-strength bags for waste. Sanitary supplies. Toilet paper, baby wipes, paper towels.
  7. Flashlights, emergency radio that operates with batteries, solar or by hand crank – NO CANDLES!
  8. Car – Always ready with half tank of gas.
  9. Cash – No electricity = no ATM, no credit card.
  10. Telephone numbers – Write on paper. Your cell phone and computer will run out of battery unless you have a solar charger.

You should be able to collect just about everything on this list right at home, before you leave for school. There’s one possible exception — the emergency radio.

Here’s a link to Amazon that will get you one of the best ones we’ve found. It operates using AA batteries, its own solar panel, or you can crank it for power. You can even charge it from your computer. Click on the image for details. (If you buy through Amazon we may get a small commission. It won’t impact what you pay.)

OK, we know you have put in a lot of effort to get to where you are. Don’t overlook some of these common-sense preparations that will KEEP you at school just the way you have planned.

Best of luck,

Virginia Nicols
Your Emergency Plan Guide Team


P.S. Please share this article with friends. It’s possible they won’t have thought of all these things, either!


What threat do you face from a nuclear reactor emergency

Share

Nuclear Power PlantWe have written before about the shadowy world of nuclear power plants. In last week’s news I found another of the disconcerting developments connected with plants that have been shut down and that are going through the “decommissioning process.”

This news comes from Vermont.

Briefly, the purpose of decommissioning is to remove and dispose of contaminated materials so that the property may be released for other uses. Since decommissioning can be a long and complicated. the plant owner is required during the plant’s lifetime to set money aside for that purpose.

Naturally, once the plant stops producing power, owners want to shut it down as quickly and as inexpensively as possible.

One of the steps they take is to petition to have the “emergency zone” around the plant reduced. We have written before about the 50-mile-zone vs. the 10-mile-zone; you can check that Advisory by clicking here.

It turns out that Entergy, owner of Vermont Yankee, has successfully petitioned the NRC not only to stop supporting planning in the 50-mile zone, but also planning in the 10-mile zone. In fact, it has petitioned to eliminate ALL its responsibility to the 18 towns around the plant.

Apparently the funds set aside for decommissioning have also been “used for other purposes.” Lawsuits are being filed, hearings held. It’s not clear what the outcome will be.

But this brings up the whole issue of emergency planning around nuclear power plants.

Can you answer these questions about living near a nuclear power plant?

Nuclear Reactors U.S.1. How far away is the closest nuclear plant?

There are about 100 operating nuclear plants in the U.S., and most tend to have a low profile. So if you don’t really know where the nearest reactor is located, here’s a link to a map from the Nuclear Regulatory Commission (NRC):  http://www.nrc.gov/info-finder/reactor/  *There’s a lot more info behind each pin on the map at the site.

2. In an emergency, how will you be affected?

The NRC defines two emergency planning zones around nuclear power plants: 1) a “plume exposure” zone with a radius of 10 miles, where airborne radioactive material would directly impact people, and 2) a second zone with a radius of 50 miles where contaminated food and water could be ingested by people within the zone.

(As a side note, Japanese authorities set a 20 km “exclusion zone” around the destroyed Fukushima Daishi power plant. That zone continues to be adjusted as radiation levels change as the result of government clean-up efforts and new weather events.)

3. What preparations can you make to protect yourself from a nuclear accident?

If you live near an operating plant, it’s likely that the first you’ll know of an emergency is when you hear a siren. (3-5 minute blast, repeated) Immediately tune to your local FM radio station or TV station, or to one of the Emergency Alert System (EAS) stations.

  • Plan to shelter in place. The major hazard in the plume area is direct exposure to the radiation cloud – through breathing, touching particles on the ground, or eating materials that have been contaminated.
  • Go indoors and stay there. Close doors and windows and shut off furnaces, fireplaces and air conditioners. Keep pets inside. If you’re in your car, close the windows and vents.
  • Keep listening for updates!

4. What will the authorities be doing?

  • An evacuation may be called. Grab your survival kit/evacuation kit and follow instructions. Hopefully your car’s gas tank is at least half full.
  • You may be advised to take potassium iodide (KI). KI is a nonprescription medication that blocks uptake of radioactive iodine by the thyroid gland. It is FDA-approved and readily available, coming in 65 and 130 mg tablets and liquid form; children need half or even a quarter of the dose for adults, so follow directions carefully. KI is effective for about 24 hours and you need to have enough to last every member of the family for several days or until you can get out of the affected zone. (See purchase info at the bottom of this article.)
  • You’ll be notified when it’s safe to return. (How can you be sure it’s safe? See “More resources,” below.)

5. What about the threat of a closed plant?

Here in Southern California, the San Onofre plant ceased operations in 2013 after a history of maintenance problems. The owner of the plant is just now putting final touches on its “decommissioning plan.” Spent fuel is being stored in one of the closed reactor containers — just hundreds of yards from the Pacific ocean (risk of tsunami?).  Since the 2010 U.S. census counts over 8 million people living within 50 miles of the plant, ANY emergency here will have a big impact!

Clearly, the chances of a nuclear disaster are far less for a plant that is no longer running, but as long as radioactive fuel is still being stored on site a certain threat remains, whether from a weather event (like what happened and continues to happen in Japan) or a terrorist event.

So it’s back to you and your emergency planning team, whether that’s your family, your local neighborhood emergency response team or your workplace leaders:

  • Are you near a nuclear plant?
  • Is it operating at full or reduced capacity?
  • Is it shut down or scheduled to be shut down?
  • What is the emergency plan for the site?

As an active and concerned citizen, it’s up to you to learn more. I hope this article can be the impetus. We’ll continue to share what we learn . . .

Virginia Nicols
Your Emergency Plan Guide Team

More resources:

Buy KI tablets. As you are shopping, consider the make-up of your family, and whether it would be easier for you to have smaller tablets (adults take two, child takes one) or even liquid (would have to be mixed with something). This is an inexpensive item so get a big enough supply that you don’t have to worry about running out. This particular item often goes on sale at Amazon — note its expiry date! (Click on image or link to get current price details.)


IOSAT Potassium Iodide Tablets USP, 130 mg, 14 Count


For more understanding of your circumstances, consider a Geiger Counter. You can learn more about them at this Advisory and take a look at two versions here:

SOEKS 01M Plus Generation 2 Geiger Counter Radiation Detector Dosimeter (NEW Model replaces SOEKS 01M)

GCA-07W Professional Geiger Counter Nuclear Radiation Detection Monitor with Digital Meter and External Wand Probe – NRC Certification Ready- 0.001 mR/hr Resolution — 1000 mR/hr Range


There are less expensive options, including this app that works with your phone. Its  low cost makes it attractive for people living or working in areas of moderate risk, or for people who want a backup unit to carry on the road.. . .

Smart Geiger Counter Nuclear Radiation Dosimeter “X-Ray” and “Gamma” Detector Smartphone Android iOS with App


Don’t miss a single Advisory. Sign up below.


Assessing Threats to Your Business

Share

“What could possibly go wrong?”

Storm with lighteningWhen asked that question about their business . . .
Most people think first about natural disasters.

Here in California, everyone is concerned about earthquakes or (some years) El Niño. Along the coasts, popular threats are hurricanes and, occasionally, tsunamis. That leaves tornados and storms for the rest of the country.

Would you believe that initially, most people overlook the most common natural disaster?!

According to the experts, the most common natural disaster – accounting for about 30% of all disasters in the U.S. — is flood!

But let’s take a broader look at threats.

What about threats that are man-made?

This list will be a lot longer. Here are some more threats to business (or to any community), in no particular order:

  • Unplanned IT and communications outages
  • Cyber attack
  • Data breach or loss (accidental or deliberate from disgruntled employee; loss of mobile device)
  • Power outage
  • Water main break
  • Fire
  • Security breach (including theft)
  • Health emergency (chemical leak or spill)
  • Safety problem (accident, train wreck, explosion)
  • Terrorist act
  • Regulatory change
  • Lawsuit: personal injury, employment practice
  • Loss of key personnel
  • Civil unrest (might depend on your neighbors and/or neighborhood)
  • Supply chain interruption
  • and the list goes on!


STEP ONE. What threats does YOUR business face?

One of the first steps in preparing for emergencies in your business or community is to take a look at the threats you are facing. The easiest way is to gather together key people and simply brainstorm, writing down everything you can think of.

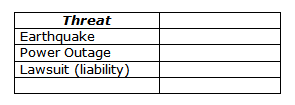
For example, your list could start by looking like this:

List of threats

STEP TWO. What’s the likelihood of the threat actually happening?

The next step in your analysis is to rate all the threats you’ve come up with as to their probability of taking place. An easy way to do that is simply give each threat a score from 1-5.

  1. = rare
  2. = unlikely
  3. = possible
  4. = probable
  5. = almost certain

Here’s our sample list with the threats rated.

Probablethreats


STEP THREE. What would be the impact of the threat?

There’s a second side to every threat, too. That’s the impact that it would have on your business. For example, some common threats (for example, a break in a water line) might be serious but would probably not threaten the health of the whole organization.

Other threats, like a direct hit from a tornado, might completely destroy the business.

So your threat analysis needs to consider impact.  Again, one way to help direct your preparedness efforts is to add a second score to your list of threats.

The impact score could also be 1 – 5, from lowest to highest impact. For example . . .

Threat probability

STEP FOUR. So which threats do we need to look at first?

By completing the list, you can get an idea of the priorities for your preparedness efforts. Here’s our sample, completed:

Create the total score by adding probability and impact.

Business threat

The higher the total score, the more attention you probably want to place on preparing for that event.

Caution: Danger of Threat Analysis Paralysis

Analyzing your threats can become complicated. In fact, in the wrong hands it can get WAY too complicated!

You don’t have to do it the way this report suggests.

But it IS important to get past that first quick assumption about natural disasters, and take a look at the other threats facing your business. The risks associated with the threats might be reduced by better procedures, better insurance coverage, or simply more awareness.

Completing even a simplified risk analysis will give you a more realistic picture of what could happen and how to protect and prepare for it.

Joe and Virginia
Your Emergency Plan Guide Team

P.S. If you are serious about analyzing the risks to your business, consider purchasing this book. It has a significant security focus, but defines all types of threats and lays out a process to help you make decisions regarding mitigation.  Threat Assessment and Risk Analysis: An Applied Approach. The book is available in hardcover or soft at Amazon, where we’re affiliates, as you know.


Stay Safe in Hotels

Share

Summer may find you traveling to new places, and staying in new hotels.

Hotels have their own risks

. . . worth noting and being aware of.

Smoke in hotelFire:

High-rise hotels (or any high-rise building, for that matter) are vulnerable to fire. The causes? malfunctions in electrical equipment, carelessness, smoking (in bedrooms), temporary decorations for festivities, use of combustible cleaning materials, and, of course, arson and sabotage.

In a hotel, fire danger is increased because guests, people attending conferences, patrons at restaurants and bars, etc. probably don’t know the layout of the property and have no idea about security or emergency policies.

Terrorism:

Particularly in developing countries, hotels have become the popular target for terrorists. There are a number of reasons why.

  • Over the past couple of decades, embassies and military buildings have been “hardened” against attack.
  • Hotels remain areas where many people come and go, where entrance to the building is seldom restricted, and where politicians and other high-profile individuals are likely to be found.
  • Even when security is improved, by definition a hotel is a “soft target.”

If you are traveling and can make a choice about which hotel to stay in and where in the hotel to sleep or conduct your business, you may wish to consider these recommendations, culled from a variety of sources including the Stratfor Weekly, National Fire Protection Association, and Siemens Switzerland Ltd.

What to do to reduce the risks

Before you arrive

  1. Find out about hotel security. Is parking secured? Is the desk manned 24 hrs. a day?
  2. Ask about smoke/fire alarms and sprinkler systems. There is no guarantee that they will work, but if they are absent altogether, you may wish to look for another hotel.
  3. Choose a room between the 3rd and 5th floor, where terrorists can’t easily reach you from the street and fire department ladders can reach if you need to evacuate.
  4. Choose a room away from the street to avoid an explosion or violence at the entrance, which is where most terrorist activity occurs.
  5. On your floor, confirm the location of fire extinguishers. Have they been certified?
  6. Check on emergency stairs, exits and signage. Confirm that there are no items stored in stairwells.
  7. Keep emergency items next to your bed: shoes, a flashlight, and a smoke hood if you carry one. See below for more details.

If there is a fire in the hotel

  1. Grab your smoke hood and be ready to put it on if you smell smoke.
  2. Escape from your room if you can safely.
  3. Stay low and use walls as a guide.
  4. Use stairs; do NOT use elevators.
  5. Do not enter a staircase or hallway if it is filled with smoke. Try to find another path.
  6. If you must, stay in your room. Protect against smoke by sealing the door with duct tape and/or wet towels; stay low to the floor.

If you suspect terrorist activity

  1. Escape from the hotel if you can.
  2. If you are trapped in your room, protect yourself. Lock the door. Use a door wedge. If you can do it quietly, move furniture in front of the door for further protection. Turn off the lights. Turn off the TV and silence your cell phone. Close the drapes to protect from explosions that might create broken glass, and stay away from the windows. YOUR GOAL IS TO MAKE THE ROOM APPEAR EMPTY so terrorists will go on to an easier target.
  3. If terrorists are evident, and you cannot escape and cannot hide, you must fight. Improvise weapons with whatever is at hand – a lamp, a piece of furniture, a hot iron, a full water bottle, a battery charger at the end of a cord or in a sock, etc. In this case, your SURVIVAL MINDSET IS MORE IMPORTANT THAN WEAPONS. Fight, and don’t stop.

Emergency items for travelers

In this article we’ve mentioned just a few items that are recommended for travel safety. We haven’t used all of them ourselves, but it they make sense to you, check them out.

Door wedge

You may have a couple of these in the house already! Simple, small, easy to pack. Very effective at keeping any door closed — and you can get a couple of them for less than $10. Here’s an example from Amazon:

Shepherd Hardware 9132 Rubber Door Wedges, Brown, 2-Pack

If you’re traveling by car, you can also consider carrying a sliding glass door security bar. We always have one for peace of mind when we stay in hotels with balconies. Cost is right around $20. Here’s a link to a good one (no photo – I figured you know what a bar looks like!):

Master Lock 265DCCSEN Dual-Function Security Bar


Smoke hood

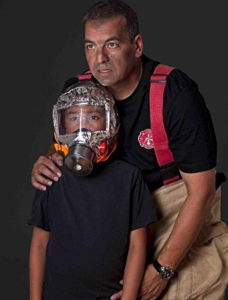
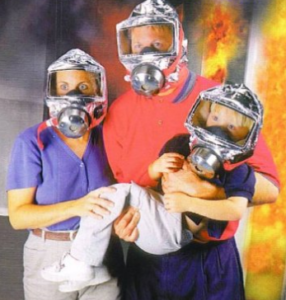
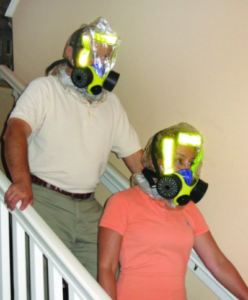
Rather like a gas mask, a smoke hood goes over your head and seals tightly to protect you from inhaling smoke. A filter allows you to breathe. Smoke hoods cost anywhere from $25 to $150 or even twice that, so you’ll want to shop carefully.

The filters in smoke hoods screen out particulate matter, fumes and gases. Unfortunately, the most deadly gas, carbon monoxide, can’t be filtered out. But carbon monoxide can be converted to carbon dioxide. Look for this feature in the smoke hoods you’re considering.

Other features to consider: How big is the hood — will it go over eyeglasses? Will it fit a small child? How good is visibility? Can others see you in the smoke? How long will protection last?

Here are three different models from Amazon, for comparison. Look at the photos (provided by the sellers) to answer some of the questions above. Click on the links to go directly to the detailed product page.

1 – FIREMASK

FIREMASK Emergency Escape Hood Oxygen Mask Smoke Mask Gas Mask Respirator for Industrial and Urban Survival – Protects for 60 Min Against Fire, Gas, & Smoke Inhalation . Great for Home, Office, Truck, High Rise Buildings. Get Peace of Mind 

Firemask

Firemask claims 60 minutes effectiveness. Of course, it is one-time use, replaced if you need to use it. Its Polycarbonate visor looks to provide good visibility.

Easy to put on, fits children as young as 3. Amazon low cost (as of today), $28.95.


2 – SAFESCAPE

Safescape ASE60A Fire Escape Smoke Hood Respirator Hard Case with Glow in the Dark Side Straps and Labels

safescape

From the photos and reviews, it looks as though the hood on the Safescape is bigger and perhaps more heat resistant than other hoods. The hard case can be mounted in a strategic place, and the glow in the dark strips would make it easy to find.  Any hard case might make packing a smoke hood more difficult.

60 Minutes of breathable filtered air. Easy to put on without special instruction.

Five year shelf life – Free Replacement if used in documented emergency.

Amazon price today: $69.95. Note that there is also a less expensive Safescape 30-minute hood.


3 – iEVAC

iEvac® the only American Certified Smoke/Fire Hood

ievac

This is most expensive and heaviest of the three hoods here. Notice the reflective tape top and sides, which will stand out in smoke and darkness.

This hood is the only “certified” hood. It gets top reviews and carries some strong endorsements:

  • Designated as an Anti-terrorism technology by the US Department of Homeland Security Safety Act
  • Tested by the US Army Research, Development and Engineering Command, Edgewood Chemical Biological Center
  • Currently being used by numerous Federal, State and local Government Agencies including every branch of the Military

The iEvac costs $149.95 at Amazon (and more in other places).


Of course, you can’t avoid every potential danger when you’re traveling. But some simple, common sense preparations may make your trip a lot more comfortable and safer.

Virginia 
Your Emergency Plan Guide Team

If you actually live full-time in a highrise building, you may want to take a much closer look at what would happen if a fire broke out. Here’s an Emergency Plan Guide Advisory with more ideas.


Emergency Radio Update

Share

Panasonic Emergency Radio

How old do you think this radio is?

Radios — The Most Popular Piece of Emergency Gear

More of our readers “invest” in emergency radios than in any other one piece of emergency equipment. (Makes sense, of course. Without a reliable emergency radio, when disaster hits you could be completely cut off. Without a good emergency radio, you may not even know that a disaster is COMING!)

Because of this interest, we continually comment on what to look for when you’re shopping for a radio. And we regularly update our Best Emergency Radios review page to be sure the radios listed there are still available.

So it’s time for yet another radio update.

Status of our long-time favorite emergency radio

The Ambient Weather Adventurer, original cost around $30, has been our favorite for a while. We own more than one, and many of our readers have them, too. It’s a great radio to tuck into your pack or simply have on the kitchen counter.

Bad news! This model seems to have been discontinued. Here and there online you can find one for sale, but their prices make no sense! I saw one yesterday at $281!

So we aren’t recommending this model anymore. (Maybe you want to try to sell yours for a profit???)

New favorite, the Eton FRX5

Eton makes several different radios, and the brand carries a number of labels including one from the American Red Cross.

The FRX3 costs about $10 more than the original Ambient Weather, and has most of the very same features.

The one we’re recommending today, though, is the Model FRX5.  It costs nearly twice as much, but for that you get double the power, more lighting options, the ability to charge a smart phone, capture localized emergency alerts, etc.

Here’s a link to the radio: Eton FRX5 Hand Crank Emergency Weather Radio with SAME Alerts

And here’s what it looks like:

This is a very compact radio, just over 7 inches tall and a couple of inches wide. It operates on battery, AC, solar and crank. In fact, this radio earned the best score in a recent test measuring how much listen time was created by 2 minutes of cranking. (In this case, something like 10-12 minutes.)

What I like is the SAME Alert feature — stands for Specific Area Message Encoding. You enter in your county and the radio will automatically send alerts for that area.  (Seems to me this would be essential in Tornado Alley of the U.S.!)

When you click the link above, you’ll go directly to Amazon. Scroll down to the bottom of the Amazon page for a full description of this radio, with several more photos.

First time radio purchaser? Get answers to 7 important questions.

If you haven’t yet added a radio to your survival supplies, check out the Eton model above. Just click on the blue link to get started.

If you have NEVER shopped for an emergency radio before, go first to our Best Emergency Radio Reviews page because you’ll find there the 7 questions you need to consider before adding a radio to your pack, or to the survival kit of any of your family members. And you’ll see a number of other radios that we have reviewed and recommend.

The radio we would upgrade to if we were flush

I’ve mentioned before that we have an old Panasonic shortwave radio. (Joe’s had it ever since we’ve been together, and that’s over 33 years now, so its age is something older than that!) That’s the radio in the picture at the top of this page. Joe was changing the batteries, which explains the red ribbons at the bottom.

We have hauled this radio from coast to coast and back again, and Joe loves it.

Yesterday Joe handed me a spec sheet for the radio he would LIKE to have. It’s also available at Amazon, and also made by Eton. As far as I am concerned, it certainly looks a lot like the old Panasonic (!), but . . .Joe assures me that it’s “the ultimate” in radio receivers. It gets AM, FM, Aircraft, Longwave and Shortwave bands, has a rotating antenna plus you can tune-in stations by keying them in or searching for them. You can actually store 1000 stations!

If you’re really serious about emergency radios, check this one out.

Alert – Prices for the SAME RADIO vary considerably. Shop carefully to get the best deal!

Eton Grundig Satellit 750 Ultimate AM/FM Stereo also Receives Shortwave, Longwave and Aircraft Bands – Black (NGSAT750B)

And doesn’t it look a LOT like the Panasonic collector item above?


You need at least one emergency radio, and probably several. The good thing about radios is you can select the features you need (for each use or each person) and not have to buy features you don’t want, and you’ll save by choosing carefully.

Do you already have an emergency radio? Would you recommend it?  Let us know in the comments!

Virginia
Your Emergency Plan Guide Team

Don’t miss any of our equipment updates. Sign up below to get our Advisories directly into your email each week.


Plastic Bags – Use or Reuse for Emergencies

Share

PlasticBagsToday I stuffed 20 or so plastic bags into one, so I can take them back to the store to be recycled. It’s amazing how many accumulate in just a couple of weeks – and we carry reusable shopping bags!
Be that as it may, I always keep some bags handy for emergency use! Here are 20 ways they can come in handy or even save the day!

And the best part? You can collect these bags and add them to your kit for free. (Or at least you MAY get them for free. A new law was just passed in California to ban free plastic bags . . .)

Keep out moisture

  1. Use a plastic bag to line your Bug Out Bag, to help keep it water proof.
  2. Use zip-lock bags for storing food, small items, cosmetics, etc. in your bag.
  3. Put a plastic bag OVER a backpack to keep out the rain.
  4. Turn a large plastic bag – like a trash can liner – into a rain poncho. Just make a slit along the seams for your head and arms.
  5. Use bags inside your boots to keep your feet dry.
  6. “Wear” underneath your clothes for extra insulation.

Protect from dirt

  1. Pull a plastic bag over your hand before picking up something dirty. Then just turn the bag inside out and dispose of it.
  2. Tie a bag over your face to keep out blowing dirt or sand. (Of course, don’t use thin plastic that clings for this!)
  3. A plastic bag can work as a diaper. (Why, I remember the earliest plastic diapers that I used on my daughter really weren’t much different!)
  4. Water out of order? Use plastic compactor bags in the toilet to capture waste. (These won’t likely be bags that are reused. But having a supply is essential for your emergency stash.)

Aid for First Aid

  1. Use zip-lock bags to store different first-aid supplies, keeping them clean and dry. You can pack full small bags into a larger bag for easier and more efficient access. (For example, pack gauze in one bag, band aids in another, tape and scissors in a third; put them all in one larger bag.)
  2. Fill a bag with ice and apply over an injury to keep swelling down.
  3. Turn a plastic bag into a sling.
  4. Tie a bag over a bandaged wound to help keep it dry.
  5. Somebody sick? Use a bag to catch vomit or diarrhea. Yukky, but better than having it spread all over the car or your living area.

Other smart uses

  1. A bag with no holes can be a temporary carrier for water, snow, berries, etc.
  2. Twist a bag or two together and use them as a belt or a carrying strap.
  3. Fasten a number of bags together end to end to use as rope. Braid several strands for more strength.
  4. Use a white bag as a signal or strips of bag to mark the trail.
  5. If an emergency keeps you trapped in the house, use trash bags – for trash! You can always dispose of it later.

As you’re packing your Survival Kit, use a few extra bags as padding, to cushion the sharp corners on tools, keep shoes separate, etc. That way you’ll always have some at the ready.

And one last note about the “secret ingredient”

Many of the ideas above would work a lot better if, in addition to the right sized bag, you have DUCT TAPE. (That’s an old roll in the image, above. Recognize it now?)

Use duct tape to close gaps, make sure the bags stay put, and even to seal them up when they’re full of waste.

These two essentials – plastic bags and duct tape — should be in every one of your kits. And the good news? They’re practically free!

Virginia
Your Emergency Plan Guide Team


Readers and friends send me ideas all the time. Don’t hesitate if you have one. And don’t miss ANY of them. Sign up below to get all our Advisories.


Has the Zika Virus reached your neighborhood?

Share

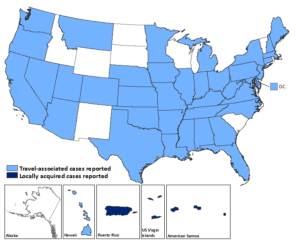
Like the Killer Bees, the Aedes mosquitoes carrying the Zika Virus have spread across the southern part of the U.S. and are steadily expanding northward.

But people travel much faster than mosquitoes, and so the disease has outpaced the mosquitoes. Zika Virus MapHere’s a Center for Disease Control map (from April, 2016) showing where cases of the disease occur. UPDATE from December, 2016. Every state in the U.S. now has reported infections — a total of 4,756 in all!

So far, most of these illnesses are travel-associated.

But it is only a matter of time before the mosquitoes get here. In fact, because symptoms of the disease are typically mild and like those of a lot of other diseases, the mosquitoes may already be here and we just don’t know it because infections haven’t been reported.

Symptoms: fever, rash, joint pain and red eyes (conjunctivitis). People don’t get sick enough to go to a hospital, and rarely die. The concern, as we know, is for pregnant women, whose unborn babies may be affected.

So how to avoid bites from disease-carrying mosquitoes?

No matter where you live, or how old you are, here are three important steps to take to protect yourself and your family.

1 – Get rid of standing water!

It’s simple. Mosquitoes lay eggs in water, the eggs hatch, and you have bugs. So take a tour around your home and office and clean up or get rid of any standing water. In particular, look for . . .

  • Water barrels and recycle bins
  • Flower pots, saucers, toys
  • Areas around drains
  • Old tires
  • Pet or animal water bowls
  • Bird bath


2 – Wear long-sleeved shirts and long pants.

Mosquitoes are particularly active for an hour before and after dawn and dusk. Cover up and, if necessary, go inside to avoid getting bit.

3 – Use insect repellents.

We’ve probably all experienced that slippery smelly stuff that we slathered on as kids. It worked, but wasn’t very comfortable.

From what I can tell, things have improved somewhat. Here are some of the decisions you’ll want to make before buying any insect repellent.

  • What insects do you want to repel? We’re talking here at Emergency Plan Guide about mosquitoes, but some repellents are good for ticks, chiggers, etc. as well. Read the labels.
  • Do you want to use DEET? DEET (N,N-Diethyl-meta-toluamide, or diethyltoluamide), developed in the 1940s for use by the army, is the (yellow) chemical ingredient that is the standard for repellents. Tests show that the higher the concentration, the longer the protection. (For example, 100% DEET was found to offer up to 12 hours of protection while several lower concentration DEET formulations (20%-34%) offered 3–6 hours of protection.) Most of what I read suggests that non-DEET repellents shouldn’t be relied on for prolonged protection where mosquito-borne diseases are a substantial threat.
  • How long do you need protection? Note the concentration and buy and re-apply accordingly. Labels are very clear as to the percentage concentration, and will give you an idea of how long to expect the repellent to last.
  • Three chemical alternatives to DEET are Picaridin, Permethrin and IR3535. They don’t seem to affect plastic or vinyl the way DEET does, and have similar protective capabilities. Again, check percentage concentrations.
  • Looking for a natural repellent? Consider Oil of Lemon Eucalyptus. It seems to provide good protection with a pleasant odor (!) but protection may not be as long lasting as the chemical repellents.

All these repellents come in lotion, cream or pump, and some as wipes.

Note for children: Some repellents come as the ingredient in a “repellent bracelet,” but reviews suggest these bracelets may not be as effective as advertised. In any case, if you have children, be sure to note age restrictions that appear on some of these products.

What do repellents cost?

With all that info behind us, let’s move on to the good news.

Repellents are easy to get and quite inexpensive — less than $10.

There is no reason not to have a bottle or two handy in the car and in the house as part of your personal program to prevent the spread of disease.

Some recommendations for repellents.

These can be readily found at drugstores; clicking the link will take you to Amazon, where you’ll find a lot of detail and reviews from users, which I find particularly useful.

A DEET product at 98.1% concentration: Repel 100 Insect Repellent, 4 oz. Pump Spray, Single Bottle

Up to 10 hours of protection. Comes in a pump bottle small enough to carry easily.

From the same company, a natural ingredient formula: Repel Lemon Eucalyptus Natural Insect Repellent, 4-Ounce Pump Spray

This product is advertised as having a “cool, refreshing scent”. Up to 6 hours of protection.

Another version of repellent designed to be sprayed on outdoor clothing: Sawyer Products Premium Permethrin Clothing Insect Repellent Trigger Spray, 12-Ounce

This is advertised as being “as effective as 100% DEET.” Spray it on clothing, it won’t stain or damage, and will last through multiple washings.

My recommendation — Don’t wait until you read that the virus has hit YOUR town. Clean up your yard, then get and start using insect repellent. Pretty simple precautions.

Virginia
Your Emergency Plan Guide Team


A note: We’ve talked about mosquitoes carrying the virus. Be aware that it can also be transmitted through sex. If someone is infected, abstinence is the best protection.

Solar Security Lights — Do they work?

Share

Worried about someone lurking in the shadows?

Security for backyardWe’re known as the “Survival People” on our block, so it’s not uncommon for people to stop and ask for our opinions about anything connected to survival, which seems to include security.

Last week we got asked TWICE:

“What outdoor lighting do you recommend for security?”

We’ve written about this topic before, but the questions pushed us to do more research and ask our own questions, so before we give any answer, here’s more of what we’ve learned.

Question 1. Do bad guys prefer to operate in the dark?

According to all the stories we’ve read, and we’ve read a lot of them, the simple answer is, “No.”

In fact, there are many reports of cities or neighborhoods in both the U.S. and other countries where street lighting was turned off – to save money, usually – and street crime went DOWN.  Why?  Apparently bad guys don’t like tripping over things in the dark any more than you do.

And when they use a flashlight, it’s immediately noticeable.

Question 2. So does outdoor lighting actually encourage bad guys?

That depends. Lights that are on all the time give bad guys the ability to see what they are doing and get it done more easily.

However, if someone is watching the premises, and sees suspicious activity and acts quickly to stop it, then the lighting is useful. The key is to have that alert human presence.

At your house or business, who is keeping watch at night? Are they watching all night?

Question 3. What about motion activated lights?

Now we are getting somewhere.  A light on all the time is predictable and becomes unremarkable. When a light goes on suddenly, it is startling – and noticeable. Anyone within sight of the light is going to look to see what set it off.

So from a security standpoint, motion activated lights are the obvious choice.

Here’s what we have at home.

Now at our house, we actually DO have a light that burns all night. It’s on the porch and is designed to light the steps for us and for visitors. It’s a hardwired fixture with energy-efficient LED bulb, and we have checked to be sure our neighbors aren’t bothered by it. The bulb has lasted for years.

We have hardwired motion sensor lights where we park the car. They make it easy for us to get to and from the backdoor and into and out of the car.

Finally, behind the house, we have solar powered motion-activated lights. When they come on at night, we are awakened instantly and are able to look out to see what may have set them off. (Usually we can’t tell! Perhaps it’s a bird flying by. Occasionally we suspect an animal like a possum or raccoon. We haven’t seen any people crossing the backyard, yet.)

One of these lights actually has an audible alarm that can be turned on or off, too.

If you’re shopping for lights, here are some recommendations and suggestions about what to look for.

Recommendations for Solar Powered Lights

We started years ago with simple battery-operated lights. While they were easy to install, they seemed always to be dim and dying. So, we quickly turned to hard-wired lights. They work great but you need a ladder, patience and some handy-man smarts to install them.

When solar powered lights came on the scene, we were thrilled.  Particularly since we live in Southern California!

Solar lights are either one self-contained unit (solar panel + storage battery + light itself) or have separate components: solar panel (that must be mounted where it gets sun) connected via a thin wire to the actual battery + lighting fixture.

Whether you select the self-contained unit or the component unit depends on where you’re installing the light and where the sun is.

Over the years we have tried small, inexpensive solar-powered lights and moderately priced ones and have concluded that you pretty much get what you pay for. You can get great deals at Amazon, where, as you know, we are affiliates.

Here are two lights that we really like. Click on the images to get all details.

This Litom Bright 60 LED Solar Powered Security Light seems to be top of the line in its price range (around $40). We have found it to be as bright as we need, and some of the reviewers at Amazon say that it is brighter than any others they have tried! This light is also waterproof, essential for an outdoor fixture.

The best part is how adjustable the light is. You can set it for dim or strong, set it for always-on or motion-activated, and you can adjust the “activation” area as well as the “lighting” area. Really, it ought to work for whatever you need!

Read the reviews at Amazon, and they will give you more ideas about installing and using the light. (If you want a white finish, take a look at the Sunforce 82080 80-LED Solar Motion Light model. It costs within a dollar of the Litom model.)

The second recommendation is for a light made by the same company. The Litom 20 Big LED Solar Sensor Powered Wall Light is smaller, more compact, and even brighter! (And less expensive — around $25.) Many of the Amazon reviewers say that they got several in order to cover different areas of their property. Last time I looked, you could purchase packs of 4 for a discounted price.

As I wrote this, Litom was offering some special deals on Amazon. (Scroll down on the page below the photos.) And different sellers were charging quite different prices!  So take the time to shop!

To get details and current prices, click on the images.

To summarize.

Lighting alone will not deter a determined bad guy. But good lighting can make it safer for you and visitors, and motion-activated lighting can cause an unwanted visitor to change plans.

Let us know your experiences with lighting!

Virginia
Your Emergency Plan Guide Team

We have full reviews of several popular emergency items. See all our product reviews and recommendations here.


Lies Your Mother Told You

Share

“In a big emergency, FEMA will be there to help.”

You’d think that after what happened after Katrina, all of us would be tuned in to the role that FEMA plays to help with disaster recovery.

Apparently, we’re not.

Some recent headlines got my attention and prompted me to take a closer look at FEMA. Check these out:

  • Louisiana: Some who sought FEMA assistance after Katrina being forced to pay back ‘debt’
  • Iowa: ‘Serious Risk’ Federal Flood Protection Money Not Coming
  • New Jersey: Hurricane Sandy Anniversary 2014: Billions Of Dollars In Federal Aid Still Unpaid

Bridge down after floodIf you are counting on government money after a disaster, you’d better keep reading.

This article is not meant to give you legal or financial advice. You need to check with your own state’s emergency management agency for details. Still, the examples we’re providing raise some pertinent questions.

Question #1: Who gets FEMA money after an emergency?

FEMA money is meant to help two major groups: local governments and local citizens.

Before any money starts flowing after a disaster, though, there’s a procedure to follow. The FEMA website describes it this way:

  1. Local Government Responds first, supplemented by neighboring communities and volunteer agencies. If overwhelmed, it turns to the state for assistance;
  2. The State Responds with state resources, such as the National Guard and state agencies;
  3. Damage Assessment by local, state, federal, and volunteer organizations determines losses and recovery needs;
  4. A Major Disaster Declaration is requested by the governor. It describes the damage and agrees that the state will commit state funds and resources to the long-term recovery;
  5. FEMA Evaluates the request and recommends action to the White House based on the disaster, the local community and the state’s ability to recover;
  6. The President approves the request (or FEMA informs the governor it has been denied). This decision process could take a few hours or several weeks depending on the nature of the disaster.

So that’s the process. Disaster recovery is designed as a partnership between the state and the Federal Government. If the state doesn’t want to play, the government won’t play either.

And, even when a request goes through the process and is approved, that doesn’t seem to mean the funds always arrive as anticipated.

In 2014, for example, Congress authorized $73 million for flood protection for Cedar Rapids, IA (things like flood walls, levees and pump stations) but never appropriated the money.

Even though both New Jersey and New York suffered roughly the same amount of damage from Hurricane Sandy in late 2012, New York has received over $7 billion in assistance and New Jersey has received only $1.7 billion.

If you live in either of these places, you have to ask “Why?”

Question #2: What can FEMA money be used for?

First, FEMA money can be used for “public assistance,” which is money aimed as repairing a community’s infrastructure – roads, bridges, buildings, schools, etc. FEMA can pay for 75% of the costs; the state is required to come up with the rest of the money.

Individuals apply for – you guessed it – “individual assistance.”

Disaster aid to individuals generally falls into the following categories:

  • Disaster Housing, available for up to 18 months, for people whose homes were damaged or destroyed. Funding also can be provided for housing repairs to make them habitable again.
  • Disaster Grants can help replace personal property and provide money for transportation, medical, dental and funeral expenses.
  • Low-Interest Disaster Loansare available after a disaster for homeowners and renters from the U.S. Small Business Administration (SBA) to cover uninsured property losses. Loans may cover repair or replacement of homes, cars, clothing or other damaged personal property. Loans are also available to businesses for property loss and economic injury.
  • Other Disaster Aid Programs may supplement state or local help with counseling, unemployment assistance, legal aid and assistance with income tax, Social Security and Veteran’s benefits.
  • Assistance Process– After you apply, your damaged property will be verified. If you are approved, you’ll get a grant for rental assistance. A loan application requires more information and it may take weeks for it to be approved.

The deadline for applying for most individual assistance programs is 60 days following the President’s major disaster declaration.

This leads us to question #3.

Question #3: Why would some people be forced to pay back FEMA money?

After FEMA funds have been approved and distributed, the program is audited. Through the audit, FEMA is looking to “recoup” funds that have been issued to the wrong people or used incorrectly.

First, FEMA is looking for duplicated payments. This is where the homeowner has received money from both their insurance company or from an SBA loan and from FEMA — for the same purpose.

Second, auditors look for ineligible uses. This is where the recipients of FEMA money have used it for unintended purposes. For example, a recipient got money to repair the home and used it, instead, to pay off the existing mortgage.

In some cases, months after the disaster and receipt of FEMA funds, residents receive letters seeking “recoupment.” These letters are reported to threaten legal action, negative reports to credit agencies, property liens, and impacts on residents’ future eligibility for federal disaster assistance if they fail to pay.

A couple of examples:

FEMA has so far determined that $34.7 million given to Floridians for recovery from the 2004 hurricanes was improperly spent and must be repaid,

And in 2014, over 1,000 New Jerseyans still displaced from superstorm Sandy started receiving letters from FEMA telling them they had received too much money and would have to pay it back.

If anyone tells you to count on FEMA as your disaster plan, you may want to pause before you believe it.

Aren’t you glad you read this far?!

Virginia
Your Emergency Plan Guide Team

If you have any experiences with FEMA to share, good or bad, please do!


Don’t miss any of Emergency Plan Guide’s Advisories. You can sign up below to receive them automatically.


5 Ways to Create Your Own Home-Grown Disaster

Share

Danger, Not a Step.

Look familiar? See #4 below.

Not knowing is one thing. Just not thinking is another.

Here are five really dumb things that people do that lead to emergencies and even disaster.

Don’t do any of them, please.

 Dumb Act #1: Mix household cleaners.

The classic mistake is to mix household ammonia (like window cleaner spray) with liquid bleach — “because two cleaners ought to work better than just one.”

The result: a gas that can cause nausea, eye irritation, sore throat, headache, cough, and difficulty breathing.

In fact, the chloramine gas that’s released could even send you to the hospital for an emergency tracheostomy — surgery to create a hole through the neck into the trachea (windpipe) to allow you to breathe.

OK, so you know about not mixing.

Did you know that you can create the same noxious gas by simply using two cleaning agents one after another on the same surface?

Every cleaning agent should be suspect:

  • liquid cleaners for the toilet bowl
  • gel for unclogging drains
  • powdered cleansers for counter tops and grout
  • spray foams for the shower.

Check the label for ingredients (look for sodium hypochlorite) and warnings.

If you smell or feel ANY strange or strong fumes, get out of there immediately and allow the space to air out thoroughly before allowing anyone into the area. Rinse everything completely with water and let it dry out some more before you attempt to finish your cleaning job.

Dumb Act #2: Work alone.

Most of us are happy to work alone for some time during the day!

But most of us are not engaged in high risk activities like using dangerous tools, working around machinery, electrical wires, scaffolding, trenches, high pressure materials, hazardous substances, at height or in closed spaces like grain elevators or tanks, etc.

For the 15% of people who do find themselves in these situations it’s important to have some sort of check-in procedure.

This isn’t just for construction or agricultural or other special industries. Office workers like receptionists or parking attendants who work alone may face potential violence from the public. They need a check-in procedure, too.

If your workplace doesn’t have a policy about working alone, get one.

Dumb Act #3: Underestimate a portable generator.

We’ve talked a lot lately about how a portable generator can be a great emergency preparedness tool if the power goes out. We’ve even made some recommendations about which kind to consider, how much to expect to pay, etc. (See footnotes for links.)

We have certainly talked about the risk of carbon monoxide poisoning from setting up a generator indoors. That extends to having it in the garage or even locating it too close to an open window.

There are other dangers associated with generators that you would know if you thought about it – but sometimes, people just don’t think.

Consider these possibilities:

  • Fire. Like any motor, your generator can get overheated. Don’t spill gas on or around it!
  • Electrocution.  A generator produces – electricity! If your power cords are too light, frayed or kinked, or not properly grounded, you could get the shock of your life. Electricity can kill.
  • Electrocuting someone else. The fifth leading cause of occupational deaths is what is termed “back-feeding.” This occurs when a power company worker touches a wire that should be inert but isn’t because it is carrying power from an unanticipated source – like YOUR generator.

This is why you don’t plug your generator into a wall outlet in your house. The power goes into the house and right through the house into the power grid where the unsuspecting worker is busy trying to fix the outage!

Yes, there is a way to power your house with your generator, but it requires a special “power transfer switch” installed in advance by a qualified electrician.  (A solar array with battery backup requires the very same type of switch.)

Dumb Act #4: Disrespect a ladder.

We are all pretty familiar with ladders, and have probably used at least a couple of different types — step ladder, extension ladder, etc.  (There are many types. Wikipedia lists 21 different ones!)

But for all its familiarity, a ladder can be very dangerous.

If its feet aren’t solidly placed, the ladder can tip over backwards or slide down frontwards. You come down right with it, flat on your back or your face or tangled between the rungs.

Second, a ladder can break. Like any other piece of equipment, ladders simply wear out.  Got an old one in your truck or garage? Before you use it the next time, check out the rungs, the rails, the spreader bars and locks and the feet to be sure they all function as designed.

Finally, can you read? I’ll bet your ladder has a sign somewhere that reads, “Not a step.” (I took the photo above of my own well-used step ladder.)

In simple English, that means “Do not stand on this.” Get up too high on a ladder and you will overbalance the whole thing. Stand on a paint can shelf instead of a step, and the shelf will break.

Every year, more than 90,000 people end up being treated in the emergency room from ladder-related injuries!

Dumb Act #5: Disconnect smoke alarms.

This is simple. Once again, the statistics tell you everything you need to know.

Half of U.S. fire deaths occur in houses where a smoke detector is installed but has been disabled because it beeps.

Of course, nuisance chirping from a smoke alarm is awful. And yes, it always seems to happen in the middle of the night.

Just take the time to fix it. Either put in a new battery or replace the whole thing, preferably with a photoelectric alarm (instead of the cheaper ionization model). If you’re not sure how to do it, go online to YouTube and search for “How to change the battery in a smoke alarm” or “How to install a smoke alarm.” Some videos are boring and some are better; any of them will guide you in making the fix!

As you read this, I hope you are saying to yourself, “Heck, I knew that!”

The key thing is, not everyone does know it! When you have the chance, share this information with children, co-workers, members of your club or church — anyone, in fact, who might have missed it. These are NOT emergencies you want people to learn about from experience.

Virginia
Your Emergency Plan Guide Team


Looking for more info on some of these topics? Here are other Advisories we’ve written over the past year or so.

The Best Generator for Emergencies

Portable Generator for Power Outage — Safety Update

Carbon Monoxide Alarms and Detectors

What you didn’t know about Smoke Alarms


Don’t miss the NEXT safety Advisory. Sign up below to get them all.


Here’s a Gift for You or a Friend

Share

On a daily basis we’re caught up in the excitement of whatever storm or heat wave is going on, or in the latest political maneuverings. Or maybe news from the sports world.

Here in California, though, there’s a background noise like the far-off rumble of a train. It is  . . .

The steady threat of an earthquake.

It’s tough to get people to think about and prepare for something they may never have experienced, no matter how dramatic you try to make it. Our neighborhood emergency planning group comes back to the subject of “the big one,” and earthquakes in general, again and again!

Here’s one of our best neighborhood emergency response group flyers.

How to protect yourself during an earthquake and afterwards

Share this flyer!

How to use the flyer.

  • Make copies and go over it at a neighborhood meeting. You will be surprised at the number of questions that will come up and the number of comments people will make about the supplies they have stored. Discuss the status of gas lines in your neighborhood and how to tell if there is a leak. Take a look around the room you are in and ask people what furniture they would get under if the earthquake happened right this minute! If your meeting takes place at night, find out how many people in the audience even have a flashlight with them! (Action item: Come prepared with a flashlight to give away as a door prize.)
  • Make a few changes to the text and and use the flyer at work.
  • Send to family members and out-of-town friends, too.

Emphasize the warning about NOT STARTING YOUR CAR if you suspect a gas leak. Cars backed up in traffic jams have started devastating fires in earlier quakes.

So you can make any changes, and fill in the box at the bottom of the flyer,

Click here to download the Microsoft Word document.

Let us know how your meeting goes. What questions came up that you weren’t expecting?

Virginia
Your Emergency Plan Guide Team


If you need more background for likely questions, here are some earlier Advisories that may be useful:

Smartest Emergency Purchase I’ve Made Lately

Share

When it comes right down to it, having a simple phone plugged into a traditional landline simply makes sense. And when it costs so little . . .!

Corded phone for emergencyFive reasons to go out today and buy a corded phone.


1 – It works when other phones are knocked out or overwhelmed in an emergency.

How many times have we talked about what happens to regular phone communications in a widespread emergency? Power can disable cordless phones; cell phone towers can fall; systems can be overwhelmed. Ultimately, any device powered by a battery will stop working.

Landlines are the most reliable of all the options.

2 – Emergency Services will pinpoint where the call is coming from.

When you call 911 from a landline, emergency services know just where you are. When you call from a cell phone, they have to go through extra steps (using GPS) to find you. And if you’re on the tenth floor, and the only ID the emergency services get is the address of the building . . . When seconds count, a landline wins hands down.

3 – Your kids (visiting grandmother, babysitter) can operate a simple corded phone.

My granddaughters play with their parents’ cell phones all the time. That doesn’t mean they know how to actually turn a phone on, get past the password, find the phone app, and use the phone to make a call.

EVERY kid above the age of about 2 can be taught how to dial 911 from a simple phone.

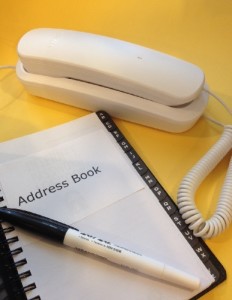
Not every adult carries a phone, either. Consider elderly relatives. They, too, would easily be able to make an emergency call using a phone like the one in the photo.

4 – Yes, someone could tap the line – but not a random hacker.

Privacy is a concern whenever you’re using wireless communications. A landline is secure unless someone has actually installed wiretap equipment onto your line.

5 – You won’t misplace or lose it.

Your emergency phone is tethered to the wall. It will always be in that place so you will always be able to get to it immediately.

What will it cost?

A neighbor told me he’d bought a simple phone recently for “around $10.”

Frankly, I found that hard to believe. Still, when Joe went shopping for a phone yesterday, he came home from Walmart with the one in the photo. And it had cost him $5.95!

Naturally, you can get fancier ones, with a bigger price tag. (Check out our friends at Amazon. Use the search words: “corded phone.”) But we were looking for the simplest model possible.

Joe opened the box, pulled out the phone, and . . .

We plugged it into a wall jack — instant dial tone.

No registering, no passwords, no set-up, no waiting for a battery to charge, no software upgrades.

(What a relief after we had spent hours over the past week getting our over-the-air antenna to work with our TV and our Amazon Fire Stick. That’s another story, of course . . .)

Now, since the phone doesn’t store names or numbers, you’ll have to dig out an address book to go along with it. Or simply type up and print out a one-page sheet of emergency numbers as part of your family communications plan. (If you have children, you are likely to have this page already prepared for babysitters.)

Fasten this page to the phone itself, or tape it to the wall next to the phone, so it doesn’t get misplaced.

That’s it! It has taken me longer to write this Advisory than it did to get the phone set up.

Action Item: Do yourself a favor and get your own corded phone today.

You will definitely feel smarter and you and your family will definitely be safer!

Virginia
Your Emergency Plan Guide Team


Being prepared is more a state of mind than anything!  Keep your mind focused every week or so by subscribing to our Advisories. (Form below.) Free. Easy. Sensible.

Have friends who should be thinking about preparedness? Forward this email to them and suggest they subscribe, too!


Pedestrian Killed In Accident

Share

When you’re driving, how well do you see pedestrians or bikers?  How about at night?

Man in darknessIt’s raining in California – at last! Yesterday our day was wet and gray and darkness came early. We stuck close to home and didn’t even take the car out.

Probably a good idea. According to Marc Green, legal expert in “Human Factors” (vision, perception, memory, etc.), “ [the] pedestrian fatality rate is three times higher at night.”

Darkness, smoke, fog, rain = all mean lower visibility and even greater danger for pedestrians.

Somewhere someone is experiencing these conditions right now.

In an emergency, conditions will be worse.

Imagine yourself on foot, either as a victim or as a responder. Street lights are out. The roadway has buckled and cracked so vehicle headlights are jerking and flashing in all directions. Blustery rain is coming down and water is pooling everywhere.

Drivers don’t know what to expect — so their reaction times are slower than ever.

What can you do to protect yourself? Wear high-visibility clothing.

We see safety vests every day, worn by people working in construction, landscaping, traffic control and clean-up. These workers’ vests are required by OSHA (Occupational Safety and Health Agency) and, in fact, they must “reflect from all sides for 1,000 feet” in the dark.

Smart joggers and cyclists have taken to wearing reflective clothing as a safety precaution when they are out in the dark. Typically they have wrist or ankle bands or reflective tape on a backpack or fender. High-fashion garb has stripes, sometimes even small LED lights built in.

(As a driver, I appreciate their efforts, and find myself yelling at those who DON’T make it easy for me to see them.)

The BEST gear is both fluorescent and reflective, or retroreflective.

Fluorescent materials actually emit light by converting invisible ultra-violet rays to visible light. They work best in low natural light, particularly dawn or dusk. Reflective materials bounce a beam of light off their surface – thus they only work as long as a light is shining on them. Retroreflective materials combine both fluorescent and reflective properties.

Get high visibility gear into your emergency kit.

Some popular high-visibility “vests” really look just like a pair of wide suspenders and belt. Convenient to carry and easy to slip on and fit. Here’s a popular one from Amazon: Rioa Best Reflective Safety Vest – Stay Safe Jogging, Cycling, Working, Motorcycle Riding, or Running – Elastic and Easily Adjustable Means the Best Running Gear Around


In my estimation these belts, even with wrist or ankle bands, may not provide enough coverage.  In fact, if you are moving in an emergency situation – crawling, running, bending, digging – the viewer may see movement but not be able to tell what it is he or she is actually seeing.

I prefer a full vest, like the one pictured below: High Visibility Gear Set of Reflective Safety Vest with Pocket + 2 Wristbands+Bag | Perfect for Running Walking Cycling Jogging Motorcycle | Fluorescent Yellow | Size L/XL This vest will make it clear that you’re a person. It has a pocket for your phone or keys, and comes with a small storage pouch.  The hourglass design leaves your sides less visible, so arm/wrist bands help fill in that gap.

Adding a high visibility vest to your emergency kit is easy, and you will find that you pull your vest out more often than you might have thought. For example, I’ve used mine just to walk from a distant parking lot to an event, and I’ve lent it to a friend who found herself drafted to direct traffic during a race. Of course, for CERT trainings I wear my CERT vest, but it is bulky and no where near so comfortable (!).

Virginia
Your Emergency Plan Guide Team

P.S. Be sure to consider what you might be wearing UNDER the vest to be sure you get the right size.