Category: Family Survival

Stuck In Your Car? A Kit To Get You Home

Share
Stuck in car away from home

How many cars do you have in your family? Which car do YOU take when you head out? How many people usually ride with you? How far from home do you get on a regular basis?

Have you ever been stuck in your car?

On any given day if you are more than a couple of miles from home, being stuck in your car could become an emergency.

Imagine any one of these things happening, to you or to a family member . . .

  • You run out of gas coming back from a sporting event. You are on a strange road.  And it’s dark.
  • Fog causes a massive pile up on the interstate and you are caught in the middle of a mile-long traffic jam.
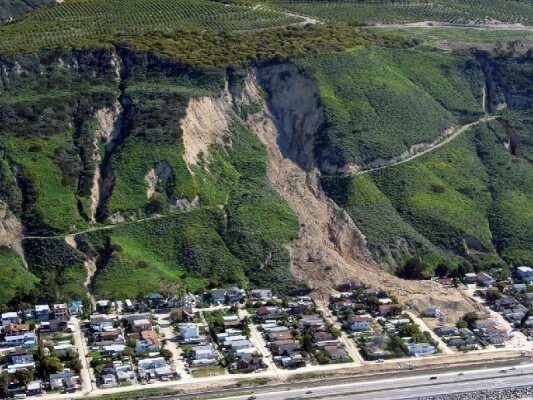
  • A freak snow storm closes the pass. You can’t turn around and head back down. All you can do to pull over onto the shoulder of the road and hunker down.
  • A downtown political rally turns into a riot and you need to find a safe way around the violence.
  • You are heading back to the office from a remote client meeting when you hear on the news that a chemical spill has blocked the road home.

In all these cases, you are physically OK. Your car may be out of gas, or close to it, but it isn’t damaged.

But it looks as though you may be stuck in your car for HOURS. What do you have with you that will make this an adventure, instead of a disaster?

When you are stuck in the car you will turn to your Get Home Bag.

There are two aspects to each bag: EQUIPMENT and SUPPLIES. Let’s take a look.

Let’s look first at emergency EQUIPMENT for your Get Home Bag.

When I was a kid the only emergency stuff we carried in the car were tools, a jack and a spare tire. (We used a screw driver from the tool kit to pry off the hubcaps so we could use them as buckets for picking wild blackberries.)

Today cars are a lot more reliable. It’s rare that we get a flat tire or a breakdown. But incidents like those listed above – storms, accidents, out-of-control crowds — are in the news every day! And hundreds if not thousands of people are caught up in them.

If you’re one of them, you are going to be a lot more comfortable and safer if your Get Home Bag has some if not all this equipment:

  • Lights for seeing and reading (flashlights, lantern)
  • Flares for signaling.
  • Radio reception so you can find out what authorities are doing. Your car has a good radio, but not if you run down the battery. You can also supplement with a battery, solar-powered or hand-crank emergency radio. Not knowing is scary and may lead you to make a dumb decision.
  • Phone so you can call for help. Same issue with the battery. Do you have a power bank or solar charger? (That traffic accident could happen on the long desert road between Las Vegas and LA. Solar would work perfectly – though there may be limited or no service!)
  • Some basic tools – pliers, wrench, tape – and a shovel and traction tracks for snow or sand. Samples below of each of these. Click on the images for full details and prices at Amazon.
Sahara Sailor Folding Shovel Camping Survival Shovel, Collapsible Tactical Shovel – Tri-Fold Handle, High Carbon Military Steel – Entrenching Tool with Storage Pouch ,Camping Survival Gear

I took a look at several shovels. I was looking for something small enough to fit in the trunk, but sturdy enough to be useful. The shovel above seems to fit the bill, plus it has a case. This same manufacturer also makes a more complete “kit” with multiple attachments. Check it out when you get to Amazon.

ALL-TOP 4×4 Recovery Boards – 2 Pcs Off Road Traction Tracks Mat for Sand Mud Snow 4WD Track Tire Ladder + Storage Bag (Red)

If you could be caught in snow or sand, having a set of traction tracks makes all the sense in the world. They come in varying sizes and weights, but I liked this set because of its orange color. One smart marketer has actually packaged these tracks with a shovel.

What about emergency SUPPLIES for your Get Home Bag?

Now we’re back to survival kit basics that you ought to be able to rattle off. Here are 6 main categories for every kit, including the get-home-bags in your cars:

  1. What you need to keep you warm and comfy: clothing, blankets, gloves, comfortable shoes, hand warmers.
  2. Food for energy and comfort: snacks, protein bars, raisins, hard candies.
  3. Water to maintain hydration.
  4. Towels or wipes to keep you clean in the car. Plastic bags for trash. Toilet paper to allow you to stay clean when you have to head outside the car. (Use that shovel to bury your waste!)
  5. First aid kit for any scrapes, headaches, sunburn, etc.
  6. Personal items: chap stick, sun glasses, pills, tampons, etc.

OK, those were the basics. Now, for two often overlooked items . . .

First, check out that guy in the image at the top of this page. What’s he holding? In this digital age, paper maps of your city and the larger surroundings may be forgotten. Your smart phone may be great for directing you to a specific address — as long as you HAVE a specific address. In an emergency you may not have an address. You may be trying to understand a much bigger picture, see all the options for getting around a barrier, a compromised bridge, etc.

There are many maps available, from state to region to city. Two major publishers are Rand McNally, and Delorme. Maps are harder to find than they used to be, so start your search now!

And the single most important supply of all:
A full or almost full tank of gas.

With plenty of fuel you avoid emergency #1 above altogether. You can turn the motor on to keep the car warm and check the news. You can drive the LONG way around the riot or the accident without worrying if you have enough fuel.

Should I carry or try to “borrow” extra gas?

It’s not a good idea to carry extra gasoline. In fact, it may be illegal. If you are determined to carry extra fuel, you’ll want to buy appropriate gas cans, fill them properly, and install a frame on the back of the car where they can be locked down for transport. (Be sure you have competent help with this.)

What about siphoning gas from another car? Newer model cars have a valve that blocks the gas tank from leaking if the car tips over. It will block you from siphoning in the old-fashioned way, too.

So an item for your “additional survival gear list” might be a siphon kit that uses a hand-pump instead of your mouth – lots easier and certainly safer. You’ll have to know what you are doing – attach the hose the right way, understand how gravity works to place the source and the container, etc. If you are shopping online, read all the reader comments!

The siphon above looks to be one of the best moderately priced siphon kits on the market. (Based on comments, the cheap versions don’t seem so reliable.)  Click on the image to get to Amazon.

The upshot: extra gas is hard to get.

So make it a new preparedness habit to stop frequently to top up your gas tank.  All it will cost is a little extra time.  But when you need that extra gas, the payback will be huge!

Wait, you’re not quite finished!

Now, back to our first four questions: How many cars do you have in your family? Which car do YOU take when you head out? How many people usually ride with you? How far from home do you get on a regular basis?

If you are stuck in the car, you want that car to have an emergency kit. But what if you discover this car has the wrong kit?

If you commute to work, and always in the same car, then you can pretty much review this Advisory, pack up what makes sense for you, and you’re set. (Of course, if you use a company car for travel during the day, then you’ll want to transfer your kit to that car for every trip!)

If one of your tasks is to haul the children locally to and from school and sports and whatever else, then THIS car needs a totally different kit. It needs to have a lot more clothing, more food, more water, etc. because “locally” may mean 30 or more miles in any direction!

In fact, you may want to pack one “family” bag for this car and then a small bag for each family member — including one for the pet that always rides along!

Get Home Bags are pretty easy to assemble, don’t cost much, and they will make life a lot easier if you’re ever stuck in the car. Put Get Home Bags on your To-Do list for next weekend!

Virginia
Your Emergency Plan Guide team

P.S. I expect you’ve been thinking of yourself and your family as you read this. But if you are a business owner or manager, stop right now and consider — are your EMPLOYEES prepared with Get Home Bags? Chances are just as good that an emergency will happen during their workday as when they are at home.


Preparedness Story with a Twist

Share
Cars driving in snow
OK, what’s a little snow?

As you can imagine, sometimes – in fact, many times – I send an Advisory out into the blogosphere and it’s never clear what impact it has, if any.  

So when something like the following happens, it’s great!

What started everything off

Last week’s Advisory was a simple list of good preparedness ideas that we’d like to see become second nature for everybody.  

I had thought the list might be just too elementary for Emergency Plan Guide readers, who seem to be pretty knowledgeable. Some of them are recognized experts.

So I hesitated before publishing, but knowing there are new readers out there, I figured . . . what the heck. A reminder once in a while can’t hurt.

Results of my post

First, I got a quick note from one of our long-standing readers who has actually written guest posts for us from time to time. Sparky’s note read: “Excellent list.”  I was gratified!

Then I got a whole long preparedness story from a reader who describes herself as “the well-prepared one.”  It made me shake my head and smile. I even laughed out loud to read the footnote. This was such a great story that I decided to turn it into the keynote for this week! 

Here’s Clare’s story, word for word. Hope it resonates with you like it did with me!

The preparedness story

Hi, Virginia, and thanks again for all you do.

I consider myself well prepared for most perplexities. Usually I’m the person others call for help. I stay informed and stay aware.

How funny is it that I was recently in a situation where I was UN-prepared?

We live in an area (Maine) where weather is a daily concern. I decided to spend Presidents day shopping 2 hours away from our home in a metropolitan area. I watched the weather reports (slight snow in the morning but clearing and the temps above freezing). I cleaned out the car so we could have room for purchases.

As I neared the shopping area it was still snowing but I wasn’t going to run home; after all, this was going to let up, the weather report said.

Well, it didn’t. It snowed and snowed and visibility got bad. The turnpike speed dropped to 40 mph.

We decided if we could find someone to care for the dogs at home we’d be better off finding a motel and staying the night where we were.

That’s when I realized one of the things I’d tossed in the house before leaving was—my every day carry bag, with all my emergency supplies inside it. A change of clothes (which I could also use as pajamas), hotel sized toiletries, extra meds, cash, reading book, even some energy bars, raisins and packets of instant oatmeal. The only thing I left in the car was the first aid kit and spare tire. After all, we were only going to be gone a matter of hours!

Luckily the motel where we stayed gave us toothbrushes and toiletries but our clothes were so wet we had to stop and buy some marked down pjs to change into and spend more money for dinner (which neither of us enjoyed, since by then quite a few restaurants closed early and we were left with bad take out).

How could I get into such a pickle? The worst part of the trip was how helpless I felt, and how angry I was with myself. I was dependent on others, not on myself. True, the hotel had a microwave but how much better I’d have felt having my familiar things with me.

The next day we drove home slowly after a hot breakfast and all’s well that ends well—but you better believe my EDCB will never leave my car again.

And then Clare added a list of what’s in her Everyday Carry Bag . . .

  • cash in small bills and a roll of quarters
  • energy bars, small boxes of raisins, instant oatmeal, small bottles of drinking water, packets of dried cocoa, teabags and sugar packets
  • Sterno, metal cup & disposable lighter
  • toiletries in small sizes plus 2 days of extra meds
  • change of clothes (we keep tee shirts, thermal bottoms, extra sox and underwear) We also keep a bright orange extra-large sweatshirt in the car–as a rule! It’s been used for everything from changing a tire to making a bed for a dog en route to the vet
  • individual flashlights & whistles
  • multi-tool
  • bandanas
  • reflective armbands
  • reading book and puzzle books in paperback form, small notebook with marker
  • first aid kit (separate in the car) with space blankets 

And this all fits in one medium-sized backpack.

The following day, I got this footnote . . .

I’m the well prepared one….and I nag others to plan and prepare. My son had even asked that morning, “Don’t you want that backpack?” and I said, “No, I’ll be home by dark and I’m going to Sam’s Club so I need the room in the car.” My family has not stopped teasing me!

Do you have a preparedness story to share?

When it comes to preparedness, we are all trying to do our best. Hearing how others handle it is so useful – and reassuring.

If you have stories of triumph or setbacks, please share them!  We can always change a detail or two to protect your privacy – but REAL stories go a long ways to keeping up our energy levels.

You can drop a story into the comment box at the bottom of the page, or write to me personally. We all look forward to hearing from you!

Virginia
Your Emergency Plan Guide team

P.S. Here’s the link to that original “good ideas” list. You might want to read it again – and forward to friends and family. 

Specialty First Aid Kit

Share

Are you ready for these unusual threats?

First Aid for Everyday Emergencies

Before we get to our specialty first aid kit discussion, here are a couple of safety rules to live by:


Do not allow a large knife to fall handle first into the garbage disposal while the disposal is running.

What you will discover, if all the stars are aligned, is that that knife will fly out of the disposal and scythe its way through the kitchen, slicing anybody in its path.

In our case, the person in the way was Joe. Specifically, the back of his right hand. (Do not ask for more details.)

And here’s another rule based on personal experience plus a LinkedIn post I read earlier this week:


Assume that, as you set up for an important business presentation, the hinge of a piece of equipment will strike back, gouging a nice chunk out of a finger.

Not exactly everyday accidents, but not unheard of, either! Certainly, breaking the first rule, and then reading about the second rule, made us rethink our own first aid kits — and consider at least one specialty first aid kit as our next project.

Have you considered the state of your own first aid kits?

Where are they?

If you are at home when the wayward knife strikes, your first aid kit is probably in the bathroom. So before you head there to get it, you grab a clean dish towel or a handful of paper towels, and tell the injured person to “apply pressure” to keep more blood off the floor.

If you are in the conference room of a client when the equipment attacks, you may have NO first aid kit handy!

 You certainly don’t have a dish towel and probably don’t have paper towels, either!  (Maybe there will be some napkins over on the table with the coffee.) You grip your bleeding hand with the other hand, getting both of them covered with blood.

Now, if you’ve been through a CERT course, you may have a first aid kit in your car, which is about 2 blocks away in a parking structure. In this case, 2 blocks away is too far away!

How about adding a specialty first aid kit?

Since experts seem to agree that the kitchen and the bathroom are the two most dangerous rooms in the house, why not have kits in each room?

A kitchen kit

In the kitchen, cuts and burns are probably your most likely emergencies.  Your kitchen kit has to have the necessary to respond for all sizes of each.

In our case, a simple band aid wasn’t adequate for the cut on Joe’s hand. And the cut seemed too deep for that handy liquid skin.  We needed to stop the bleeding and close the cut. So, we used folded gauze and several strips of tape, cut to fit. (Which means we had to have scissors, too.)

So, our new kitchen kit will include all those, plus band aids and burn spray.

Traveling kit for business meetings

Our event planning list always has a tool box (for larger events) and a first aid kit. But that’s when we expected a team to be in action.

Now even our smaller meetings – at least, those with presentations! – will contain a specialty first aid kit for pinches, gouges and scrapes! It needs to be small enough to fit into a tote or briefcase.

I picture a ziploc bag with essentials: gauze, tape, band aids, antiseptic cream.  And from the LinkedIn post that I mentioned, this great idea: a RED washcloth to absorb and/or wipe up blood and make it less noticeable!

Your “master” first aid kit — that one in the bathroom — can have dozens of items, depending on your location, your skill level, etc. The list below has suggestions for one of the simpler specialty first aid kits described here.

What do you need for YOUR kits?

Of course, by now you may have thought of a specialty first aid kit that YOU need – like for the kids’ sporting events, or for the woodshop, etc. Each kit might need other items, but you can start with the list below, and have them assembled and IN PLACE with little delay. Click on the image to go to Amazon where you’ll find other styles and sizes.

1-A selection of band aids. These are fabric, which I think holds better than paper.

2-Liquid skin is great stuff. (Some people use crazy glue, but I prefer the “official” item!) Use when a bandaid will get in the way, get dirty, or can’t cover the scrape. This is a pack of two.

3-Gauze pads for cleaning, absorbing. They come in sterile and in non-sterile packs.

4--Antibacterial cream. You probably already have a tube or two of your favorite cream. This one is ours.

5-Spray for burns. Comes in a pressurized can, like this, or in a pump version. If you’re building a specialized first aid kit that will be traveling a lot, you might prefer the pump version.

6-First aid tape comes in different widths, made of different materials, can be self-adhesive, etc. This one is basic, breathable and works pretty well for any use.

7-You may already have scissors at home, too. For your traveling kit you’d want a small, slim pair like these.

I don’t always show prices, but in this case I was trying to show that with a relatively modest outlay you can have WHAT YOU NEED – in the kitchen and in your briefcase — to stop the bleeding, relieve pain, and take the first steps to get the situation back to normal.

If you already have a good supply of everything you need, just divide things up and you’ll be set! Otherwise, grab a couple of the missing items and complete each specialty first aid kit on your list. It will be worth it!

Virginia
Your Emergency Plan Guide Team

Update from March 7. Following my own advice from last month, I went out last week and added a can of first aid disinfectant spray to my new kitchen first aid kit. I have already used it twice when I grabbed a hot pot handle with bare fingers. You can also get mini-sized sprayers, perfect for your purse or key ring. Click on one of these recommendations from Amazon and shop there to see what might fit your kitchen needs.


Seniors Struggle with Emergency Preparedness

Share

Seniors struggle with preparedness

How will these seniors cope in an emergency?

Focus on Senior Citizens

This week I wrote an article for a newspaper being delivered to over a hundred Southern California “55+” mobilehome communities.

The topic was emergency preparedness, and it turned out to be about how seniors struggle to prepare for and to respond to emergencies. The article seems particularly timely given the terrible loss of property and lives in mobile home park disasters across the country in the past couple of years.

The most recent tragedy, of course, was the fire in Paradise, in northern California.

If you have done any research at all about this fire, you will discover that of the 86 people who died in that fire, 53 of them – 77% — were over 65! (If you want to read a full article about that fire and the people who were affected, get this one from the Los Angeles Times.)

The question is:

Why were seniors affected so disproportionately?

We can all probably agree that the basic steps to preparedness are pretty much the same for every audience.

But when you look at these basics, you realize that some proportion of seniors struggle with making any headway.

  1. Seniors may not have easy access to information about the risks they face.
  2. They may not have the discipline to come up with a reasonable plan.
  3. If money is tight, they may not be able to afford the emergency supplies that everyone recommends.
  4. In a violent emergency (flood, earthquake, fire), seniors may not be strong enough or mobile enough to save themselves. (Just look at the women in the image above.)

But when we look even more closely at why seniors struggle with the concept of preparedness, we see that . . .

Seniors may be a “different breed.”

For example, in my own senior community, when there’s an emergency we immediately hear cries of:

 “Who’s going to take care of me?”

Seniors have taken care of others during their lives. Now they expect others to take care of them. The problem with this thinking?

Realities have changed!

  • Families no longer live in close proximity.
  • Property owners and managers are under no obligation to protect their senior residents.
  • We’ve seen how local authorities can be overwhelmed.
  • And Federal authorities can be just too late with too little.

Counting on someone else leaves seniors more vulnerable than other groups.

 “I’ve made it this far and I’m not changing the way I do things.”

Sound familiar? There are jokes, even movies, about stubborn, crotchety old men.

When it comes to preparedness, though, this is no joke.

  • Seniors who refuse to look at risks or to take steps to prepare for them are more likely to become victims.
  • Some seniors even actively protest against preparedness announcements – “You are trying to scare me.”

This mindset endangers those people and puts their neighbors at greater risk, too.

“If it’s my time, it’s my time.”

What is there to say to this?!

What can we do to improve this situation?  Can you help?

Of course, I have done a lot of searching for different official programs aimed at seniors. But when it comes to conclusions, so many of the reports say that results are, well, inconclusive or downright dismal.

So I’d like to ask YOU to think about the seniors you know, and the ones you’ve worked with, and see if you have suggestions that we could share.

Action item: Please consider the three questions below and include a comment at the bottom of this page or write directly to me at virginia@emergencyplanguide.org.

  1. When it comes to seniors you know, what attitudes do you encounter toward emergency preparedness?
  2. What sorts of existing programs or incentives have you seen to be most successful in getting seniors to take an interest in preparing?
  3. If you ran the world, what would you suggest to improve the odds for seniors facing an emergency?

I’ll be collecting everything I can and will share in later Advisories. (Of course, I’ll maintain confidentiality.)

Thank you.

Virginia
Your Emergency Plan Guide Team


What To Do When You Discover a Gas Line Leak — Part Three of a Series

Share

(Part Three of a series aimed at neighborhood or workplace teams)

Gas main shut-off

Where and how?

“OMG, I smell gas!”

In the first two segments of this special article we talked about where gas lines run, why they leak and how to recognize a leak. Now, let’s talk about what to do if you actually discover a gas line leak!

What to do depends in large part where you find the leak.

When you discover a gas line leak in the home

Don’t forget Rule #1. If you detect a STRONG smell of gas in your home, leave the house immediately. Do not do not switch on or switch off lights or appliances. Do not make a telephone call from within the house.  Do not start the car.  When you are at a safe distance, now call 911 and/or your utility to report the smell.    

What’s most likely, though, is that you will get a weak smell of gas. In that case, remain calm. Think.

You may be able to solve this problem yourself and safely.

Possibility #1. Pilot light

Nearly every home has a couple of pilot lights – usually in the gas furnace or water heater, gas stove or oven. The pilot light is really a “starter” flame. When you turn on the appliance, the pilot light ignites the gas coming out of the main burner.

In older appliances, the pilot light burns 24/7. In newer ones, it is turned on when needed by an electronic igniter. (You may hear a clicking sound as it activates.) Fortunately, when the pilot light goes out, it triggers an automatic shutoff valve to the gas supply. So you won’t usually smell a gas leak from this source.

However, in older systems, your pilot light could go out from something as simple as a draft or spill. If the system doesn’t have an automatic shut-off valve you would smell leaking gas.

In this case, you can attempt to relight the pilot light yourself by following instructions on the appliance. They are likely to be something like this:

  1. Turn off the appliance and wait at least 5 minutes for any leaked gas to dissipate.
  2. Be sure you know where the pilot flame is located. (It may not be near the on/off knob.)
  3. Turn the knob from OFF to PILOT.
  4. Hold down the reset button (could be the knob itself) and light the pilot light with a long match.
  5. Keep holding the reset button until the flame is burning steadily, maybe a minute.
  6. Turn the knob to ON.

If the light doesn’t stay lit, try again. If it still doesn’t work after a couple of tries, quit and call for professional help.

Tip: You can’t light an electronic pilot system using a match! If the electronic system isn’t working, be sure the appliance is turned off and call for professional help.

Action item: Check all your home appliances now, before there is any leak!  See where you have pilot lights.  Are they ever-burning or do they have electronic ignition?

OK, so much for pilot lights. You’ve checked, they are working, and you still smell gas.

Possibility #2.  Appliance connection

Most often, if it’s not the pilot light, when you discover a gas leak in your home it will be from an appliance with poorly designed, faulty or damaged connection.

  • Sniff to see if you can detect where the rotten egg smell of leaking gas is coming from.
  • Coat a questionable pipe or connection with soapy water. Bubbles will appear where the leak is located.
  • Look at the color of the flame on the appliance. Is it blue (good) or orange (not so good, could suggest a leak)?
  • Check the outside of the appliance for soot or scorch marks.
  • Do you have excessive condensation on the inside of your windows?

In these cases, if you identify the culprit appliance, get assistance from a qualified expert – probably your gas company. You may be advised to shut off the gas to the appliance, or even to the whole house. In either case that expert will have to re-set the system once the leak is repaired.

Action item: Do any of your appliances have shut-off valves? Look for them when you’re looking for pilot lights. Usually the shut-off is a handle that turns 90 degrees.

When you discover a gas line leak in a larger pipe or larger system

If you discover a gas leak in a larger pipeline or facility, move to a safe distance and notify your gas system operator or property owner and/or 911. (Review signs of a major pipeline leak in Part 2 of this series.)

Do not attempt to find the exact location of the leak, to shut off the pipeline or to fight any gas main fire. Dealing with a large pipeline leak is the business of professionals.

However, in a BIG disaster . . .

You may be called upon to shut down an entire system to protect against fire or the spread of fire.

The more you know about where gas lines run and the shut-offs on those lines, the more options you will have.

1-Building or home shut-off. In an emergency, shutting off the gas to the building likely means shutting it off at the meter. To do this, you’ll need to know where the meter is. You will also need a wrench and an understanding of the ON vs. the OFF position of the valve. Here’s a sample of what a typical home shut-off valve looks like. The shut-off consists of a rectangular piece sticking out of a round valve.

Gas meter turn-off

And here’s an illustration showing the ON (open) and OFF (closed) positions of the valve.

Open or closed?

You can turn a shut-off valve using a regular crescent wrench. Or you can use a non-rusting tool specially designed for the purpose, like the one shown on the ground in the photo or the one below. (Click the image or the link to go to Amazon, where you can buy this tool — less than $15. As always, full disclosure: We are Amazon Associates and may get a commission.)  In either case, you must store the tool near the valve. And you may need to stand on the wrench to get the valve to turn!

SurvivalKitsOnline 515100 On-Duty Emergency Gas and Water Shutoff 4-in-1 Tool for Earthquakes, Hurricanes, Fires, Floods, Disasters and Emergencies

Action item: Find your home and building shut-offs and place a wrench at each location. Figure out a way to attach the wrench nearby to keep it from disappearing.  Suggestion: Consider a bulk purchase of shut-off wrenches for members of your neighborhood group. It’s an easy and valuable way to recognize their volunteer efforts. And it means they will be better prepared to help neighbors in an emergency.

2-Automatic valves. Some valves, such as seismic gas shut-off valves, operate automatically. They aren’t required, and many professionals don’t trust them – but you may have them on your system. Action item: Find out if any automatic valves are installed on gas lines leading to your home or in your place of work.

3-Gas main. When it comes to shutting off gas at a larger line, the shut-off may be a larger version of the wrench turn off, or it may operate with a large wheel and gear. It may be locked. Often, these valves are painted red. Action item for your group: locate the pipes and the shut-offs leading to your building or community. Larger line shut-offs may be marked with a sign like the yellow one at the start of this article. Or they may not be marked!

What procedures are in place for shutting off the gas?

As we have emphasized, shutting off the gas is a major event to be taken only with due deliberation. It will require professional assistance to get the gas turned back on again. It may take days for all gas service to be restored.

You or your group may have to make decisions about shutting off the gas. In our case, members of our community actually took official training in how to shut off the main valve. All residents have been shown how to shut off the gas to their own homes.

Questions you need to have answers to BEFORE something happens

  • Who is authorized to shut off the gas?
  • Which valves are they authorized to shut off?
  • What training and tools do these authorized people need? Do they have what they need?
  • How likely is it that authorized and trained people will be on hand in an emergency, when immediate action may be required?

With this info, you will be far more prepared in case of an emergency.

Getting even more answers

Over the years we have found that “the authorities” are loathe to share gas line information. However, as we have built up our own skills and knowledge, we have better luck at getting more. Above all, we have a better understanding of just what our role should/could be in an emergency.

One of our most effective guest speakers was a representative from the Fire Department who talked about the various gas lines in our neighborhood. (We have the usual mains and feeder lines PLUS a high-octane aviation fuel line running beside our community.) Action item: Get a speaker on natural gas safety from your own fire department or local utility. Prepare some questions in advance and send them to the speaker.

Your invitation will cause that fire official to update his or her knowledge about your neighborhood or building, as well as remind your neighbors and/or co-workers to be more alert. (In our case, the fire department speaker was NOT up to speed on gas mains that had recently been installed near us as part of a construction project!)

_______

We started this 3-part series with the question, “Are you sitting on a gas leak right now?” The question still is pertinent. We hope that by now you have a better idea of how to respond!

And one last disclaimer. We are not professionally trained experts on gas main construction, maintenance or procedures. We offer this special series for informational purposes only. Any time you consider messing with your gas supply or gas lines, we recommend that you do it with the assistance or under the supervision of professionals. Gas is inherently dangerous so treat it with all due caution.

But as emergency responders, you can’t ignore it!

Virginia
Your Emergency Plan Guide Team

Here are the three parts of this special series. Please read all three parts.

Part One: Are you sitting on top of a leaking gas line?

Part Two: Detecting a gas line leak

Part Three: What to do when you discover a gas line leak


Detecting a Gas Line Leak — Part Two of a Series

Share

(Part Two of a series aimed at neighborhood or workplace teams)

“Do you smell gas?”

“Could this be leaking? What is it carrying, anyway?”

If you are concerned about the potential for a gas line leak, you probably want to start by finding the location of gas lines in your neighborhood. You will discover that this takes some time and effort!

Still, using the online resources and your local utility, as described in Part One of this series, you can usually get a good start.

You will note that there are three main types of gas lines:

  1. Transmission lines — Long-distance lines, typically more than 10” in diameter (can be as big as 42”), move large amounts of gas under high pressure (200 – 1,200 psi).
  2. Distribution or main lines –- These lines operate at intermediate pressure (up to 200 psi) and are 2″ to 24″ in diameter.
  3. Feeder or service lines – These are the lines that actually connect to your home. They are not so easy to track once they disappear underground. Typically they are less than 2” in diameter, and they carry odorized gas at low pressures, below 6 psi.

For a local emergency response group, your feeder or service lines are probably what you’ll be looking for. But we have to repeat, utility companies are concerned about vandalism and sabotage or even terrorism, so they don’t publicize the location of these lines. Think persistence and relationships!  We were actually able to get the construction drawings showing location and sizes of the gas lines for our community.

Action item: create a map of your neighborhood, showing the different gas lines as you identify them. If possible, note the location of shut-off valves.

Should we assume we’ll experience a local gas line leak?

Yes!

The gas distribution system is made up of thousands of miles of pipelines, and they operate safely most of the time. Still, all of the time, the system is under one or another source of stress.

Stresses include:

  • Built-in weaknesses from poor connections, bad welds or incorrectly installed equipment
  • Corrosion or wear from aging
  • Weather-related shifts (winter freeze-thaw cycles) Think of the extreme weather events we’ve experienced in the past couple of years!
  • Seismic shifts or earthquakes

And, of course, there are construction accidents where a hand shovel or large piece of equipment punctures a line.

Just to give you an idea, I cut this out of the news yesterday.  There are notices like this every day!

Gas line leaks reported

. . . from the news yesterday

It is the responsibility of the system operators to monitor and maintain the pipelines under their jurisdiction.

In some states legislation has been introduced to require the utilities and/or operators to report on leaks and on their progress in fixing them. As you can expect, the utilities oppose this legislation, saying that the number of leaks is exaggerated and that fixing more leaks faster would be too expensive. Find out about legislation in your own state!

Can we prevent a gas line leak in any of these pipelines?

No.

But you can do your community a service by finding out what sort of gas line maintenance takes place.

And, you may be able to prevent a disaster by detecting and reporting a leak!

How can we tell if there’s a leak?

1-Use your nose in and around the house!

The most common indication of a leak is SMELL. An odorizer called Mercaptan is added to feeder lines for the very purpose of making a leak noticeable.

What does Mercaptan smell like? Most people compare it to “rotten eggs.” In any case, it is distinctive and obvious.

If you just aren’t sure what natural gas smells like, spend a few dollars for some “scratch n’ sniff” samples! Makes a great addition to a meeting about gas leaks! Here’s a link to Amazon – 30 stickers like the one shown as the left, only $3.00 when I checked today!

Natural Gas Mercaptan Stickers

2- A gas sniffer will help pinpoint the leak.

If your environment may have more than one suspicious smell, or if you sense you might easily get used to a smell and stop noticing it, consider investing in a gas sniffer. This is a simple hand-held gadget that can identify a leak for sure. Some sniffers tell you what gas is leaking. They use a meter and/or an audio sound (“tic, tic”). As always, the more you pay for equipment, the more functions you get.

Our local emergency response groups own a couple of different ones. The “pen” model (less than $40) is used by one group to check around their emergency gas generator when they start it up.

The “tube” model (around $150) adjusts from broad to fine sensitivity in order to pinpoint the precise location and type of gas that is leaking. We have used this model with startling success, using it to identify a propane leak from a gas BBQ, among other leaks. (We also have a neighbor who insisted she smelled leaking gas. It turns out it was smoke from marijuana coming from a nearby shed. We didn’t pursue to see if its use was legal or illegal!)


Pen style

General Tools PNG2000A Natural Gas Detector Pen


Tube model

UEi Test Instruments CD100A Combustible Gas Leak Detector

Action item: If you suspect or are plagued with frequent leaks, you may want to add a gas sniffer or two to your collection of safety equipment. They are easy to operate and can add a degree of confidence to your suspicions. In a big emergency, a gas sniffer might make it easier to decide to shut off the gas entirely.

Be on the lookout for signs of leaks from larger pipelines.

You’re not likely to find yourself walking along the route of a larger underground pipeline, but a leak can show up anywhere. (We experienced a gas-line break right in front of our community. A back-hoe hit a line that according to the construction crew “wasn’t on the map.” )

Here are some ground-level signs you might notice:

  • An unexpected hissing, roaring sound
  • Dirt or dust blowing up from the ground
  • Water bubbling or spraying
  • A spot of dead or brown vegetation when it’s green everywhere else
  • Flames coming from the ground

As a reminder, the gas in these larger pipes may have no odorants added.

What should we do when we discover a leak?

When you do identify a leak, you need to act quickly and decisively. Your goal is to avoid a build-up of gas around a leak or a build-up from gas “migrating” to a nearby area (such as a basement) – creating conditions for an explosion.

Your first response should be to get safely away from the area (hundreds of feet away!) and then CALL 911 or the gas line operator to GET THE GAS SHUT OFF.

As you move away, warn other people about the danger, too, and encourage them to move to safety.

Above all, DO NOT CREATE A SPARK by flipping a light switch, lighting a cigarette, starting an engine, turning on a battery-operated light, etc.

Action item: Discuss with your group where a break might logically occur in your neighborhood. Identify some ordinary actions that someone might take that could start a gas fire. In our community, starting up the car to “get away from the danger” is likely to be the most dangerous action possible. The catalytic converters of cars in a traffic jam can reach 1,600 degrees – plenty hot enough to start a fire if there is the right mixture of gas!

Is that all we can do? Shouldn’t we turn off the gas?

Calling 911 from a safe distance is the first and most important step. Not creating a spark is the second.

Every member of your family and of your workforce should know and be able to follow this rule.

However, as an emergency response group, there is more you should know and consider when it comes to getting the gas shut off.

We will address some of these options in Part Three of this series.

Virginia
Your Emergency Plan Guide Team

Got any stories about gas line leaks or explosions? Feel free to share . . .! And don’t miss the first article in this series.


Are you sitting on top of a leaking gas line? Part One of a Series

Share

(Part One of a series aimed at neighborhood or workplace teams)

An often-overlooked threat

Be safe from leaking gas line

Read before you toss as junk mail!

The word “disaster” usually makes people think about natural disasters like tornado, flood, or earthquake.  You’ve probably already talked in your group about how to prepare for these threats.

But unless we’re reminded by notices from our local utility we may never even think about the gas lines that run under or near our homes or places of business.

And if we take the time to learn even more, we will discover that any gas line could be a leaking gas line! Moreover, a big enough gas leak can be deadly.

Time for your group to be asking: Where are the gas lines around us?

Finding out where the gas lines run in your neighborhood will take some effort.

In the years that we’ve been studying our own community we have run up against resistance from a number of sources. As can be expected, cities and gas line operators are concerned about sabotage and/or terrorist activities. They protect the details of their systems from everyone, including residents.

Moreover, a leaking gas line may or may not be repaired even though it has been noted. As you can imagine,  a utility company really doesn’t want you looking over their shoulder when it comes to their maintenance policies!

Still, a good emergency response group wants to understand its community’s risks, and so the group perseveres . . .!

Three places to start your research.

1-The National Pipeline Mapping System (NPMS) is an online map provided by the Department of Transportation. As a member of the public you can search by your State and COUNTY to get an idea of where gas transmission and hazardous gas pipelines are located.

I say “get an idea” because the public viewer is good only to +/- 500 ft.  (If you are actually going to dig, then you need to contact your local pipeline operator – or call 811 – to find out exactly where the pipes are.)

Here’s the link to the map (“Public Map Viewer”):  https://www.npms.phmsa.dot.gov/Default.aspx

2-Your local gas company

Here in California we have two of the largest public utilities in the country, and our local utility provides a map showing transmission and distribution lines. Once again, the authors of the map stress that the maps are accurate only to +/- 500 ft. Still, we can easily identify the “hazardous liquid” line running along the railroad tracks very near our home.

My research on other utility companies shows that there is no consistency. Many of the utility company websites simply refer readers to the National Pipeline Mapping System.

3-Your local pipeline operator

The pipeline operator is not necessarily the same as the utility.

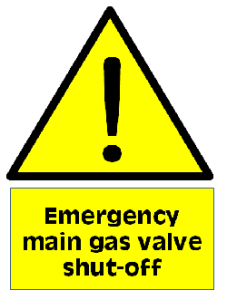
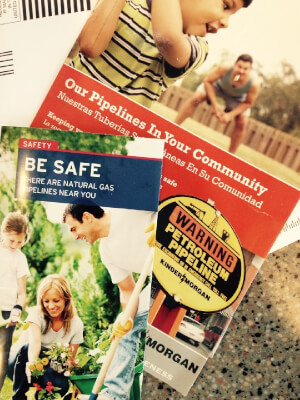
Keep your eye open for pipeline signs. They are not required, nor are they necessarily placed in the same way every time. What they seem to have in common is the gold color.

The round warning sign will tell you who the pipeline operator is. (You’ll see a round sign on the brochure in the image above, too.) Write down the name and emergency phone number. You may be able to get further information about that particular pipeline and what it carries from the operator.

Kinder Morgan is the largest pipeline operator in the country. Its website says it transports nearly 40% of all piped natural gas, refined petroleum products, crude oil, carbon dioxide (CO2) and more. I found this map at their website. It shows just their biggest pipes. As you might expect, Kinder Morgan has a number of competitors.

Kinder/Morgan PipelinesThe point of all this is that with some digging (bad joke!) you can discover a lot about where pipelines are in your community and who is responsible for them.

How we got information about our own community.

This Advisory is meant to give you an idea of where to start. Different members of our neighborhood emergency response group took on different tasks in researching our gas pipelines.

  • I tracked down online maps like the ones shown in this Advisory.
  • One member hiked along the nearby railroad tracks and photographed a construction project. His photos show the size and exact location of gas lines.
  • One member went to city hall to get the original construction drawings for our community. These drawings show not only the location but also the size of the various pipes in the network, plus shut-off valves.
  • As a group we queried the management of our community regarding make-up and maintenance of our local system.
  • Our group invited the fire department, the police department and our local utility to special meetings on gas safety. (You will not be surprised to learn that they don’t always agree on where the lines are, what information to share or how to respond in an emergency!)

OK, so we now have an idea of where the pipelines are and what they are carrying.

And we found that gas is leaking from all these systems all the time!

With over 200,000 miles of pipelines, and many of them decades old, it’s to be expected that there will be leaks. In fact, distribution companies track something called “lost and unaccounted for” product.  One report has their measurements ranging from under 1% to over 4%!  (https://www.scientificamerican.com/article/how-much-natural-gas-leaks/)

What causes the leaks? Common causes are simple deterioration, overgrown and over-stressed systems, defective equipment, incorrect hookups, code violations, faulty manufacturing of tanks and/or appliances — and natural ground shifts due to floods, earthquakes, etc.

Most of the time gas that escapes isn’t even noticed (except by the atmosphere, of course, since methane – the main component of natural gas – is 30 times more potent as a heat trapping gas than CO2.)  But any time there’s a leaking gas line, there’s a potential for explosion or fire.

The key is to keep gas from building up until it reaches the level where it can explode — that is, to where it makes up between 5 and 15% of the atmosphere. A whiff of gas won’t explode.  A mix that is too rich won’t explode. There is a 10% window in which it can ignite.

Good to know!

In Part Two we’ll share what we have learned about finding leaks!

Click here to move right on to Part Two.

Virginia Nicols
Your Emergency Plan Guide Team


Everyday Household Supplies as Tools for Survival

Share

Tin Foil Frying Pan

Don’t you love lists? I see them everywhere I turn online.

And I read a lot of them, particularly those in the survival niche. Mostly, they confirm what I already know. But every once in a while I find survival ideas I hadn’t really considered before.

What follows are some ideas using everyday household supplies as tools for survival. Maybe you can add them to your list, too!

Six reasons to have aluminum foil in your survival supplies.

Who knew all the things it can do in an emergency – and, for that matter, every day!?

  1. Cooking over a campfire? Wrap smallish pieces of food in a foil pack, cook over or buried in coals.
  2. Add a foil reflector to block the wind from your fire, and to direct its heat.
  3. Position a foil sheet to reflect and enhance the light from the sun or from your lantern.
  4. Use crumpled foil under a bar of soap and under a scrub pad to keep them from getting gunky or rusting.
  5. Fold a small piece of tinfoil and stick in your flashlight between the battery and spring to improve a loose connection.
  6. And this, from Reader’s Digest. (And see my image, above.) Make a temporary tin foil frying pan by covering a forked stick with a double layer of foil. Make a slight depression in the space in the V of the fork — that’s where you’ll put your food for frying!

Four more survival uses for everyday household supplies using everybody’s favorite — duct tape.

I’m sure you have plenty of duct tape at home. I hope you have some in your survival kits, too. The “flat packs” are much lighter and more convenient than the heavy roll. (See below.)

You can use duct tape to fasten just about anything, but here are a few more ways to use it as a survival tool:

  1. First aid supply – Use thin strips to close a wound. Use thicker strips of tape plus small branches or pieces of wood to create a splint for a sprained ankle.
  2. Twist a length of tape to create a rope for tying anything. Fold a length of tape in half onto itself to create a strap – for a belt, a sling, a carrying handle.
  3. Keep out cold air by closing leaks in clothing using tape. (Don’t tape to your skin. )
  4. Tape together Mylar blankets or large size plastic bags to make a sleeping bag or a shelter.

And while we’re on plastic bags, here are seven ways to put these everyday household supplies to use as survival tools.

Different weights of plastic have different uses. And, of course, the heavier the weight, the more they add to the weight of your survival kit. Here are some often overlooked survival ideas using bags and baggies. (More info, with prices, at the end of this Advisory.)

  1. Trash compactor bags are very thick – and thus work well to manage human waste in a survival situation. Place the bags in the toilet, or in a plastic bucket. (When full, add kitty litter or some disinfectant, close and dispose of.)
  2. Use ordinary plastic bags from the grocery store to line boots (over socks, inside boots) to keep your feet dry. (Probably won’t work in a stream but does fine through wet grass and puddles.)
  3. Use plastic bags as temporary gloves to protect your hands from germs, blood, yucky stuff, etc. (I used one just last week to dispose of a dead rat.)
  4. Large garden size bags can be used to line your pack to keep it dry. Raining? Cut a hole for your head and turn the bag into a poncho. Tape a couple of bags end to end for a makeshift one-person tube tent.
  5. Ziploc bags of different sizes are helpful for sorting clothing (clean, dirty, wet), protecting foodstuffs and matches from the damp, and keeping first aid items readily visible. And you can use a baggie to start a survival fire. A fire?
    1. Fill the bag with water.
    2. Twist to create a tightly filled plastic water “ball.”
    3. Position the ball over fine tinder and use like you would a magnifying glass. The sun shining through the ball of water can heat tinder sufficiently to start a fire! Here’s a great YouTube video from the King of Random showing just how to do it: https://youtu.be/vMcgs7Tx3Hs
  6. And from Primal Survivor, this idea for using a plastic bag to catch fish. Find a stream with fish. Create a sort of funnel in the stream by building a V with stones. (Open end upstream. ) At the tip of the V fasten a plastic bag with its mouth open and a few holes cut in to allow water to flow through. Go upstream and scare the fish so they head downstream – into your funnel and then into your plastic bag!
  7. And a final idea – using a clean clear large-sized plastic bag to capture water from a plant or tree. Pick a NON-TOXIC plant with large leaves. Pull a bag over a large branch with lots of leaves and tie it tightly. Be sure the lowest point in the bag is below the tie. Over time, the plant will release water vapor. The vapor will condense, run down the sides of the bag and collect in the bottom, where you can capture it to drink.  This will take time and patience, but could save your life in an emergency.  You can find an easy to follow picture-by-picture explanation here. https://www.instructables.com/id/Extract-Clean-Drinkable-Water-From-Plants/

I’ll soon be testing both the baggie-full-of-water-as-magnifying-glass and the bag-to-collect-transpiration-from a tree. (No streams with fish near me . . .) I’ll let you know how it goes.

Maybe YOU can test these two ideas with your own kids or other members of a group – Scouts? Sunday school?  Your neighborhood emergency response team?  (Watch the video and check the how-to-pictures first. They include a couple of safety messages you don’t want to overlook.)

Three ways to get everyday household supplies for your survival kits.

  1. Start by going through your cupboards and pull from your regular supplies. You’ll probably have aluminum foil, duct tape and a few assorted bags. If you find ties, pull some of them out, too.
  2. Make a list of other items you might want: flat packs of tape, trash compactor bags, heavy-duty large black trash bags, maybe even that very light-weight see-through bag that will work to capture water from a plant.
  3. If you are part of a group, consider pooling your money and making a bulk buy. By buying in bulk you’ll be able to save money and give everyone a chance to get a few of what they need and not overbuy.

Here are some suggestions from Amazon, where we often go first for our shopping. Since most of these everyday household supplies are probably readily available in your local stores, you may want to shop specials. I’m including price info from Amazon so you can get an idea of costs if you’re shopping for a group. And if you are a prime member at Amazon, all the supplies could be delivered at once, making it easy to get everything distributed.

Buy over time!

Not everyone can run out and immediately buy everything on every survival list. But items like the ones on this list are pretty inexpensive, so you can buy one or two every so often until you have everything you need.

It’s the same with assembling ALL your survival supplies — emergency radio, batteries, food, etc. Slow and steady means when the disaster hits you may not have everything, but you will have more to help you get through than you did last month . . .!

Good luck with your shopping!

Virginia
Your Emergency Plan Guide team


Wildfire Prevention Starts Now

Share

Wildfire hazard
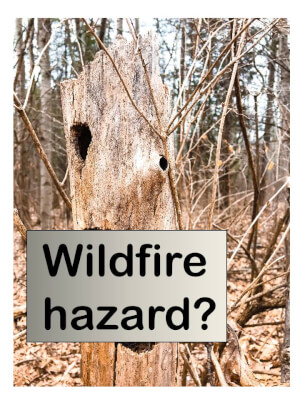
Wildfires are now a year-round threat

We used to consider “fire season” to be summer into fall, and then winter rains came along. These days, wildfire season seems to be year round!  So we should be taking steps for wildfire prevention year round, too.

Here are 5 Action Items for wildfire prevention. Let’s look at them right now, even while cold January rain is falling outside my window . . .

Wildfire prevention on your own property

I hope that you are pretty familiar with what to do for your own property. Action item #1: Confirm you’re following these basics of wildfire prevention.

1Maintain defensible space. Maintain an area around the home cleared of brush, dead tree limbs, and flammable plants. In the areas close to your home, chose fire-resistant plants and keep all plants properly irrigated. The image below, showing different defensible zones, comes from the CalFire website: http://www.readyforwildfire.org/Defensible-Space/ .

CalFire zones

State law in California requires properties in wildfire areas to maintain a 100 ft. defensible space. In 2015, The Los Angeles’ Brush Clearance Program set more specific – and more stringent — standards for clearance:

  • 10 feet of roadways
  • 10 feet of combustible fences
  • 200 feet of structures

2Use fire-resistant building materials. Use brick or stone for walls and garden borders. Build decks of noncombustible materials. Re-roofing? Choose fire-retardant shingles. Obviously, you might not be able to make dramatic changes immediately. But at least be aware of changes you should plan for.

3Block embers. Most fires start from embers that catch on the house, not from a wall of fire! Install screens over vents and block access to eaves and under decks, etc.

This is only a partial list! 

I’m in California, where fire danger is particularly high. You may be in a less vulnerable location, or have different issues. So, Action item #2: Check with your own fire department for recommendations or programs for your neighborhood.

For another good overview resource, get this pamphlet from Farmers Insurance. https://www.farmers.com/content/dam/falcon/pdf/catastrophe-brochures/wildfire.pdf

And while we’re on insurance, be aware that your premium may reflect what you’ve done for fire prevention. Some companies may even offer a discount for defensible space and/or fire retardant building.

Action item #3: Talk with your insurance agent about your personal fire insurance coverage.

Wildfire prevention in your neighborhood

It’s one thing to take steps to protect your individual home.  After all, by law you are responsible for it.

But what if you live in a neighborhood of closely spaced homes, condos, or in a mobile home park? What about nearby community buildings? Local schools?  Parks? If they catch fire, you may be threatened, too.

Action item #4: Find out who is responsible for neighborhood properties. Do they know best practices for fire prevention, and are they following them?

You may need to contact a city or tribal agency, a property manager, or a neighborhood association. Once you have a contact, put on your leadership hat.

Are you on or can you attend a governing board that hires landscapers and/or gardeners? Make sure that your board and the landscapers are aware of basic fire prevention techniques for their site. Do they know what to plant, what to clear, what to trim – and do they do it? (Your fire department will surely be happy to send an expert to one of your board meetings.)

Your own HOA or emergency response team can help individual families understand the safest way to maintain private patios and gardens. Hold a meeting. Draft a notice to include with the rental invoice. Train a couple of your team members as “consultants” for people who have questions or don’t seem to get with the program.

Of course, even with well-maintained defensible space, a property can still burn. But if there’s a choice for fire fighters to protect a prepared space vs. an overgrown and unprepared space, which do you think they will choose?

Consider a community project for wildfire prevention

Since 2013, The National Fire Protection Association® (NFPA) and State Farm Insurance have been sponsoring Wildfire Community Preparedness Day.

This is a national campaign that encourages people to come together ON A SINGLE DAY to reduce wildfire risk. This year, Wildfire Community Preparedness Day is on May 4, 2019.

The idea is to get a group to work together on a project or event. Their efforts may be supported by $500 grants from State Farm.

Here’s what some groups have done in the past:

  • 20 volunteers from the Red Cross, AmeriCorps and the tribe prepared a defensible space around the residences of 3 tribal elders in San Diego County.
  • The local fire department and a youth organizations spent 3 days clearing out dead trees and underbrush from Colorado Mountain Zoo.
  • An elementary school created a “Firewise garden” in front of their school.
  • Boy scouts and local residents worked together on a clean-up day, cleaning roofs and gutters, removing vegetation and debris.
  • Four towns in Colorado banded together to rent equipment to remove 66 truckloads of slash from home sites!

What about your emergency response group taking the lead on a project?

A community project might be a great way to motivate your group! At the same time you could help promote wildfire safety and strengthen relationships among residents, local fire department,  community leaders and elected officials.

To get one of the 150 awards being made by State Farm, you’ll have to submit a plan for your project by March 1.

Action item #5: get all the info about Wildfire Community Preparedness Day, including the application for the grant, at this website:  https://www.nfpa.org/Public-Education/Campaigns/National-Wildfire-Community-Preparedness-Day

With the government shutdown still ongoing this week, the whole concept of reducing fire risks seems particularly important. Why? Because thousands of agency employees are not able to do the cleanup and training they would normally be involved in.

Time for us to step up ourselves. Even starting in the rain!

Virginia
Your Emergency Plan Guide team

P.S. This Advisory focuses on preparations you can make BEFORE a fire threatens. Evacuating and fighting fires are separate topics in themselves.

Covered for a natural disaster, or not?

Share

Covered for natural disaster

Time for an insurance review.

I’m putting together my to-do list for the holiday vacation. After all this year’s natural disasters, first on the list is an insurance review. I started the review, and more and more questions kept coming up! Naturally, this led to an Advisory!

Ask your insurance agent these 7 questions to see how well YOU are covered for a natural disaster.

“How many of your clients are under-insured? Am I one?”

This is a tricky question, of course! Maybe you could soften it starting with this quote from Nationwide:
“I understand that 60% of American homes are under-insured by an average of at least 20%. I want to be sure I’m not one of them!”

“I’m worried about all the recent (fill in the blank: wildfires, storms, tornadoes). Am I covered for a natural disaster? What if my house is totally destroyed?”

This is the main question you want answers to. Start with these sub-questions . . .

  • What is the amount of my home coverage?
  • Is that based on the value of the house, or replacement cost? (Be careful. “Value” of a home could include the value of the land, in which case your coverage might not be enough to replace the house.)
  • Exactly how is replacement cost figured in my policy? (It turns out that there is “replacement cost” and then there’s “extended replacement cost.” Make sure your agent can explain which you have, and the difference between them.)

“If I have to live somewhere else while the house is being rebuilt, will my policy cover additional living expenses?”

How much and for how long? Any restrictions on where I stay? How do I get the money in my hand?

“Will my policy cover (fill in the blank: floods or storm surge from a hurricane, earthquake, land slide following rain, volcanoes)?”

You will probably NOT BE COVERED for a natural disaster from the list above!

I love this paragraph from esurance

Homeowners insurance typically doesn’t cover landslides or mudslides. That’s because both are considered a form of “earth movement”, and like an earthquake or sinkhole, they’re generally excluded from a standard homeowners insurance policy. Flood policies often don’t cover damage from landslides or mudslides, either. And earthquake policies only offer reimbursement if an earthquake caused the events.

Quiz your agent closely on coverage for natural disasters. Be sure you know just where “water damage” (covered) leaves off and “flood water damage” (not covered) starts, where “rain damage” (covered) ends and “mud damage” (not covered) starts – on YOUR policy!

Perhaps you need separate policies to be sure you are covered for natural disasters?  We have addressed some of these special threats, including insurance policy info, in earlier Advisories about Volcanoes, Earthquakes , and Floods.

“What else don’t I know about? What about . . .”

  • Mold
  • Sewage backups
  • Debris removal after a disaster
  • Lightning
  • Hail
  • ????

Get your agent to mention some of the frequent problems he or she has encountered here in your neighborhood. Some of these may be covered by your policy, others not. You may want to add an endorsement to your policy to cover a specific risk.

“This is adding up. What can I do to reduce premiums?”

The first thing to discuss are your deductibles, particularly if there has been a change – from dollar amounts to percentages, for example. A 5% deductible may sound better than a $15,000 deductible, but not if your house is worth $400,000!

Generally, the higher the deductible, the lower the premium. You want the highest deductible you can afford.

And you may want to check with your agent to see if you can make changes or improvements to your home that will improve your coverage for natural disasters while lowering the insurance company’s risk. These might include replacing the roof, upgrading the electric system, clearing brush around the house, retrofitting for earthquake, or installing storm shutters. Ask for a list of all the home discounts you’re eligible for, not just those associated with natural disasters!

Now, I don’t review my insurance every year – but this year I’m going to with the help of these questions. I hope you use them, too!

Virginia
Your Emergency Plan Guide team

P.S.  If you discover that you seem to be well covered for natural disasters (Hooray!), you still might want to pose this last question:

“Is the bill for my current homeowner’s policy going up?”

If the answer is YES, and it’s more than 5% or so, ask why. You might hear these reasons:

  • Recent disasters have made prices rise for all insurance companies.
  • Risks have gone up in your neighborhood.
  • Your personal risk profile has changed. (Confirm what’s changed – is it your credit score? That could have an impact in some states.)

P.P.S. Consumers Reports says that people who shop for better deals on property insurance can save hundreds of dollars a year. You can get quotes for free through insure.com or InsWeb.com. (as recommended  by This Old House)

And finally, a disclaimer. I am not a licensed insurance agent, hence all the links in this Advisory to what I trust are reputable sources. Be sure to get advice on insurance from professionals.

Are you vulnerable to landslides?

Share

Southern CaliforniaCalifornia Landslide

Santa Barbara County, California – Landslide Photo – USGS

Landslides can occur in all 50 states. They can be sudden and shockingly deadly. Are you vulnerable?

It’s Wednesday November 28th. I’m watching the weather reports today. Here’s a sample of the local headlines  – this one from ABC. today:

Storm system will bring rain to SoCal starting Wednesday evening with heavier downpours expected overnight and into Thursday morning, causing flooding concern for residents in the recent burn areas.

This led me to an older news report. This one was also from California, back in January 2018:

For days, officials advised residents in areas burned by the Thomas fire that a coming storm could bring major mudflows. Several neighborhoods were under a voluntary evacuation order. Many residents decided to stay. Some assumed the threat was overblown just weeks after the fire triggered similar calls to evacuate.

And the result: At least  21 people were killed by the flooding and debris flows at followed the heavy rains.

Have you experienced heavy rains yet this season? If yes (or even if no), are you vulnerable to landslides?

Take a look at this map from the US Geological Survey, showing regions of vulnerability. As you can see, they are mostly along the west coast of the US and also in the eastern mountains.

The bright red Appalachian Mountains area is labeled as having 15% of the land vulnerable to mud and landslides!

vulnerable to landslides

How do you protect against landslides?

Much of the following information was provided via resources suggested by one of Emergency Plan Guide’s readers. Thanks, Bradley Davis at DisasterWeb.net. !

Learn more about your risks beforehand.

  1. Check on detailed maps like the one above from the USGS to see if you are vulnerable to landslides, and if so, just how vulnerable you are. Maps are based on geographic features, soil properties and historic and anticipated rainfall.
  2. Second, be aware of recent fires that may have raised the risk in an area that otherwise might not have been so risky. Note: you may be traveling into a higher risk area that will make you more vulnerable. Find out what’s been going on there recently!
  3. Check with your insurance agent to find out if you have coverage for mudflows. Unless you have Flood Insurance, you probably don’t!

Be ready to evacuate.

Have an evacuation plan and evacuation kits. You may have very little notice so be prepared to leave IMMEDIATELY and know where you’re headed or at least how to get in touch with other family members. (That out-of-state emergency contact, remember?)

Take action now to protect your property.

You can’t stop the rain. But you can take steps to control and redirect water on your property. Some examples:

  1. Consider plants and trees that have deep roots, to control erosion and to help absorb and filter water.
  2. Landscape to include depressions/channels to direct runoff. The water needs to end up on your property, remember.
  3. Build a “rain garden” to catch and hold water, where it can soak into the ground within 24 hours. Plants in the garden need to be wet-soil tolerant and have deep roots. Get professional assistance in planning this depression. Find more info and great photos of rain gardens at the Groundwater Foundation.
  4. Divert water from rain spouts so it doesn’t collect and make puddles.
  5. Build up grass and natural barriers at the perimeter of your property to keep water out or redirect it.
  6. Install permeable paving and porous surfaces in driveways and walkways.

Know the signs of impending danger.

As always, be alert to your surroundings. Some indications that land may be starting to shift, signalling a potential landslide . . .

  • Strange sounds – trees cracking, rocks clashing, water flowing rapidly.
  • New cracks or bumps in roads, on slopes.
  • Soil moving away from foundations, road bed dropping.
  • Saturated ground where it is usually dry.
  • Tilted trees, decks, fences or walls.

Watch the weather reports, and be ready to leave at a moment’s notice!

Finally, if you do have to evacuate as a result of landslide, before you head back in . . ..  

Even if things look OK at first, be cautious before you assume anything. Check with authorities that are on site to see if Personal Protective Equipment is required or desirable. (Direct Relief,  a disaster relief organization, is providing coveralls to victims of California fires right now.)

At the very minimum, wear heavy rubber boots, long pants and long sleeves, heavy work gloves, and use a mask (N95) to protect against breathing in contaminated dust and/or ash.

Approach your “re-entry” step by step.

  • If your home suffers structural damage, take photos and contact your insurance agent. Keep receipts for any clean up and repairs.
  • Utilities may be off or damaged. Check for gas leaks, broken wires or the smell of burning insulation. Check for broken water and sewer pipes. Call on professionals for help turning these back on.
  • Everything that got wet may be a health hazard. Disinfect (Bleach is the best) and then dry. Wear gloves, mask and eye protection against dust, chemicals, mold.
  • Watch out for rashes as a result of exposure to debris. Watch for “trench foot” as a result of having wet, cold feet hour after hour.
  • Any cut or even breathing contaminated air may turn into a serious infection. Check your condition frequently and don’t delay in seeking medical advice.

When many people are displaced and living in local shelters, the chance of contagious diseases is also increased. Again, use respiratory and eye protection to help prevent the spread of germs, and be aware of hygiene at all times.

Wow. So how vulnerable are you?

What started out as an extended weather report has turned into quite a lengthy discussion. If you are outside of a potential slide area, perhaps you can forward this Advisory to friends elsewhere. If you’re not SURE whether you are in a slide area, head back to the USGS and see if you can dig into their maps for more detailed info about YOUR location.

If you’ve been affected by recent fires in California, you may also want to check out some of the FAQ (Frequently Asked Questions) at the USGS. Here’s one specifically about wildfires and debris flows. And here’s even more detail about Southern California susceptibility.

The latest weather update . . .

So I just checked with the National Weather Service. They have issued a FLASH FLOOD WATCH  for my area and in particular for burn scar areas, for tomorrow, Thursday morning through Thursday night.

Here’s the message:

Heavy rainfall could cause debris flows in recent burn areas according to rainfall thresholds provided by the USGS. Debris flows are extremely dangerous and happen suddenly often with little time to act. It may even not be raining at your location to be impacted by a debris flow. You should monitor the latest forecasts. Heed any advice given from local authorities.

This is real life.

Virginia
Your Emergency Plan Guide team

Simple Survival Signals Can Help Speed a Needs Assessment

Share

Survival signal flare

Wham! Your neighborhood is hit by an emergency! Before you do anything else, you check immediately on your own condition and the condition of the place where you are.

Then, if you are a member of a CERT or NERT team, you set out to check on others and help come up with a Needs Assessment(Our team members, like others, use checklists to record and walkie-talkies to report on how many people have been impacted, who is injured and to what degree, and what’s the status of neighborhood structures.)

The full needs assessment may take quite a while.

  • You and a partner can try to hurry to every single house on the street, interviewing residents and noting damage. But that may be beyond your physical capability.
  • You can try to call everyone on the street. However, even if you know all their phone numbers, that, too, would take a long time — dialing, hearing their story, answering questions, leaving messages, etc. (Besides, in a big emergency the phones may be down or overloaded.)
  • If you had a drone, and knew how to make it function, and it was daytime, you could send it up to view the houses. Of course, you wouldn’t be talking to residents.

Time is of the essence!

Here are three simple survival signals that might speed the needs assessment in your neighborhood.

These signals are in use by various neighborhoods in our Southern California area. Obviously, every region/neighborhood is different. But if one of these makes sense for you, or a version of one makes sense, bring it up with your group. Of course, not one of these will work without NONE of the signals works unless people have been  have come up with different ways to SIGNAL they are OK. All of these “systems” have come into play after group discussion, and they only work if people have been trained to use them in advance of the emergency.

Simple Survival Signal #1: White Towel Over the Mailbox

In closely-spaced neighborhoods like ours, we can stand at one corner and see all the way down the street to the corner. Many residential neighborhood developments around the country are laid out similarly.White towel signals OK

In an emergency, if people would SIGNAL THEY ARE OK by putting a white towel over the mailbox. A quick glance would tell rescuers to head to the next house.  (Note how the white towel in the photo stands out!)

Advantages of the white towel system:

  • Everyone has a white towel or rag or can get one. (White cloths are sold inexpensively in packages, as rags.)
  • Towel won’t be damaged by getting wet or dirty.
  • White towel is visible day or night.

Disadvantage of this system:

  • Won’t work if you don’t have mailboxes or other structure at curb in front of each house.

Simple Survival Signal #2: Red Card, Green Card in the Window

At a recent meeting sponsored by the Earthquake Alliance here in Southern California, we were shown a great printed resource designed to be handed out to everyone in a neighborhood. It’s an oversized tri-fold brochure printed on heavy paper, with all kinds of interesting facts and tips about preparing for disaster.

Two of the panels are signaling devices. One has a big OK in Green. On the reverse is printed a big red HELP! In an emergency you put the appropriate sign up in your window to let first responders/neighbors know what’s what. (The image shows two of the brochures so you can see both red and green panels.)

Emergency Signal Sign
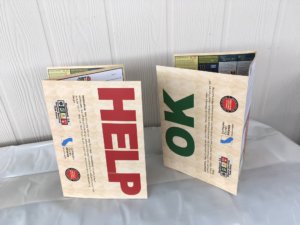
Advantages of the colored card system:

  • A sign inside the house won’t get blown away or damaged by weather or vandals.
  • This sign is big enough and heavy enough that it won’t be accidentally tossed.
  • Resident won’t have to go outside to place signal.

Disadvantages of this system:

  • All residents in the neighborhood would need to be provided with the signs (cost).
  • Someone has to design, write and print the signs, which would be different for every region.
  • Window sign is probably only visible from directly in front of the house or window.
  • Probably not visible at night.

The green/red signal doesn’t have to be printed. It could be as simple as two pieces of construction paper, one red and one green. Store them near the front window, of course.

Simple Survival Signal #3: Survival Whistle Calling For Help

Ok, what if you are trapped under fallen debris? You certainly can’t place the red (HELP!) card in the window. And depending on ambient noise, time, etc., you may quickly become exhausted calling for help.

But nearly everyone would be able to use a whistle to signal their need for help – as long as they can get the whistle to their mouth.

The universal signal: three loud, short blasts followed by a pause, and then three more loud, short (3 seconds?) blasts.

Advantages of having a survival whistle:

  • Whistles are small, light-weight and easy to carry – on a key chain, connected to your purse, on a lanyard fastened to your backpack, etc.
  • Whistle can be large, small, colorful or discreet. You can find the style you like.
  • Whistles can be used for other purposes, too – calling kids, scaring away animals, warning drivers, etc.
  • Nearly every whistle I’ve ever seen costs less than $10.

Disadvantages of a survival whistle:

  • A poor quality whistle will NOT serve. A cheap whistle (the kind with a round “pea” inside) can jam. (I have experienced this!) The sound made by cheap whistles can also be too soft. You want 90 to 120 decibels of sound.
  • Super loud whistles may require earplugs.
  • Even though they cost less than $10, buying whistles for a whole group can become expensive.

There are so many whistle choices! I personally have a half-dozen or so different whistles, because I keep seeing ones I want to try! A couple of them are just to fat or ugly to make me feel like carrying them. (I use them for show and tell at our meetings!) But I have found a couple that I really like, and I have them with me all the time. Check out the whistles below for yourself, your family (great little surprise gifts) or your group. Click on the images or the links to go directly to Amazon.

Perfect for EDC — Every Day Carry

I really like this brass whistle! It’s neat, attractive, sleek, reaches 120 decibels.  It’s truly mini — small enough to fit in the palm of my hand. Of course, I’d want to attach it to a key chain or add some sort of lanyard; the gold ring looks sturdy and well made. AND the whistle costs less than $5 as I write this!

Mini Whistle Premium Emergency Whistle by Outmate-H62 Brass Loud Version EDC Tools

Businesslike and flexible

The whistle below comes as a two-pack, with carabiner and lanyard included for a variety of fastening options. Still, it’s not too bulky. This is the loudest of the three examples. Its stainless steel double-tube design can achieve 150 decibels — that sound carries farther, too! Also less than $5 each.

Michael Josh 2PCS Outdoor Loudest Emergency Survival Whistle with Carabiner and Lanyard for Camping Hiking Dog Training (Gold)

Fun and sporty

This third example also comes as a 2-pack. The whistles are dual tube, made of colorful, unbreakable plastic, waterproof. (Plastic doesn’t stick to your lips in the cold, either.) Matching lanyards are also sporty, would attach well to backpack, sports equipment. These whistles might not blend in  so swell with business attire (!), but look great for sporting events, camping, etc.  Loudness: 120 decibels.

HEIMDALL Safety Whistle with Lanyard (2 Pack) for Boating Camping Hiking Hunting Emergency Survival Rescue Signaling

I hope you’ll take a serious look at these simple survival signal ideas, and share them with your neighbors. And let us know how your tests work!

Virginia
Your Emergency Plan Guide team

P.S. Of course, you will likely turn to your cellphone as your very FIRST signalling tool in an emergency. Even if the phone does work, it would take a long time to dial up all your family and neighbors. Better? Pre-program your phone so you can send a TEXT MESSAGE all at once to a group, with just the push of a button!  (If the president can do it, we can too.) I’m researching programs for this right now. Do you have any recommendations?


Will Your Business Survive a Disaster? What About the Employees?

Share

Updated 2018, after Hurricane Florence. Note: this Advisory touches on a number of very significant issues that all employees and their employers need to be aware of. Everyone is urged to talk directly to their employer to get specific answers to the questions raised. Different states have different rules; different industries may have different requirements. Will your business survive a disaster? Know more about what to expect!

A second update, from 2020. Business closures as a result of the pandemic are not likely to reflect all the general guidelines described in this article. Still, it’s worth knowing questions to ask.

If you evacuate, and your work shuts down, will it survive?

evacuate ahead of storm

When Hurricane Irma threatened Florida and Georgia just about a year ago, over 7 million people were under mandatory evacuation. This year, as Hurricane Florence approached the Carolinas, officials ordered over a million people to pack up and leave.  As I write this Advisory today (September 27, 2018) thousands more people in South Carolina are closing up and getting out to avoid historic flooding.

Most if not all of the businesses that employed all those evacuating people were closed; some are still closed.

Questions to consider:

Survival Question 1 – How long will it take to get the building back up and functioning?

If the business is damaged by winds, flood, contamination, fire, or even if it was not physically damaged, how long will it be before it can be re-opened?

  • Getting electricity and other utilities back up is only the first step — and that may take days or even weeks as we have seen.
  • Repairs to roads, bridges, etc. may be required before repair crews, equipment and supplies can reach individual business or residential communities.
  • Construction supplies and crews will be in short supply, which means you will have to get in line — and their prices will go up.

Survival Question 2 – Once the building is up, what about the employees?

  • Some employees may be unable to return to work because their homes have been damaged.
  • Some employees may be unable to return to work because roads are still closed.
  • Family issues (injury, child care, medical, etc.) may keep employees at home.
  • Some employees will have run out of money and will not have been able to wait for the business to reopen.

Survival Question 3 – Even though the business is now ready to re-open, what about customers and suppliers?

  • Your regular customers may not have returned from having been evacuated.
  • Some may still be struggling with their own disasters and not want or be able to use your services.
  • Your regular vendors may still be struggling, too — and you may not be able to get your usual deliveries of supplies.
  • The entire economy may be depressed. (The tourist economy of Puerto Rico has not recovered after Hurricane Maria.)

Where will the money come from to make survival and rebuilding possible?

Timing is everything. If you can’t get the doors re-opened within 10 days, your business has little chance of surviving. In fact, about 40% of companies hit by natural disasters never do re-open.

And for small businesses, the chances of going under are even greater because not only is the workplace damaged or destroyed, but local customers have been hit by the storm, too.

OK, those are statistics. But stick with the scenario a bit longer.

Big storm hits – and thankfully you get through unharmed. Your family is shaken, but safe and back together. Unfortunately, your workplace was flooded and needs some major repairs. So now, the real emergency begins, because . . .

Income Question #1 – Will employees get paid during the evacuation and the re-building process?

If you are an employee, here’s what you need to know first about getting paid during and after a disaster.

  1. Are you paid on an hourly basis and eligible for overtime? Or are you “exempt” from overtime?
  2. How long is the business likely to be down?
  3. Can you work from home?
  4. Does your employer have an Employee Assistance Program (EAP) that will help?
  5. Do you have a personal retirement plan – 401(k) – that you could borrow from?

As you can imagine, answers to these questions may vary company by company, and state by state. Here we are publishing general guidelines.

Income Question #2 – What does the Federal Government require of your employer?

According to the Fair Labor Standards Act (https://www.dol.gov/whd/flsa/), employers must pay covered non-exempt employees (hourly workers) for hours worked, and overtime to those workers who work more than 40 hours in one week. So, if you work, expect to get paid.

If you DON’T work because a disaster shuts down the business, don’t expect to get paid.

If you are a salaried employee, and the business is shut down for less than a week, you will probably get paid for that time. However, your employer may deduct those days from your leave bank. If the business is closed for a full workweek, your employer isn’t required to pay you.

If the workplace is completely destroyed from the disaster, you may be eligible for unemployment while you look for work or the company is being re-built.

If the company re-opens, but you can’t make it back to work because your own home has been damaged, or someone in your family has been injured, your absence is considered “a personal day” and it will likely be counted against your leave bank or deducted from your salary.

Your employer may have set up an Employee Assistance Plan (EAP) that in addition to referrals and counseling might provide short-term financial help – perhaps advancement on future wages. Note my use of the word “might” in that sentence . . .

Income Question #3 – Does your employer have the resources to hold things together?

If your employer has planned for emergencies, and made sure the company has the right insurances, funds may be available to keep the business and employees going while the business regains its footing. Applicable insurances may be property, flood, business interruption, added expense, etc.

For example, insurance coverage may allow for essential operations to be moved to a temporary location. There, office or other equipment can be rented so the company can provide regular or at least a skeleton service. Employees may have to be put up in a hotel. New temporary employees may have to be hired. Or, a few key employees may be called upon to work from home if they can get upgraded broadband, etc.

These additional expenses can add up quickly and many may have to be paid in cash, so this will require advance planning.

What’s the best answer?

Of course, you can’t predict a disaster, but the more you and your company prepare, the better the chances you’ll make it through the disaster and get back up and running before it’s too late.

So, even if emergency planning isn’t part of your official job description, you are advised to find out what planning your employer has done. It’s very possible that you could help improve whatever plan exists.

We have resources right here at Emergency Plan Guide.

  • Use the search bar to find specific topics.
  • Click on Business Planning in the Build Your Survival Skills section of the sidebar to page through some of the recent Advisories specifically for business owners and employees.
  • Consider getting and sharing a copy of Emergency Preparedness for Small Business. Like this Advisory, it asks a lot of pertinent questions, and has many, many resources in its Appendix.

Even if the business ultimately survives a disaster, the people who worked there may experience their own, personal disaster. Smart planning may help everyone involved.

Virginia
Your Emergency Plan Guide Team

P.S. In the midst of a disaster, employment issues can quickly develop. We are not legal or licensed insurance experts. If this Advisory has raised any questions about termination, discrimination, wage or hourly pay, insurance benefits, etc., please consult with a qualified adviser for answers that fit your individual situation.

Emergency Planning for Seniors

Share


Lost Pet Flyer

Have a flyer ready before the emergency!

When it comes to emergency planning for seniors, the basics really aren’t that different. After all, I am a senior myself and I don’t consider myself so different!

But . . . there are some issues that we face in our community-of-a-certain-age. This week, when I received info about a program being sponsored by one of the Northern California CERT groups, it caught my “senior” eye.

Interested residents of Lafayette, Moraga and Orinda are invited to a special meeting sponsored by the Lamorinda CERT: “Bring Your Stuff Workshop”

The agenda is very comprehensive. CERT members will be checking on 25 different emergency planning items for workshop participants. You may want the whole list, but for today, here are . . .

Three important issues that apply particularly to emergency planning for seniors.

Could any or all of these could be the subject for YOUR next workshop?

  1. Getting an emergency alert in a timely fashion – including at night.
  2. Having copies of important documents in case you need to evacuate.
  3. Having a Lost Pet Flyer as part of your pet’s survival kit.

Let’s take a look.

1-Alerts are especially important for emergency planning for seniors.

Some of our neighbors are pretty anti-social. They actually have turned off the phone service here in our community that is aimed at promoting various social events, announcing utility turn-offs, etc.

Some of our neighbors are hard of hearing and when they take out their hearing aids at night, they are unable to wake for a phone call or even for police pounding on the door!

(There are special alert phones for people with hearing difficulties. These phones have loud alarms; some vibrate and blink. The best ones can be programmed to suit the kinds of weather disasters you could expect (tornado, for example), and to turn off those that don’t apply (flooding). And some of them allow for an extra strong strobe light to be attached. See research report at the end of the Advisory.)

Even when they hear the alert, seniors may need more time to get organized — so it’s important that we find out about danger right away!

Now, most people DO have cell phones. So the Lamorinda group is planning to individually help all their workshop participants:

  • Sign up for their local community warning system and/or any regional alert systems.
  • Add ICE (In Case of Emergency) contact information to their phones – including local non-emergency numbers.
  • Make sure the people know how to get to the ICE numbers in an emergency!

2-Emergency planning for seniors needs to include getting copies of important documents!

This is a tough one for elderly people. First, the older you are, the more saved documents you may have. Some are irreplaceable because they were generated before the era of computer data bases. Many of the documents are odd sizes, faded, etc. making a commercial copying job expensive. Second, very few of my senior neighbors have scanning capabilities at home. Third, there’s the issue of privacy.

(A year or so ago we considered putting out a call to neighbors offering to scan their documents, but then we withdrew the offer, not being able to guarantee security.)

The Lamorinda group, which is holding its meeting at the local library and putting it on in conjunction with the police department, will be doing the scanning “in a secure environment with law enforcement present to eliminate privacy fears.”

They will also have thumb drives for sale so people can carry their documents home with them with the matching thumb drive tucked right into a purse or pocket!

3-Seniors who are pet owners need to have the proper ID and protections for their pet.

At nearly every meeting of our neighborhood group we discuss emergency planning for pets. For example, at our recent “show and tell” meeting we were able to compare a couple of different pet carriers, we discussed the importance of the right pet food (and what happens when a pet eats strange food), and, of course, we talked about leashes, collars (including glow-in-the-dark collars), and identifying a lost pet via an embedded microchip.

(Please note: microchips do NOT have GPS and are not designed to track your lost pet. The microchip has a registration number and a phone number of the registry for that particular brand of chip. A person with a handheld scanner (the vet) can read the chip and find the owner.)

At the Lamorinda meeting, pet owners will be helped to create a custom Lost Pet Poster to help save time in an emergency. The images at the top of this Advisory are examples of free templates.

You could consider having the basic flyer already prepared, with photo, name, etc., and then, as necessary, fill in the appropriate emergency phone number.

In any case, if everyone has to evacuate, you cannot assume that your local copy shop or your friendly computer whiz neighbor will be available to design and run out copies  for you!

I’m always on the lookout for meeting ideas, and I think all three of these are excellent. I will be checking in with my friend at Lamorinda CERT to see how their meeting actually goes, and and I’ll let you all know.  In the meanwhile, perhaps you could start planning on a similar meeting for YOUR group. (And if you want the full agenda from Lamorinda please let me know.)

Virginia
Your Emergency Plan Guide Team

Extra: Research Report on Emergency Alert Equipment for People Who are Hard of Hearing

Special alarms for hard of hearing: Three years ago our community participated with the local fire department to have over 400 smoke alarms installed. During that event I became aware of the challenges that some neighbors had in being able to hear the alarms, particularly at night. Ultimately we were able to get a couple of special smoke alarms installed that activated blinking lights and made the whole bed vibrate.

This week, as I followed up on the Bring Your Stuff Workshop, I checked again for emergency alerts. What’s available is essentially the same sort of technology as we found with the smoke alarms: louder alarms, strobe lights and vibrators. When it comes to emergency alerts, however, these “extras” are connected to a special NOAA (National Oceanic and Atmospheric Administration) Weather Alert radio

NOAA radios at the center. Unlike a regular AM/FM radio, weather alert radios sound an alarm even if the radio is in standby mode. NOAA weather alert radios with S.A.M.E. (Specific Area Message Encoding) technology allow you to enter local county codes and eliminate alerts that are not within your programmed Specific Area.

Weather Alert radios are available costing anywhere from $30 to $100 dollars. We have reviewed several of them on our Best Emergency Radios page.

We have bought Midland. When it comes to radios with more options for readability and hearability, we have chosen Midland for closer examination. We use Midland handheld radios in our neighborhood emergency response group and have found that although the models are frequently upgraded, the quality is consistently reliable.

Below is the latest Weather Alert radio from Midland. (Model 400) Notice the three color-coded alert levels: advisory (yellow), watch (orange) and warning (red). And the written alert TORNADO WARNING is big enough to read easily. You can program the radio for up to 25 counties, and it will announce alerts for 80 different weather hazards and emergencies including Biological Hazard Warnings, Fire Warnings and even Child Abduction Emergencies (Amber Alerts). This model has a USB port that allows you to charge devices directly from the radio. Includes an AC power adapter but can use four AA alkaline batteries for emergency power back-up (not included).

Earlier versions of this radio have a white or gray case, and the warning messages are black on gray.  (Not so easy to read in my opinion.) They do have the same NOAA alerts (only 60 of them!). AM/FM radio with alarm buzzer and battery back-up in case power goes out.

Click on the image or the link for full details and to check the current price at Amazon.

Midland Consumer Radio Weather Radio All Hazard Radio Gray (WR400)

And here’s an attachable strobe light that would improve the value of the radio for people with hearing problems.

Strobe for Midland Public Alert Weather Radio

We have several NOAA Weather Alert radios in our house. I recommend you consider one, too, and not just for someone who doesn’t hear very well! We all deserve to get warnings of impending emergencies as soon as possible!


Counting On Your Neighbors

Share

Preparedness Training in Mandarin

How confident are you about your neighbors’ level of preparedness?

The title of this Advisory is taken from our Neighborhood Disaster Survival Guides. If you’ve looked at one of the Guides, you’ll remember that Part One is titled “Your Personal Safety,” and Part Two is titled, “Counting On Your Neighbors.”

  • How confident are you about your neighbors?
  • Are they prepared for emergencies?
  • Would they be able to step up to help you, or others?
  • Would they be able to evacuate?

Heck, do you even KNOW your neighbors?

Every community is different, of course. And the make up of communities can change rather quickly. So while a couple of years ago you could answer the questions above, you may not be so sure today.

That’s why building a local Neighborhood Emergency Response Team that keeps going is so important!

Our neighborhood keeps changing.

Our local community here is pretty diverse, and as residents move out and in, we’re getting ever more new neighbors who . . .

  • don’t know what threats they should anticipate (earthquake, tsunami, flood?)
  • don’t know about our city and county emergency services
  • have never even heard of emergency preparedness.

Moreover, many of our new neighbors do not speak English as a first or even second language.

When someone asks me, “Are you counting on your neighbors?” it’s tough to answer affirmatively!

How to reach new neighbors?

I’ve written before about some of the activities we’ve sponsored in order to attract interest, educate neighbors, etc.

(One of the most popular was putting a bottle of water on each doorstep with a message saying, “Here’s a start for your own emergency supply kit. Don’t expect your neighbors to do anything more . . .!”  Well, it didn’t say that exactly, but that was the message!)

Today I wanted to report on yet another outreach event that happened just last week. It was a first for us.

Pick a specific target audience.

A growing number of our senior neighbors are coming directly from China and Taiwan. They haven’t lived in the U.S. before, so while they may know a few words of English, it’s not something they used in daily life or even studied in school. (Today, of course, all Chinese school children are learning English.)

Engaging these folks in our emergency response activities was pretty impossible until we tried several things:

  1. A few of our community leaders got together to teach a series of informal English classes. The classes were fun and funny – and students and teachers got to know one another.
  2. After the classes were over, some of the Chinese-speaking students kept meeting. One of their standing “agenda items” is to go over the community calendar with a group leader who translates everything.
  3. Finally, after our city’s CERT group came to give a presentation to our entire resident community, the Chinese-speaking group leader and I decided to put on a repeat performance – just for the Chinese speakers.

That’s the picture you see above. Our evening started with a pot luck dinner, then continued for a full 90 minutes while our Mandarin-speaking police officer went through the basics of emergency planning, earthquake preparedness etc. She was talented and the audience was totally engaged!

I even sneaked in another English lesson. And I passed along the discount coupons made available by our local hardware store.

Follow up!

As a result of this meeting, my own circle of friends has expanded. (My Chinese vocabulary remains stuck at 3 words.) I’m working with the leader and her core group to make sure these folks get more good training on a regular basis. First on the agenda, a great handout – in Chinese – from the Earthquake Country Alliance.

The group members are all looking forward to the training, and actually to a repeat visit from the policewoman. I’m looking forward to counting on these neighbors when the disaster hits!

Expect some push-back.

A couple of days after the dinner meeting, I mentioned it in a different setting. A long-time neighbor commented: “Well, as long as we keep doing things for them in their own language they will never learn English.”

Hm. I agree with that statement. I think everyone in the U.S. should learn English. (That’s why I was part of the teaching team! For that matter, I’ve taught ESL in a variety of settings over the years.)

But when it comes to an emergency, I am not willing to watch people get into trouble – or get ME into trouble – when some basic information would make all the difference!

And at Emergency Plan Guide the concept of “us” vs. “them” isn’t too popular! We don’t think anyone is unworthy of assistance or training. Our goal is all-inclusive — to help individuals and their communities become stronger and more resilient.

Where do you go from here to have a better chance of counting on your neighbors?

What challenges do you have in organizing YOUR community? What successes have you had in attracting people to emergency preparedness activities? What hasn’t worked? Who have you called on as resources?

Please send a message and share a story about your best meeting, of just drop your story into the comment box below to share with everyone!!

Virginia
Your Emergency Plan Guide team

P.S. I’ve mentioned a few resources in this Advisory. Here are some direct links if you want to track them down:

  • The Neighborhood Disaster Survival Series —  Each of the three books in the Community series has hundreds of ideas for building a neighborhood group and a “durable” emergency preparedness plan.
  • Message in a Bottle This is an inexpensive, one-time activity designed to remind everyone in the community about building up a supply of emergency food and water.
  • Partnership with the Local Hardware Store  You may be familiar with multi-tools or gas-shut-off wrenches or fire starters, but that doesn’t mean everyone is. Here’s how we partnered with our local hardware store for a great show-and-tell meeting.