Category: Neighborhood groups

Revive Our Group!

Share
Dog raising paw - showing need for help
Raise your hand if your group needs help!

After 18 months of not seeing each other’s faces, it was time for our Neighborhood Emergency Response Group to get back together. We needed to revive our group. We needed new ideas.  We needed to regain some momentum!

Here’s a quick story of how we have progressed over the past two months. While this describes a Neighborhood Emergency Response Group, I think the step-by-step activities could be used by just about any group! 

First step: Make sure a face-to-face meeting is safe.

When our “revival” started, COVID was declining in our community but we were still cautious. After all, the goal of a Neighborhood Emergency Response Group is to protect health and lives, and not threaten them!

So, while our clubhouse had been “officially re-opened to groups,” we decided that masks would be required. (As you can imagine, a few people then declined to come. . .)

In contrast, we held our most recent meeting, just yesterday, outside in a patio area. We enjoyed plenty of fresh air and masks were optional. The dynamics improved, along with the acoustics!

Second step: Advertise “Revive Our Group” by promising that everyone will be involved.  

Our meetings have traditionally taken place in a meeting room, with tables and chairs and someone leading the discussion. Shy attendees are able to get through without ever really joining in.

For our first Revival Meeting, we tried a new format.

Here’s how it worked.

Our meeting was advertised as having a goal of “collecting new ideas.” After a brief catch-up of what had happened during the pandemic shut-down, we identified four areas that we wanted to work on:

  • Group purpose and positioning
  • Recruitment of new members
  • Education and training
  • Budget and sponsorships

During this discussion, we gave every attendee a pad of yellow (or other color!) sticky and a pen. We invited them to write down their ideas, one idea per sticky. It was billed as a “brainstorm!’  (“Every idea is good. No judgment calls.”)

We labeled sheets of paper with the themes. (We happened to have bright pink paper, but any color will work!) At the given time, attendees all got up and pasted their individual stickies on the appropriate sheets. There was some jostling but it was good to get people out of their chairs. Here’s what one of the sheets looked like after the stickies had been posted:

Third step: Document EVERY idea, no matter how new or unusual.

After the meeting, I captured all the individual sticky ideas and turned them into a more formal list. I sent out the list with Instructions: “Please consider which ideas should be on our ultimate “Top Ten” list.”

Fourth step: Let your group members vote for their favorites.

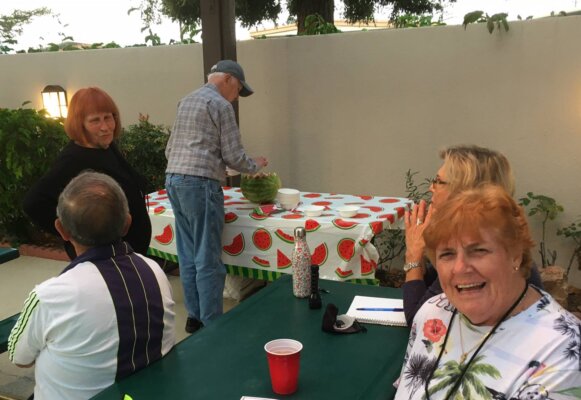
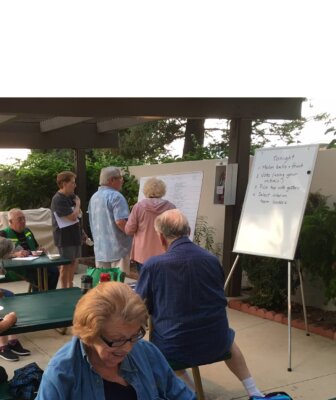
A month after our first meeting we gathered for our second meeting. It was outdoors, face to face!  We started with refreshments (melon balls in carved up watermelon – labor of love from one of our volunteers!). We discussed each of the ideas on our Master List, and then people went over to the board where ideas were listed and they voted.

People voted for the activities they thought would be most do-able and most productive.

When they placed their votes (their initials) into the column labeled, “I will help,” we suddenly had a whole group of volunteers!

Fifth step: Pick the Top Ten,” assign an interim team leader – and let everyone get started!

Master list of activities: Vote for your favorite

The picture above shows just the top few lines of one of the two big ballot sheets.

  1. Note the column headers: Priority, Activity or Event, “I will help.”
  2. “Votes” are indicated by the sets of initials after each activity or event.
  3. The more sets of initials, the more popular or desirable the activity.
  4. The red checks indicate which events were chosen for the Top Ten. (Actually, we ended up with only 8 out of a total of 23 suggestions.)
  5. The red circles show the person chosen as interim team leader. Team leaders got a short list of “Project Planning Tips” to help them get started.

What about the activities and the people left over?

My next step will be to again document the Top Ten and list the volunteer team members. At the same time, I’ll encourage “orphans” to join in one of the first teams created or, if they want, to simply proceed on their own to develop their favorite activity.

I’ll report on how all that goes in an upcoming Advisory.

Conclusions from our first efforts to “Revive our group.”

  • Starting with refreshments works better than waiting until the end. If the meeting goes too long, people want to leave. (In our case, waiting too long would have put us all in the dark!)
  • Using pens and stickies to capture people’s input was particularly successful at engaging those people who aren’t comfortable speaking up.
  • Brainstorming – “Just come up with ideas, every idea is good.” – works to generate lots of ideas.
  • Sorting through all the ideas to pick the best (easiest? most popular?) takes time. It took a LOT of time. But our goal was to create energy by engaging more of our group members – and the effort paid off.

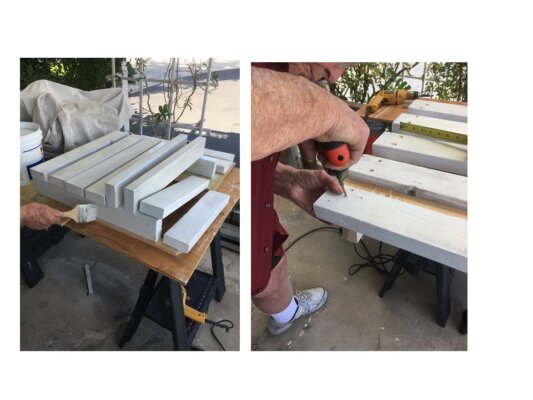
Just a couple more photos while it’s all still fresh in my mind!

Revive our Group party starts with watermelon
People helped themselves to melon-scooped balls from a carved watermelon on watermelon tablecloth!
Volunteersvote on best activities to revive the group
Note people in background studying Master List of activities before voting.

Within about 20 minutes from the time the photos were taken, this entire patio was dark. Fortunately, people brought lanterns (emergency lighting!) to allow us to finish up.

Our Watermelon Party doesn’t end this story. I’ll be writing again about the various events and how they develop. If you have held some successful events designed to engage group members, pleas let us know the details. We all need ways to stimulate participation and revive our groups!

Virginia
Your Emergency Plan Guide team

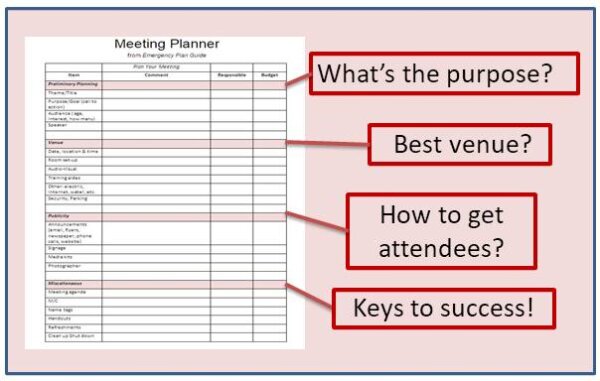
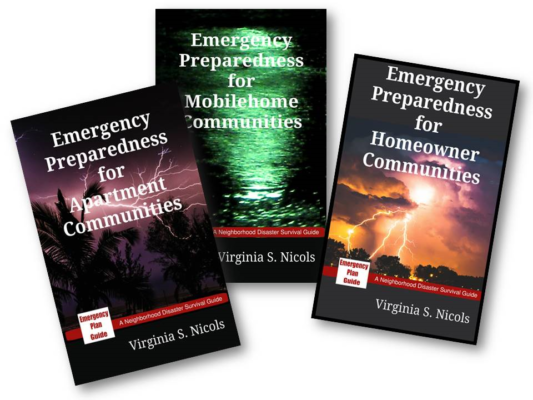
P.S. You know, of course, that we’ve published a whole book with Emergency Preparedness Meeting Ideas. It has over 100 pages of ideas for meeting topics and formats to get you started or keep you busy.


School Preparedness Questions for Parents

Share
She’s ready to learn – but is she ready for an emergency?

Every year in August I think about school starting and ask, ”Do I really need to give parents a list of questions about school preparedness?” And every year, because things keep changing, the answer is YES. Lately my list has had to be updated more than once a year!

Here are updated school preparedness questions for Fall, 2021.

These questions are written primarily for elementary school parents, teachers, staff, security and healthcare providers. Of course, every school is unique – not to mention every student! – so we can’t provide guidelines for every single situation.

In particular, we can not address the situation with COVID-19 and public health that is front and center for school children this year.

But we can ask pertinent questions with the hope that all parents will make sure to get the answers that work for their family.

Preparedness questions to ask the school

Caution: School personnel may be hesitant to answer some of these questions. They may not want to share details. They may be uncomfortable with preparedness issues in general. Or given all the changes that are happening, they may simply not know the answers. But remember, if you feel good answers are not forthcoming, stick with it!

Also remember this, too. School staff members may not consider themselves “First Responders,” but when something happens, they are the first ones there. Their actions can keep an emergency from turning in to a disaster. School staff deserves and needs to have the right training and supplies — and support from the district and the community — to do this job.

1 – General school emergency policies.

  1. Does the school have written emergency policies and plans? Have they been updated to account for the Coronavirus? For air quality or other emerging situations?
  2. How do parents find out about the policies?
  3. What about emergency contact forms for each child. How are they distributed? Where kept? How detailed? How often updated?
  4. Who decides on the definition of “emergency?”
  5. How will parents be notified in emergencies? Are all parents notified for each emergency?
  6. What are student pick-up policies? What are alternative pick-up locations if school has been closed? Who can pick up your child if school is shut down? How will they be notified? How will they be identified before child is released? What if your child won’t go with them?

2 – Emergency drills.

  1. Does the school face any particular threats because of its location? (near railroad tracks, busy traffic or airport, environmental hazards from neighboring businesses, potential for earthquake or tsunami, etc.)
  2. How are teachers and students on site notified of an emergency? (site-wide PA system, internal phone system, cellphone app, etc.)
  3. How can teachers advise the office of an emergency?
  4. What emergencies does the school train for other than fire or storm? (Earthquake, tornado, wildfire, active shooter?)
  5. Does the school train for evacuation as well as shelter in place?
  6. What should parents know about how these drills are called and how conducted?
  7. Who does the training and how often?
  8. How are substitute teachers included in these drills?

3 – Emergency supplies and equipment.

  1. What food and water supplies are maintained in the school?
  2. Are supplies kept on school buses?
  3. What food, water and hygiene supplies are in the classroom in case of extended lockdown? (Please see P.S.!)
  4. Are first aid supplies available in each classroom?
  5. What first aid training do staff members get? Do they get age-appropriate training? (For example, CPR for infants and children is different than for adults.)
  6. Where is emergency equipment located? (fire extinguishers, AEDs, wheel chairs, etc.)
  7. Who is trained in equipment use?

4 – Security features.

In recent years, many schools have made changes to their physical infrastructure to provide more security. Parents and students should know what to expect.

  1. Have changes been made in the classroom or on the campus due to the threat of COVID?
  2. Has the school made any changes to the way visitors are allowed onto the campus or into the buildings? What are the policies?
  3. Does the school have security cameras? Are they monitored?
  4. Does the school have a professional security force? How many officers with what credentials, what training and what weapons? Their role?

(By the way, a report from the National Center for Education Statistics can give you an idea of how your school stacks up compared to others when it comes to physical security and crime statistics. The report is updated every year.)

5- Getting back to business as usual.

Sometimes it’s easier to focus on immediate protective actions and overlook what it will take to recover once the event is over. A good school preparedness plan has procedures in place to help parents and students “get back to business as quickly as possible.” (Obviously, after a year of distance or hybrid learning, these procedures may be new for everyone.)

Depending on the age of the students, such activities might include

  • professional and peer counseling
  • student-aided clean-up
  • building safety inspections
  • memorials
  • acknowledging First Responders, etc.

See what plans the school has for such activities and what role the parents are expected to play.

Next steps for parents.

First, share your list of school preparedness questions with other parents. You may want to take the time to expand it with details unique to your school. Next, approach teachers and administrators for answers.

Make sure the answers get out to everyone in the neighborhood! You may want to insist on special presentations on some topics. Guest speakers could be school staff and a member of the police or fire department. You yourself might volunteer to help design and put on parts of the presentation.

You may need to create materials in multiple languages.

Presentations could be held virtually, or on Back to School night, at a PTA meeting, and, of course, in the classroom. Have students videotape the presentation for later showing or showing online, as well.

Working together, schools, students, parents and other community members can keep emergencies from becoming disasters and do the best possible job of protecting students when disasters do occur.

Virginia
Your Emergency Preparedness Team that naturally includes children!

P.S. Does your school ask that you send an “emergency kit” to school with your student? If so, please read this companion Advisory, also newly updated for 2021: Emergency Kit for School.


Meeting Planner for Neighborhood Emergency Groups

Share
A meeting planner for Neighborhood Emergency Groups
Download the pdf of the Planner. See below!

Planning a neighborhood meeting? You need this Planner!

Our neighborhood emergency group has traditionally taken a break during the summer.  Last year, because of COVID, we were forced to. This year, after practically a whole year of break, we are ready to get back together. So, we’ve pulled out our Meeting Planner for help!

Building a neighborhood emergency group just won’t happen without a strong and consistent plan for regular meetings.  If you agree with this principle, you might want to hold one meeting just to plan a year’s full campaign! Give people a calendar and block out appropriate meetings based on time of year, local events, holidays, etc.

In the meanwhile, though, here are key steps we’ve found to be essential for a good meeting. The image above gives you an idea of how to start your planning.

Step 1: What’s the purpose for this particular meeting?

How many of us have gone to “regular monthly meetings” with that sinking feeling that this one will be just a repeat of last month’s meeting?  Before you even begin your meeting planning, ask some questions like these:

  • What do we want to accomplish at this meeting?
  • Could we accomplish it a different way – like with an email survey, or a written report?
  • Who needs to be at this meeting?  Everybody, or just team leaders? Or maybe it’s for possible recruits? Or potential donors?
  • Given the purpose, then what KIND of meeting will be best? For example, a simple social get-together? An expert as guest speaker? A series of talks or show-and-tells by members?
  • What will be our measure of success?

Once you establish the purpose and the format, you can move to step two.

Step 2: What’s the best venue for this particular meeting?

Some of us will have little choice about where to hold a neighborhood meeting. Still, maybe it should be outside instead of in your usual meeting room? Or maybe at a member’s home?  Horror of all horrors – maybe this meeting could be accomplished with a Zoom call?

Wherever, you’ll need to consider:

  • Size of the meeting place
  • Table and chairs and how to set them up to meet your purposes
  • Screen, electric hook-up for computers, projectors,  etc.
  • Parking
  • Location of fire alarms, extinguishers, etc.

Step 3: The challenging part. How to get people to our meeting?

If you did your homework on Step One, you know WHY you’re meeting. This means you can tell potential attendees just how they will benefit by coming!

The more reminders, the better. Use email to your list. If appropriate, post on Facebook and Nextdoor. Encourage your speaker to promote the meeting. Distribute and tack up flyers. If this meeting has public service interest, send out a press release.  Repeat!

Good advertising takes copywriting and design skills. Who can do this for your group? Maybe you can get the help of a kind professional?

Step 4: The show is on! What “extras” will help it be a success?

Here are a few things we’ve used over and over again because they work, over and over again!  Use whatever works for YOUR group.

  • Refreshments.
  • A meeting agenda with specific end time.
  • Sign in and Name tags.
  • Door prizes. (Our favorite “emergency preparedness supplies” door prize has been — wait for it – a can of sardines with mustard packet!  It turns out a lot of people really hate sardines, with or without mustard. So, we get a lot of laughs!)

Want more details?

If you’d like to download a full-sized pdf of the Meeting Planner (full size and readable, without the big red labels!), of course at no cost, grab it here . . .

And if you’re really serious about planning meetings, make a $10 investment in yourself and get our BEST SELLER!

Book -- Emergency Preparedness Meeting Ideas by Virginia S. Nicols

Emergency Preparedness Meeting Ideas. Over 100 full-sized pages, with 21 specific meeting descriptions – objective, procedure, materials, comments. There’s a Meeting Planner page for each one.

Plus, it has lots more ideas for meeting themes, diagrams of different room set-ups, how to get more of your volunteers to become a part of the planning team, etc.  Click here to go right to Amazon and order it so you will have it in your hands before your next meeting!

Here’s what Jodi, one of the book purchasers at Amazon said:

“Great value and just what I needed! Fantastic ideas!”

(Nice, eh?! Thanks, Jodi!)

Let me know if you have questions or suggestions for the NEXT volume of ideas. We’ll always need more!

Virginia
Your Emergency Plan Guide team

P.S. Having a team sharing the responsibility for meetings can make the job a lot easier. Consider getting a couple of copies of Emergency Preparedness Meeting Ideas so volunteers can be working on more than one upcoming meeting at the same time. (Having a meeting “on the shelf” is a great idea, too.)


Fire News

Share
Picture of burned forest, smoke and flames in background
Pictures like this coming one after another . . .

News often drives these Advisories. You can’t have escaped the latest headlines about summer heat and summer fires. The following selected statistics from various fire news sources will give you an idea of what to expect this summer.

First, sobering statistics on the fire front — and they threaten to continue.

  • Fire season – what’s changed? Last season’s California fires were some of the biggest ever seen. Already this year, fires are burning faster and hotter and earlier. Summer fire season used to start in May. Now fire “season” is all year long.
  • High temperatures – how high? This year heat waves with triple-digit temperatures have hit most western states and even western Canada, setting records and breaking them the next day. (Are you familiar with “heat dome?” The NOAA defines it as “when the atmosphere traps hot ocean air like a lid or cap.”  Read more on the NOAA site and you’ll see that it’s all because the Pacific Ocean has heated up faster than the Atlantic. Expect more about heat domes in upcoming fire news.)
  • Drought – again? High temperatures added to dry vegetation make fires more extreme. Two-thirds of western states are in a drought. In California, 85% of the state is in a drought. The Governor has already called for 15% cut-back in water usage.
  • Deaths Dozens! People have died from these extreme temperatures – because they didn’t have A/C and because they didn’t know how to take care of themselves, or couldn’t. And of course there have been deaths due to the fires, too. The whole situation is sad and distressing.

By contrast, is there any good fire news?

Some. You may want to find out more about each of these!

As mentioned above, the fire season is now officially 12 months long. The Federal Budget has increased funding for permanent firefighter staffs. This means departments can do a better job of planning.

Meanwhile, new technologies are coming online to improve fire detection and firefighting. Drones are a good example. They can find fires (with the help of specialized cameras), assess conditions and direct fire fighters. New apps have been developed, for professionals and citizens, which show fire locations, evacuation zones, current evacuation alerts, and up-dated escape routes. Artificial Intelligence is being harnessed to capture and analyze information from cameras, current and archived weather data, satellite images and modeling tools to predict the likelihood of fire conditions wind patterns, utility service, and more.  

All these have potential, of course, but until there are some massive breakthroughs, it looks as though we are going to experience more and more extreme fire seasons.

What can we do today here in our neighborhood?

This question prompts me to write every week!  What can I do? What can my neighbors do, working together? How can we make use of good guidance and professional resources?

The news in this Advisory, and the emergency situations described below, are meant to help you step up to a higher level — of knowledge and of readiness. Like much of what you see here in Emergency Plan Guide, this Advisory assumes you already know most of the basics. So you can consider these items as extra credit!

How many fire extinguishers should you have in your home?

Where's the nearest fire extinguisher?

“More than you need.” CERT training suggests you attack a fire with a buddy. You both should have extinguishers, both pins should be pulled, both extinguishers tested BEFORE you attack the fire. When you’re ready, approach the fire, aiming at the closest lowest edge. Get it put out quickly! Your 2.5 lb. ABC extinguisher will only discharge for approximately 9 seconds! (5 lb., 14 sec.; 10 lb., 22 sec.) Find out more about extinguishers here. It tells about a special meeting we held, plus has a recommendation for a good deal on purchase.

Fire Alert! Wildfires can blow up out of control within as short as an hour, People need all the advance notice they can get in case they need to evacuate. Can you name three ways YOU will get warnings about fires?

Everyone should be familiar with and able to get multiple alerts: text and phone alerts from Federal and local jurisdictions, news from public airways, and messages from their place of  work. We’ve written before about emergency alerts. Be sure you are signed up if signing up is required! Promote signing up as a community or neighborhood activity. Be aware that PEOPLE WITHOUT INTERNET ACCESS MAY NOT GET ALERTS, particularly if power is out!

Possible gas leak from earthquake! Clouds of dust! A gas line valve needs to be turned off, but you know that a spark could set off an explosion or fire. What tools do you use?  

Non-striking adjustable wrench for use around electricity or gas

You use non-sparking tools — wrenches, hammers, etc. They are made of Aluminum-Bronze (Al-Br) or Copper-Beryllium (CuBe) alloys. (The gold-colored handle might as well be gold, for the price!) If you need non-sparking tools for the job, though, you’ll be thankful you have them.

Wind is pushing embers out miles in front of an advancing wildfire! You don’t expect to have to evacuate, but embers could certainly start a smaller fire. What is the latest fire news for removing vegetation fuel outside the home?

“Keep vegetation 1 foot away from the house, keep plants/bushes trimmed up 2 feet off the ground.” Get all the guidelines at FireWise. (And get rid of all Juniper bushes – to quote the firefighter giving one of the recent presentations I attended, “They are a roman candle ready to explode.”)

A small fire starts in an older public building. The fire department has been called. People are getting safely out. You notice a fire hose and standpipe right there. Are you allowed to use this hose to keep the fire from spreading?

fire hose with standpipe

According to my firefighter host – and supplemented by online research – small hose (1 – ½ in.) already connected to standpipe systems are designed for use by “trained building occupants.” If you feel you are “trained,” and you can safely stop an incipient fire from growing, take action. Open the case, turn on the valve, pull the hose all the way out, turn on nozzle and aim water at base of fire. You may have put the fire out before professionals even arrive. (P.S. They will be bringing their own, heavy-duty equipment.) Thanks to Guardian Fire Equipment for the photo. And here’s more info about these systems (no longer required but still found) with a quiz to finish up with.

Next steps

Every one of the questions above can be turned into a comment, an article, a show-and-tell, a flyer, a study session – perfect for sharing with others. You can invite a guest speaker from the fire department. Everything fire-related is appropriate for every single family and every single community. Please make a commitment to share!

Good luck with your fire prevention and preparation activities.

Virginia
Your Emergency Plan Guide team


What happened to Alice – Part Two

Share
Woman sewing mask during pandemic shut-down
Sewing two-layered pandemic mask . . .

Last week I relayed the story of “What happened to Alice” during the pandemic shut-down. (If you missed it, please read it now.) I found Alice’s story disturbing. I’m confident, though, that anyone who could describe a 13-month lock-down as “$4k a month to be in jail” will be able to get back to a full and satisfying life!

While I was writing, I found myself with questions. How might Alice’s “stay” have been handled differently? What could the retirement facility have done? Did other seniors experience this same sort of lock-down? Answers started coming – so this week, here’s “What happened to Alice – Part Two.”

First, the difference between an “assisted living” facility and a “retirement community.”

Alice lives in an assisted living facility where meals are provided. She gets various levels of medical assistance, and social activities are offered (when it’s safe for people to get together). Assisted living apartments usually have emergency communications (a pull alarm or a wearable medical alert). And in an emergency like a wildfire or flood, facility staff manages an evacuation.

By contrast, I live in a 55+ retirement community where we are considered “independent.” We own our own homes, and property managers don’t come in. Meals and (most of) our activities are up to us. We get ourselves to the doctor or call 911 when necessary. In an emergency like a fire, we are responsible for our own evacuation – following police instructions, of course. (You can read our near-evacuation story, too, if you missed that!)

The important point: Retirement or assisted living communities are not nursing homes. The former are considered “residential” environments; nursing homes are considered “medical” environments. (Want more details on these definitions? Here’s a good resource.) This Advisory deals with senior residential living.

How did senior retirement communities respond to the pandemic shutdown?

Here are some examples of what went on in different communities. All this information comes from people I know – or heard about from readers.

Visitors.  

Alice’s facility closed its doors and residents’ doors and monitored all traffic. As already mentioned, no one died of COVID. (Editor’s note: Nationwide, 1 in 12 people in assisted living homes died of COVID.)

Where I live, visitors — including gardeners, housekeepers, etc. — came and went. People wore or didn’t wear masks. (Our clubhouse was closed.) We had a handful of COVID cases among neighbors, but no deaths that I know of.

Isolation.

Alice was alone in her room all day with her TV. Food was delivered at the door. Had she not picked up her food, staff would have noticed. (But it doesn’t sound as though anyone lingered to chat.)

My brother lives in a large (1,000 + people) retirement community in Arizona. Some people had meals delivered, but not all. To track their residents, that HOA set up a system of hanging a sign on the door knob. (Picture a “Do not disturb” sign on a hotel room door.) If you didn’t take the sign in in the morning, security personnel knocked and then came right in to check on you.

In our community of over 500 people, most people stayed home. We shopped during “senior hours.” Some people picked up food boxes via drive-thru, and food programs delivered meals. During these months at least 4 people living alone fell and were not found for hours or days. Three died on the floor and the other died later in hospital. There was no system for checking on everyone. (A particular challenge during our near-evacuation.)

Communications.

So many people report having “binge watched” old sitcoms, series, movies, etc. Alice had TV and probably did her share of watching. But she didn’t have internet access because she didn’t have her own computer. Joe and I have both TV and internet. My brother had the computer and internet and conquered Zoom so we were at least able to see each other’s smiles.

What could have been done to combat what Alice described as “being in jail?”

As long as people are still getting infected by the coronavirus, it has the chance to mutate again. More shut-downs are very likely. We might as well be ready. Here in “What happened to Alice – Part Two” are some ideas I’ve picked up.

  1. Set up a one-on-one “Buddy Phone-Call” program. Within a week of the shut-down we had found volunteer telephone callers. They checked in daily with a handful or even a dozen neighbors up and down the block. (The program worked for about 3 months, then dwindled.)
  2. Connect groups via conference calls. Many families set up weekly zoom calls, as did church groups. Our emergency preparedness group held zoom meetings with professional guest speakers. Our low vision support group set up a weekly telephone conference call. And a senior friend of mine attended a weekly “book club” zoom call. Everyone still read the book – via Kindle – and participated in the discussion. Only thing missing were refreshments!
  3. Plan a daily activity – like delivering meals or the newspaper or picking up trash – to make it clear when people aren’t responding. (My brother reported that sure enough, some mornings he got a knock on the door because he’d forgotten to take in his door-hanger!)
  4. Come up with a no-contact game.  At a retirement community not far from where I live, neighbors staged a “mailbox scavenger hunt.” Special stickers were placed on a couple dozen mailboxes sprinkled throughout the community. Neighbors taking their daily walks searched for and “found” the stickers. They noted the mailbox numbers and deposited their entry forms. Winners were chosen. This simple game got people safely out and about – social distanced — and gave everyone something to enjoy.
  5. Combine some ideas! Our craft group was amazingly creative. First, they sewed and delivered over 700 hand-made masks (as in the image above)! Then they switched to working on a monthly craft project for people at home. Neighbors signed up to get the project pieces. A conference call later on delivery day helped explain how to assemble everything. Different group members took on planning, assembling the pieces, writing directions, boxing everything up, delivering boxes to that month’s participants, and conducting the conference call. Everything took place while members maintained proper “social distance.” (Now that we are open again, the monthly craft project delivery service is still going strong to about 25 home-bound seniors.)

Of special concern for seniors — internet access.

TV and internet access seem essential these days for entertainment and mental activity. But I am afraid many may be making inaccurate assumptions about internet usage by seniors.

Alice’s retirement home apparently had internet, but she hadn’t had time to get a computer before everything closed down. My brother’s community offers basic cable as part of the rent but charges extra for upgraded internet service. (They do have a “computer club” to help with computer literacy, but of course it was shut down during COVID.). In our community, you’re on your own to buy TV and internet service and to get the help you need to make everything work.

What we discovered during the evacuation scare last year is that at least a third of our senior neighbors have no internet access.

They don’t have it because they either can’t afford it or don’t have the necessary computer skills. Obviously their entertainment choices were limited during the shut-down. Worse, they missed emergency communications during the evacuation threat!

What have we learned from What happened to Alice – Part Two?

This Advisory is not a complete analysis of how seniors cope with isolation or how senior residential facilities provide “caring and supportive environments.” It’s just a collection of what I have learned and observed within my own circle of friends and acquaintances.

A couple of things stand out.

First, some communities had better chances of connecting. These were communities with active and creative neighborhood leaders. Setting up meetings, games, etc. took thought and time and the ability to organize things remotely.

Second, voice and video connections were essential to helping people combat loneliness and isolation. Hugs would have added, of course. Anyone heading for retirement living needs to find out about services and support for digital devices!

As I wrote at the beginning of telling Alice’s story, preparedness really means having some options and some extra supplies. It also takes some extra creativity. When it comes to coping with a pandemic shut-down, we need all three!

Virginia
Your Emergency Plan Guide team

What are some things you did in your own community to keep people entertained and engaged during these long months? What can you add to our findings about “What happened to Alice — Part Two?” Please let us know.


Get something going with neighbors!

Share
Neighbors getting together on rooftop planning for summer preparedness activities
Does your neighborhood look like this? Every neighborhood is different – but neighbors are neighbors!

We’re seeing our neighbors again for the first time in a LONG time!

Three weeks ago I went to my first face-to-face, no-masks meeting since mid-March 2020. After 14 months of being shut-in at home, I felt almost giddy! That was the first such meeting. Since then, I’ve been part of two more. It’s been invigorating! In fact, a desire to “Get something new going!” seems to be catching!

In case you’re ready to get something going, too, here is an idea for  spreading the preparedness word.

Write and share a personal story about disaster!

I was encouraged to write just such a story when I saw an invitation on LinkedIn. It came from Mark Keim, MD, one of the emergency preparedness professionals I follow. He had put out a Help Wanted blurb, asking for personal stories to include as part of a series on his website, DisasterDoc.org. The website is a comprehensive one, focused on preventing public health emergencies around the world.

I submitted my story, and it was accepted! It is another look at what happened to us and our neighbors last year when we were threatened by a wildfire. You may want to give this version a quick read on the DisasterDoc blog, particularly if you are working with any fire departments or city emergency management agencies. For sure, evacuation will be on the danger list for many this summer!

Virginia Nicols' article announced on LinkedIn

The picture shows how my article was announced on LinkedIn. And here’s the link to the website blog page where the article appears: https://disasterdoc.org/blog/

While you’re there, be sure to read Mark’s post titled “How a children’s book saved my life!” That personal story is what caught my attention in the first place.

OK, with all that background, here’s my own HELP WANTED blurb, and your chance to get something new going!

Let’s hear YOUR story of an experience you’ve had working with neighbors in an emergency or preparing for one.

You wouldn’t be reading this if it didn’t matter to you what happens to other people in an emergency. Why do I know that?  Because anyone interested in preparedness knows you can’t really prepare all by yourself!

After all, when the hurricane hits, and your home is threatened by storm surge, so is every home around you. When the power goes out, what your neighbors do – or likely don’t do – comes right back to haunt you!

Here’s an excerpt from Elizabeth’s story about neighborhood preparedness.

Elizabeth wrote to me just a couple of weeks ago about having helped plan and practice an evacuation of her Northern California mobilehome park neighborhood – in advance of this summer’s wildfire season.

Her intro sentence was . . .“Well, we had our modified, practice Evacuation Drill last weekend and if I do say so myself, it went off rather well.”

Her report went on to talk about who participated and who didn’t, how many people had Go-bags at the ready, what a difference the donut hole snacks made.

She further reported — and this is key — that “Volunteers on almost every street offered to help disabled folks, notify them, and help them get out of the park. That is still a big issue! Where does personal responsibility start? Where does it end? What responsibility do we have for our neighbors?

Great, eh? What story can you share? Maybe . . .

  • You took a great Red Cross class or finished a refresher course? (The takeaway?)
  • You’ve met with just a few neighbors to find out where the gas line shut-offs are? (What prompted it?)
  • You’ve planned emergency drills with teachers at your kid’s school? (Were your efforts welcomed?)
  • You made it through the Texas power outage? (What helped?)
  • You’re an EMT and have a story to share about your team? (Heroes all!)

We’d love to know what you and your neighbors have done, or are doing, to be safer and smarter in the face of emergencies.

Nothing works like real stories to give the rest of us encouragement and ideas!

Just drop me an email with your idea! We’ll make sure you get your story written and published here as part of our “Get something going with neighbors” focus for the summer!

Virginia
Your Emergency Plan Guide team

P.S. Many websites managed by “regular folks” are devoted to prepping, wilderness survival skills, etc. We do a lot of that too, but what we do that sets Emergency Plan Guide apart is getting the wider community involved. This Advisory is another effort to do that – and your story will help!

Walking the talk when it comes to emergency water supplies

Share
Lake with dramatically low water level
Uh oh, we get a lot of our water from Nevada . . .

We have often repeated that “Preparedness is more a way of life than a list of stuff.” So over the past few days, in the face of ever more ominous threats of power outages and drought here in California, Joe and I took another look at our emergency water supplies.

  • Liter bottles. Oh yes, we have bottles of water. A couple dozen liter bottles in the house, a half-dozen in each car, more in our storage shed. We go through them steadily, and replace as needed. (As we’ve mentioned before, we try to find square bottles. They pack so much better!)
  • Bigger bottles. We also have sturdy half-gallon plastic bottles of water as back-up. I like the ones with indentations for handles.
  • Empty containers. We have empty plastic jugs and bags to be filled at the last minute.
  • Frozen water. And of course we have square plastic containers full of water in all our freezer compartments. They help with energy use and serve as yet another backup supply in the case of a power outage. (“Previously frozen” water does not really smell very appetizing but it would certainly work for hygiene.)

Today, we take another look at our 55 gallon water barrel.

Every preparedness list also includes the famous 55 gallon barrel. We have talked about these barrels many times over the years, since that one item would make a really big difference in emergency water supplies for most families!

How much is 55 gallons?

Well, if you use the standard measure of “1 gallon of water per person per day,” then your two-person family could get along for almost a month using water from a full barrel! A family of four could manage for at least a couple of weeks. Honestly, it just makes sense to have one – if you can afford it and can find a place for it.

What’s involved in having a 55 gallon water barred?

Here’s what we did this past week . . .

We’ve had our barrel for several years. It was part of a discounted group purchase made available to our Neighborhood Emergency Response Group. The price included the necessary hand pumps. (All the barrels were dropped off on one afternoon to our neighborhood. Volunteers then delivered them one by one to the people who had already paid. As it turns out, a barrel will NOT fit in an ordinary car or its trunk, so several people with trucks and/or golf carts ended up doing all the delivering.)

Our goal this week was to refresh the water in our own barrel and make a better place for storing it. In particular, we wanted it to be relatively invisible while still accessible.

First, build the platform.

Joe did a lot of measuring and cutting and painting and screwing to build a sturdy platform in this narrow space. “Sturdy” is the important word. The full barrel weighs nearly 500 pounds!

Building water barrel support
The old “Measure twice, cut once” exercise . . .

We positioned the platform at the corner of our shed, where it would be accessible from two sides. Then Joe cleverly added hinged “doors” so that the barrel itself, when in place, really isn’t visible.

Then, prepare the barrel.

In the meanwhile, I pulled that barrel down, cleaned the inside with a strong bleach solution, and rinsed it out to be refilled.

(Sorry I don’t have any photos. Imagine me rolling the barrel over and back on its side, with the bleach sloshing about loudly on the inside.)

Then we put the barrel up onto its new platform. Note: one person cannot manage a barrel, even an empty one! It’s not that it’s so heavy, but that there are no handles. We tried moving it using the hand truck you see in the photos. No – better to just carry it. But it is fat and extremely awkward!  Get a friend to help!

Finally, fill the barrel.

I filled the barrel using the garden hose (carefully cleaned beforehand). Took 15-20 minutes. Added the proper amount of bleach to keep any nasties from growing inside. (See below for more on purifying the water.) Closed up the bung holes, covered the top, laid on a second, raised top to reflect sunlight and allow air to circulate, then stepped back to admire our work!

Voila! With the “door” closed, all you can see is the base of our hand truck, which fits in there very nicely, too!

Water barrel installed
Note the platform, and the “door” at left. Swing it closed and voila!

If you’re inspired by our barrel, here are a few more guidelines to consider.

  • Blue barrels can be pricey. (There are other colors, of course, but blue seems to be the standard.) On Amazon, where we’re Associates, you might find a price variation of as much as $40 for the same item!  Be sure you shop and get what you want.
  • You need a way to get the water out of the barrel once it is filled, so don’t forget a pump. (There are electric pumps available, but in an emergency you aren’t likely to have electricity . . .!)
  • Be sure not to place your barrel right onto cement or concrete. Raise it up on a couple of boards, at least.
  • Water doesn’t spoil. It’s the creepy-crawlies and dirt that get into it that make it unpalatable or even dangerous. Be sure you can seal the barrel tightly using a bung wrench. (For some reason holes in a cask or in the top of a barrel are called “bung holes” and the stoppers are called “bungs.”)
  • Consider adding purifier for your long-term water supply. We used simple bleach. You may want to use liquid purifier, as shown below.

This looks like the best deal going right now.

We’ve shopped barrels for years. Right now, prices vary a lot. This package looked to be the best and most complete deal available on Amazon. Start your shopping here.

Augason Farms 6-07910 Water Filtration and Storage Kit 55 Gallon BPA-Free Wate 6-07910 Augason Farms Water Filtration and Storage Kit 55 Gallon BPA-Free Wate, Blue

And a couple of additional resources for emergency water supplies:

https://emergencyplanguide.org/store-water-for-emergencies/ This Advisory goes into more detail about all kinds of water storage bottles, bags and bladders. Lots of pictures, ideas for storage, etc. It’s been recently updated, too (which is how we noticed some of the differences in pricing!)

https://amzn.to/3rvGWM0 This link takes you to our Mini-Book on water. It has close to 50 easy-to read pages on storing water now, before the emergency hits; how to find water AFTER the emergency hits and you’ve run out of your supplies; and dangers to watch out for. If you’re going to invest money in water, I’d recommend investing $5 in this little book first!

Walk the talk. Don’t overlook your water supplies. (Maybe you can get a discount deal on a bulk purchase, too!)

Virginia
Your Emergency Plan Guide team


Overlooked Threats to the Neighborhood

Share
Pig pee and poop. Where does it end up???

When we wrote our “Neighborhood Disaster Survival Series,” Part Three  was aimed at building a more capable neighborhood. After all, our neighbors are our true First Responders. They are right there next door or down the street when calamity hits. They know our neighborhood. And we trust that, like good neighbors everywhere, they will be the first to help in an emergency. It follows then, that . . .

The more the neighbors know about threats to the neighborhood, the safer we all will be!

That’s why, after covering personal preparedness and training in Parts One and Two in the series, Part Three of each book provides a step-by-step plan to strengthening the neighborhood. One of those steps is doing a more thorough job of identifying THREATS to your particular neighborhood.

As you might expect, we include a long list to choose from. (59 different threats, to be exact. Even though our list was first compiled in 2018, I’m happy to say it included “Pandemic.” Who would have guessed . . .?!)

Now in the past I’ve done research and written an Advisory on the dangers posed by dams. If you know you have a dam nearby, I urge you to review that Advisory. And follow up with some of its recommendations. Why? Dam safety gets a “D” rating from by the American Society of Engineers. That’s why dams are high on the list of infrastructure improvements for legislation being considered right now. But along with dams,

My attention has recently been drawn to another, water-related threat.

While maybe not so dramatic, it’s equally scary. Take another look at the pig in the image above. Note that puddle he’s lying in. It could well end up in a so-called “hog waste lagoon.” (I find this expression offensive, actually. Trying to make something distasteful and dangerous sound benign . . .) Open air ponds and lagoons, typically built with earthen walls and sometimes lined with clay or plastic fabric liners, store water and all sorts of liquid products. Their level rises with rain, goes down thru evaporation.

If ponds and lagoons leak or overtop, dangerous and toxic waste can flow into neighborhoods and contaminate local water supplies.

Here’s the current news story that prompted today’s Advisory. It’s taking place today in Piney Point, Florida. There, an industrial waste pond, pretty much abandoned since its original builder went bankrupt 20 years ago, has started leaking.

Governor DeSantis has declared an emergency. People have been evacuated for fear that a full-fledged collapse could lead to a wall of “mildly radioactive” liquid pouring through their community. Special teams have begun siphoning millions of gallons of water off the top of the pond, and diving into it to inspect the pond liner. Thermal imaging is being used to ascertain the rate of flow of the leak. Authorities are issuing daily reports.

This NPR report has all the details,

This year I discovered threats I had known nothing about!

Just a year ago our town put finishing touches on a new Emergency Plan. Now, we only have a couple of visible dams anywhere nearby, and no animal farms. So when I got a copy of the plan I was amazed to find that we are surrounded by eight dams and reservoirs!

The plan makes it clear that if any of the larger dams were to fail, releasing their maximum capacity of water, millions of dollars of infrastructure and hundreds of thousands of people would be impacted. As you might expect, more vulnerable households would be disproportionately affected.

What about your town and your neighborhood? What threats have you overlooked?

Do you actually know what kinds of reservoirs or other water storage might be tucked into the hills or lying overlooked in agricultural fields or industrial areas? Does your water utility have ponds? What kind?

Time to add a water storage threat assessment to your neighborhood plan!

Here are some ways to do that assessment.

  1. Find out if your city/town has an Emergency Plan that includes a Local Hazard Mitigation Plan. (That’s the chapter where I found out about those eight dams in our town.) It will probably list flood zones, dams, etc.
  2. Then, contact your local water utility to find out about their water treatment system. They may have “waste stabilization ponds” – typically open basins that hold run-off and domestic wastewater. Each basin uses specific techniques to treat water, like sunlight, temperature, plants, oxygen and bacterial action.  Your water utility may also manage reservoirs for drinking or recycled water. If you can, schedule a tour for your neighborhood group!
  3. You can also search for local dams and reservoirs on the following list, maintained by Wikipedia. (I found several of our local dams there!) https://en.wikipedia.org/wiki/List_of_dams_and_reservoirs_in_the_United_States
  4. Certainly, if you find local dams that would be high-hazard dams, see if they are following FEMA requirements for an “Emergency Action Plan.” (Only about 80% have one on file.) You can get more info about what should be in that EAP here.
  5. Finally, if you feel you really need a better understanding of dams, reservoirs and other artificially-maintained bodies of water, it turns out that just this month FEMA has added three new courses on Erosion and Seepage.  

It seems strange to be writing this Advisory on floods and liquid seepage just as we head into the driest months of the year. But most everything we’ve talked about today may have been built 60 or 80 years ago – or longer ago than that. And things wear out.

Be sure you and your neighbors are thinking creatively about some of the hazards currently all around you, not just the storms or hurricanes that might be on their way.

Virginia
Your Emergency Plan Guide team

P.S. Let me know what your investigation reveals. And if you don’t have your copy of the Neighborhood Disaster Survival Guide for YOUR neighborhood, here’s where you can pick the one that fits best.


Apartment Safety and Security

Share
Image by zephylwer0 from Pixabay 

Why, some of my best friends live in apartments (and condos)!

So much of what we read about preparedness and survival assumes a rural or at least a single-family-home setting, where there is room for a survival garden, water barrels, storage shelves in the basement, etc. There may even be nearby woods where you can practice building shelters, cooking over a campfire, etc.

But what about the 37% of us who live in rental properties, mostly in multi-family buildings? What about our safety and security? We have no room for many of the preparedness activities mentioned above. No place to practice outdoor survival skills. And we can’t just run outside if a fire threatens or we smell a gas leak.

And what role does the property owner play in taking care of safety and security items? Time to find out!

Let’s make sure renters are as prepared for emergencies as anyone else! Starting with . . .

Easily overlooked apartment safety and security recommendations.

Is your apartment secure?

Door locks. Whether you’re moving into a new unit, or have been there for years, take a look at the condition of your locks. Today, reasonable security for an apartment includes a deadbolt and a peephole. In fact, a peephole may even be required by your local building code! Find out before you make any assumptions, of course. And be sure to ask the landlord for help or at least permission to make any changes. You may be able to do these installations yourself, or you may have to pay to get them done. Read below for some ways to save money.

Oh, and while you’re talking with management, be sure to find out the property policy for management or maintenance to enter your apartment.

Balcony security. Don’t forget the locks on your balcony windows and doors, even if you are on the second level. Sliding glass doors are particularly vulnerable. Consider a security bar, or at the very least, a rod cut to the exact length of the sliding door’s track. Here’s an example of an adjustable bar that also locks to keep children from lifting it out.

Securityman Sliding Door Security Bar-Child Proof Sliding Door Lock Bar with Anti Lift Lock – Fits Most Doors & Windows-Adjustable Patio Door Security Bar (19″- 51″) (White)

Security system. If neighbors and/or the police records show danger of unwanted activity in your neighborhood, consider installing a security system. For a more detailed discussion of options, check this Advisory. For your apartment, there are many battery-operated systems that won’t damage the walls, and that you can then take with you when you leave.

Here’s a sample of a simple, battery-operated security system that could be mounted outside or in your apartment for additional safety and security. Click the image for price and full details. (The more options you want — lights, camera, audio, etc. — the more expensive the system, of course. This model is a good start for comparison shopping.)

Are you prepared for fire?

Does your apartment have a sprinkler system?  Starting in 2003, all apartment buildings were required to have sprinklers (but smaller and older buildings may have been grandfathered in). If you are moving to a new apartment, check closely. If it doesn’t have sprinklers, you may want to reconsider. (You may recall the story of how Trump Tower only has sprinklers on the lower floors. A fire there in 2018 killed a resident and injured six firefighters.)

Smoke alarms and carbon monoxide detectors? Do they work? Don’t take a chance. Test, require they be replaced or replace them yourself. Depending on the type of sensing equipment you choose, you can get alarms for around $15-$20. (Here’s a link to our alarms reviews.) According to The U.S. Fire Administration, more than one-third (38 percent) of home fire deaths result from fires in which no smoke alarms are present!

Do you have a home fire extinguisher? More than one? Are the extinguishers located where kids or someone in a wheelchair can reach them? Does everyone in the home know how to operate the extinguisher?

Can you get out of your apartment safely?

Getting out of a large complex is a lot different than fleeing a burning home! So, lots to think about.

Just as you want to know that your doors and windows can be locked, you want to test to be sure they all OPEN in case of emergency.

The standard “Family Evacuation Plan” calls for you to identify two ways to exit every room. Obviously, in a rental apartment, that may be tough, because the second exit is probably though a window. Can you actually get out your window? Can you get down to the ground safely? Does your family plan have a place for you to reassemble after having evacuated?

If your apartment is no higher than 4 stories, consider an escape ladder. Escape ladders are available in 2 to 6 story lengths, but the longer ones become quite a bit more expensive, and of course are more demanding in terms of required strength and agility.

Since in an emergency you could get trapped in an elevator, do you have more than one stairwell as an option for your family? Do all family members know where other stairwells are located? Are these stairwells well marked? If a family member is unable to get down stairs, do you have a plan for carrying that person down? Do you have the equipment that would make carrying possible?

Evacuation chairs and evacuation sleds may be the only way to get someone who is ill or unable to walk down stairs safely in an emergency. Find out about costs and capacity (different sizes for different sized people), note whether equipment takes two people or just one person to operate. Here is a place to start your research. And below see a 4 min. video that will give you a good idea of just how an emergency sled works.

I have not personally used this item, so I can’t recommend it. But the video is useful.

Do you have renter’s insurance?

Worth it. Check with neighbors to see what they have. The discussion alone will add to the safety and security of your apartment! Bring up the topic at a community meeting. Bring up the idea in the next paragraph at a community meeting, too!

Does your community have a community emergency response plan?

Knowing your neighbors is the best defense. They will be the best source of help in an emergency!

Put in the effort to create a community emergency response group and a plan. Engage management’s support and assistance – they have everything to gain by keeping tenants safer, too. Together with management, learn more about your buildings, security, utility service, maintenance, etc. Agree on emergency procedures – who will be responsible for what.

Added benefit of having a group for apartment safety and security

Working together, you will have more power to negotiate with the property owner. And you may be able to save money by buying locks or security lights in bulk. You may also be able to arrange with a handyman or contractor to install them for everyone in the group. Best of all, you could provide a job if that handyman or handywoman is one of your own neighbors!

We’ve written a book to get you started on putting that neighborhood group and plan together.

Emergency preparedness for apartment communities
“The more we all know, the safer we all will be!”

Thanks for taking action on this.

Virginia
Your Emergency Plan Guide team


No phone service!

Share
“. . .but it’s fully charged!”

Nearly 20 years ago, Joe and I worked on a marketing campaign for one of the largest telephone companies in the country. Called “Silence can be deadly,” the campaign was aimed at selling more dependable phone service.

In the middle of the campaign the Loma Prieta quake hit in San Francisco. No phone service! Only static on the car radio! Traffic lights missing in action! Worse, because it took the World Series right off the air, the whole country was suddenly struck by the shock of no communications! (This dramatic interruption helped make the campaign a huge financial success.)

That was then. This is now, when we are all carrying cellphones. Still, communications can be interrupted by disasters. Be ready!

For example, just last month, you’d have seen this news coming out of Texas.

“.. . all major cell carriers are experiencing interruptions.” And this meant . . .

“Can you hear me?”  Hundreds of thousands of cell phones were silenced when power was cut to cell tower sites. Even if your cellphone is fully charged, when cell towers don’t function, either because they have lost power or are turned off, that means no calls, no texts and no access to the internet news.

No emergency alerts. When California shut off power deliberately in the summer of 2019, it wasn’t anticipated that without TV, radio or cell service, governmental emergency alert notices do not come through. Without power, the only way you’ll get notified of impending disaster is via physical alarms like sirens, airhorns, car-powered loudspeakers, etc. (Does your preparedness team need any of these devices?)

No 911 service. These days, 96% of people carry cellphones, so that’s where 80% of 911 calls come from. If your cell phone isn’t working, you can’t get through to 911!

It feels as though this list is just a start for the inconvenience and the danger that awaits in a widespread and/or lengthy power outage that includes telephone companies.

What is the answer when you have no phone service?

So far, there seems to be no one perfect answer. If your power goes out because of a disaster or a policy decision, here are a few suggestions:

  1. Adjust your attitude. Just expect to have no instant communication with the outside world – with your family, your work, or your health care providers. It’s not impossible – our grandparents lived this way! As for attitude, one of our Emergency Plan Guide readers reports that she invited neighbors for dinner every night of a recent power outage! Together, by the light of solar garden lamps, they put together meals (cooking with charcoal grills) and enjoyed each other’s company.
  2. “Read you loud and clear.” If you have family or neighbors within a local neighborhood, you may be able to use inexpensive battery-operated walkie-talkies to touch bases, ask for assistance – or invite people to dinner. Longer-rage satellite radios could reach to just about anywhere! (We just added info about satellite radios to our review page.)
  3. Get on the air with HAM radios. Amateur radio operators – HAM radio operators – have higher-powered equipment that will likely be able to get news from other HAM operators and receive emergency communications from official agencies, too. They may be able to send messages from your neighborhood, as well. A good HAM set-up should have battery-back-up — check with your local HAM team members!.

What about getting to the internet via my cellphone?

It’s possible that you can reach the internet through your cellphone or VOIP phone even if your local phone service isn’t functioning. Once there, you could reach emergency contacts using internet phone systems (Ex.: Vonage, GotoConnect) or apps (Ex.: Google Voice, WhatsApp).

This scenario makes a lot of assumptions. First and foremost, you’ll need ready-to-employ back-up power for your own home or office wi-fi set-up (modem, router). It also assumes your internet provider (operating over fiber or in the cloud) is able to continue operations.

Action item: check with your own internet provider to see just what will happen to your service in a power outage! Find out if they have recommendations to keep communications open.

What about my hard-wired landline?

Honestly, I don’t have a solid recommendation here. Many phone companies seem to be discontinuing wired phone service – I know we can’t use our cheap hard–wired phone any longer. Still, some people’s wired phones do seem to have continued to work even during the outages. If you have a hard-wired phone, you may want to hang on to it. (Check first to see if it is actually working!)

Don’t confuse “wired phone” with “portable phone.” Your portable phone’s base may be connected by hardwire, but – surprise! – that system itself needs electricity to operate.

Once again, do you have suggestions? Stories about power outages that might be useful to other Emergency Plan Guide readers? Please share! This is a complicated issue, with many possible variations. And they keep changing. We’d like to hear from you with your latest discoveries!

Virginia
Your Emergency Plan Guide Team

P.S. And while I’m writing from here in California, where we have experienced planned and deliberate Public Safety Power Shut-offs, please remember that historically, the leading cause of power outages in the U.S. is hurricanes! So if you’re not in wildfire country, don’t shrug this info off as something you won’t need to know!

Managing Risk for Volunteers

Share
Volunteer placing band aid on finger

Our neighborhood emergency response group is in the midst of updating after a year of very little activity. COVID has added new perspective, so managing risk for volunteers is part of our update. Fair warning: this is only the first episode on risk!

Our volunteers’ risks may be different from yours.

Every group is different. Risks depend on WHO is being covered and WHAT actions they are taking.

Take a look at our volunteer group. It is made up entirely of senior citizen volunteers. Their ages range from 55 to 85. Some of them have had CERT training and some have not. (CERT training has been the basis for all our organizing and training.) However, we share one mission: be of service to our senior community by helping each other prepare for and manage our way through a disaster.

Over the years, we have met frequently with local First Responders. They have encouraged us to above all focus on everyday safety and security with a secondary emphasis on shelter-in-place.

Some historic examples of our volunteer activities.

With these two priorities, we’ve held many educational meetings, often with 50-100 people in attendance. As we look back, we can see where and how some of our activities might be considered to have risks! For example:

  • How to stabilize furniture and shelves to keep things from falling in an earthquake (Local handyman gave demo and volunteered to help secure shelves, TVs, etc. in neighbors’ homes.)
  • How to build up emergency supplies (Local hardware store brought examples of lights, fire extinguishers, first aid kits, etc. People bought whatever equipment they decided they needed.)
  • How to protect home from wind-blown sparks (FD did tour of entire area and we wrote up their findings regarding weeds, flammable decorations, etc. There was no follow-up to confirm whether people followed the recommendations of the fire department.)
  • How to avoid ATM scams (Police department crime prevention specialist gave Zoom presentation.)
  • How to turn off gas line to your home if there’s a leak (Our group owns a real gas meter attached to a base, so people can practice turning the valve using a wrench. Unfortunately, every time we have a practice, somebody runs home, smells “gas,” and shuts off their meter! One year the “gas smell” resulted in a visit by our emergency response team plus a visit by the fire department. No one could find the leak until we determined it was the smell of marijuana floating over from a nearby backyard . . .!)

A new risk emerged in 2020.

Last fall we faced a new situation – a near miss with a rapidly moving wildfire! Since then we’ve expanded our education to include evacuation. In coordination with the fire department, police department and city emergency operations, we came up with a series of recommendations. (You can read details about how the evacuation threw everyone for a loop here and what we did afterwards here.)

As a result of the evacuation scare, it has become clear that, at least in our senior community, an informal volunteer group cannot be responsible for an evacuation. People have to make their own decisions! And now the question regarding managing risk for volunteers:

If our neighbors don’t take precautions, or don’t make smart decisions, can they (or their relatives) somehow blame our volunteers?

That’s the question that started this whole Advisory. As I began to do the appropriate research on managing risks for volunteers, I realized there were three main issues to examine. I’ve spent the last month or so asking questions of Emergency Plan Guide subscribers, LinkedIn connections, and insurance companies.

As you continue to read, please realize we are not offering legal advice. We trust you will follow up with research on your own volunteer needs and your own country or state laws.

Part 1: How does the Good Samaritan Law work?

Generally, a “Good Samaritan” is someone who volunteers to aid an injured person in an emergency.  The term comes, of course, from a parable in the Bible. The Samaritan helped the victim of a robbery, even after others had passed the victim by.

In the United States there is no one law.  Each state is different. Moreover, state laws sometimes change. Action item: Go to your browser and type in “Good Samaritan Law [your state}”. What follows here is our best understanding as of the date of this Advisory, and some examples to show differences. 

What separates a Good Samaritan from a First Responder?

 In an emergency setting, a Good Samaritan someone who has no duty to give aid and is not trained to do so but volunteers to help. 

A member of the fire department, for example, is not volunteering to help in an emergency. CERT members who have been “activated” and are serving under the direction of CERT leadership may or may not be volunteers. The point? You have to know your own circumstances.

What kind of care can I give and be considered a Good Samaritan?

The Good Samaritan Law protects you if you provide assistance “as an ordinary prudent person would under the same or similar circumstances.”  (There is a similar “Prudent Man Rule” that operates in the world of finance.) It is assumed you won’t try something that would be considered “wanton or reckless.”

Do I have to ask the person if they want help? 

Generally, if the victim is unconscious, it is assumed that they give their consent for your help.  If they are conscious, it’s a good idea to first ask permission to help. (You see a person choking. He can’t talk. Before you start the Heimlich maneuver, it’s a good idea to ask: “Are you choking? Do you need help?” and get a positive nod!)

A recent law in California added Good Samaritan protection to people who call 911 to protect people who have overdosed. This broadened the scope of the law from providing purely “medical assistance” to “non-medical” – and saved lives because the 911 callers were often underage or engaging in dangerous or illegal activity themselves and thus were afraid to call.

What if their injuries are such that I can’t really help? 

In most states, you are not obligated to give help. You can at least call 911. It may be considered negligence if you simply do nothing. You’ll have to check with your local laws to see if you have a “duty to help.”

What if I make it worse by helping? 

If you are acting in good faith you will likely be protected. But, here are the limitations that you don’t want to ignore if you are depending on Good Samaritan protection.

Make sure you know these limitations to the Good Samaritan Law!

  • First, you must provide the care at the scene of the emergency, and to protect the victim from what might be considered “imminent peril.”  An example. There’s been an automobile accident, but there is no fire or danger of a second collision. The victim is stable. Moving her at that time might be ill-considered.
  • Second, your assistance won’t be considered having been given in good faith if you think it will result in payment. Even getting a reward days or weeks after the fact may exclude you from Good Samaritan protection.

What about volunteer activity that takes place when there is no emergency?

Now we get to a completely different situation!  So, let’s take a look at a Federal law passed in 1997:

Part 2: How does the Federal Volunteer Protection Act work?

Its goal was to encourage volunteerism at a time when social services were needed. Non-profits formed, but volunteers were afraid to help because they thought they might be sued. The VPA was passed to help manage risks for these volunteers.

The non-profits are expected to provide the appropriate training so that the organization’s mission or purpose will be properly served. Training usually includes clearly laid out policies and procedures. In addition, volunteers agree to follow them!

Just like the Good Samaritan Act, the VPA has limitations. Volunteers are covered if –

  • They are performing within their assigned job description.
  • They have whatever license or certification is required.
  • Their action in question is considered “ordinary negligence” and not “willful or criminal” or reckless.
  • They aren’t using a vehicle that requires a State-issued license and/or insurance.

The volunteer won’t get the benefit of the VPA if the volunteer commits a hate crime, denies someone’s civil rights, or is volunteering while drunk!

Note that the VPA protects the volunteer of a non-profit, but doesn’t protect the organization.

Part 3: What about Insurance Protection?

As you can imagine, insurance for managing risk for volunteers is detailed, confusing and can be expensive. Speak with a local expert (maybe several!) before making any decisions.

Here is a BRIEF list of different types of insurance that I have discovered. This discussion assumes your “organization” is a non-profit. If your emergency response group is affiliated with or sponsored by a city or a fire department, you are probably already covered by one or another. Find out which.

  • Liability coverage carried by the organization typically covers bills for accidents or damage caused by the organization. Volunteers can be added as “additional insured” to give them protection for a claim that arises while they are performing their assigned volunteer duties.
  • Professional liability insurance (also called Errors and Omissions or Malpractice insurance) protects the organization if it is charged with giving bad advice, making a mistake or failing to do something that was expected.
  • Directors and Officers insurance covers Board members from allegations of fraud or mismanagement, mostly involving the organization’s money. (This could include not having enough insurance!)
  • Volunteer Accident Insurance provides limited coverage for a volunteer who gets injured while on the job.

Every volunteer group runs some risk. Certainly, as you reach out to recruit more members, you may be asked about how you are managing risk for volunteers. You will want a good answer!

Today’s Call to Action

To repeat the same sentence we used at the beginning, every group is different. You can use this Advisory to start a discussion about where your volunteers’ actions could lead to problems. Make a list. Then, reach out for help from an expert who understands your community. You should probably talk to more than one expert (i.e.: insurance agent). Then you can decide what coverages your group needs – if any – and how best to pay for them.

We’re in the midst of reviewing our own situation. I’ll report on the decisions we come to!

Virginia
Your Emergency Plan Guide Team

P.S. In the meanwhile, if you have good insurance stories or good insurance recommendations, please share them. The world of emergency preparedness is “a different animal” and we can all use pertinent information!


Working with your neighbors – the Second Step in Preparedness

Share
volunteers
Neighborhood volunteers!

Because you are reading this, I can bet you’ve already done a pretty good job of the first step in preparing for an emergency – that is, preparing for your personal safety and security. I trust you can answer confidently questions about your extra food supplies, your family’s Go-Bags, stored water, and emergency communications plans. Focusing on personal safety is step one for everyone. But where do you stand on the second step — working with your neighbors?

(Have you seen recent news reports about families spontaneously getting together to save each other during this recent Texas winter storm? Proof of what we repeat here at Emergency Plan Guide: “In an emergency, the real first responders are your neighbors, because they are already on the scene!”)

So for us, once you’ve taken care of your personal planning, it just makes sense to look at how your neighbors are doing. And to ask yourself, “To what extent will you be able to count on them in an emergency?”

You can’t assume that your neighbors have the attitude, the skills and enough supplies and equipment for you all to get through any disaster that hits. You have to find out!

Step Two in preparedness planning is a process to give you confidence as you start working with your neighbors.

After 20 years in our current neighborhood, we’ve had to repeat the process several times because neighbors come and go. Team members get older and drop out.

In fact, now that the pandemic looks to be loosening up, it’s a good time for us to start getting to know our neighbors once again!

Here are the steps we’ll be following to improve neighborhood cohesiveness and resilience. See if you can make use of them too.

Define the neighborhood.

Whether this is a new group or an existing one, invite neighbors to get together and start by building a map of your neighborhood. Your map may show just one street, several streets, one building or just one floor of a building. The idea is to keep the “neighborhood” small enough so that you can get to know the other neighbors. (Some experts recommend a maximum of 20 families per neighborhood.)

You will probably want to hand draw the first iteration of your map, so everyone at a group meeting can see and agree. It’s really fun to get a giant piece of butcher paper or a big white board, with colored pens, and turn people loose!

If you have access to a drone, consider using it to get a better overhead view of your neighborhood’s layout!

Add more details to your map. Details might include streams, driveways, landscaping, common areas, parking, playgrounds, stairways, entrances and exits.

For the next layer of detail, note the location of safety equipment: fire extinguishers, fire hydrants, utility shut-offs, emergency exits. You may want to use standard icons for fire fighting equipment or emergency exits, etc.,

Once your map is drawn, you can take a photo and scan it so the image can be shared digitally with everyone in the group.

Review your list of threats.

This is a great topic for a subsequent group meeting. Invite people to come up with every threat they can think of, and make a list of them. Again, easel paper works well, particularly the kind you can stick to the wall.

Capture as many threats as you can.

Here are suggestions to get the conversation started!

  • What threats do we face because of our location?
    Probably everybody knows about threats from the weather; either you live in a flood plain or you don’t. If you’re in an area safe from earthquakes but on the wildfire-urban interface, you have different priorities than a property bordered by mainline train tracks or in the flight path of a local airport. Your map will point to some of these vulnerabilities.
  • What about the property itself?
    How old are the buildings? How well maintained is the infrastructure? (Lighting, gas lines, etc.) Are there tunnels or bridges on the property that could collapse? What will happen to gates and elevators if the power goes out?
  • Do our neighbors need special consideration?
    For example, do we have children or pets to plan for? Any aged or physically impaired residents? What about neighbors who only speak languages other than English?

Once you’ve listed all the threats you can think of, go back and prioritize them. Pick the top 5 or 6 threats that are most likely to materialize. Talk about the impact of that threat on each aspect of the neighborhood.

Again, this is only the beginning, so rough estimates are all that you need.

Identify your neighborhood assets.

Once you know what you’re watching out for, you’ll find it easier to know what you need to improve your response.

How close are you to fire and police stations? What kinds of businesses (if any) are close by? What is the status of the water supply to the neighborhood or to the building? Where do able-bodied residents live? Are they likely to be home? Do you have a number of retirees? Do they have specialized skills? How many are likely to be available in an emergency?

How many people have first aid or medical experience? How about people skilled in trades? What tools are available? How about working vehicles (trucks, vans, etc.)? Motorhomes (with AC electrical supply generators)? Boats? Snow blowers? Golf carts? Here’s one of the lists we use to identify assets.

(Singing) “Getting to know you, getting to know all about you . . .”

In your first meetings, you can only estimate the answers to some of these questions. While many city programs suggest identifying assets at the very first meeting, we have found that at the beginning, people are reluctant to share details of their personal lives.

Later, though, working with your neighbors becomes easier and easier as they start to know one another, have heard from each other about training and commitment, etc.

And people recognize right away that by working together they can avoid the costs of duplicate effort.

For example, in the aftermath of a hurricane, there’s really no need for every house on your block to have a chainsaw, When the power is out, one or two families with BBQ grills can host the others for an outdoor dinner! Not every household needs to have a trained ham radio operator; a couple of enthusiastic hams can provide important emergency communications for the whole neighborhood.

Having an understanding among neighbors improves the situation for everyone!

Of course, you’ll want to discuss the need for protecting the privacy of this personal information. The best way is to keep the group small enough and personal enough that every member will respect the other members. Don’t post obviously private info where people outside the group can see it.

The Step Two Process can lead to more, including Building a Written Plan that will endure.

The three actions we’ve talked about here — mapping your neighborhood, reviewing likely threats, and getting a handle on assets you already have in place – will be a great introduction to emergency preparedness for a newly forming group. They can serve just as well as a refresher for an already existing group.

The process will reveal areas where you want more information, and thus provide suggestions for upcoming meetings or for recruitment.

The process may also provide an opportunity to sign neighbors up to take the CERT training!

In our estimation, the Third Step in Preparedness Planning is to actually build a written plan for your neighborhood, using CERT as a foundation.

Building a written plan is another whole topic. If you’re eager to get started right away, please take a look at our Neighborhood Disaster Survival Guides. Each book is divided into the three parts we’ve mentioned in this Advisory: (1) personal preparedness, (2) working with your neighbors, and (3) building your neighborhood plan.

We’ve put years of experience into these books (having lived in all three types of communities!) and we think they’ll help you work effectively with old and new neighbors at all levels of preparedness. Just what you need as we return to active life after months of COVID inaction!

Virginia
Your Emergency Plan Guide team


Make Virtual Meetings More Fun — and More Effective

Share
Ready for virtual meeting. Hope it will be fun and effective!
“How will I possibly make it through the whole meeting?”

Our best-selling book last year was Emergency Preparedness Meeting Ideas – that is, up until COVID hit and in-person meetings were cancelled! Happily, our Q&A Mini-Series was finished just in time to take up the slack. The mini-series booklets can provide the perfect launch for a series of virtual meetings on the topic of emergency preparedness. Whatever your topic, though, you want to make virtual meetings more fun — and as effective as possible!

We’ve scheduled different types of virtual meetings since our in-person meetings were cancelled.

Telephone Conference Calls

Earlier this week, for example, we held a simple telephone conference call to discuss an upcoming COVID vaccine clinic being held in our neighborhood. We chose a simple telephone call-in format so neighbors without internet access would be able to participate. About 40 people joined the call. (Hint: Even a simple conference call needs managing! Be sure that you know how to mute and unmute attendees, and explain what you are doing when you do it! First-timers on a conference call may never have heard the word “unmute.”)

Virtual Video Conference Platforms

Joe and I have also participated in many webinars, several Zoom meetings and a Microsoft Teams meeting. Meetings were as long as 2 hours; participation ranged from 15 to as many as 60+ people. Some sessions could have been more effective and a whole lot more fun. Here is some of what we experienced . . .

  • Some people’s faces are in total shadow so you can’t see if they are awake or asleep.
  • Probably half the attendees pay close attention; others bob around, eating and drinking.
  • A few people simply disappear for a while and leave you seeing just their name, or worse, their empty chair!

We want to improve on results for the meetings we are hosting!

A while back we compiled some best practices for preparing for and managing virtual conference calls. They still hold. Today we want to step up to another level of effectiveness – an increase in engagement, education, and just plain fun.

Whether you are the host or a participant, you can help get your message across by including some of the following suggestions. We’ve included emergency preparedness examples to help in your planning.

As you will see, these suggestions assume a relatively small group – maybe 12-15 people. A group this size keeps everyone visible in gallery view. Plus, you can see people’s expressions, their hand motions and, if they want to hold something up to show, everyone can see it. This size group is also exactly what we had in mind for the Prepare & Share concept, where the goal of the meeting is to help build relationships, not just deliver information!

Show and tell, don’t just talk!

  • Demonstrate a piece of equipment or a tool. If the topic of conversation is emergency lighting, for example, you can hold up your foldable lantern, flip up the handles and pull to turn it on, show how the switch activates different white/red/strobe lighting options.
  • Show variations on a theme. Have several members of the audience bring their favorite pocket knife or maybe their favorite first aid kit — and be ready to explain which feature/s they particularly appreciate.
  • Illustrate using a miniature or a picture – either of which can be held up to the screen so everyone can visualize the item. For example, what about a model mobile home or tent, a chain saw or a firefighting helicopter with its snorkel? Too big to hold up to the camera!

Give weight to your words.

  • Make words or ideas tangible. Are you quoting a good book? Hold up the book where the words can be found. Point to the picture of the author!
  • Illustrate a concept. Show how the wrong sized wrench can’t accomplish the job! Or remember the little kid’s toy, with holes for the various shaped blocks? Use either to illustrate the importance of the right fit.

Ask for feedback along the way.

  • Ask for a quick vote: thumbs up, or thumbs down? Interrogate a couple of your participants as to why they voted that way.
  • Take a survey. Go around the “room” and check to get everyone’s opinion regarding an option, their biggest concern, etc.  Use this information to schedule the next meeting topic, invite a guest speaker, etc.

Make virtual meetings more fun!

  • Pick a theme and decorate! Have participants create their own (homemade) video background based on the theme of the discussion. Let everyone vote on the winner.
  • Dress up for fun! Have everyone wear a hat illustrating the theme or the topic of the day. (Fire helmet. Police cap. Ear muffs for bad weather. Headlamp. Hard hat.)
  • Bring something to illustrate the topic! For example, people could bring and share “the one thing they would HAVE to have in their Go-Bag!” You’ll be surprised . . .!
  • Celebrate a holiday or a birthday – or an “un-birthday.” Share a photo of a past birthday, or a wedding. Or a holiday. There’s a holiday of some sort every day! Today, for example, it’s National Chili Day! See https://www.calendarr.com/united-states/observances-2021/
  • Grab a screen capture of your group so you’ll have something to share on a completion certificate, or in a church newsletter, etc.

Be confident in your personal “look.”

  • Wear real clothes, not your PJs. You may have to get up and “reveal” yourself. No use being embarrassed.
  • Set up lighting so your face is clearly visible. Your remarks will be more effective. And people want to see that you are paying attention! (See lighting hints here.)
  • Avoid annoying and disconcerting glare from eye-glasses by further adjusting lighting. (Here’s an excellent and energetic YouTube video to give you help with avoiding eyeglass glare!)
  • Know how to mute and unmute yourself. Practice.
  • Stay “in the frame.” Make sure you, your hands and your props stay “in the frame” that everyone else sees. Rule of thumb: your head should take up 1/3 of the screen. You may have to practice holding your props at the proper distance from the camera, pointing to a specific feature using a pencil, etc. (You can go to Zoom before your meeting and test your audio and video.)

Whether you’re hosting a meeting of neighbors, family or business colleagues, I hope you’ll find some suggestions here that will work to make virtual meetings more engaging. If I were responsible for facilitating a meeting, I’d try to fit in an “activity” like one of those above every 6-10 minutes.

And don’t be shy. You can use items from this list to make virtual meetings more fun and more effective even when you’re not the person in charge!

Virginia
Your Emergency Plan Guide team

Send a copy of this Advisory to every one of your team (along with the list of Best Practices) so they each will have some good ideas with which to start their next virtual meeting!


Covid-fatigue? Two Suggestions for Relief

Share
Man on phone with covid-fatigue

Covid-Fatigue is a Big Problem

Yesterday I had a video-visit with my doctor. It was a regularly-scheduled check-up, and as soon as it was clear there were no medical issues to discuss, the conversation went to my state of mind. (On the list of interview questions these days, I am assuming.)

Then I turned the question around and asked about HER state of mind. As a kidney specialist on the front line, she laid it out clearly and starkly. “Virginia, I haven’t had one of my patients walk out alive.”

Punch in the gut. Then the call was over. And I can’t forget what she said.

Later the same day I was struck by the title of this recent article about Covid-fatigue, coming from The Atlantic: The Pandemic Has Erased Entire Categories of Friendship

The author writes about all the people and simple social interactions she has missed, “without fully realizing it.” Her list includes watching sporting events in a crowd of fans, saying hello to the local barista, even discussing the weather in the break room at work.  Ordinary conversations with people not so close but people who “were all, in some capacity, my friends, and there was no substitute for them during the pandemic.”

My own list of missing people doesn’t include sports bar fans (!), but I miss greeting the stylists at the salon. I miss discussing books when I visit our neighborhood library. (Only one person at a time allowed in the room.) My world has become strangely silent since all those people that used to make up my day are staying safely invisible at home. Has your circle of friends gotten smaller, too?

Some Ideas for Covid-fatigue Relief

So let me report on a couple of ideas that may work to help. Of course, they are related to emergency preparedness. Happily, preparedness isn’t controversial. Pretty much everyone can relate to the topic. So you may find more response to either of these than you might have expected!

Idea #1: How about a one-time Zoom call featuring a police officer on the topic of personal safety?

We’ve had more neighborhood reports of cars being broken into and stolen, wallets disappearing from shopping carts, packages scooped up by strangers right out from under the Ring porch cameras. Facts are hard to come by – mostly we get stories via fearful or angry online messages.

People in our neighborhood are calling me, too, because I’m head of our local emergency response team. They want to report on “strange people” they have seen in the street, or worries about elderly neighbors being abused . . . things that I can do little about. But I listen and offer what little advice I can.

These negative stories, mixed in with misinformation about the availability of Covid vaccine, started taking over our daily communications. We needed facts and realistic recommendations, not more rumors.

So I took the initiative and scheduled a zoom call with the police. I invited everybody on my neighborhood email list to join in. For some, this was their first ever Zoom call. For most, it was useful info. And for all, it was a chance to see smiling neighbors’ faces WITHOUT MASKS, and to hear voices!  Yes, a social interaction! 

I recommend you call your police department immediately and set up something similar! (I’ll be happy to share the invitation I used, with the questions I wanted to be sure to get answers to.)  In a future Advisory I’ll be sharing all the tips we got.

Idea #2. How about a multi-session group activity designed to make new friendships while helping everyone in the group get better prepared?

You know we’ve been publishing a series of booklets on preparedness topics. It’s called the Emergency Preparedness Q&A Mini-Series. One topic to each mini-booklet; 14 topics in all.  

What you may not know is that as the series developed, it became clear that each of these little booklets could be used as the basis for a group discussion – on Zoom or in person.

The whole series can be a tool for building community – and fighting Covid-fatigue!

When I say “community” I’m referring to groups. Which kinds of group do you have in your life?  

  • Church group
  • Scout troop
  • Service organization
  • Neighborhood group
  • Etc., etc.

The secret that makes this idea work for any group? “Shared Leadership.”  That is, your group doesn’t need an “expert” to lead the group. With the help of the mini-series booklets, members of the group make it all work by themselves!

The last booklet in the series, Prepare & Share, goes into great detail about how to use this tool to help your group reconnect with current members, or attract new ones.

If you and family or neighbors are struggling with COVID-fatigue, either or both of these suggestions may put some welcome “social activity” back into your lives. If I can be of any help setting them up, please let me know.

Virginia
Your Emergency Plan Guide team

P.S. Visit this separate webpage for full details on the Prepare & Share concept!


Drones in Emergency Situations

Share
Drone at dawn

By now you know our mantra here at Emergency Plan Guide: “The more we all know, the safer we all will be.” This attitude is convenient for people like me. I enjoy learning more about aspects of emergency preparedness I don’t expect to become an expert in

Today’s Advisory about the use of drones in emergency situations is an example. While we’ve written about drones before, Joe and I don’t own one. But drones appear ever more frequently in First Responder and emergency preparedness circles. When I got the chance to work with an expert, I grabbed at it.

Today’s Advisory is built around the professional roles that drones are playing today. It’s written by Anthony Jamison, head of the Outreach Department of Drone Services Phoenix. The company provides aerial photography and videography for commercial projects (real estate, construction, etc.. (If you’re interested in learning more about drone services as a career, check out their website! Lots of good info there.)

So here’s what Anthony pulled together. I emphasized a few sentences in bold that I thought were particularly important.

How Drones Are Being Used To Assist In Emergency Situations

Drones or unmanned aerial vehicles (UAV) have come a long way from their beginnings as a purely military tool. While they remain an indispensable part of countless military operations to this very day, their ever-increasing commercial availability has ushered in a new era of widespread use among everyday people.

Today, UAVs are a potent business tool, with many companies and entrepreneurs leveraging aerial drone photography to further their business goals.

Drones are also proving to be quite handy during emergencies. Let’s take a closer look at how people are using drones for disaster relief and other emergency situations.

Water Rescue

A drone operated by lifeguards saved the lives of two people who were at risk of drowning after getting caught in heavy surf in Australia.

It took only two minutes to complete the rescue. The drone flew half a mile above the struggling swimmers and dropped a flotation device, which helped the swimmers back to shore.

It’s the first time that a drone was used to achieve such a feat. It likely won’t be the last. After all, drones can get much faster to those in trouble in the water than rescuers swimming towards them.

Drones can also be used to scan the surf for sharks and keep beach-goers safe.

Supply Drops

Disasters can render any part of a village, town, or city inaccessible.

With drones, we can now deliver supplies and emergency survival kits to those who need them most without delay. Our increased drone capabilities also mean that we don’t have to risk human lives to make food, water, and medical supply deliveries to victims of a disaster in hard-to-reach spots.

Firefighting

For the longest time, firefighters have been using planes and helicopters to combat wildfires. But flying them through the conditions such conflagrations create can be downright dangerous.

Drones equipped with infrared cameras, however, can fly through thick, black smoke into spots too dangerous for manned aircraft.

Whether they’re carrying buckets and massive tanks filled with water and foam for dumping over large areas or ping-pong ball-sized incendiary devices that deny advancing wildfires of fuel, drones are proving to be quite effective firefighters.

Search and Rescue Operations

Locating people that need rescue and evacuation is a task that drones appear to be built for.

Drones can reach high altitudes, fly into mining shafts, and detect body heat through thermal imaging cameras. They are proving their worth as an indispensable tool for search and rescue operations.

CBRNE Events

Natural disasters are bad enough, but chemical, biological, radiological, nuclear, explosive, or CBRNE events are even worse.

Whether the release of hazardous materials was accidental or intentional, like in the case of a terrorist attack, a CBRNE event creates extremely unsafe situations for victims and relief workers alike. However, immediate relief must be provided and the extent of the damage assessed. An aerial drone can help with that and more.

Drones were deployed to inspect the meltdown-hit Fukushima Daiichi nuclear plant, a direct result of a powerful earthquake and tsunami that hit Japan in 2011. With the help of drones, authorities were able to receive data that allowed them to measure radiation inside the reactor, monitor possible radiation exposure, and repair destroyed areas.

With drones doing the dangerous parts of the job, nuclear fallout exposure for relief workers was kept to a minimum.

COVID-19 Response

The COVID-19 pandemic is the worst crisis to hit humanity since the Second World War.

To date, the coronavirus has claimed the lives of more than two million people worldwide. Its economic impact is also massive, with millions of people losing their livelihood amid business shutdowns and country-wide lockdowns.

The COVID-19 pandemic, however, has given birth to a larger role for drones.

  • With the pandemic in full swing, drones have become instrumental in contactless food and medical supply deliveries.
  • Drones are seeing use as a disinfectant delivery system, spraying large areas to limit the spread of the coronavirus.
  • In the United States, special drones designed to monitor public spaces and ensure compliance with social distancing protocols are already in use. These UAVs can detect temperatures, heart rates, coughing, and even social distancing.

As drone technology evolves over the years, we can expect to see more developments that will make them even more useful in times of crisis.

What about us non-professionals or hobbyists using drones in emergency situations?

I know that some preppers have considered using drones in non-professional – and maybe even illegal – ways. For example, just today I read an article suggesting that drones could serve to intimidate or distract people approaching your location, or to surveille people or situations that might turn into a threat.

I think these are good uses. The “illegal” part is that these drones would likely be flying low over groups of people, or flying out of the sight of the operator, both of which have not been allowed.

An update on drone regulations has just been announced.

In December, 2020, the Federal Aeronautics Association (FAA) finally passed new rules that have been in the works for a couple of years. They give drones new flexibility to fly at night and over humans and traffic as long as the drone is able to broadcast its identification and location. (Apparently community-based and educational groups will still be able to fly non-remote-ID equipped aircraft in specially designated areas.)

I assume that professional pilots know all the details. (I had trouble finding a source for more than what I’ve written above.) If you are interested in flying a drone as a hobby, be sure to check in with the FAA regarding licensing and flying requirements.  

I’ll close this Advisory with a few more words from Anthony:

As drone technology evolves over the years, we can expect to see more developments that will make them even more useful in times of crisis.

While we may still be a long way off from drones capable of evacuating people from disaster areas, the advances that we are going to see will be just as exciting.

All very thought-provoking, isn’t it?!

Virginia
Your Emergency Plan Guide team

P.S. Our earlier Advisories about drones – what to look for, limitations, what they cost, what equipment they carry, etc. – have been updated. Check them out: