Respond to an Active Shooter


Ready to head back into society after the pandemic?
Planning an outing to a favorite shopping street for the first time in months? A big family picnic in the park for the 4th of July? Looking forward to getting back to the office? If you’re like me, you probably are spending time just imagining how great it will be to be with people again! If you’re like me, you are also taking some time to think about personal safety in these crowd settings. In particular, you’re thinking about how you would respond to an active shooter.
The huge upsurge in shootings over the past year just can’t be ignored.
Can you prevent an active shooter event? No.
Can you protect yourself from being a victim? Possibly. But only if you know WHAT TO DO and you DO IT IMMEDIATELY.
What’s the latest intel on active shooters?
I just attended two webinars on the topic of active shooter events, one from a commercial security firm and the other sponsored through FEMA. I looked at the latest statistics and reviewed the latest “best practices.” Interestingly enough, the people doing the shooting are pretty much the same: 98% men.
How police respond has changed dramatically. (As the security guy said, “The first officer to show up will be coming in running . . .”) Weapons have become more deadly. And the number of shootings is increasing.
How to protect yourself, though, hasn’t changed much. But that won’t do you any good if you haven’t prepared.
It’s time to prepare emotionally and review just how we would respond.
“I just lay there, waiting for my turn to die.”
I first read that statement after the events that took place at Virginia Tech way back in 2007. You will remember that the shooter entered several classrooms and simply shot all the students one after another. Then he came back and shot them again. The quote is from one of the girls who survived.
What is shocking is that this same quote has been repeated more than once in similar situations! Faced with an active shooter, some people seem to become like sheep! I was outraged and dismayed by the quote, and determined that Emergency Plan Guide readers would never respond this way!
So, what’s your plan?
Start now working on situational awareness.
In our Mini-book on Personal Safety, we describe a half-dozen “exercises” you can practice — alone or with your kids – that will up your readiness. The exercises almost all have to do with what’s called “situational awareness.” That is, noticing what other people are doing, noting where entrances, exits and potential hiding places are, and thinking and talking about “What would we do if . . .?”
Since Active shooter events are almost always over within 10 minutes – sometimes before the police even arrive — what counts is what you do within the first minutes or seconds. The faster you realize that something is wrong or out of place, the faster you’ll be able to act. Situational awareness is what gives you that edge.
Then, it’s good to know what to do to respond. Here are three resources I hope you’ll put to use starting immediately. Share them with your family, groups you belong to, and at work. You’ll come out with a better idea of how to respond if you encounter an active shooter.
Step One — Watch the video: Run – Hide – Fight
The original Run-Hide-Fight video was produced in 2012 by the City of Houston. We have shown the video multiple times to different audiences. They are always taken aback even though it’s a staged production. It lasts only 5 minutes but will generate important comments and questions. Here’s the link to YouTube: https://youtu.be/5VcSwejU2D0 (Be ready to skip the ads at the beginning.)
Step Two — Watch the video: Options for Consideration – Active Shooter Preparedness
The Department of Homeland Security produced this video in 2019. It’s about 7 minutes long. I didn’t find it as powerful as the Run-Hide-Fight, nor is the quality as good. What is good, though, is to observe how long it takes the people in the video to respond to the sound of gunfire! And it has some more good ideas about hiding. You could watch both videos at the same meeting.
Link to the DHS website where you can view the video: https://www.dhs.gov/cisa/options-consideration-active-shooter-preparedness-video
Step Three — Download: “Active Shooter – How to Respond”
This is a 13-page pdf from the Department of Homeland Security. You can use it in many different ways — as study material for a discussion, as a guide for a quiz, material for a flyer, etc. Since you’re here right now, though, here are some highlights taken from all three of these resources to get you started.
And now, some specifics.
RUN.
If you hear gunshots, don’t stop and ask, “Hey, do you think that’s gunshots? Maybe it’s just fireworks? Or is it a car backfiring?” If you see a shooter, or see people running, don’t just stand there looking for the source of the noise or action! You need to get away from the shooter and any stray bullets!
- Have two different escape routes figured out – at all times! First may be back the way you came in. But if that route is blocked, or the shooter has come in behind you, you need an escape route that takes you out another way. Maybe it’s through the kitchen of the restaurant, out the loading area of a grocery store, out a marked emergency exit. Always keep a lookout for alternative exits wherever you are.
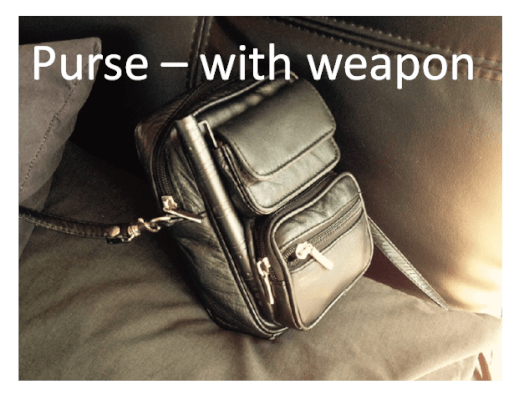
- Leave your stuff behind – purse, backpack, computer, etc. You can’t run with your arms full of packages.
- Get out even if others don’t seem to want to. But don’t allow people to head INTO danger if you can help it.
- Call 911 when you can. Give as much information as you can to dispatch: who, where, how many, etc.
HIDE.
The shooter is in a hurry. He wants to injure or kill as many people as possible. He knows he will probably die before it’s all over. So he’s looking for easy targets. If you can hide, and he doesn’t know or suspect you are there, he’s likely to move on. So, how to hide?
- Get into a room with a door you can lock or block. Reinforce by pulling furniture in front of the door. (Remember that scene in the Capitol where furniture kept insurrectionists from breaking into the House Chamber?)
- Turn out lights. Pull blinds or otherwise block the view into your room. You don’t want to draw any attention to your hiding space.
- Get behind heavy furniture as protection from stray bullets.
- Be quiet – really quiet. That means turning off radios and computers, and SILENCING your phone, not just putting it on vibrate.
FIGHT.
If the shooter is so close to you that you can’t run or hide, your only option is to fight for your life! Yes, you may be injured. But you may also save many lives that otherwise would surely be lost.
- Attack means attack! Scream and yell aggressively and dramatically! Move rapidly!
- Create chaos! Throw stuff to hurt and disorient the shooter. Computers, chairs, lamps, a pot of coffee, your purse, books, a fire extinguisher. Anything can become an effective missile.
- Gang up and attack as a pack! Some people can go for the shooter’s legs, others for his body. The sheer weight of several people can overwhelm one individual. You may be able to hold him down until authorities arrive.
- Commit . . . and don’t quit.
And here’s one more exceedingly simple suggestion – When you get back to work or to school, take a look at the doors of the rooms you use. Can they be locked to keep out a shooter?
You may not be able to harden door frames or replace locks. But for sure you could make sure every inward-opening door is equipped with a simple rubber door stop! Shooters are looking for easy victims; if a door appears to be locked or is too hard to open they will go on to the next one.
I found this commercial door stop at Amazon. It’s meant to block doors with an up to 1 ½ inch gap.

At a cost of less than $5, I would buy one for every non-secure door in my building!
Be ready to take action. Train family members and neighbors, too. This is life-saving information.
Virginia
Your Emergency Plan Guide team