Category: Neighborhood groups

Earthquakes have positive result in our neighborhood!

Share
Volunteer activity is positive result of earthquakes in California

The recent California earthquakes have had several positive results here where we live, in Southern California.

I already mentioned how our neighborhood emergency response group volunteers jumped into action after the 7.1 quake on July 6. There they were, out in the dark with their walkie-talkies, talking to people, passing along info to our mobile radio command post.

What happened the next day, though, was actually more exciting. Everywhere you could hear the second positive result from the earthquake: ordinary citizens talking and talking about the quakes and how to be more prepared next time!

  • “How should I be storing water? Do you have a water barrel? What about plastic bottles?”
  • “What’s the chance of a broken gas line? Should we turn off the gas?”
  • “What if I am trapped in my house?”

And hooray! Positive result #3 — Two more neighbors decided to join the team!

I am busy assembling the “recruiting” kits – some basic info and instructions, plus the two most important items for team members: a fluorescent vest and a battery-operated walkie-talkie.

If you are figuring out what your next move ought to be for summer – consider getting a couple of walkie-talkies!

They are fun for families camping, hiking or heading to a county fair. Small kids and teens like them. They are essential if you have wandering children or lagging-behind grandparents! And if you are interested in building a neighborhood emergency response team, you’ll want to practice with those walkie-talkies before you decide which ones to buy.

I’ve written reviews of the top 5 or 6 models every year. If you are really interested in more detail, please check out that page. There’s a whole lot of info there to absorb before you make a big buying decision.

Here’s a recommendation for you.

In the meanwhile, here’s information about my favorite model – and the one we use for our local neighborhood group. Simple, straightforward, flexible.   These use AAA batteries or rechargeables; you can also recharge by plugging into the wall. A pair costs less that a dinner out – and will make your summer a whole lot more memorable! (Click on the image to get details and prices at Amazon.)

If you manage to get a pair of walkie-talkies as a result of the earthquakes and of reading this Advisory, that would be the best positive result of all!

Virginia
Your Emergency Plan Guide team


Day 10 of Summer Vacation: A time for some shorter and lighter Advisories as a welcome change-of-pace!


What exactly is CERT?

Share

CERT is in all 50 states and in over 3,000 cities. Why, there may be a chapter in YOUR town that you didn’t know about!

So what exactly is CERT?

Community Emergency Response Team training is what started Joe and me off and what continues to provide structure and support to our local neighborhood group, even though many of our volunteers have NOT completed the training. Every one of my books builds on CERT principles!

Official CERT training takes about 24 hours, stretched over several days or weeks. This 6-minute video will give you a good idea of what CERT training means to ordinary people who are looking for a way to be better prepared and to have a stronger connection to their community.

What potential dangers are YOU concerned about? What did you see in the video that you would you like to know more about? Find out about CERT in your neighborhood. Just type into your browser the name of your city or town, followed by “CERT.”

Let us know what you discover! (And if you’ve already had some experience with CERT, please give us an idea of how it went in the comments, below.)

Virginia
Your Emergency Plan Guide team

Day 8 of Summer Vacation: A time for some shorter and lighter Advisories as a welcome change-of-pace!

Paranoid or trusting in an emergency?

Share
Photo by Caleb Woods on Unsplash

Have you ever googled “emergency preparedness?” 

After a row of stuff for sale — survival kits, freeze dried food, first aid kits — you’ll hit the first of page after page of agencies ready to give you comprehensive and usually trustworthy advice.

Now go back and google “emergency preparedness forums.”

This is where people, not agencies, hang out!  The words associated with preparedness change immediately. You’ll see references to urban survivalists, bush craft, self-protection, weapons, primitive technology – passionate entries from writers getting ready for when the SHTF or we reach TEOTWAWKI. (See below if you need a reminder about what these stand for!)

s a writer about the topic, I get deep into just about everything: self-defense, camping skills, CERT, emergency communications, dealing with authorities, preventing fires, etc.

One of my favorite topics, though, is how to build stronger neighborhood groups. (Not too common a theme in other sites, actually!) I’ve been part of my own neighborhood group for over 17 years. What I hear from members of my neighborhood group is not that they are paranoid. They are not even particularly afraid.

Rather, they actively “want to help others.” Normally, you won’t read too much about that, either!

How people responded to the earthquakes in Ridgecrest has been an inspiration.

Watching TV coverage about the California earthquakes over the past few days certainly reinforced that message. In Ridgecrest,

  • Did you see how often people mentioned neighbors coming by to see if they needed help?
  • How neighbors were offering to do repairs for free?
  • How neighbors pitched in to help clean up?

The actions of these neighbors, victims all, encourages me to keep organizing, keep learning, and keep writing.

Oh, and here’s the quote from George R.R.Martin, author of A Game of Thrones, that got me started on this whole post, and inspired the image at the top of this page:

 “When the snows fall and the white winds blow, the lone wolf dies but the pack survives.” 

Virginia
Your Emergency Plan Guide team

  • SHTF = (when the) sh*t hits the fan
  • TEOTWAWKI = the end of the world as we know it

Day 7 of Summer Vacation: A time for some shorter Advisories as a welcome change-of-pace!


Earthquakes in California

Share
Map of Active earthquakes in Southern California
Best source for earthquake news – USGS

A “robust sequence” of earthquakes.

That quote above is from the eminent seismologist Dr. Lucy Jones. If you’ve watched the news about the earthquakes in California, you’ve seen her.

Here’s a quick report from our community in Southern California.

We’re in Orange County, along the coast in Southern California, about 160 miles from the earthquake epicenter at Ridgecrest, which is more in the center part of the state.

But even here, we felt both of the largest quakes – the 6.4 on July 4th, and the 7.1 yesterday on July 5th. No comparison – that second quake was MUCH bigger! 

When it started, I was seated right here at my computer. The chair seemed to be moving left and right. Then it was definitely moving left and right! That died down, and then things started shaking. The whole house started bumping, rattling, creaking, clunking, blinds banging and banging against the windows! Happily, our lights stayed on. I moved away from the computer and monitor and my bookshelves, but nothing fell.

In the end, things gradually returned to normal. Today, the only damage I could find in my house were three new hairline cracks, perfectly aligned about 4 feet apart, from one side to the other of the tile kitchen floor.

Our neighborhood emergency response team got into action.

We are always preparing for earthquakes in California. Here in our community, several people quickly made phone calls, and we were also able to connect via email, but our main communications took place via walkie-talkies. Within about 5 minutes, neighbors were checking on neighbors and reporting in. Two of our team members monitored the news (using ham radio, too) and shared what they were learning. That info was passed along via the walkie-talkies. Within about 20 minutes, everyone had reported in to our “Command” channel: “People in the streets, no damage.”

What happened in Ridgecrest was far worse, and is a reminder about being prepared.

We should be prepared for any emergency with basic supplies:

  1. Sturdy shoes
  2. Flashlights and lanterns!
  3. First Aid kit
  4. Water
  5. Non-perishable food (in non-breakable containers)
  6. Blankets

In earthquake country, you want to stash these items throughout your house.

An earthquake isn’t like a storm, where you probably have some warning to grab your survival kit and head to shelter. In a quake you will still be at home afterwards, and so you want to be able to get to your supplies even if parts of the home are damaged.

And talk over a plan for contacting family members after an emergency. Be sure to include an out-of-area contact number.

Now, in my case, our out-of-state contact person, my brother – was somewhere on a boat headed to Alaska! So we need to set up a secondary contact right away.

What comes next?

We’ll be operating for a while based on what we learned last night about earthquakes in California. For us, the good news is our neighborhood volunteers were prepared and DID WHAT THEY HAD TRAINED TO DO.  

If you are interested in building a neighborhood emergency response group, or strengthening the one you have, we have resources that can help! Check out our website: https://EmergencyPlanGuide.org! and if you have specific questions, please be in touch directly. We have some real experience — even more today than before — and we’d love to share.

Virginia
Your Emergency Plan Guide team


Day 6 of Summer Vacation: A time for some shorter and lighter Advisories as a welcome change-of-pace! (Or at least, that was the plan!)


CERT Challenge: Overcoming Apathy and Procrastination

Share
“How prepared are they?”

We sat at the 2nd Wednesday monthly meeting of our CERT Leaders and stared gloomily as one of our members gave yet another status report about some of “her” residents in the community. “Not one extra can of food. Not one extra bottle of water.”

Her neighborhood had many elderly residents. In some cases, residents are handicapped by lack of funds. In others, the reason is plain apathy, procrastination or worse. You may hear: “It’s the government’s job to provide for us in an emergency.”

Are “governments” responsible to care for us in a disaster? How capable are they?

We saw an answer to the second question in interviews by the media following Hurricane Sandy’s damage in New Jersey. Local and state governments were overwhelmed and unable to respond. Likewise, relief agencies like the Red Cross and Salvation Army were also overtaxed by the enormity of the event. Some people went weeks without services.

More recently, we watched the Federal Government pretty much abandon the victims of Hurricane Maria, in Puerto Rico.

And here in California, huge fires have pulled emergency responders from communities distant from the fires and even from other states — leaving the people left at home without full protection for days and even weeks.’

These disasters damage communities and even destroy them. And usually, it’s people who are less affluent who suffer the most.

And these disasters pose an important question for all of us: What can we do to help? Are we doing it?

And the most difficult version of that same question:

Are we prepared to share with people who ignored warnings?

Are we ready to care for irresponsible neighbors as well as ourselves in a disaster scenario? That question presents responsible citizens with untenable choices.

Here in our neighborhood we are admittedly better prepared than most. Over 70% of our residents indicate that they have some food and water set aside for emergencies, largely as a result of ongoing education programs that span a decade.

But 70% isn’t 100%. More needs to be done.

Never stop educating people on the realities of a disaster.

Here in our neighborhood we regularly publish “educational bulletins” and, when circumstances allow, bring in guest speakers to talk about preparedness. Some of the best bulletins:

  • Recognize a gas line leak. (Gas company)
  • Clean up around the house to prevent a wildfire. (Fire Department)
  • Vial of life — important emergency info for the refrigerator.

Some of our most successful meetings:

  • What’s in your emergency kit? (Show and tell!)
  • Try out a fire extinguisher! (Thanks to Fire Department)
  • Retrofit your home to withstand an earthquake. (Neighborhood contractor)

Maybe if we make a party out of preparing for emergencies . . .

Every neighborhood volunteer group is always looking for ways to engage new neighbors. We hear about some of the good ones!

During a power outage, one neighborhood held a “Power Outage Picnic.” People brought meat to the party and a couple of volunteers with gas-burning grills cooked it up for everyone to share! By lantern light!

We held an “emergency preparedness fair” sponsored by the local hardware store. They brought dozens of items as demos, then handed attendees a coupon for 20% off if they would come to the store to buy.

After all these years of coming up with educational ideas and trainings, we finally put together a whole book with ideas for 21 activities to help overcome apathy and procrastination. That book has been our consistent best seller! If you are looking for some inspiration, consider getting a copy for YOUR neighborhood.

Emergency Preparedness Meeting Ideas

Each one of the activities comes with objectives, procedures, materials you’ll need, and commentary. And there’s a separate planning sheet for each activity to make it easy for volunteers to step up and take a turn as host. You can find out more about Meeting Ideas here.

The point of all this? Leaders have to recognize that preparedness is an ongoing challenge. You may have to wheedle or even use a little guilt now and then to get people to take action. But with a few ideas and some energetic team members, you can make a big difference in how resilient your community will be.

We think it’s worth it. That’s what this website is all about!

Does Business Hold the Key to Community-wide Preparedness?

Share

Anyone who is active in the world of emergency preparedness recognizes these simple truths:

  • Disasters, whether natural or man-made, are becoming more frequent and more serious. And more deadly.
  • People with a personal survival plan have a better chance of surviving a disaster than those with no plan. Same for businesses and for communities with active neighborhood emergency response groups.
  • Getting individual Americans to make a plan is an uphill battle!

How Can We Help More People and More Communities Be Better Prepared for Emergencies?

The government plays a role in preparedness.

FEMA was formed in 1979 with good intentions. When disaster awareness took front stage after 9-11-2001, FEMA’s efforts ratcheted up.

Actually, even before that, FEMA had seen the efforts of Los Angeles Fire Department to train civilians in earthquake preparedness. The LAFD program was adopted in 1993 as a national program and called Community Emergency Response Team (CERT).

CERT training is now available in all 50 states. Thousands of citizens have been trained and now serve as valuable interim backup to official First Responders. Training is at minimal cost and in some cases is free.

For the past decade or so, shifting from its traditional top-down approach, FEMA has looked at improving resilience at the community level. But here we are today, having gone through Katrina, Sandy, Harvey, Irma, Maria and Michael. We’ve experienced hundreds of mass shootings, thousands of acres of historical flooding, massive wild fires, and millions of data breaches — and the level of preparedness in American families hovers unchanged at around 50%!

Why don’t individual Americans prepare for emergencies?

After 30 years of working with our individual neighbors all across the country, we have found it boils down to this: the comforts of urban living have overtaken the urgency to develop survival skills.

And there’s a secondary reason, too. While people understand that working together will give them an advantage in an emergency, our increasingly diverse and ever-more-mobile society makes working together harder. 

So while people will always agree that they SHOULD be preparing, and that working together will give them an advantage, most lack the necessary leadership skills or they just aren’t willing to make the effort.

CERT Volunteers do their best to engage neighbors – but . . .

CERT training attracts a special breed of people, people who recognize risk and are eager to take action to reduce it for their families. When they have completed the CERT training they have a unique understanding of how their community and in particular how their First Responders work in a disaster. They also have skills to help save lives on the ground until those First Responders arrive.

But CERT training does not include a module on “community organizing.” Without the aptitude for sales or sales training — and lacking backing and financial support – individual CERT volunteers who want to build neighborhood groups around themselves inevitably run into a wall.

Businesses have preparedness advantages that individuals don’t.

Are you familiar with the statistics for business survival after a disaster?

FEMA reports that up to 40% of businesses never reopen after a disaster, and those that stay closed for more than 5 days are unlikely to last more than a year.

With a solid emergency preparedness or Business Contingency Plan, chances improve dramatically for a business to make it through or re-open more quickly.

But small businesses, like individual families, still lag behind in planning. They may not recognize the powerful advantages they already have for effective preparedness:

  1. A business is already an existing group. Its members are typically in close physical contact. They know each other. They are used to working together as a team to meet a common objective.
  2. Businesses have a built-in network of resources to call upon for help in planning for emergency. Those resources include other neighboring businesses, partners like suppliers, city governments, utilities, and professional advisers like accountants, attorneys, insurance agents, etc.  And CERT training is available to business usually at no cost.
  3. Every business has a duty to protect lives, and everyone in the business has an incentive to protect their livelihood!  Even if the doors of the business are closed, the business has to make sure regulatory and legal commitments are met. A proper plan can assure this continuity, keep employees paid and deflect legal assaults.
  4. The owner or employer sets the tone and can require and ensure that the business develop a preparedness culture.
  5. Where the business’s plan includes well-thought-out emergency communications with employee families, it reduces employee anxiety and gives employees an incentive to stay or at least return to work during the critical minutes and hours immediately following an event.
  6. And the prepared business actually adds a bonus for the whole community. Employees will take knowledge and training home and spread it within their local neighborhood.

Businesses start ahead of the game. All they have to do is get into it! 

Logically businesses might first turn to their existing team of professional advisers for help in putting together a plan. These are the accountants, attorneys, bankers and insurance brokers who currently advise them on their business issues. Each has valuable expertise.

But these professionals may not see themselves having a role in emergency preparedness. So without that guidance, how can businesses turn the corner on preparedness?

Businesses can use CERT to jumpstart preparedness training at their location.  

Once the business has been exposed to CERT, building a more comprehensive Business Contingency Plan will be a natural. And once employees have been exposed to CERT, they will automatically take new awareness and skills home with them right into their neighborhoods!

Spreading CERT from the business into the community at large isn’t a guaranteed or proven answer to more community resilience. But, given the uneven track record that many communities experience in trying to organize neighborhoods, this would certainly seem to be an approach worth testing.

Let us know what you think!

Here at EmergencyPlanGuide.org we’ve been committed for years to preparedness at the community level. To help businesses get started, we have published a simple guide to preparedness for small businesses. We are making it available to professional business advisers, too, along with reference materials and more resources from that particular service perspective.

How to Inspire Readiness

Share
Do your neighborhood group meetings feel like this???

If you are what we could call a “solo preparedness devotee” (or perhaps “voice in the wilderness?”) you know it’s hard to stay inspired and to maintain any momentum in learning new stuff, keeping your supplies up to date, etc.

And if you are involved with a group of neighbors or even trained citizens, you experience the same problem — only worse!

How to keep people interested and inspire readiness?

A close call works.

For example, a 4.5 earthquake works well here in California. News of disasters in other parts of the country or even the world also catches people’s notice and can inspire readiness. Even an announcement about a change in course of FEMA can be useful.

But close calls usually indicate that someone is suffering, so we certainly don’t like waiting for them or depending on them . . .

For a group, we look to regular meetings for inspiration and engagement.

So then the question: What should be on our meeting agenda this month?

I’ve been organizing or helping organize our neighborhood emergency response group meetings for about 16 years now. Even if we figure only 4 meetings a year during that time, that adds up to A WHOLE LOT OF MEETING AGENDAS! Every meeting is an effort — and a challenge! – to inspire readiness through training, door-prizes, entertainment, examples, stories . . . whatever works.

Fortunately, other groups share their meeting agendas with me.

If you’ve been sticking around here at Emergency Plan Guide for a few years, you’ve read about a number of meetings – and not just ours, but also meetings I’ve heard about from other CERT or neighborhood groups. For example, just this week I got these three reports that have already helped suggest meeting topics here in my neighborhood:

  • A friend in a Northern California coastal town reported that she is putting on an earthquake tabletop exercise for a neighboring town. Both those towns are in the way of tsunamis if/when there’s a big Pacific Rim earthquake. Here in Southern California a tsunami is less likely, but an earthquake?  You bet.
  • Another leader in a different Northern California city wrote to tell me that her neighborhood group had planned and executed a Fire Prevention Clean-up Day – removing Juniper trees (very flammable), trash, leaves, fallen branches, etc. from around the homes in their mobile home park. Hearing about this group’s enthusiasm was certainly inspiring to me! We’re working on a similar project right now! (Watch for more.)
  • Still another formal CERT group got this media mention yesterday: Lafayette, CA: The Lamorinda Residents Guide to Wildfire Preparedness & Evacuation. a joint effort that included the Lamorinda Citizens Emergency Response Team (CERT) was mailed to more than 62,000 residents in critical wildland fire hazard areas of the East Bay (CA).

Emergency Plan Guide tries to share as many good ideas as possible!

In the past I have put out many individual Advisories about successful meetings we’ve held. And I’ve also published two downloadable books with meeting planning ideas, with about 75 plans for easily-repeatable neighborhood meetings.

Note – these aren’t official CERT trainings. Rather, they are ideas stressing readiness that can be used with “ordinary” groups of neighbors, some of whom have had CERT training but most of whom have not.

I am in the midst of updating them with more meeting agendas and will soon be republishing them in a new format.

And this brings me to a request.

What can YOU add to our list of meeting resources that will help other neighborhood groups inspire readiness within their own ranks?

Have you held meetings that have been particularly interesting, fun or productive? And that lend themselves to being copied? If so, could you please send a description so I can include it in the next version of the book?

I’m thinking that together, we can produce something like “Chicken Soup for Great Emergency Preparedness Teams!”

Here are some simple questions that might work for telling your Great Meeting story:

  1. What was the title/theme of the meeting and what was your objective?
  2. How did the meeting unfold? Any surprises? Any laughs? Any hiccups? What was particularly inspiring or engaging?
  3. Did you need props, handouts, show-n-tell items, other materials?

Please send a story! If you want to remain anonymous, or your group wants to remain anonymous, just say so/ But let us know what sort of neighborhood you’re in, to help readers adapt your great meeting to their neighborhood.

Sharing strengthens volunteer groups and thus whole neighborhoods!

As you know, FEMA’s most recent push has been for Community Resilience – as opposed, I guess, to national response capability. I’ve been working at the community level for years, and I think most of you have been, too. Sharing ideas to help organize communities and inspire readiness among their residents is what we’re about.

I welcome your ideas for great meetings to share!  Please send them to Virginia@EmergencyPlanGuide.org.

Virginia
Your Emergency Plan Guide team

In case you’ve missed them, here are a couple of Advisories from the past about meetings that worked to inspire readiness. At least, I have received repeated assurances that they made a difference!

Spring Cleaning for Preppers

Share
Spring cleaning means washing windows

If you are a dedicated spring cleaner, you’ve already taken care of the windows. You may have done some spring cleaning in closets or in the garage, too. And when the time changed a few weeks ago, you undoubtedly checked the batteries in the smoke alarms. (You did, didn’t you?)

With summer coming up quickly, it will be easy to get caught up in end-of-school parties, vacation plans, etc. In the midst of that, your spring cleaning may get interrupted, along with some of your good preparedness habits.

Here are a few quick reminders for your family and your neighborhood team. Click on the images to get more details on these items from Amazon.

Walkie-talkie spring cleaning.

Yesterday we picked up my daughter at the airport. While Joe circled, I hopped out with a walkie-talkie so we could keep in touch. This is one of the most convenient uses for these hand-held radios!  No dialing, no busy signals, no dropping of the signal. Just push to talk: “OK, I see her! “OK, we’re at gate 3, right at the crosswalk.”

But the walkie-talkies have to have good batteries! Actually, we have added walkie-talkie battery replacement to our twice-a-year Daylight Savings Time checklist.

Last week we also added 10 more walkie-talkies to our supply for our neighborhood group Block Captains. The Uniden model continues to be our favorite, and prices haven’t gone up much at all. Here’s the model we buy – less than $25 for a set of 2:

Uniden GMR1635-2 Up to 16-Mile Range, FRS Two-Way Radio Walkie Talkies, 22 Channels with Channel Scan, Battery Strength Meter, Roger Beep, Call Tone, Keypad Lock, Black Color

If you are building your emergency team, or are planning family outings that will involve keeping track of each other in crowds (like a theme park) or in the woods, consider Walkie-talkies for your own family use. For short-distance communications they really can’t be beat.

Spruce up safety clothing.

Some clothing items seem to find their way into dark corners and onto the floor of the trunk of the car. I’m referring to sweatshirts, gloves, hats, etc.

With summer coming, it’s time to clean out and be ready for warmer weather. But don’t forget the safety gear that you KEEP in the car.

For example, we have found that having colored shirts and/or reflective vests are smart additions to our usual car survival kits.

  • Heading for Disneyland? If everyone in the family — Mom, Dad, Grandpa, Kid 1, Kid 2, Kid 3, etc.! — is wearing the same bright-colored T-shirt you will be a lot easier to spot!
  • Being on the street in the dark next to a disabled car is terribly dangerous! A reflective vest becomes an important safety item on the street and a reassurance in a campground at night.

Last week when we put in our order for more walkie-talkies for our team we also bought 10 more reflective vests for our neighborhood group Block Captains. They are amazingly modest in price!  (It’s not like we are wearing these every day, so they don’t need to be top of the line.) I chose these because they have pockets, and the package came with an extra vest in child-size!

Click on the link below the imageto get full details.

CIMC Yellow Reflective Safety Vest with Pockets, 10 Pack, Bright Construction Vest with Reflective Strips,Made from Breathable and Neon Yellow Mesh Fabric,High Visibility Vest for Working Outdoor

Battery replacement.

How many flashlights and emergency radios do you actually have, when you add up all the ones in the cars and in the house?

Guess what, they probably all use batteries! And have you noticed the rule that says batteries will whimper and die just when you really need them?

So, the competent Prepper adds a flashlight check and battery replacement exercise to the spring cleaning list.

Over the years we have tested and tested different batteries. The best ones one year seem to lose place to another manufacturer the next year. So we simple buy batteries on a regular basis.

Again, you probably need different sizes. Here’s a convenient pack with the AA and AAA sizes most common for our flashlights and walkie-talkies. Click on the image for exact pricing.

You may want to separate batteries and put a set of extra ones – of the right size – in a plastic baggy that you store alongside the item they belong with. When the power is out you can’t be searching through your battery box . . .!

Here’s an image of one of our flashlights. Note the green batteries in the holder which will be replaced with the gold ones stored in the bag.

Replace batteries with right-sized batteries stored in plastic bag
Always replace all batteries when you replace one.

Car survival kit spring cleaning.

We’ve spent time before on everything to consider for the survival kits you carry in your car.

For spring cleaning, it may be enough to simply refresh.

  • Go through your first aid kits and replace old bandages, anything that has cracked or gotten wet. Recycle old medicines and put in new ones. Add anything you’ll need for summer, including sunscreen and dark glasses.
  • Replace all your snack food with new packages. Canned stuff may last a while longer, but why not eat it up now and put new things in its place?
  • Remove kids’ items that they have outgrown, and replace with more appropriate things – we’re talking games, toys, etc.
  • Consider adding a new battery-charger for your devices. As we’ve written before, the “power packs” store enough to charge your phone more than once. (Scroll to the P.S. in that Advisory for an example of a popular power pack.) And solar-powered chargers are now ubiquitous. Both make good gifts, too.

Communications update.

Do all family members have updated phone numbers? Do all response team members have updated phone numbers for their neighbors? Now’s a good time to refresh this info.

And test family members’ memory. Can they recite the phone number of your out-of-town contact?  (Make it a contest as you are driving to that vacation spot. . .)

Insurance review.

We see so many ads on TV about saving money by switching auto insurance. Maybe you have switched, and actually saved money!

When it comes to other insurances, it’s important to shop and compare, too. Given the past couple of years’ dramatic storms, fires and floods, you may discover that the coverage you thought you had has changed, or is going up in cost. Or maybe you thought you were covered and you haven’t been covered at all! Or you are now required to have coverage that you didn’t have to have when you bought your house years ago!

Check out these Advisories for important questions to have ready when you talk with your insurance agent.

OK, this Spring Cleaning review could actually take some time. You probably can’t do it all in one week.

But every item you check off the list means you are in better shape to avoid an inconvenience, not to mention an emergency.

Good luck!

Virginia
Your Emergency Plan Guide team


Automatic Survival Habits

Share
Automatic survival habit - looking for exits at the theater

How would you rate your everyday survival habits?

It’s such fun to get caught up in whether your next knife should be full tang or folding, or maybe assisted folding. Whether you need a sleeping bag that has synthetic insulation or goose down. Whether to buy last year’s model hand-held radio (to save a lot) or splurge on the very latest version.

These are fun decisions and here at Emergency Plan Guide we engage with them just like you do.

But these decisions are one-time. What we want to talk about today are:

Simple survival habits as second nature.

As you know, we are part of a neighborhood emergency preparedness group. A lot of what we do is aimed at getting other neighbors to take even their FIRST step toward preparedness!

Actually, we work on at least a dozen survival habits, trying to turn them into second nature to improve the readiness and resilience of the whole community.

Below is a recent list of survival habits we’re trying to instill in everyone around us. As you look through the list, ask yourself.

  • How well do you measure up?
  • What steps would you add for your neighborhood group?
  • How will you share the list with them?

20 Easy and Smart Automatic Survival Habits

1 – Heading to the grocery store? Buy just one or two extra cans of food for your emergency supplies. You don’t have to stockpile everything all at once!

2 – Adding to your emergency food supplies? Be sure to get things you like and eat regularly. That way, you can eat from the front of the shelf and replace at the back.

3 – Building a better emergency kit for your car? You may be able to get a used backpack or tote bag at Goodwill – cheap, serviceable, and unnoticeable.

4 – Keep your car half full of gas all the time. (I keep mine 3/4 full!) Nothing worse than being caught in a traffic jam, watching that gas gauge go down and down!

5 – Keep your car locked when it’s parked, even at home. An unlocked car is an invitation a passerby might not be able to resist.

6 – Whenever you go into a building – theater, store, school – get in the habit of noting the location of other exits. In an emergency you may want to avoid the way you came in. This survival habit may save your life in an active shooter situation.

7 – Update the emergency info on your refrigerator at least twice a year, when the time changes. Have there been changes in your medications? The phone numbers of your emergency contacts?

8 – Don’t have the Vial of Life info on your refrigerator? Here’s what we did with our group.

9 – Need help? Can’t call loudly enough to be heard outside your home? Consider adding a simple whistle to your key ring or someplace else where you can reach it in an emergency.

10 – Flying? Keep your shoes on for the first 3 minutes after take-off. That’s the most dangerous time, and if you have to evacuate you don’t want to do it bare-footed!

11 – Teach your grandchildren their first name and last name. Absolutely necessary if they get separated from their parents.

12 – When you’re planning for emergencies, start your planning with the most likely emergencies, not the most severe. For most people, the most likely emergency is a power outage. Not too hard to plan for! All you need right away is emergency lighting and a way to keep warm.

13 – Heat wave and no A/C? Don’t try to tough it out! Put up shades to block the sun coming in the windows. Take a cold bath. Drape yourself with wet washcloths and towels.

14 – Power out during cold weather? Pick a small room, hang or tape blankets over the windows and door, get into bed with blankets.

15 – Best emergency lighting? Inflatable solar lanterns and/or battery-powered lanterns. It should go without saying that you have a flashlight in every room, with extra batteries handy.

16 – After a couple of days of eating out of cans, you’ll really appreciate having condiments to spruce up the taste! When you are out, collect packets of BBQ sauce, honey, jelly, soy sauce, ketchup, syrup, etc. for your emergency food stash.

17 – Canned meat may not taste so good, but it will give you the same protein as fresh meat – and will last for years. Add canned chicken, tuna in oil, and spam to your supplies.

18 – Don’t forget to refresh your first aid kit. Throw out dried up bottles or anything that’s gotten wet. You may want to add liquid skin as a new way to treat scrapes and cuts.

19 – Be sure to store an old pair of shoes, comfortable for walking, in your car. Heels or flip-flops won’t work if you have to hike for help!

20 – If you haven’t done it yet, freeze some plastic containers filled with water. (Leave space at the top for the water to expand.) Use the containers to keep your freezer fully packed. Saves energy when you have electricity, provides emergency water when you don’t!

Do all these ideas sound familiar?

Have you taken any of these steps and/or practiced them more than once? Have they become automatic survival habits?

I hope the answer is yes!

Virginia
Your Emergency Plan Guide team

P.S. Here’s something that you may find it interesting in light of the things we’ve talked about lately.

It turns out that Amazon (where we are Associates) has a service called PRIME PANTRY where you can buy everyday first aid, household, cereals, packaged items, etc. – what they call “everyday essentials” – and have them delivered for free. You don’t have to buy huge quantities, either.

Click on the ad to find out more. This may be a convenient way for your group to stock up on some of the things you want for your survival kits.


Seniors Struggle with Emergency Preparedness

Share

Seniors struggle with preparedness

How will these seniors cope in an emergency?

Focus on Senior Citizens

This week I wrote an article for a newspaper being delivered to over a hundred Southern California “55+” mobilehome communities.

The topic was emergency preparedness, and it turned out to be about how seniors struggle to prepare for and to respond to emergencies. The article seems particularly timely given the terrible loss of property and lives in mobile home park disasters across the country in the past couple of years.

The most recent tragedy, of course, was the fire in Paradise, in northern California.

If you have done any research at all about this fire, you will discover that of the 86 people who died in that fire, 53 of them – 77% — were over 65! (If you want to read a full article about that fire and the people who were affected, get this one from the Los Angeles Times.)

The question is:

Why were seniors affected so disproportionately?

We can all probably agree that the basic steps to preparedness are pretty much the same for every audience.

But when you look at these basics, you realize that some proportion of seniors struggle with making any headway.

  1. Seniors may not have easy access to information about the risks they face.
  2. They may not have the discipline to come up with a reasonable plan.
  3. If money is tight, they may not be able to afford the emergency supplies that everyone recommends.
  4. In a violent emergency (flood, earthquake, fire), seniors may not be strong enough or mobile enough to save themselves. (Just look at the women in the image above.)

But when we look even more closely at why seniors struggle with the concept of preparedness, we see that . . .

Seniors may be a “different breed.”

For example, in my own senior community, when there’s an emergency we immediately hear cries of:

 “Who’s going to take care of me?”

Seniors have taken care of others during their lives. Now they expect others to take care of them. The problem with this thinking?

Realities have changed!

  • Families no longer live in close proximity.
  • Property owners and managers are under no obligation to protect their senior residents.
  • We’ve seen how local authorities can be overwhelmed.
  • And Federal authorities can be just too late with too little.

Counting on someone else leaves seniors more vulnerable than other groups.

 “I’ve made it this far and I’m not changing the way I do things.”

Sound familiar? There are jokes, even movies, about stubborn, crotchety old men.

When it comes to preparedness, though, this is no joke.

  • Seniors who refuse to look at risks or to take steps to prepare for them are more likely to become victims.
  • Some seniors even actively protest against preparedness announcements – “You are trying to scare me.”

This mindset endangers those people and puts their neighbors at greater risk, too.

“If it’s my time, it’s my time.”

What is there to say to this?!

What can we do to improve this situation?  Can you help?

Of course, I have done a lot of searching for different official programs aimed at seniors. But when it comes to conclusions, so many of the reports say that results are, well, inconclusive or downright dismal.

So I’d like to ask YOU to think about the seniors you know, and the ones you’ve worked with, and see if you have suggestions that we could share.

Action item: Please consider the three questions below and include a comment at the bottom of this page or write directly to me at virginia@emergencyplanguide.org.

  1. When it comes to seniors you know, what attitudes do you encounter toward emergency preparedness?
  2. What sorts of existing programs or incentives have you seen to be most successful in getting seniors to take an interest in preparing?
  3. If you ran the world, what would you suggest to improve the odds for seniors facing an emergency?

I’ll be collecting everything I can and will share in later Advisories. (Of course, I’ll maintain confidentiality.)

Thank you.

Virginia
Your Emergency Plan Guide Team


What To Do When You Discover a Gas Line Leak — Part Three of a Series

Share

(Part Three of a series aimed at neighborhood or workplace teams)

Gas main shut-off

Where and how?

“OMG, I smell gas!”

In the first two segments of this special article we talked about where gas lines run, why they leak and how to recognize a leak. Now, let’s talk about what to do if you actually discover a gas line leak!

What to do depends in large part where you find the leak.

When you discover a gas line leak in the home

Don’t forget Rule #1. If you detect a STRONG smell of gas in your home, leave the house immediately. Do not do not switch on or switch off lights or appliances. Do not make a telephone call from within the house.  Do not start the car.  When you are at a safe distance, now call 911 and/or your utility to report the smell.    

What’s most likely, though, is that you will get a weak smell of gas. In that case, remain calm. Think.

You may be able to solve this problem yourself and safely.

Possibility #1. Pilot light

Nearly every home has a couple of pilot lights – usually in the gas furnace or water heater, gas stove or oven. The pilot light is really a “starter” flame. When you turn on the appliance, the pilot light ignites the gas coming out of the main burner.

In older appliances, the pilot light burns 24/7. In newer ones, it is turned on when needed by an electronic igniter. (You may hear a clicking sound as it activates.) Fortunately, when the pilot light goes out, it triggers an automatic shutoff valve to the gas supply. So you won’t usually smell a gas leak from this source.

However, in older systems, your pilot light could go out from something as simple as a draft or spill. If the system doesn’t have an automatic shut-off valve you would smell leaking gas.

In this case, you can attempt to relight the pilot light yourself by following instructions on the appliance. They are likely to be something like this:

  1. Turn off the appliance and wait at least 5 minutes for any leaked gas to dissipate.
  2. Be sure you know where the pilot flame is located. (It may not be near the on/off knob.)
  3. Turn the knob from OFF to PILOT.
  4. Hold down the reset button (could be the knob itself) and light the pilot light with a long match.
  5. Keep holding the reset button until the flame is burning steadily, maybe a minute.
  6. Turn the knob to ON.

If the light doesn’t stay lit, try again. If it still doesn’t work after a couple of tries, quit and call for professional help.

Tip: You can’t light an electronic pilot system using a match! If the electronic system isn’t working, be sure the appliance is turned off and call for professional help.

Action item: Check all your home appliances now, before there is any leak!  See where you have pilot lights.  Are they ever-burning or do they have electronic ignition?

OK, so much for pilot lights. You’ve checked, they are working, and you still smell gas.

Possibility #2.  Appliance connection

Most often, if it’s not the pilot light, when you discover a gas leak in your home it will be from an appliance with poorly designed, faulty or damaged connection.

  • Sniff to see if you can detect where the rotten egg smell of leaking gas is coming from.
  • Coat a questionable pipe or connection with soapy water. Bubbles will appear where the leak is located.
  • Look at the color of the flame on the appliance. Is it blue (good) or orange (not so good, could suggest a leak)?
  • Check the outside of the appliance for soot or scorch marks.
  • Do you have excessive condensation on the inside of your windows?

In these cases, if you identify the culprit appliance, get assistance from a qualified expert – probably your gas company. You may be advised to shut off the gas to the appliance, or even to the whole house. In either case that expert will have to re-set the system once the leak is repaired.

Action item: Do any of your appliances have shut-off valves? Look for them when you’re looking for pilot lights. Usually the shut-off is a handle that turns 90 degrees.

When you discover a gas line leak in a larger pipe or larger system

If you discover a gas leak in a larger pipeline or facility, move to a safe distance and notify your gas system operator or property owner and/or 911. (Review signs of a major pipeline leak in Part 2 of this series.)

Do not attempt to find the exact location of the leak, to shut off the pipeline or to fight any gas main fire. Dealing with a large pipeline leak is the business of professionals.

However, in a BIG disaster . . .

You may be called upon to shut down an entire system to protect against fire or the spread of fire.

The more you know about where gas lines run and the shut-offs on those lines, the more options you will have.

1-Building or home shut-off. In an emergency, shutting off the gas to the building likely means shutting it off at the meter. To do this, you’ll need to know where the meter is. You will also need a wrench and an understanding of the ON vs. the OFF position of the valve. Here’s a sample of what a typical home shut-off valve looks like. The shut-off consists of a rectangular piece sticking out of a round valve.

Gas meter turn-off

And here’s an illustration showing the ON (open) and OFF (closed) positions of the valve.

Open or closed?

You can turn a shut-off valve using a regular crescent wrench. Or you can use a non-rusting tool specially designed for the purpose, like the one shown on the ground in the photo or the one below. (Click the image or the link to go to Amazon, where you can buy this tool — less than $15. As always, full disclosure: We are Amazon Associates and may get a commission.)  In either case, you must store the tool near the valve. And you may need to stand on the wrench to get the valve to turn!

SurvivalKitsOnline 515100 On-Duty Emergency Gas and Water Shutoff 4-in-1 Tool for Earthquakes, Hurricanes, Fires, Floods, Disasters and Emergencies

Action item: Find your home and building shut-offs and place a wrench at each location. Figure out a way to attach the wrench nearby to keep it from disappearing.  Suggestion: Consider a bulk purchase of shut-off wrenches for members of your neighborhood group. It’s an easy and valuable way to recognize their volunteer efforts. And it means they will be better prepared to help neighbors in an emergency.

2-Automatic valves. Some valves, such as seismic gas shut-off valves, operate automatically. They aren’t required, and many professionals don’t trust them – but you may have them on your system. Action item: Find out if any automatic valves are installed on gas lines leading to your home or in your place of work.

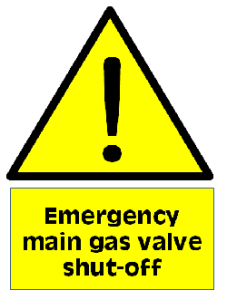
3-Gas main. When it comes to shutting off gas at a larger line, the shut-off may be a larger version of the wrench turn off, or it may operate with a large wheel and gear. It may be locked. Often, these valves are painted red. Action item for your group: locate the pipes and the shut-offs leading to your building or community. Larger line shut-offs may be marked with a sign like the yellow one at the start of this article. Or they may not be marked!

What procedures are in place for shutting off the gas?

As we have emphasized, shutting off the gas is a major event to be taken only with due deliberation. It will require professional assistance to get the gas turned back on again. It may take days for all gas service to be restored.

You or your group may have to make decisions about shutting off the gas. In our case, members of our community actually took official training in how to shut off the main valve. All residents have been shown how to shut off the gas to their own homes.

Questions you need to have answers to BEFORE something happens

  • Who is authorized to shut off the gas?
  • Which valves are they authorized to shut off?
  • What training and tools do these authorized people need? Do they have what they need?
  • How likely is it that authorized and trained people will be on hand in an emergency, when immediate action may be required?

With this info, you will be far more prepared in case of an emergency.

Getting even more answers

Over the years we have found that “the authorities” are loathe to share gas line information. However, as we have built up our own skills and knowledge, we have better luck at getting more. Above all, we have a better understanding of just what our role should/could be in an emergency.

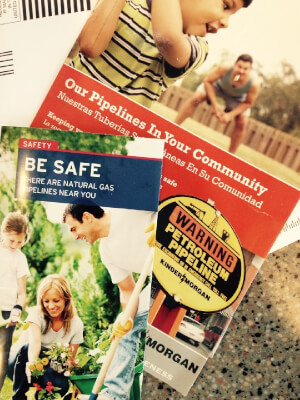
One of our most effective guest speakers was a representative from the Fire Department who talked about the various gas lines in our neighborhood. (We have the usual mains and feeder lines PLUS a high-octane aviation fuel line running beside our community.) Action item: Get a speaker on natural gas safety from your own fire department or local utility. Prepare some questions in advance and send them to the speaker.

Your invitation will cause that fire official to update his or her knowledge about your neighborhood or building, as well as remind your neighbors and/or co-workers to be more alert. (In our case, the fire department speaker was NOT up to speed on gas mains that had recently been installed near us as part of a construction project!)

_______

We started this 3-part series with the question, “Are you sitting on a gas leak right now?” The question still is pertinent. We hope that by now you have a better idea of how to respond!

And one last disclaimer. We are not professionally trained experts on gas main construction, maintenance or procedures. We offer this special series for informational purposes only. Any time you consider messing with your gas supply or gas lines, we recommend that you do it with the assistance or under the supervision of professionals. Gas is inherently dangerous so treat it with all due caution.

But as emergency responders, you can’t ignore it!

Virginia
Your Emergency Plan Guide Team

Here are the three parts of this special series. Please read all three parts.

Part One: Are you sitting on top of a leaking gas line?

Part Two: Detecting a gas line leak

Part Three: What to do when you discover a gas line leak


Detecting a Gas Line Leak — Part Two of a Series

Share

(Part Two of a series aimed at neighborhood or workplace teams)

“Do you smell gas?”

“Could this be leaking? What is it carrying, anyway?”

If you are concerned about the potential for a gas line leak, you probably want to start by finding the location of gas lines in your neighborhood. You will discover that this takes some time and effort!

Still, using the online resources and your local utility, as described in Part One of this series, you can usually get a good start.

You will note that there are three main types of gas lines:

  1. Transmission lines — Long-distance lines, typically more than 10” in diameter (can be as big as 42”), move large amounts of gas under high pressure (200 – 1,200 psi).
  2. Distribution or main lines –- These lines operate at intermediate pressure (up to 200 psi) and are 2″ to 24″ in diameter.
  3. Feeder or service lines – These are the lines that actually connect to your home. They are not so easy to track once they disappear underground. Typically they are less than 2” in diameter, and they carry odorized gas at low pressures, below 6 psi.

For a local emergency response group, your feeder or service lines are probably what you’ll be looking for. But we have to repeat, utility companies are concerned about vandalism and sabotage or even terrorism, so they don’t publicize the location of these lines. Think persistence and relationships!  We were actually able to get the construction drawings showing location and sizes of the gas lines for our community.

Action item: create a map of your neighborhood, showing the different gas lines as you identify them. If possible, note the location of shut-off valves.

Should we assume we’ll experience a local gas line leak?

Yes!

The gas distribution system is made up of thousands of miles of pipelines, and they operate safely most of the time. Still, all of the time, the system is under one or another source of stress.

Stresses include:

  • Built-in weaknesses from poor connections, bad welds or incorrectly installed equipment
  • Corrosion or wear from aging
  • Weather-related shifts (winter freeze-thaw cycles) Think of the extreme weather events we’ve experienced in the past couple of years!
  • Seismic shifts or earthquakes

And, of course, there are construction accidents where a hand shovel or large piece of equipment punctures a line.

Just to give you an idea, I cut this out of the news yesterday.  There are notices like this every day!

Gas line leaks reported

. . . from the news yesterday

It is the responsibility of the system operators to monitor and maintain the pipelines under their jurisdiction.

In some states legislation has been introduced to require the utilities and/or operators to report on leaks and on their progress in fixing them. As you can expect, the utilities oppose this legislation, saying that the number of leaks is exaggerated and that fixing more leaks faster would be too expensive. Find out about legislation in your own state!

Can we prevent a gas line leak in any of these pipelines?

No.

But you can do your community a service by finding out what sort of gas line maintenance takes place.

And, you may be able to prevent a disaster by detecting and reporting a leak!

How can we tell if there’s a leak?

1-Use your nose in and around the house!

The most common indication of a leak is SMELL. An odorizer called Mercaptan is added to feeder lines for the very purpose of making a leak noticeable.

What does Mercaptan smell like? Most people compare it to “rotten eggs.” In any case, it is distinctive and obvious.

If you just aren’t sure what natural gas smells like, spend a few dollars for some “scratch n’ sniff” samples! Makes a great addition to a meeting about gas leaks! Here’s a link to Amazon – 30 stickers like the one shown as the left, only $3.00 when I checked today!

Natural Gas Mercaptan Stickers

2- A gas sniffer will help pinpoint the leak.

If your environment may have more than one suspicious smell, or if you sense you might easily get used to a smell and stop noticing it, consider investing in a gas sniffer. This is a simple hand-held gadget that can identify a leak for sure. Some sniffers tell you what gas is leaking. They use a meter and/or an audio sound (“tic, tic”). As always, the more you pay for equipment, the more functions you get.

Our local emergency response groups own a couple of different ones. The “pen” model (less than $40) is used by one group to check around their emergency gas generator when they start it up.

The “tube” model (around $150) adjusts from broad to fine sensitivity in order to pinpoint the precise location and type of gas that is leaking. We have used this model with startling success, using it to identify a propane leak from a gas BBQ, among other leaks. (We also have a neighbor who insisted she smelled leaking gas. It turns out it was smoke from marijuana coming from a nearby shed. We didn’t pursue to see if its use was legal or illegal!)


Pen style

General Tools PNG2000A Natural Gas Detector Pen


Tube model

UEi Test Instruments CD100A Combustible Gas Leak Detector

Action item: If you suspect or are plagued with frequent leaks, you may want to add a gas sniffer or two to your collection of safety equipment. They are easy to operate and can add a degree of confidence to your suspicions. In a big emergency, a gas sniffer might make it easier to decide to shut off the gas entirely.

Be on the lookout for signs of leaks from larger pipelines.

You’re not likely to find yourself walking along the route of a larger underground pipeline, but a leak can show up anywhere. (We experienced a gas-line break right in front of our community. A back-hoe hit a line that according to the construction crew “wasn’t on the map.” )

Here are some ground-level signs you might notice:

  • An unexpected hissing, roaring sound
  • Dirt or dust blowing up from the ground
  • Water bubbling or spraying
  • A spot of dead or brown vegetation when it’s green everywhere else
  • Flames coming from the ground

As a reminder, the gas in these larger pipes may have no odorants added.

What should we do when we discover a leak?

When you do identify a leak, you need to act quickly and decisively. Your goal is to avoid a build-up of gas around a leak or a build-up from gas “migrating” to a nearby area (such as a basement) – creating conditions for an explosion.

Your first response should be to get safely away from the area (hundreds of feet away!) and then CALL 911 or the gas line operator to GET THE GAS SHUT OFF.

As you move away, warn other people about the danger, too, and encourage them to move to safety.

Above all, DO NOT CREATE A SPARK by flipping a light switch, lighting a cigarette, starting an engine, turning on a battery-operated light, etc.

Action item: Discuss with your group where a break might logically occur in your neighborhood. Identify some ordinary actions that someone might take that could start a gas fire. In our community, starting up the car to “get away from the danger” is likely to be the most dangerous action possible. The catalytic converters of cars in a traffic jam can reach 1,600 degrees – plenty hot enough to start a fire if there is the right mixture of gas!

Is that all we can do? Shouldn’t we turn off the gas?

Calling 911 from a safe distance is the first and most important step. Not creating a spark is the second.

Every member of your family and of your workforce should know and be able to follow this rule.

However, as an emergency response group, there is more you should know and consider when it comes to getting the gas shut off.

We will address some of these options in Part Three of this series.

Virginia
Your Emergency Plan Guide Team

Got any stories about gas line leaks or explosions? Feel free to share . . .! And don’t miss the first article in this series.


Are you sitting on top of a leaking gas line? Part One of a Series

Share

(Part One of a series aimed at neighborhood or workplace teams)

An often-overlooked threat

Be safe from leaking gas line

Read before you toss as junk mail!

The word “disaster” usually makes people think about natural disasters like tornado, flood, or earthquake.  You’ve probably already talked in your group about how to prepare for these threats.

But unless we’re reminded by notices from our local utility we may never even think about the gas lines that run under or near our homes or places of business.

And if we take the time to learn even more, we will discover that any gas line could be a leaking gas line! Moreover, a big enough gas leak can be deadly.

Time for your group to be asking: Where are the gas lines around us?

Finding out where the gas lines run in your neighborhood will take some effort.

In the years that we’ve been studying our own community we have run up against resistance from a number of sources. As can be expected, cities and gas line operators are concerned about sabotage and/or terrorist activities. They protect the details of their systems from everyone, including residents.

Moreover, a leaking gas line may or may not be repaired even though it has been noted. As you can imagine,  a utility company really doesn’t want you looking over their shoulder when it comes to their maintenance policies!

Still, a good emergency response group wants to understand its community’s risks, and so the group perseveres . . .!

Three places to start your research.

1-The National Pipeline Mapping System (NPMS) is an online map provided by the Department of Transportation. As a member of the public you can search by your State and COUNTY to get an idea of where gas transmission and hazardous gas pipelines are located.

I say “get an idea” because the public viewer is good only to +/- 500 ft.  (If you are actually going to dig, then you need to contact your local pipeline operator – or call 811 – to find out exactly where the pipes are.)

Here’s the link to the map (“Public Map Viewer”):  https://www.npms.phmsa.dot.gov/Default.aspx

2-Your local gas company

Here in California we have two of the largest public utilities in the country, and our local utility provides a map showing transmission and distribution lines. Once again, the authors of the map stress that the maps are accurate only to +/- 500 ft. Still, we can easily identify the “hazardous liquid” line running along the railroad tracks very near our home.

My research on other utility companies shows that there is no consistency. Many of the utility company websites simply refer readers to the National Pipeline Mapping System.

3-Your local pipeline operator

The pipeline operator is not necessarily the same as the utility.

Keep your eye open for pipeline signs. They are not required, nor are they necessarily placed in the same way every time. What they seem to have in common is the gold color.

The round warning sign will tell you who the pipeline operator is. (You’ll see a round sign on the brochure in the image above, too.) Write down the name and emergency phone number. You may be able to get further information about that particular pipeline and what it carries from the operator.

Kinder Morgan is the largest pipeline operator in the country. Its website says it transports nearly 40% of all piped natural gas, refined petroleum products, crude oil, carbon dioxide (CO2) and more. I found this map at their website. It shows just their biggest pipes. As you might expect, Kinder Morgan has a number of competitors.

Kinder/Morgan PipelinesThe point of all this is that with some digging (bad joke!) you can discover a lot about where pipelines are in your community and who is responsible for them.

How we got information about our own community.

This Advisory is meant to give you an idea of where to start. Different members of our neighborhood emergency response group took on different tasks in researching our gas pipelines.

  • I tracked down online maps like the ones shown in this Advisory.
  • One member hiked along the nearby railroad tracks and photographed a construction project. His photos show the size and exact location of gas lines.
  • One member went to city hall to get the original construction drawings for our community. These drawings show not only the location but also the size of the various pipes in the network, plus shut-off valves.
  • As a group we queried the management of our community regarding make-up and maintenance of our local system.
  • Our group invited the fire department, the police department and our local utility to special meetings on gas safety. (You will not be surprised to learn that they don’t always agree on where the lines are, what information to share or how to respond in an emergency!)

OK, so we now have an idea of where the pipelines are and what they are carrying.

And we found that gas is leaking from all these systems all the time!

With over 200,000 miles of pipelines, and many of them decades old, it’s to be expected that there will be leaks. In fact, distribution companies track something called “lost and unaccounted for” product.  One report has their measurements ranging from under 1% to over 4%!  (https://www.scientificamerican.com/article/how-much-natural-gas-leaks/)

What causes the leaks? Common causes are simple deterioration, overgrown and over-stressed systems, defective equipment, incorrect hookups, code violations, faulty manufacturing of tanks and/or appliances — and natural ground shifts due to floods, earthquakes, etc.

Most of the time gas that escapes isn’t even noticed (except by the atmosphere, of course, since methane – the main component of natural gas – is 30 times more potent as a heat trapping gas than CO2.)  But any time there’s a leaking gas line, there’s a potential for explosion or fire.

The key is to keep gas from building up until it reaches the level where it can explode — that is, to where it makes up between 5 and 15% of the atmosphere. A whiff of gas won’t explode.  A mix that is too rich won’t explode. There is a 10% window in which it can ignite.

Good to know!

In Part Two we’ll share what we have learned about finding leaks!

Click here to move right on to Part Two.

Virginia Nicols
Your Emergency Plan Guide Team


Financing Neighborhood Emergency Equipment Purchases – Updated

Share
heavy emergency equipment
Something your group needs???

Emergency equipment can be expensive!

Considering an equipment purchase for your neighborhood group?  Something BIG, like in the image above?

Not that you’re considering purchasing a log mover — I used the picture because it makes the point.  This probably isn’t something you could afford by yourself.  You certainly wouldn’t want to buy it and have it sitting around “just in case.”

But what if your group does need neighborhood emergency equipment?

On one hand, buying as a group makes it easier.

If you are part of a group, you can look at buying big items from a different perspective.

  • You and your neighbors can get access to items you wouldn’t otherwise be able to afford.
  • Your neighborhood can achieve a whole new level of resilience.
  • Sharing in the purchase decision automatically creates a stronger network of neighborhood first responders!

However, big purchases are not all about big benefits.

Neighborhood emergency equipment decisions take a lot more thought.

For example, here are some of the decisions you’ll have to make about that purchase:

  • Who will be the named owner – for tax purposes, for registration purposes, etc.?
  • Which neighbor/s will be responsible for maintenance and repairs?
  • Where will the equipment be stored and who will have access?

Here’s some of what we’ve experienced when we started buying materials for the group.

Some people don’t want to play.

People may be willing to show up to meetings. But being a member of the group isn’t enough to make everyone volunteer to spend money for the group’s welfare.

Honestly, we have found nothing that will change a “me” focus to an “us” focus. It’s either there, or it isn’t. So, if some of your group members seem unwilling to participate in group purchases, after appealing a couple of times to the concepts of cooperation and mutual support, you’ll have to let them go their own way.

Others are willing to buy for themselves and share when necessary.

Ladder
The shared ladder

In our local neighborhood, when we began to organize our group, it just so happened that we were already “sharing” a number of items. For example, Joe and I had a tall extension ladder that was left behind (too tough to pack) when a neighbor moved. The ladder ended up behind our house (see the photo!), and was used by any of a handful of people on the street. They just came and got it and brought it back when they were done.

After our first neighborhood emergency equipment inventory, we discovered that one contractor neighbor stores a heavy duty pry bar (six feet long) that he would be willing to share. Another neighbor has a pair of giant shears, good for breaking open chained gates. We have solar battery chargers.

We all learned about these items, and where they are located, and in an emergency we plan to share for the benefit of the group.

Getting money for “REALLY BIG” purchases.

When it comes to more expensive items, you may have to look at other options for financing them. Whatever you decide on, start now to put together your “wish list” of equipment your group could use effectively. Your list will be different from other groups’ lists. Just the action of making the list will involve more people and likely uncover creative ways to turn it into reality.

Option One – Funding from within the local community.

In our case, thanks to a committed and enlightened homeowners’ association board, our emergency team gets money every month via association dues. Emergency Plan Guide readers who are renters have told us their groups have received financial support from their property owners.

Some of our readers are members of groups incorporated as non-profits – and they have been the recipients of donations from local stores and local insurance companies. One group buys and resells radios at a profit.

Option Two – Funding from local or national grants.

Naturally we have looked for grant money. As a community we’ve been the grateful recipient of a grant co-sponsored by the Fire Department and First Alert. Three years ago, over a 2-day period, our team helped install donated smoke alarms in every single residence in the neighborhood!

As for getting grants on our own, we have had no luck so far. We have researched — and here’s some of what we have discovered.

  • It helps,  and often is required, that you be an established group, with an official non-profit status, ID number, etc. Federal (FEMA) grants usually go only to official government agencies – fire departments, etc.
  • Private foundations usually have a specific focus (which may change from year to year) and may have a minimum award that is higher than you can justify asking for.
  • Your request for money to solve a particular need with a one-time purchase of equipment — for example, communications equipment for handicapped or senior members – may be more positively received than a request for money for operations.
  • Many grants are announced on a specific date. The organizations involved have a strict application procedure that may take months, so you need to start your investigation now. (See this Advisory about the grants from State Farm.)
  • Your city may offer grants for specific activities. And, of course, your city or county may offer CERT training to all your group members, with no real strings attached.

Remember that grants, unlike donations, always come with strings attached. You have to meet the grant’s requirements and then show that you spent the money the way you promised you would.

Option Three — Sponsoring a fundraiser for your group.

This is the tried and true way for any community group to raise money – money they can spend any way they like. There are SO MANY ideas of how to put on a good fundraiser!  You could probably write this section of the Advisory yourself!

Here are a few questions to get the conversation started . . .

What’s the purpose for the fundraiser?  Sometimes it’s easier to have one specific goal (“$450 for walkie-talkies for our group”) rather than a generic “support our group” message.

Who would be a natural partner for the fundraiser?  Usually, this means a commercial entity that would benefit from the exposure, or from direct sales. We have had good luck getting support from emergency equipment manufacturers and local hardware stores. If the commercial group is going to sell their products, you’ll have to figure out how your group will benefit!

What will attract visitors and make them want to pull money out of their pockets!

  1. Fun fair! If your audience has kids, parents will bring them along if there is plenty for kids to do! (“Oh, a good Saturday afternoon outing for the family.”) In all the years I’ve done events, the ONE MOST POPULAR ACTIVITY has always been “Spin the wheel and win!”  Obviously this requires a wheel, lots of little prizes, and a few big ones!
  2. Bake sale – always popular in a venue where there’s lots of foot traffic
  3. Ice cream social – Get donated supplies!
  4. Yard sale with proceeds to benefit the group. (Combine with other community event or annual sale?)
  5. Speaker/local band willing to perform for the publicity
  6. Raffle for a great prize (Be sure you know the GAMBLING RULES for your state!)

What sort of location do we need, and where can we find it?

Do we have the equipment we’ll need? Tents, tables, chairs, microphone

How will we manage publicity?

What and how many volunteers do we need, what skills, with what schedule?

You’ll find many more resources online or at the library. If you would like a copy of my own well-tested Master List for Event Planning, just drop me a line!

How we’ve made neighborhood emergency equipment purchases for our own group.

Over the years we’ve held events like the ones suggested above. Some were really profitable — like when we sold a bunch of donated furniture at a yard sale. Others were barely profitable. But with the help of fund raisers plus budget from our HOA, our group has purchased medical supplies, walkie-talkies and their batteries, and pop-up tents. Our group also owns two natural gas “sniffers,” two refrigerators, a generator,  a portable loud-speaker, three loud-hailers and some big floodlights. (We have chosen not to store food or water. We encourage our families to manage their own supplies for sheltering in place.)

Naturally, it takes an organized campaign to get a financial commitment of ANY SORT. In our case,

  • We apply professional marketing planning and presentations. (Joe’s and my background is in direct marketing!)
  • Fortunately, we have a couple of neighbors who love the challenge of coming up with donated gift cards!
  • A couple of our members have jumped in to take on money management.
  • Other members are enthusiastic HAM radio operators, and they provide guidance and training for the rest of us.
  • Working with the fire department makes it possible for us to get a ladder truck and fire engine once in a while for “show and tell!”

Working together, we have been able to get financing for the big equipment we’ve needed so far for our group. It will take another Advisory to discuss how we set the priorities for using the equipment!

Virginia Nicols
Your Emergency Plan Guide Team

P.S. What sorts of fund-raisers have you been successful with?  Let us all know by jumping down below the subscribe info and leaving a comment!

Everyday Household Supplies as Tools for Survival

Share

Tin Foil Frying Pan

Don’t you love lists? I see them everywhere I turn online.

And I read a lot of them, particularly those in the survival niche. Mostly, they confirm what I already know. But every once in a while I find survival ideas I hadn’t really considered before.

What follows are some ideas using everyday household supplies as tools for survival. Maybe you can add them to your list, too!

Six reasons to have aluminum foil in your survival supplies.

Who knew all the things it can do in an emergency – and, for that matter, every day!?

  1. Cooking over a campfire? Wrap smallish pieces of food in a foil pack, cook over or buried in coals.
  2. Add a foil reflector to block the wind from your fire, and to direct its heat.
  3. Position a foil sheet to reflect and enhance the light from the sun or from your lantern.
  4. Use crumpled foil under a bar of soap and under a scrub pad to keep them from getting gunky or rusting.
  5. Fold a small piece of tinfoil and stick in your flashlight between the battery and spring to improve a loose connection.
  6. And this, from Reader’s Digest. (And see my image, above.) Make a temporary tin foil frying pan by covering a forked stick with a double layer of foil. Make a slight depression in the space in the V of the fork — that’s where you’ll put your food for frying!

Four more survival uses for everyday household supplies using everybody’s favorite — duct tape.

I’m sure you have plenty of duct tape at home. I hope you have some in your survival kits, too. The “flat packs” are much lighter and more convenient than the heavy roll. (See below.)

You can use duct tape to fasten just about anything, but here are a few more ways to use it as a survival tool:

  1. First aid supply – Use thin strips to close a wound. Use thicker strips of tape plus small branches or pieces of wood to create a splint for a sprained ankle.
  2. Twist a length of tape to create a rope for tying anything. Fold a length of tape in half onto itself to create a strap – for a belt, a sling, a carrying handle.
  3. Keep out cold air by closing leaks in clothing using tape. (Don’t tape to your skin. )
  4. Tape together Mylar blankets or large size plastic bags to make a sleeping bag or a shelter.

And while we’re on plastic bags, here are seven ways to put these everyday household supplies to use as survival tools.

Different weights of plastic have different uses. And, of course, the heavier the weight, the more they add to the weight of your survival kit. Here are some often overlooked survival ideas using bags and baggies. (More info, with prices, at the end of this Advisory.)

  1. Trash compactor bags are very thick – and thus work well to manage human waste in a survival situation. Place the bags in the toilet, or in a plastic bucket. (When full, add kitty litter or some disinfectant, close and dispose of.)
  2. Use ordinary plastic bags from the grocery store to line boots (over socks, inside boots) to keep your feet dry. (Probably won’t work in a stream but does fine through wet grass and puddles.)
  3. Use plastic bags as temporary gloves to protect your hands from germs, blood, yucky stuff, etc. (I used one just last week to dispose of a dead rat.)
  4. Large garden size bags can be used to line your pack to keep it dry. Raining? Cut a hole for your head and turn the bag into a poncho. Tape a couple of bags end to end for a makeshift one-person tube tent.
  5. Ziploc bags of different sizes are helpful for sorting clothing (clean, dirty, wet), protecting foodstuffs and matches from the damp, and keeping first aid items readily visible. And you can use a baggie to start a survival fire. A fire?
    1. Fill the bag with water.
    2. Twist to create a tightly filled plastic water “ball.”
    3. Position the ball over fine tinder and use like you would a magnifying glass. The sun shining through the ball of water can heat tinder sufficiently to start a fire! Here’s a great YouTube video from the King of Random showing just how to do it: https://youtu.be/vMcgs7Tx3Hs
  6. And from Primal Survivor, this idea for using a plastic bag to catch fish. Find a stream with fish. Create a sort of funnel in the stream by building a V with stones. (Open end upstream. ) At the tip of the V fasten a plastic bag with its mouth open and a few holes cut in to allow water to flow through. Go upstream and scare the fish so they head downstream – into your funnel and then into your plastic bag!
  7. And a final idea – using a clean clear large-sized plastic bag to capture water from a plant or tree. Pick a NON-TOXIC plant with large leaves. Pull a bag over a large branch with lots of leaves and tie it tightly. Be sure the lowest point in the bag is below the tie. Over time, the plant will release water vapor. The vapor will condense, run down the sides of the bag and collect in the bottom, where you can capture it to drink.  This will take time and patience, but could save your life in an emergency.  You can find an easy to follow picture-by-picture explanation here. https://www.instructables.com/id/Extract-Clean-Drinkable-Water-From-Plants/

I’ll soon be testing both the baggie-full-of-water-as-magnifying-glass and the bag-to-collect-transpiration-from a tree. (No streams with fish near me . . .) I’ll let you know how it goes.

Maybe YOU can test these two ideas with your own kids or other members of a group – Scouts? Sunday school?  Your neighborhood emergency response team?  (Watch the video and check the how-to-pictures first. They include a couple of safety messages you don’t want to overlook.)

Three ways to get everyday household supplies for your survival kits.

  1. Start by going through your cupboards and pull from your regular supplies. You’ll probably have aluminum foil, duct tape and a few assorted bags. If you find ties, pull some of them out, too.
  2. Make a list of other items you might want: flat packs of tape, trash compactor bags, heavy-duty large black trash bags, maybe even that very light-weight see-through bag that will work to capture water from a plant.
  3. If you are part of a group, consider pooling your money and making a bulk buy. By buying in bulk you’ll be able to save money and give everyone a chance to get a few of what they need and not overbuy.

Here are some suggestions from Amazon, where we often go first for our shopping. Since most of these everyday household supplies are probably readily available in your local stores, you may want to shop specials. I’m including price info from Amazon so you can get an idea of costs if you’re shopping for a group. And if you are a prime member at Amazon, all the supplies could be delivered at once, making it easy to get everything distributed.

Buy over time!

Not everyone can run out and immediately buy everything on every survival list. But items like the ones on this list are pretty inexpensive, so you can buy one or two every so often until you have everything you need.

It’s the same with assembling ALL your survival supplies — emergency radio, batteries, food, etc. Slow and steady means when the disaster hits you may not have everything, but you will have more to help you get through than you did last month . . .!

Good luck with your shopping!

Virginia
Your Emergency Plan Guide team